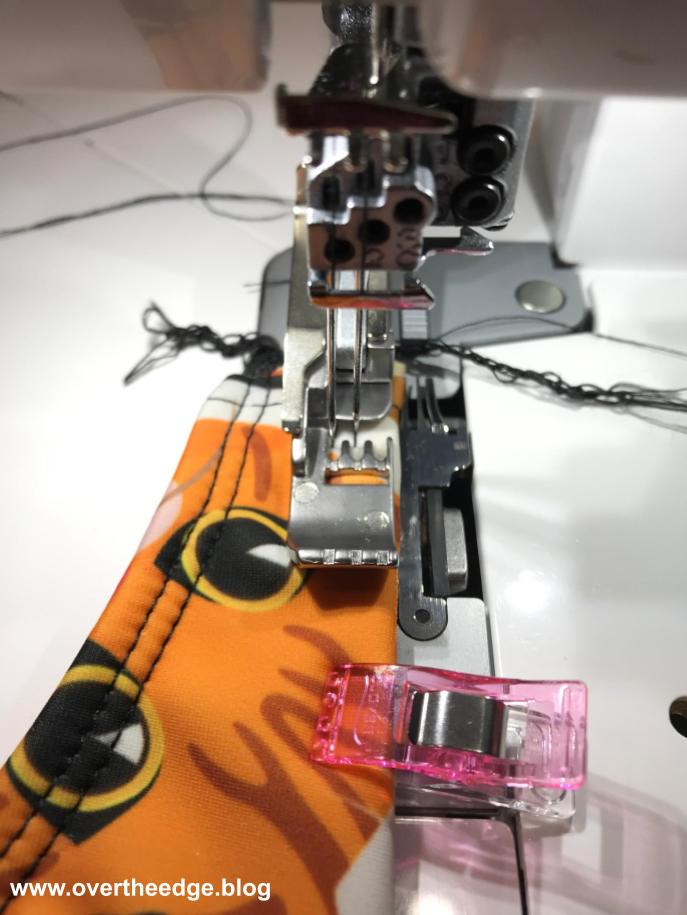
This great technique for finishing off a cover stitch in the round is not not mentioned in most serger manuals. But once you learn it, you won’t want to use any other method! This technique finishes your cover stitch cleanly and will save you time and frustration. It works well for finishing cover stitching on things such as necklines or leg openings.
Overlap Stitches
As you complete your cover stitching in the round and you get back to the beginning of your stitching, be sure to overlap a few stitches. You can use the needle markings on the toe of your presser foot to help align the stitches. Be sure to move the beginning needle thread tails to the sides so you don’t catch them in the stitching. I usually move the left needle thread to the left and the right needle thread to the right.
Stop with the Needles in the Highest Position
If your needles don’t stop in the highest position when you stop serging, use your handwheel to raise the needles.
Lift your Presser Foot to Release Tension on your Threads
Some sergers release tension on your threads when you lift the presser foot and some do not. Check your manual to see how you do this for your serger.
Sweep the Needle Threads
Keep your presser foot lifted. For this step you will need a long skinny tool. I usually use a pair of tweezers or the screwdriver used for changing my needles. Place your tool under the presser foot between your foot and the fabric, just behind the needle threads. Lift the toe of the presser foot with your other hand to give you easier access if needed. With the tool under your foot, hook both of your needle threads. Pull the threads and tool toward you until you have pulled out two loops of threads about 3-4” long.
Clip the Needle Threads
Use your scissors to cut the needle threads at the end of the loops.
Pull the Fabric to the Back
Now take your fabric and pull it steadily, straight back behind the presser foot. As you pull, the needle threads will get pulled to the underside of your project. Magic!
As you pull back on the fabric:
- the chain looper thread releases
- the needle threads attached to your fabric get pulled to the underside
- and the threads still in the needles get pulled to the back of your machine, above the needle plate and under your foot, ready to take the next stitch.
Clip the Looper Thread
Now clip the looper thread leaving a tail long enough to secure and remove your fabric from the serger.
Ready to Secure
All three threads are now on the back side, saving you the step of using a hand sewing needle to pull them to the back. Tie them in a knot or secure using your favorite method.
This technique will pull your needle threads to the back at the end of the seam, but you will still need to secure the needle threads at the beginning of your seam. I usually use a hand sewing needle to bring the needle threads to the back. The beginning of a cover stitch does not unravel as does the end. But your project looks better if you hide your threads on the back of your garment.
Finishing off a Cover Stitch in the Round
I have tried this technique with several different brands of sergers and it has worked every time. It saves time and fuss by eliminating some hand sewing. It also locks the end of your cover stitch so it doesn’t pull out as easily. (You know how easily the end of a cover stitch can pull out when you don’t want it too…)
There is one other great thing about this technique. Your machine’s needle and looper threads are now positioned correctly to begin stitching again.
I hope this technique makes your serging time more enjoyable!
I was working on a swimsuit when I made this tutorial. If you would like to see the finished swimsuit follow this link:
https://overtheedge.blog/the-purrfect-swimsuit/


