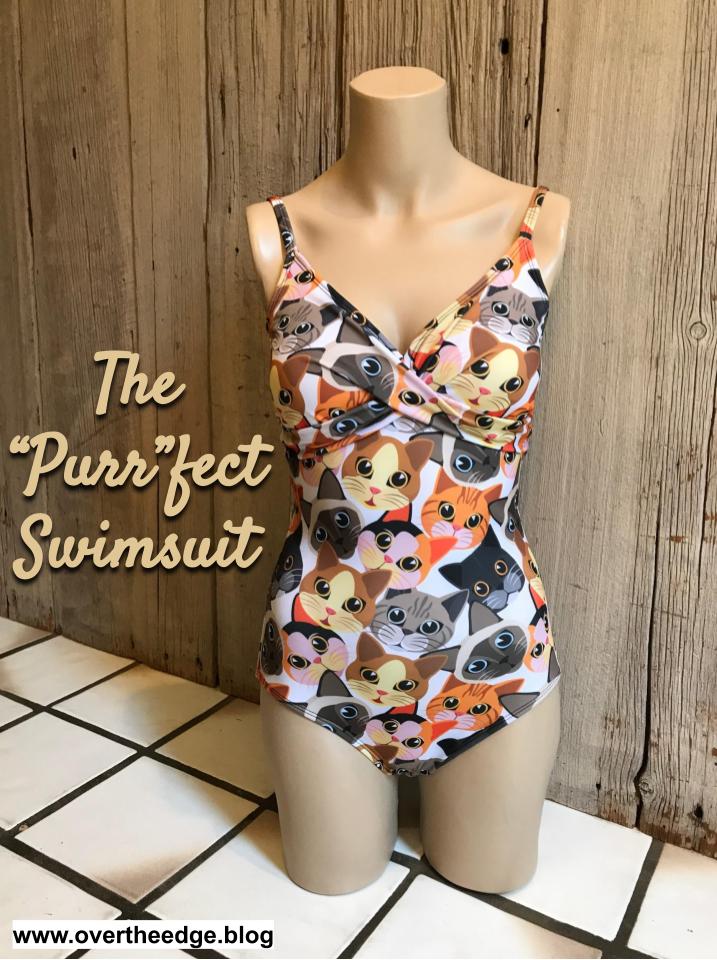
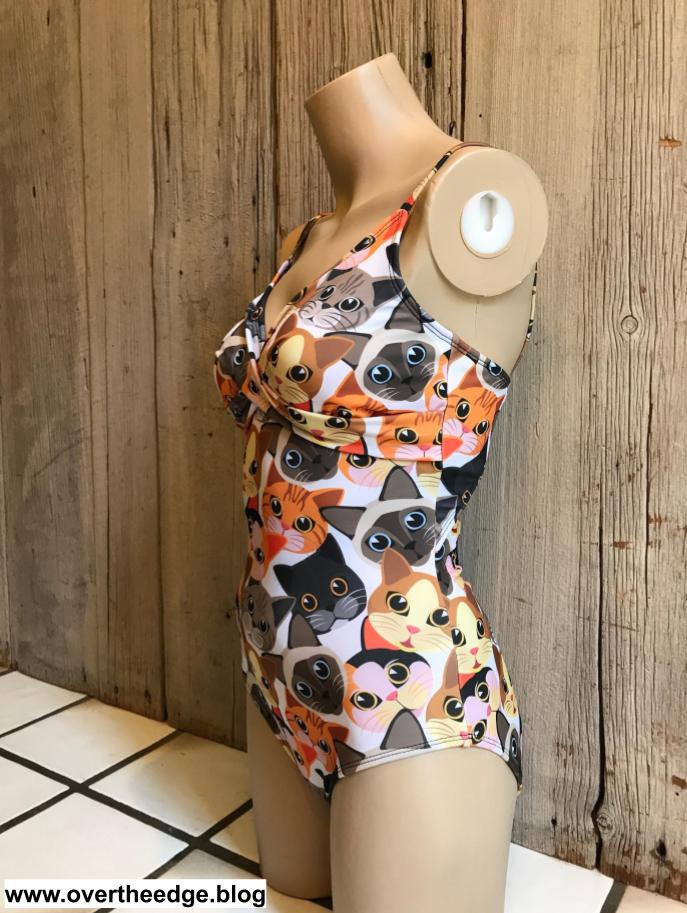
The “Purr”fect Swimsuit
Several years ago I purchased this fun kitty spandex so I could make my daughter a swimsuit or maybe a pair of leggings. For my daughter’s birthday this year, I finally made her the “purr”fect swimsuit. Summer is here, and the perfect time to serge a swimsuit!

Swimsuits by Serger or Sewing Machine
Although you could use a sewing machine to make a swimsuit, it’s so much more professional looking if you use a serger. The four thread overlock stitch is great for serging seams and applying elastic. The narrow cover stitch is perfect for top-stitching. If you don’t have a cover stitch machine you could use a sewing machine and a zig zag stitch to top-stitch. This is the way I used to do swimsuits and figure skating costumes before I had the cover stitch.
Three Thread or Four Thread Overlock
Technically a three thread overlock is the stretchiest stitch, and is sometimes recommended for stretchy knits. The four thread overlock is almost as stretchy. I typically use the four thread overlock for serging all of my knit garments because I like the added security of the second row of straight stitches. If one row of straight stitching pops, I still have one row to hold the seam together.
Thread
I used Maxilock serger thread in the needles and Guterman Bulky Nylon in the loopers. The texturized nylon is soft next to the skin and really stretchy. Some other brands of texturized nylon thread I use are Maxilock Stretch, YLI Wooly Nylon and Madeira AeroFlock.
Pattern Used for The “Purr”fect Swimsuit – Jalie 3350

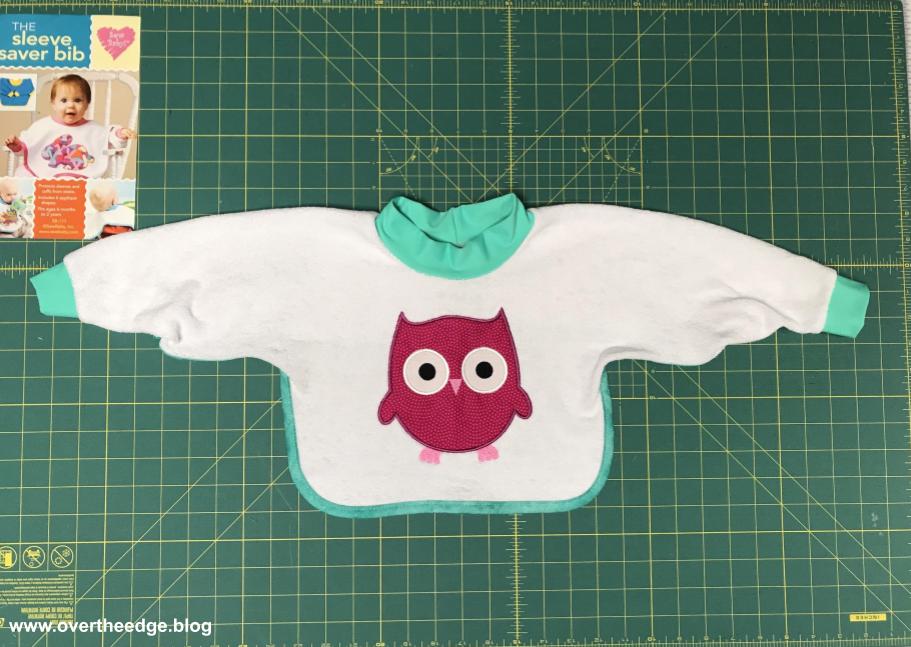
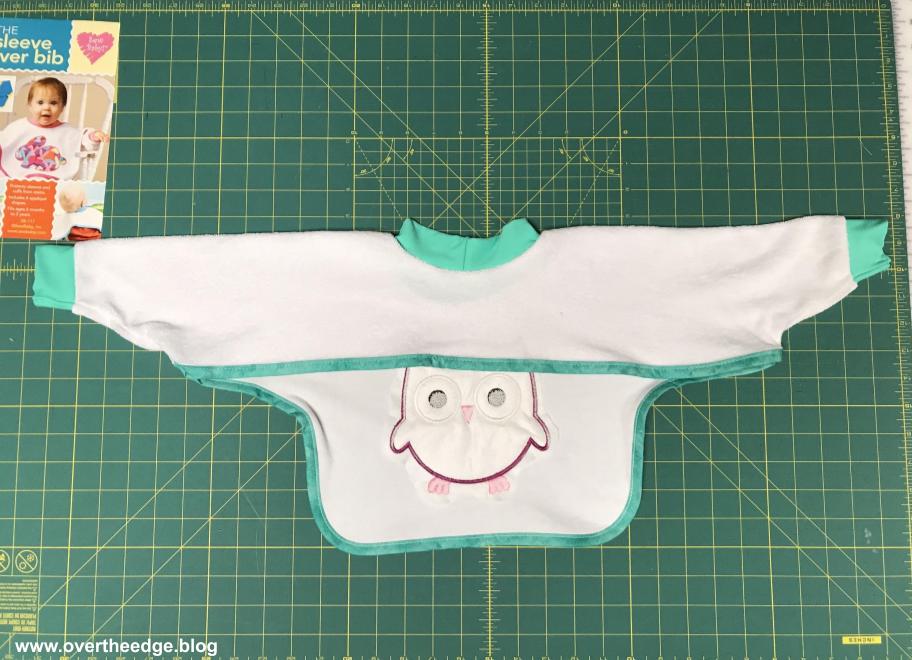
For my daughter’s “purr”fect swimsuit I used Jalie pattern 3350. I combined the twist front from view B with the open back of view A. The pattern didn’t call for lining on the back side, but I added it. The kitty spandex had a white background, and I was afraid it would be too see-through when wet. I also changed the order of construction to minimize changeovers on my serger between overlock and coverstitch.
This swimsuit pattern was a little more complicated because of the twist at the bust. But the twist was worth the time and fuss because of the extra flair it added to the suit.
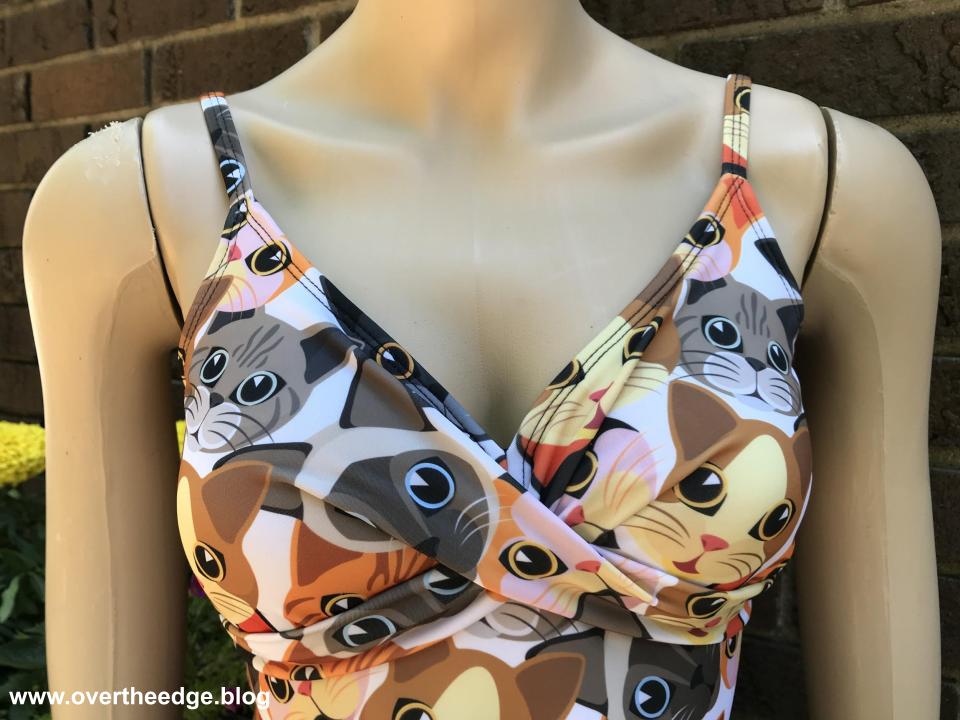
The pattern also included an extra pocket in the bust lining so you could insert a swim cup for more bust coverage. I bought my swim cups from Sew Sassy. A link to their website is included in the Resources section at the bottom of this post.

I haven’t seen Jalie patterns in the stores locally, but they are easy to find online. Jalie is a Canadian company. You can also find their patterns in shops on etsy and ebay. I’ve used Jalie patterns many times for swimsuits and figure skating dresses. Their patterns include a ton of sizes, so it’s possible to get a great fit without a lot of pattern modifications. The pattern also gives tips for sewing a swimsuit with a sewing machine.
Jalie wants you to be successful using their patterns. You will find photo tutorials for different patterns and lots of tips on Jalie’s website. I have included a link to their website in the Resources section at the bottom of this post.
Applying Elastic to a Swimsuit with a Serger
For this swimsuit, I used ⅜” cotton elastic meant for swimwear. I pre-treated it by soaking in hot water and then drying it in my dryer on low heat.
Presser Foot
I use a standard presser foot to apply my elastic on my swimsuits. There is such a thing as an elastic foot for a serger, which is great for some applications. But I find it easier to use a standard presser foot for serging the elastic on swimsuits, or for a pattern that calls for applying elastic in the round.
Quarter Pinning
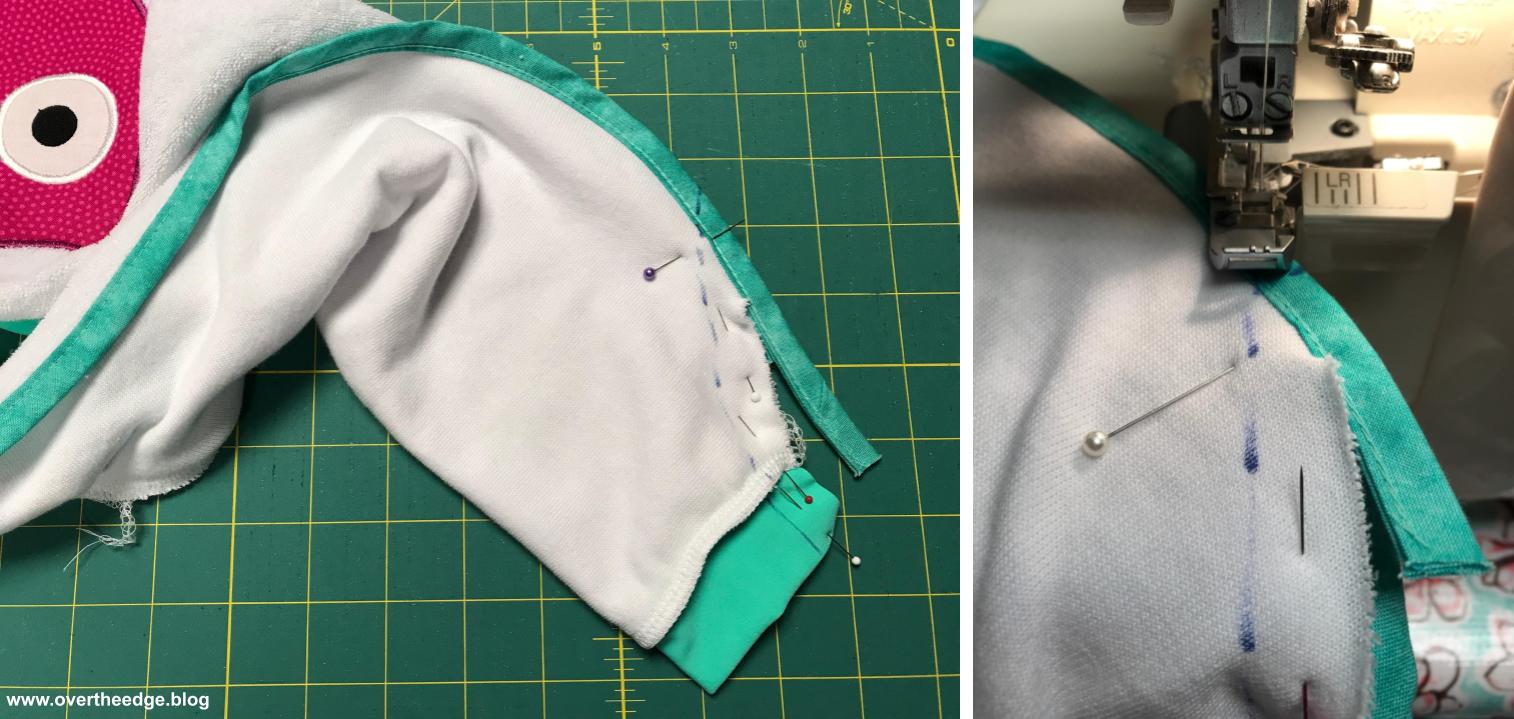
The most common technique I use for applying elastic by serger is called quarter pinning. I divide both the elastic and the spandex edge into fourths and mark them with pins. Then I pin the elastic to the project aligning the marks.
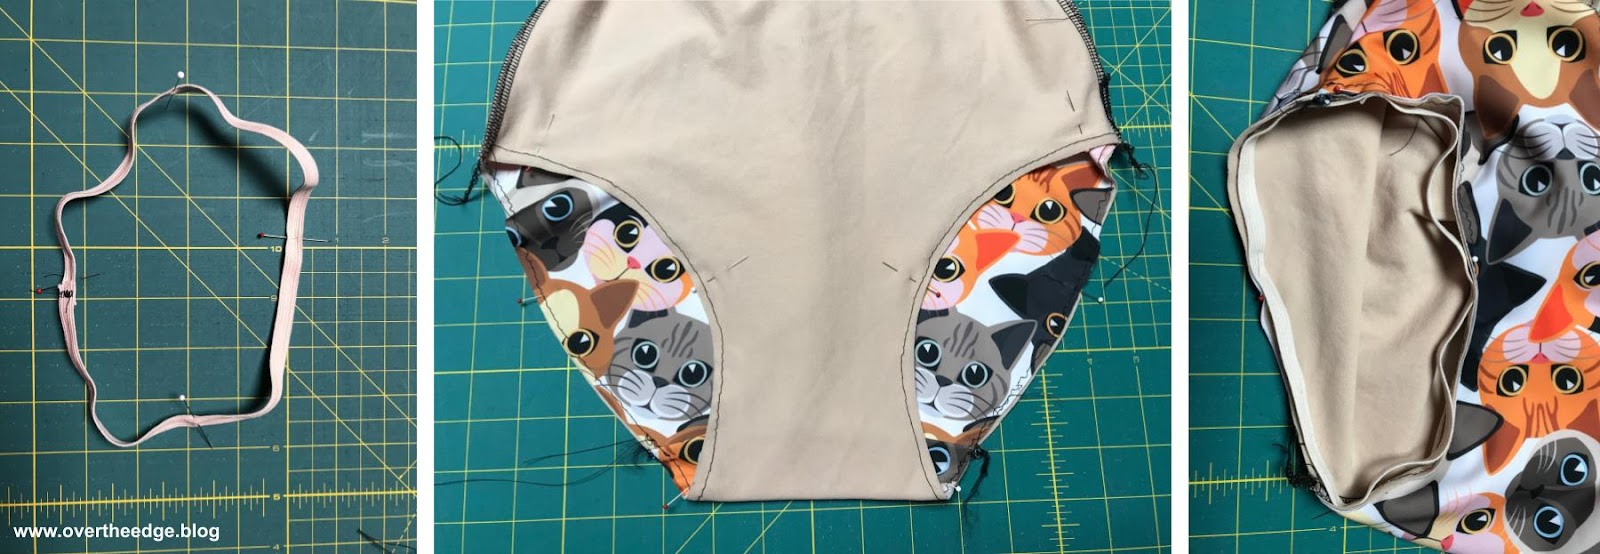
Usually the elastic is smaller than the spandex, so you have to stretch the elastic as you serge. Quarter pinning helps you spread out the extra spandex so everything looks nice and even. If the edges are fairly long, I will pin in eighths to be sure I am evenly stretching the elastic to fit my spandex.
Serge with Elastic on Top or on Bottom?
The most common way I see instructions written for applying elastic by serger is to serge with the elastic on top and your fabric on bottom (against the feed dogs). A tiny little bit of fabric should peek out to the right of the elastic so you are sure you are catching it in the stitches. Sometimes I do it this way.
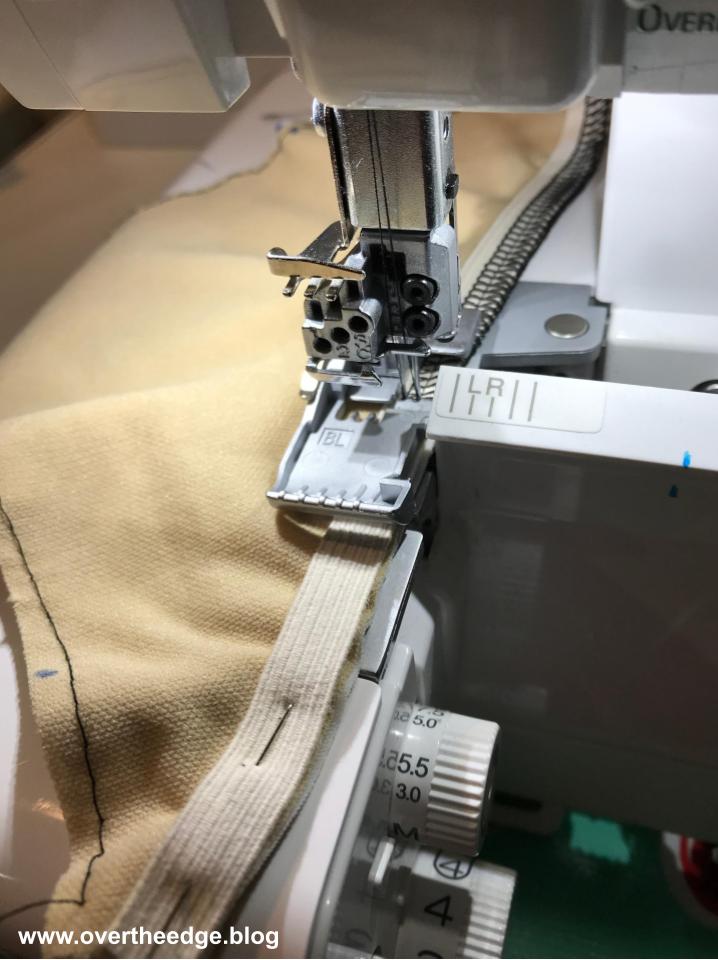
And sometimes I serge with the elastic on bottom against the feed dogs. A little bit of elastic should peek out to the right of the fabric, so you are certain you are catching the elastic in the stitching.
Sometimes I find it easier to line up the raw edges of the spandex and the elastic as I am stretching it to fit, when the elastic is on bottom. I am less likely to have the spandex migrate away from the elastic and end up with spots not caught in the stitching.
When I made the “purr”fect swimsuit, I applied elastic using both methods.
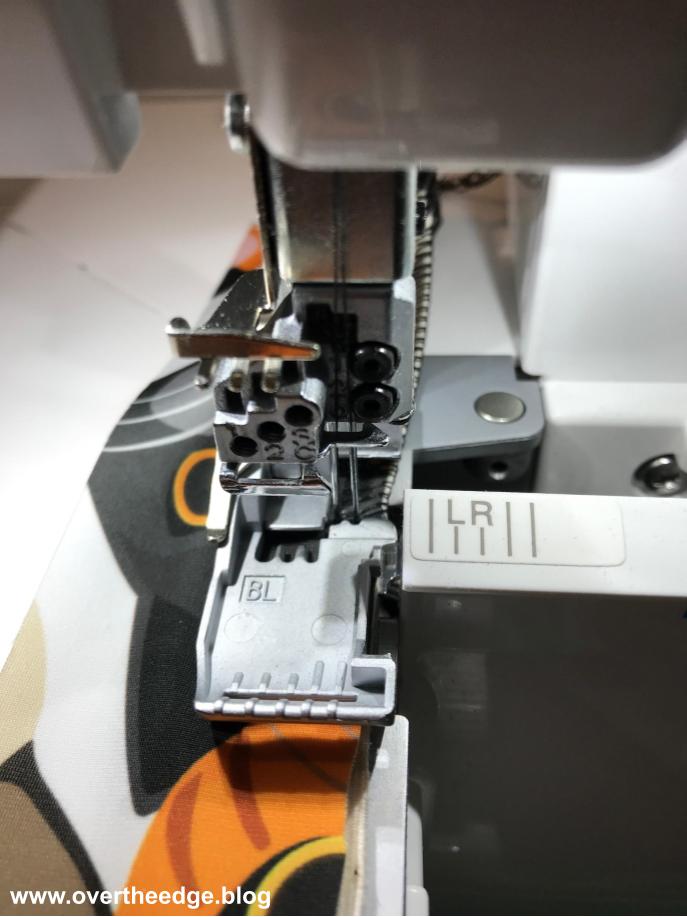
Engage or Disengage Blades?
I disengage my serger blades when I am using a standard presser foot to apply my elastic, so I don’t cut through my elastic. I am very careful to align the elastic and spandex along the edge where the blade normally cuts. If the fabric and elastic move too far to the right of the blade, they could get caught in the loopers and create a mess. The photo below shows my fabric (on top) and elastic (on bottom next to the feed dogs) lined up just to the left of my cutting blade. The stiletto is pointing to the location of the blades.
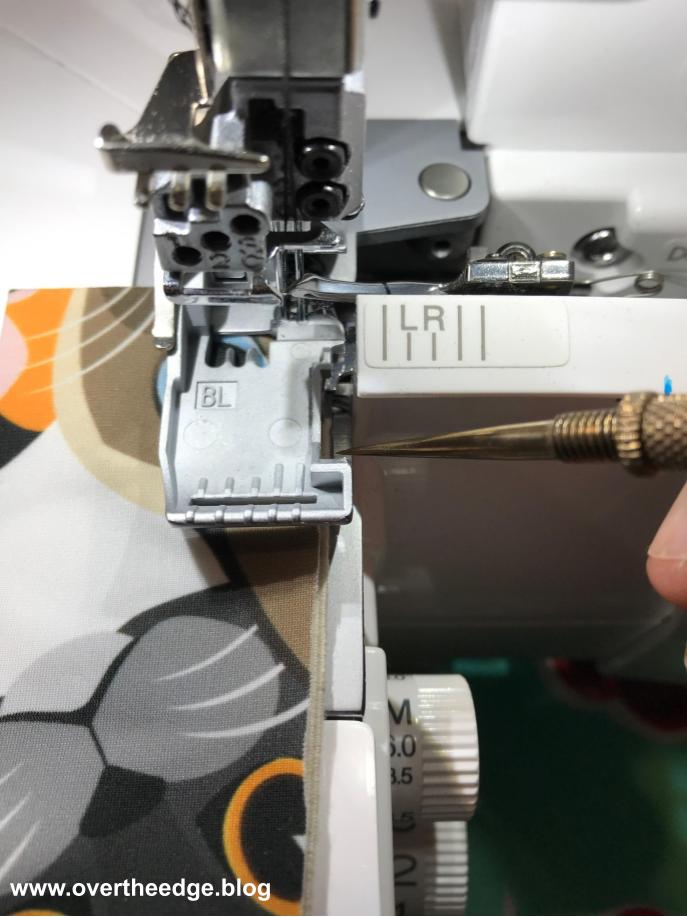
With the blades disengaged, you will need to manually trim the threads from any seam allowances you cross as you serge.
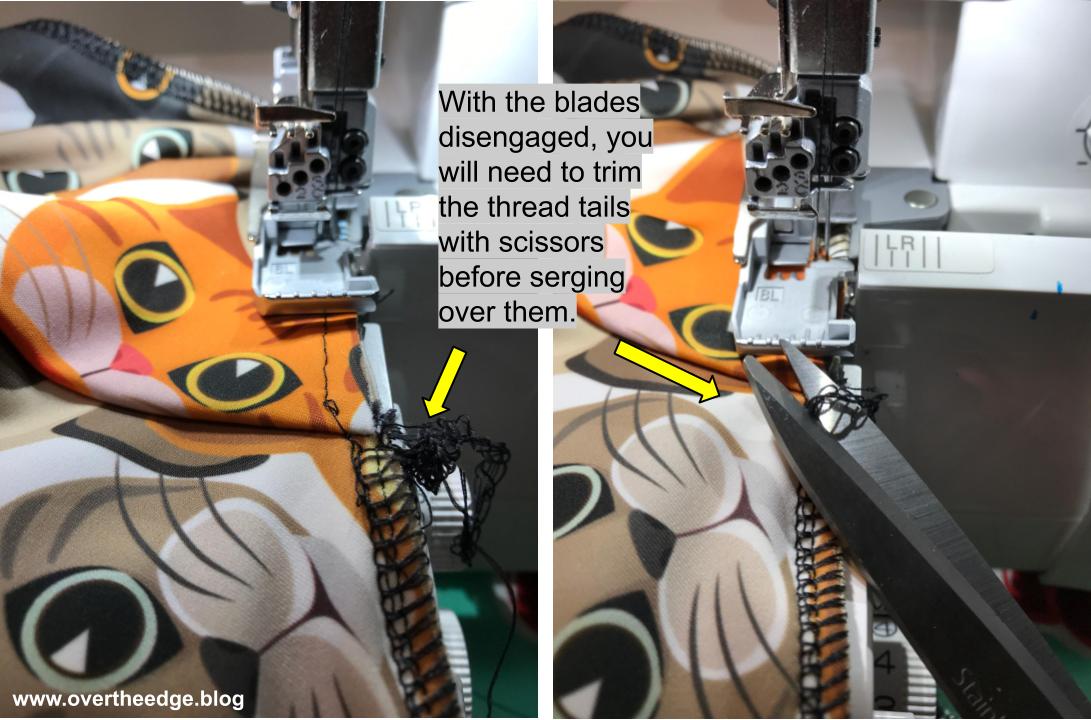
I also increase my stitch length to 4 so I don’t put too much thread bulk into my seams. You could use a three thread overlock stitch to attach elastic. But I usually use a four thread overlock to attach the elastic because I don’t want to spend the extra time changing between stitches. Since I am usually stretching the elastic to fit the spandex, all the stitching seems closer together when everything relaxes back to its unstretched state.
Serging and Sewing the “Purr”fect Swimsuit
I used my sewing machine to:
- baste the lining pieces to the main pieces
- gather a small amount in bust area
- attach the back closure hook
- attach the straps at the back edge
- stitch a few areas of the bust twist
- attach the elastic to the short front V neckline using a zig zag (The bulk of the twist at the neckline was easier to maneuver through the sewing machine.)
I used my serger to:
- attach the elastic
- serge the seams
- finish any exposed edges
- top stitch the elastic with a narrow coverstitch
Basting is Helpful for Serging
I baste all of my lining pieces to my main pieces using the longest straight stitch my sewing machine will do (which is 6 mm I think). The basting keeps the layers from shifting when I am serging. Because the fabric stretches a little as I baste, the stitches look a little loose, but that’s ok. These stitches are not seen from the right side of the finished swimsuit.

When I am done serging the seams, I stretch each seam until I hear the basting stitches pop. After the basting stitches break the seam regains its full stretch-ability. Don’t forget to break the basting stitches or the person putting it on for the first time will pop them and think they ripped the swimsuit. If the basting stitches hang out of the seam too much after popping I will pull some of them out, but mostly I leave them in. No one but me really notices the seams anyway. Most people just notice how good they look in the garment!
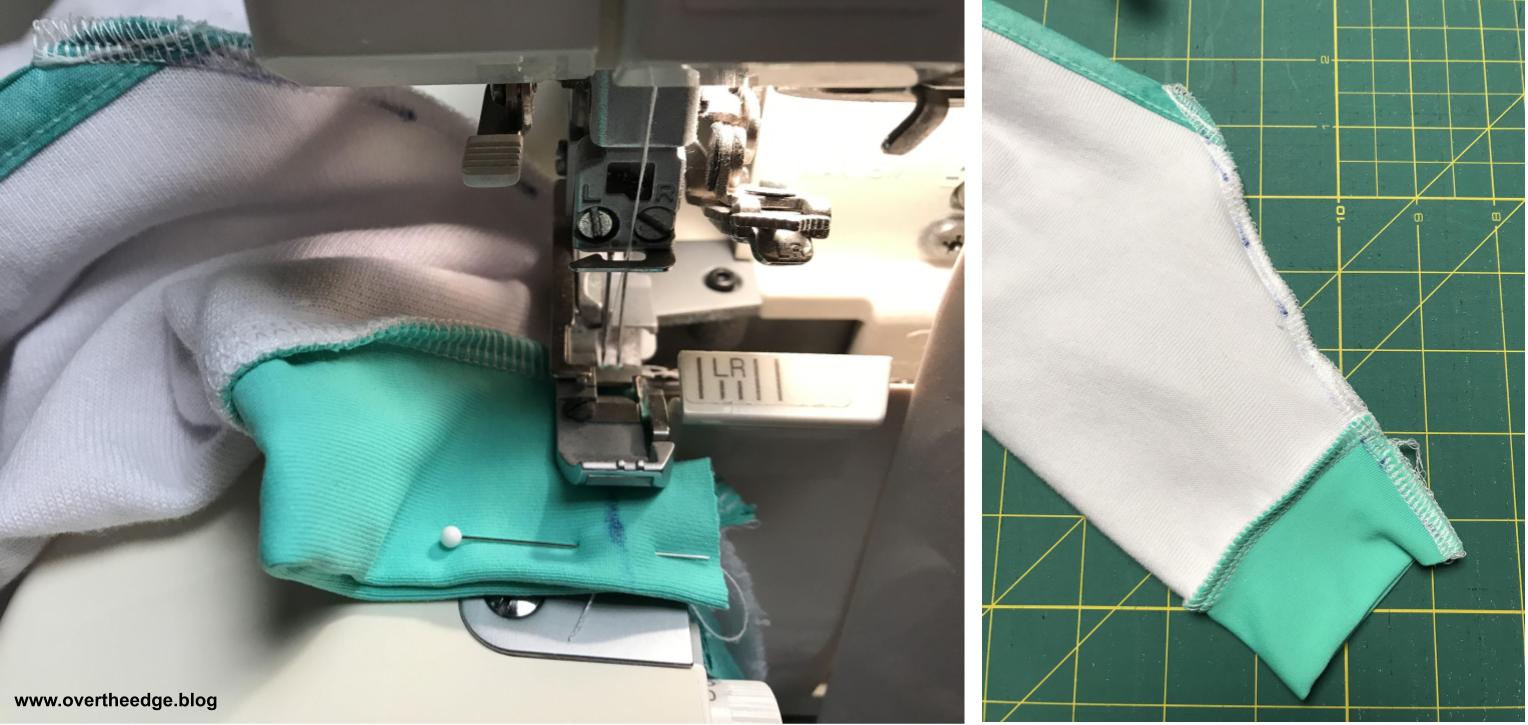
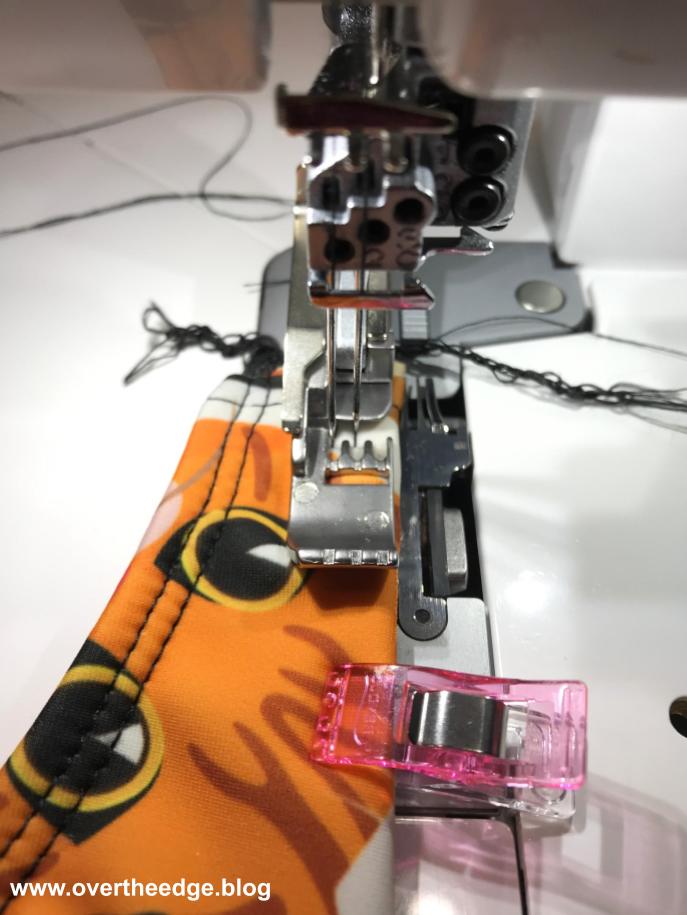
Narrow Cover Stitch
I used a narrow cover stitch to top-stitch all of the elastic in the swimsuit. The narrow cover stitch works well for top-stitching ⅜” elastic, and I like the way it looks.
I used my cover stitch foot to apply the elastic with the needles in the C1/C2 position. The cover stitch foot is narrower and makes it easier to see the right edge of your project. By aligning the right edge of the elastic just past the right edge of the cover stitch foot I get the perfect placement for my narrow cover stitch on 3/8″ elastic. You want to stitch close to the left inner edge of the elastic. If you stitch too close to the outer edge, the wrong side of your elastic will tend to curl out and not lay flat against your body when worn.
I used a stitch length of 4, which is the longest stitch length on my serger. The stitches end up looking shorter because of the thickness of the elastic and multiple layers of spandex.
A Great Technique for Finishing off a Cover Stitch
This technique has worked with every serger I have tried. It will pull your needle threads to the back at the end of the seam so they are ready to finish off with a knot. It saves time and frustration. See the Resources section at the bottom of the post for a link to my tutorial on Finishing off a Cover Stitch in the Round.
The “Purr”fect Swimsuit


I hope you enjoyed this post and are inspired to serge a little spandex!

Resources
https://jalie.com/jalie3350-one-piece-swimsuit-sewing-pattern link to Jalie’s Website and pattern.
https://jalie.com/blog/cat/photos Link to Jalie’s photo tutorials – There are six tutorials on how to make the 3350 swimsuit. I didn’t discover these until after I had made my swimsuit. It would have been helpful for everything but making the twist! Unfortunately the tutorial for the front was only for view A.
https://www.sewsassy.com/BraProducts/bra-and-swim-cups.html Link to source for swim cups.