
To inspire you to try quilting with a serger, I designed my own pattern. My challenge was to design a quilt that was quick and easy to piece using a serger and used only one layer cake of fabric. I named my design, “Forty Two Ten by Jen”. Simple and catchy don’t you think? And to help you succeed using your serger for quilting, I created my Forty Two Ten by Jen Serger Quilt Tutorial.
Why Quilt With a Serger

Most people don’t think of a serger as a quilting machine, but there are some benefits of using it for piecing quilts. Some of my favorite benefits include:
- It’s fast and it finishes the edges of the seams so they don’t unravel as the quilt is handled.
- The good feed system of a serger insures fabric points match and the differential feed helps with stretchy bias edges if you need it.
- And you can even use the serger to cut your blocks as you serge, saving you some time as I did for my “Forty Two Ten by Jen” quilt.
I chose the 4 thread overlock stitch for this quilt because most people who sew/serge are familiar with this stitch. However there are other serger stitches you can use for quilting such as the chainstitch and the flatlock stitch.
Some people think the serger stitch makes bulkier seams. The two needle threads in a serger stitch are basically the same as the top and bobbin thread on your sewing machine. So the only difference is in the looper threads. If you use serger thread for the needles and loopers in your seams, you really won’t notice much difference in bulk. When piecing with a serger I also use a slightly longer stitch length than typically used in quilting, which also helps to reduce the bulk from the threads.
Things to Keep in Mind when Using a Serger to Quilt
- It is important when you first try quilting with your serger that you practice on some scraps. It may feel a little different than quilting using a sewing machine, and you may need to get used to it. If you own a serger you really should give it a try. You may love it or you may not, but at least you will learn more about your serger.
- Since the serger cuts as it makes a seam, pay close attention to how you guide your fabric into the serger – if you trim off too much you can’t put it back.
- The serger seams need to be pressed to one side – they can not be pressed open. Quilts with small pieces or many seams that intersect at one point may be a little more challenging on a serger. Intersection where multiple seams come together may be bulkier since you don’t have the option to press them open.
Supplies for Forty Two Ten by Jen Serger Quilt Tutorial
- 42 pack of 10” squares
- Serger capable of 4 thread overlock stitch
- 4 cones of serger thread to coordinate with your layer cake
- Serging and quilting supplies
- Batting, backing, binding fabric as desired*
- Stiletto or other pointy tool to guide fabric points through serger
- Clear foot for your serger, optional but may help you to see the cutting line better
Step 1: Choose Your Layer Cake – 42 Ten Inch Squares
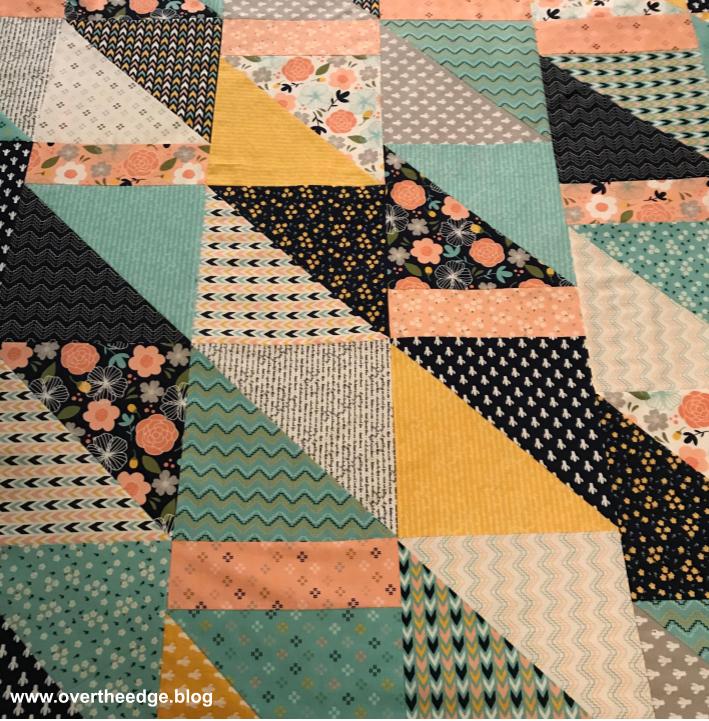
For my serger quilt, I chose Riley Blake’s Azure Skies, by Simple Simon and Company. I love the shades of navy and seafoam with a pop of peach, yellow and gray. And the flowers and the little cacti are so cute!


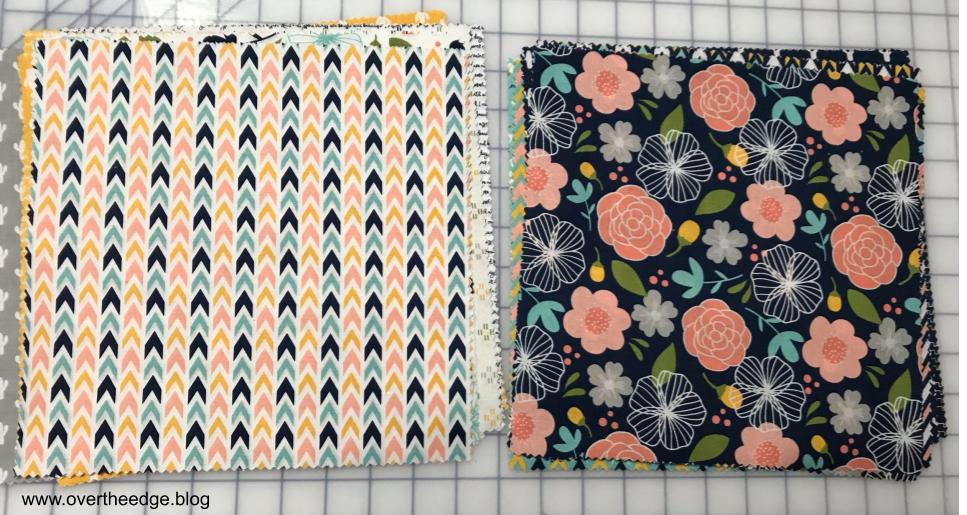
Step 2: Choose Six Squares to be Spacer Rectangles
Although these squares are different prints, they are the same basic color. (Peach squares in my quilt). Having the rectangles all the same color helps tie the scrappy blocks together.

Step 3: Select Lights and Darks
Divide the remaining 36 squares into a pile of 18 “light” squares and 18 “dark” squares to be used for the half square triangle (HST) blocks. You get to choose what a light square is and what a dark square is. The more “medium” lights and darks will look lighter or darker depending on what you pair them with.
Step 4: Create Pairs
Create 18 pairs of squares containing one “light” square and one “dark” square to be used for half square triangle (HST) blocks. I tried to mix it up so no two pairs were alike.

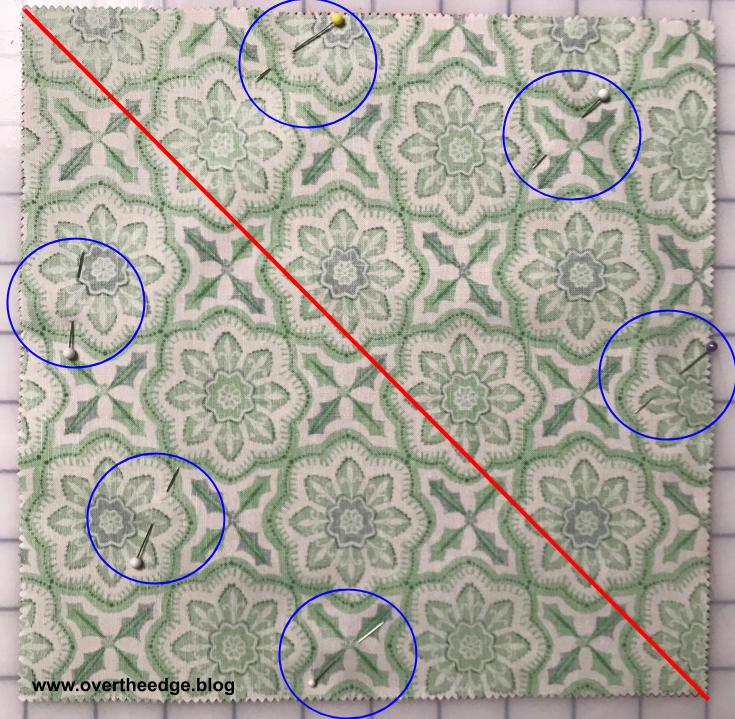
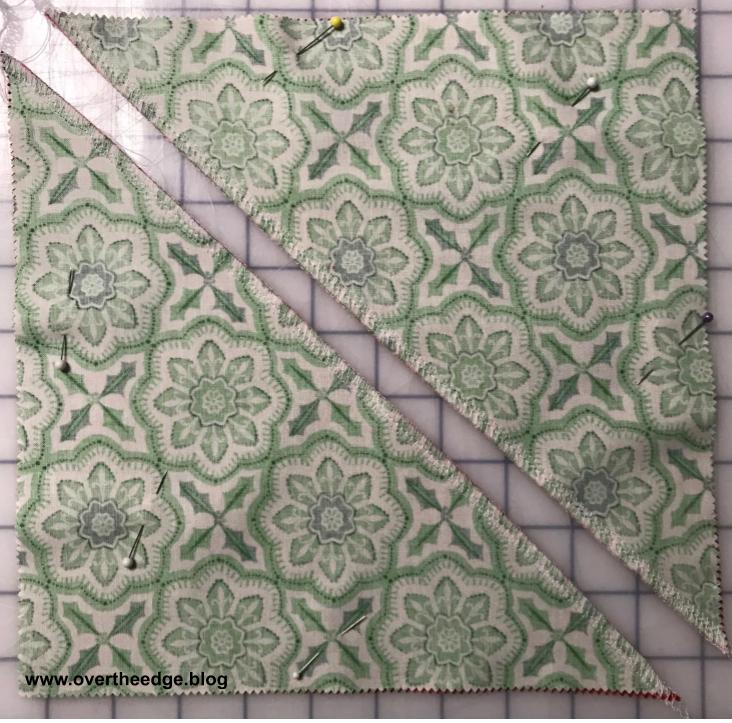
Step 5: Mark and Pin
For each pair, place the light square on top of the dark square, right sides together. Use a fabric marking pen/pencil to draw a diagonal line from upper left corner to lower right corner. Place a few pins on each side of the line far enough away from the line so you can leave the pins in the fabric as you serge (see photo – pins circled in blue.) The pins will keep the layers of fabric together until the serging is completed on both halves of the pair of squares.
Step 6. Serger Set Up
Set up your serger for a 4 thread overlock stitch using your manual as a guide. Set your cutting width to ¼” (distance between your needles and the cutting blade). On my Babylock Imagine serger I used the M setting for cutting width. For this quilt an exact ¼” is not required as long as you are consistent. Set your stitch length to 2.75-3. I set my differential to 1 (or N). I found that I did not need to use any differential feed for the bias edges of the diagonals. If your edges stretch out as you serge you can increase your differential feed slightly to counteract the stretching.
Step 7. Serge and Cut Half Square Triangle Blocks
Most people have never used their serger to cut apart their blocks while they are serging. But that is exactly what I did to make this quilt. I used the blades to cut down the middle of each pair of squares as I serged, which saved a step and time. The serger handles the bias edges beautifully and I didn’t have to use any starch! But if this makes you too nervous, you can always revert back to using your scissors or rotary cutter to cut your diagonals, and then serge each side individually.
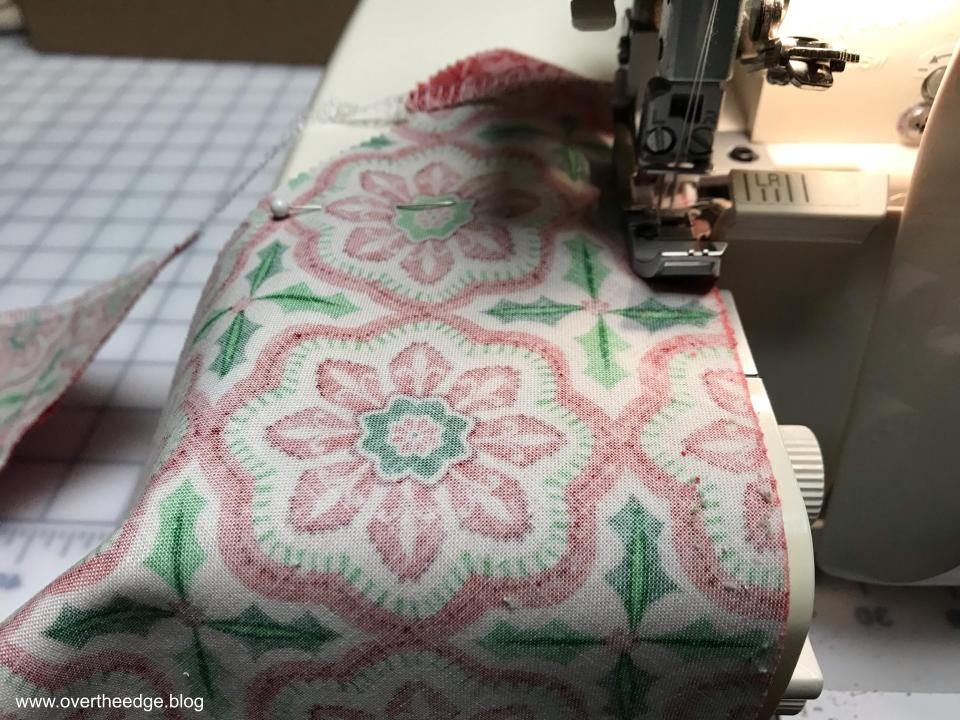
Serge and Cut First Half Square Triangle Block
So begin by placing your marked square up to your presser foot, aligning the diagonal line with the blade. Begin serging, allowing the piece being cut off to drape gently away from the blade. Leave the pins in the fabric to prevent any shifting. (The pins should not interfere with the foot or the blade since you placed them away from the cutting line.) As you continue to serge and cut on the diagonal line, make certain to keep the half being cut off out of the way of the blade.

When you get to near the end of the seam, use a stiletto to hold the corner of the fabric to help it feed straight under the foot (if you need too.) Be certain to keep the stiletto away from your blades. Serge off the end but don’t cut the chain.
Serge Second Half Square Triangle Block
Now pick up the piece you just cut off. Flip it around and line up the cut edge with the blade. Begin to serge, but this time you are just touching the blade with the edge of the fabric, not really cutting anything off. This is kind of like chain piecing on your sewing machine. When you get near the end of the corner, use your stiletto to help guide your fabric straight under the presser foot. Chain off and cut your tails or just continue to chain piece until all of your HST blocks are complete.
You just created two half square triangle blocks with your serger! Now you can remove the pins. Continue this process until you have cut apart and serged all 18 pairs of squares.
Easy Half Square Triangles with a Serger Video
I created a quick video to show you how to use your serger to cut and seam the half square triangle blocks. This video is designed to be used in conjunction with the photos and instructions in this tutorial. Follow the link here: https://overtheedge.blog/videos/easy-half-square-triangles-with-a-serger-video/
Step 7: Press Blocks and Square Up
Open each HST block and press the seam toward the dark side. You may need to change this later on some blocks depending on final block layout.

After pressing, check the sizes of your blocks. If you need to do any trimming to square up (or proof as some quilters say), now would be the time to do it. Line up the seam (diagonal line) of the block with the 45 degree line on your cutting mat and then trim to make square.

Step 8: Cut Spacer Rectangles
Cut your 6 reserved squares into 3 equal pieces for a total of 18 rectangles. Your pieces will be approximately 3.25” x 10”. Then trim the 10” length down to fit the size of your finished half square triangle block (HST) which will be about 9.5”. Now you should have 36 HST blocks and 18 rectangle spacer blocks.

Step 9: Layout Using the Diagram as Your Guide
Begin by laying out your HST blocks in columns beginning in the upper left corner and working down each column. Alternate between placing the “dark” half of the block down and then up. Place 6 HST blocks in each column, with 6 columns total. Once you are pleased with your arrangement of HST blocks, add 3 spacer rectangles per column, alternating placement as desired. Pin the pieces of each column together and label the columns 1 – 6 to help keep your layout organized. You may need to repress a few HST seams from the dark side to light side to get the seams to nest together, depending on your final layout.


Step 10: Serge Columns
Using the same ¼” seams as in step 6, serge each column together. Press the seams down in columns 1, 3, 5. Press the seams up in columns 2, 4, 6. Then pin the columns together, nesting seams where necessary and serge the columns together. To make it easier to handle the bulk of the quilt top, I serged the columns together in sections – columns 1 & 2, columns 3 & 4, columns 5 & 6. And then I serged the pairs of columns together to complete the quilt top. Press and admire – you just made a quilt top with a serger!

Step 11: Finish as Desired
With one layer cake the quilt will finish at approximately 55” x 63”, a nice sized throw. Feel free to add borders or use two layer cakes instead of one to make the quilt larger.
Using one layer cake without borders like I did, you will need approximately ½-⅔ yard of 45” wide fabric for 2.5” wide binding strips, and approx. 3⅔ yard of 45” wide fabric for the backing.
Now that you’ve read through my tutorial you will be happy to know that I created a one page pdf file with condensed instructions for this quilt. I couldn’t fit my entire tutorial on one page though, so you may want to use both the handout and the tutorial to make your quilt. And for those of you who don’t have a serger, I created instructions for you to make this quilt using a sewing machine. This pattern is free for personal use only and is copyrighted. Please have your friends visit my blog to download their own copy of my pattern. Feel free to pin and share, just be sure to to give me proper credit and include proper links to my website. Thanks.
I’m still waiting to finish my quilt (just in case you were wondering why there is no binding on the quilt in the photos.) The quilt top is still hanging at my local fabric store as one of the samples for our National Quilting Month Layer Cake Event. I can’t wait to finish it and start using it!
Forty Two Five by Jen
You can also use these instructions to make a smaller version of this quilt using a charm pack of 42 five inch squares. I call my smaller version “Forty Two Five by Jen”. This quilt finishes at approximately 25″ x 28.5″.


A view of the serger seams 
I used this Moda charm pack for this quilt
And my daughter is learning to quilt, so I just had to share her version of Forty Two Five by Jen, made on a sewing machine.

Forty Two by Ten by Jen Serger Quilt Tutorial
I hope you are inspired to serge and enjoy my Forty Two Ten by Jen Serger Quilt Tutorial.

Some Helpful Resources
https://babylock.com/learn-and-create/inspiration/how-to-make-a-quilt-on-a-serger