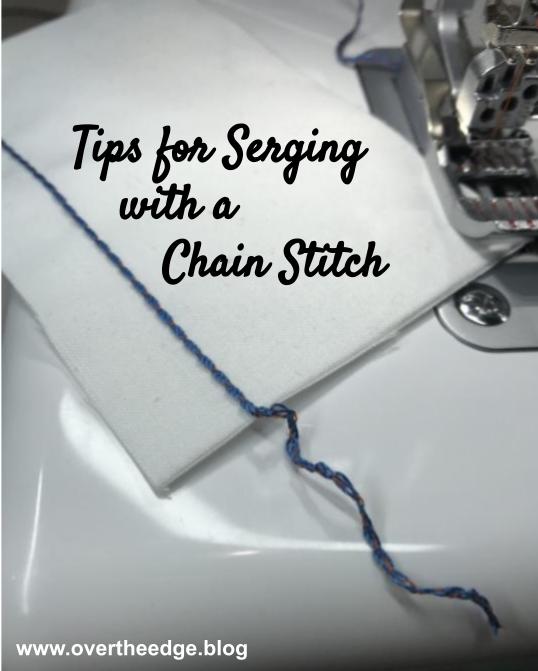
Many resources for serging show you the “wow” but not the “how”. You get all excited to try a technique and then get frustrated when it’s not as simple as it seemed. The chain stitch is one of those stitches that can be fun to use for projects, but can be frustrating if you aren’t aware of small little details. I hope my tips for serging with a chain stitch provide you some of those details that help make your projects a success.
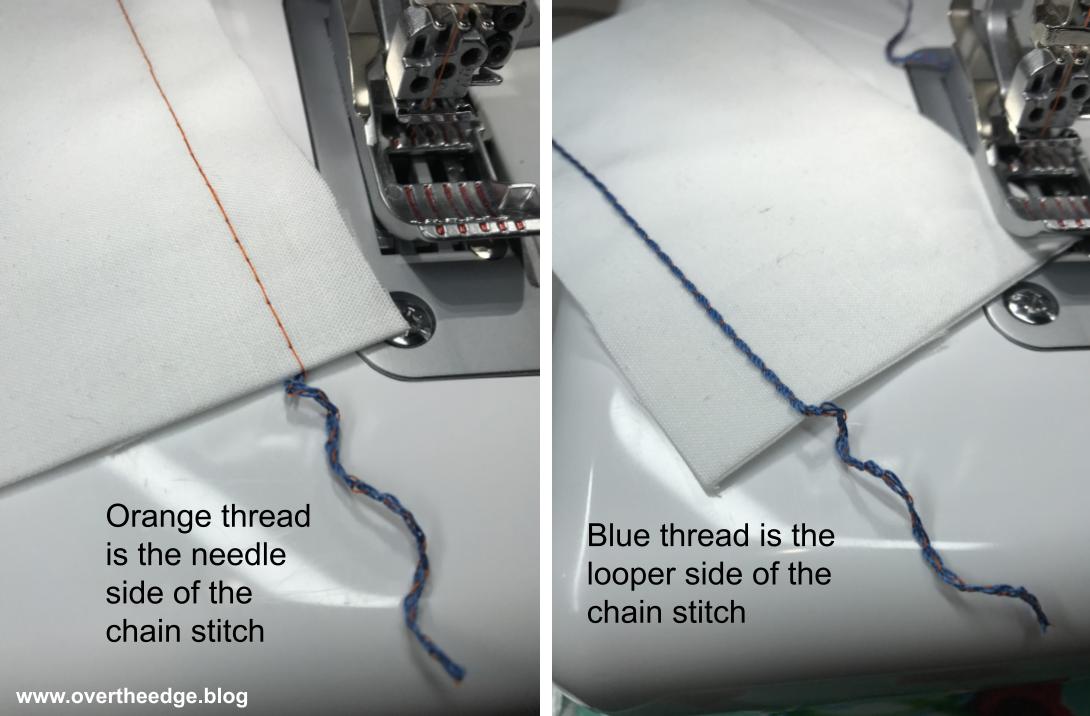
The serger chain stitch is made up of two threads – one from the needle on the top (just like a sewing machine) and one from the looper on the bottom (instead of a bobbin). The chain stitch looks just like a sewing machine lockstitch on the top side of the fabric. But on the underside of the fabric, the chain stitch looks like a “chain”.
Beginning a Seam with a Chain Stitch
When it comes to beginning a chain stitch, all sergers are the same. They all require you to begin on fabric. You must have fabric under the needle for the chain stitch to begin forming.
I usually begin chain stitching my seam directly at the raw edge of the fabric. Sometimes it takes a stitch or two for the chain to start forming, so your actual seam might not begin right at the edge of the fabric.
If you are having trouble with the chain stitch formation at the beginning of your seam, you might want to try an “anchor cloth”. An anchor cloth is a small piece of scrap fabric on which you begin to serge. Then you serge from the small anchor cloth directly onto the project. After the seam is complete, you snip the thread between the anchor cloth and the project.
Ending a Seam with a Chain Stitch
What do you do when you come to the end of a chain stitched seam? It all depends on your model of serger.
Sergers that CAN Chain Stitch Without Fabric
Some sergers allow you to continue to chain stitch right off the edge of the fabric. The chain will continue to form without fabric, like happens with an overlock stitch. If you have one of these sergers, you will be able to create a chain of thread at the end of the fabric, so then you can swing the fabric away from the presser foot before you trim the thread. Check your manual to see if this is possible. My Baby Lock Evolution serger allows me to chain off the edge of the fabric using a chain stitch.
Sergers that CAN NOT Chain Stitch Without Fabric
If your serger is not capable of chaining off the fabric at the end of the seam then you will need to follow the instructions in your manual. Typically it means when you get to the edge of the fabric you lower your needle all the way down. Then you turn the handwheel backwards and raise the needle all the way up to release the thread off the stitch fingers. Finally you grasp the thread and fabric firmly and pull both away from the presser foot before trimming your threads.
Alternative Method to End a Chain Stitch Seam
You can use the “Finishing a Cover Stitch in the Round” method to end your chain stitch at the end of the seam. See my tutorial at: https://overtheedge.blog/tutorials/finishing-off-a-cover-stitch-in-the-round/
Even if you are not serging in the round, you can still use the technique to end your seam. The benefit to using this method for seams is that your chain stitch is less likely to pull out when you remove your fabric from the machine.
Having Problems Breaking or Jamming Stitches at the Beginning of a Seam? Where is your Needle Thread?
The seam you just serged looks good. You take the fabric off the machine and prepare for your next seam. You begin to serge your next piece of fabric and all of the sudden your machine doesn’t sound right. And your chain stitch isn’t forming or one of your threads breaks. Has this happened to you?
A thread jam or break may occur at the beginning of a seam when your needle thread gets caught around the looper. To prevent this you can sweep your tweezers under your presser foot to catch your needle thread. Then use the tweezers to pull the needle thread up above the needle plate (but still under the presser foot). If you were to start sewing on your sewing machine with the needle thread caught in the bobbin case, you are probably going to get a jam right away. Same principle holds true for a serger.
For sergers that are able to chain stitch off the fabric at the end of a seam, you don’t have to bring your needle thread above the needle plate as long as you have maintained the chain. If the chain has come apart, you will probably need to bring your needle thread above the needle plate and under the presser foot.
Securing the Ends of a Chain Stitch
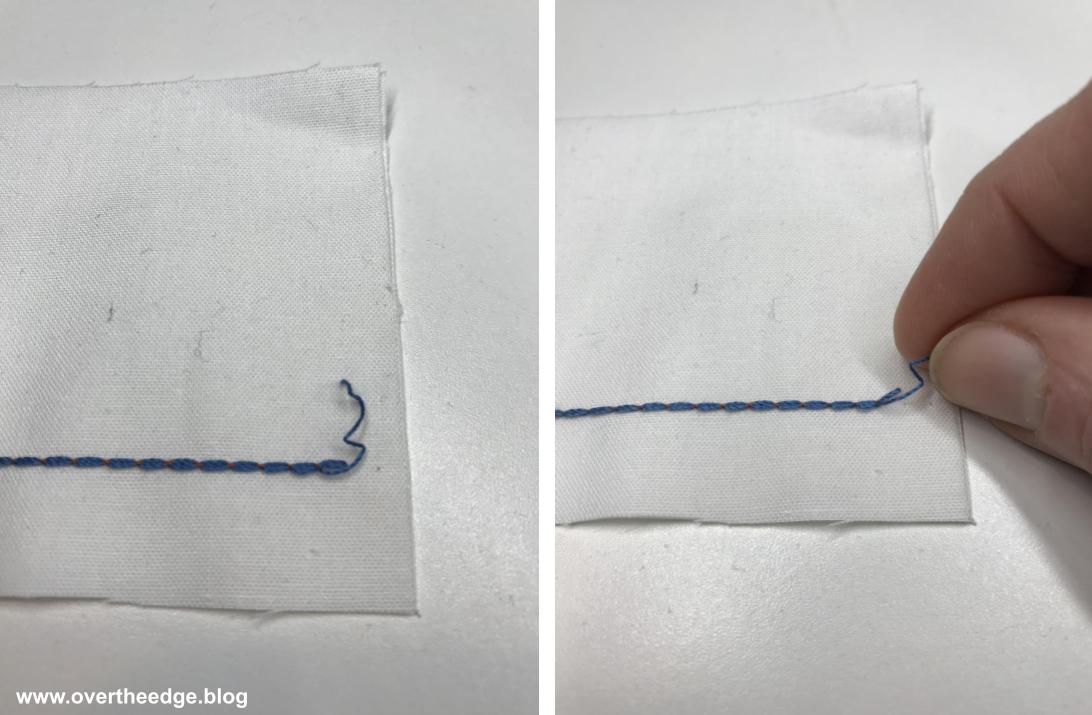
One distinguishing feature of a chain stitch is that it can be removed easily. Many sewists use the serger chain stitch as a basting stitch. However, if you unintentionally pull on the “right” thread you may unravel your chain stitches and your seam will pull apart. The chain will unravel starting from the end of the serged seam (not the beginning).
To prevent the stitches at the edges of your project from unravelling be sure to secure the ends of your thread chains, either with a knot, fray check or by serging over the stitches with another seam.
How to Easily Remove a Chain Stitch Seam

No one likes ripping out stitches and having to start over. However, there are some methods of removing stitches that are faster than others. I vote to use the faster and easier method whenever possible! This “snip, pick and pull” method of removing chain stitches is much faster than removing stitches individually (and a lot less messy).
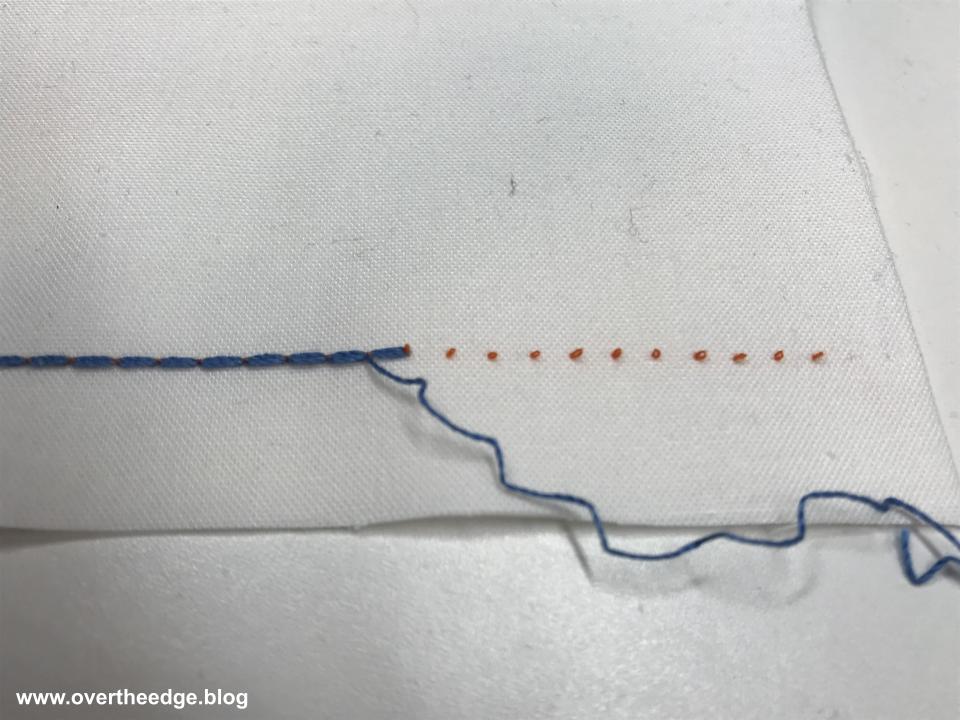
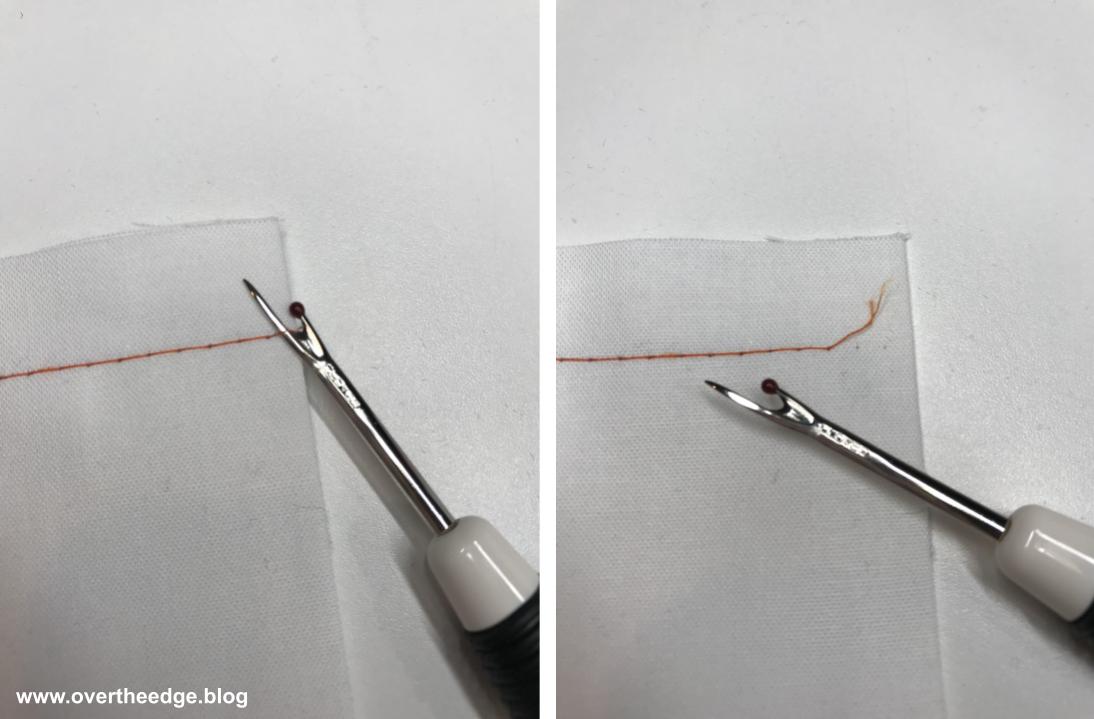
To remove the chain stitch, begin by snipping the thread chain at the end of the seam right at the fabrics edge. This method only works at the end of the seam where you took your last stitch (and not at the beginning where you took your first stitch.)
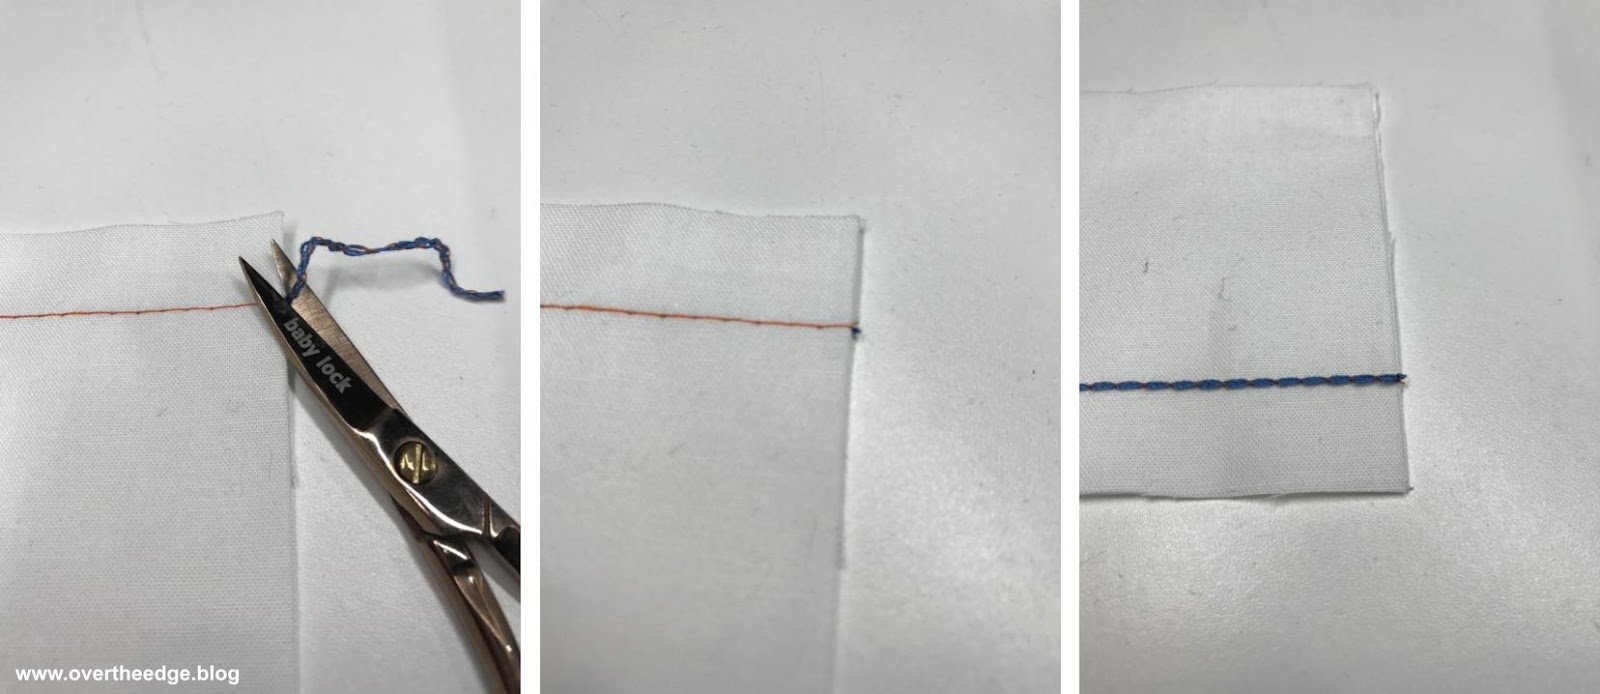
Next use a seam ripper to pick/pull out a few needle stitches at the end of the seam. This will help to separate the needle and the looper threads.
Turn the fabric over and find the tail of looper thread at the end of the seam and grasp it. Pull the looper thread and it will release from the seam.

After the looper thread has been removed all that will be left in the seam is the needle thread (orange dots from the back side of the fabric.) Grab the tail of the needle thread and pull it out.

And that’s how you easily remove a serger chain stitched seam!
Why isn’t my Seam Coming Apart Easily?
This method I just showed you works most of the time, but not always. Here are a few reasons you might be having troubles removing your chain stitch.
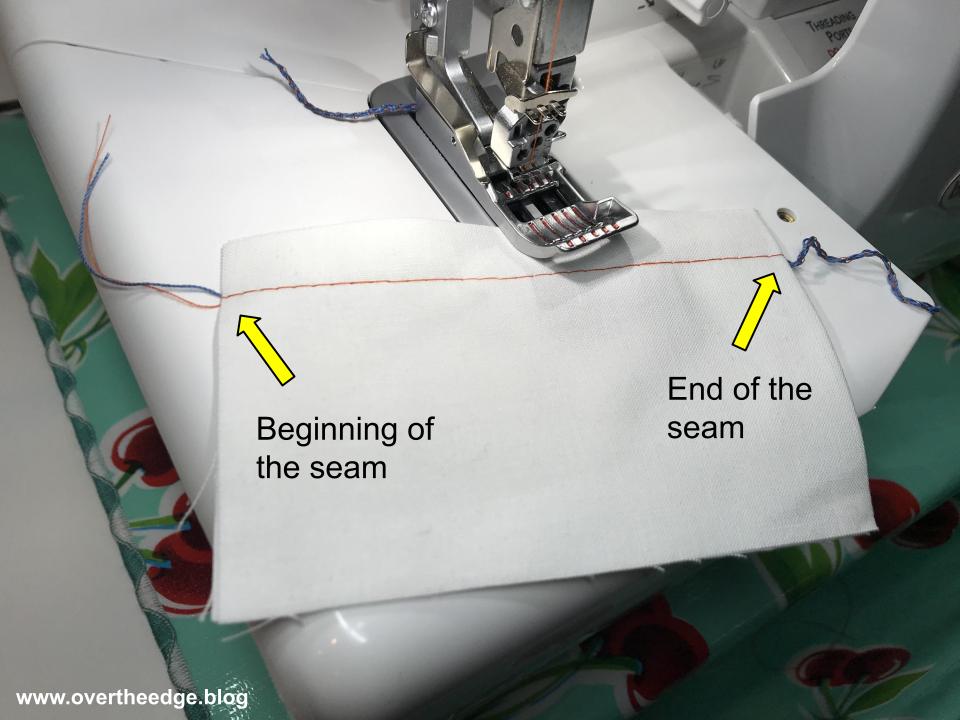
Have you correctly identified the end of the seam?
Make certain you are removing the stitches from the end of the seam where you took your last stitch. If you are trying to pull on the looper thread from the beginning of the seam where you took your first stitch, the looper thread will just get tight and not pull out. It has to do with the way the chains stitch is formed.
Could it be the thread or fabric?
Some threads or fabric aren’t as cooperative. If the thread or fabric is “hairy” or “grippy”, the thread might have a tendency to get stuck. If your looper thread begins to pull out, but then seems to hit a stopping point, here’s what you can do. Use a seam ripper to pull out a few more needle threads at the “stuck” spot. This should free up the looper thread and you should once again be able to pull on the looper thread to remove the seam.
Is the chain stitch formed properly?
For this method of removing a chain stitch seam to work as intended you have to start with a properly formed chain stitch. If something is “off” with your stitch you might not be able to pull on the looper thread to easily remove the seam. By “off” I mean stitches that are improperly formed. A few problems that could lead to improperly formed chain stitches are: incorrect tension settings for the stitch, a needle not inserted properly, incorrect needle or looper threading.
Tips for Serging with a Chain Stitch
I hope you found my tips useful and you are able to chain stitch more successfully!

Resources
Below you will find links to a few of my projects that utilize a chain stitch:
https://overtheedge.blog/how-to-serge-a-quilt-with-a-chain-stitch/ The chain stitch can be used to piece and bind a quilt. Check out My Happy Place Quilt.
https://overtheedge.blog/serging-pants-with-a-5-thread-safety-stitch/ The 5 thread safety stitch is a chain stitch combined with an overlock stitch.
https://overtheedge.blog/tutorials/serger-double-fold-bias-binder-tutorial/ The chain stitch can be used along with a binder attachment to add binding to the edge of quilts and other projects.