Since March is National Quilting Month, I thought it fitting to share the latest serger quilting technique that I have been experimenting with – one seam flying geese with a serger.
While I was surfing the internet I came across an interesting YouTube video of Jenny Doan from Missouri Star Quilt Company. She was showing how to create a one seam flying geese block using a sewing machine. I immediately decided that the serger would be a great tool to use for this technique. I couldn’t find any internet resources about using a serger to make a one seam flying geese block. So maybe I am the first person to try it with a serger? Probably not, but it appears I am the first person to blog about it…..
One Seam Flying Geese with a Serger
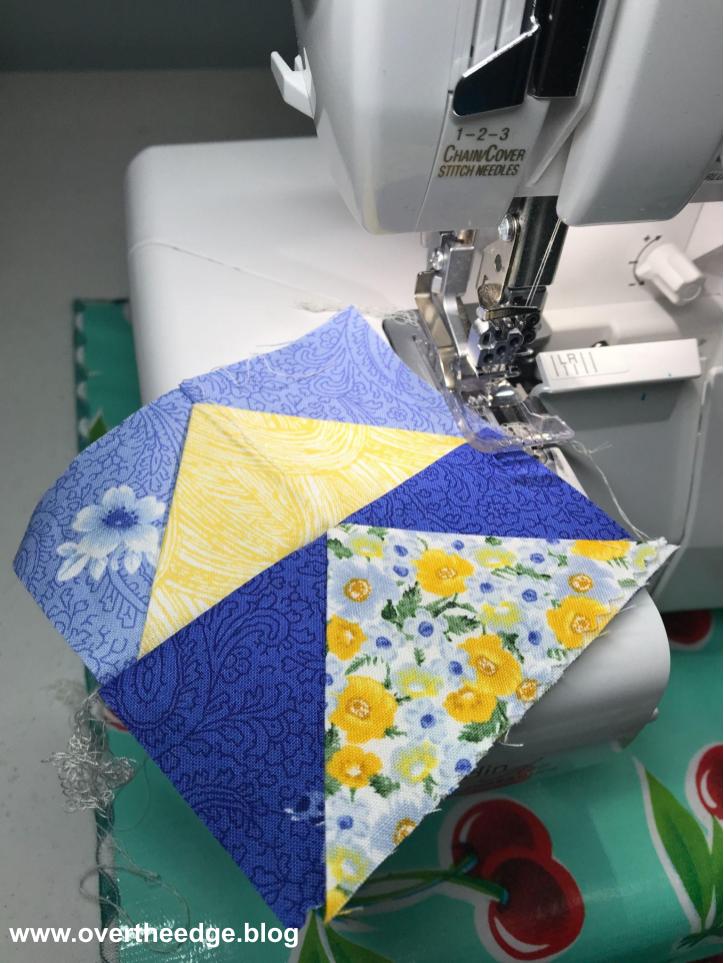
The one seam flying geese block is a three dimensional block. The block is made from a rectangle and two squares and has just one seam. Each geese block/unit is twice as wide as it is tall. The angled sides (or wings) of the geese are folds in the fabric. This method has no lines to mark, no subcutting, and makes perfect points. How easy is that?!
Pros and Cons of the One Seam Flying Geese Block
Pros
Accurate
Fast
No markings or paper to remove
No bias edges
3D adds texture
Very little waste
Cons
May need or want to stitch down the wings of the three dimensional geese
Some seams are a little thicker due to the folded fabric
Jen’s Experiment with Serged Flying Geese
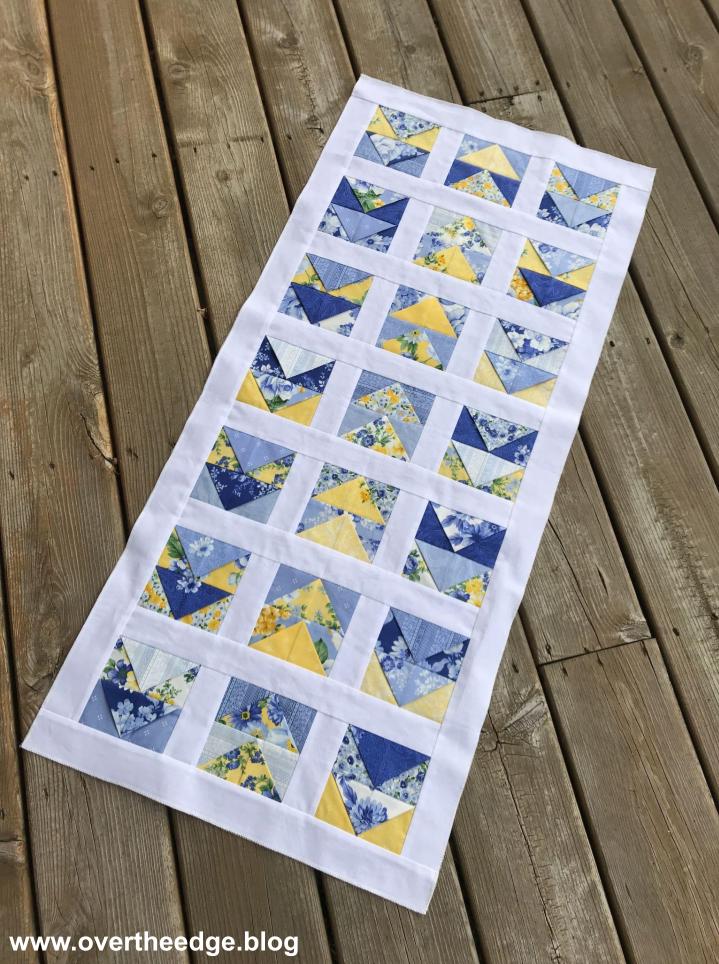
I pulled a charm pack from my stash. The charm pack was from Boundless Fabrics and called Dutch Garden III. The blues and yellows were so fresh and cheerful compared to our dreary February weather! With a few simple cuts and a little serging, I quickly transformed the 42 squares in my charm pack into 42 flying geese units. Chain piecing the blocks on my serger was quick and easy. I found making them kind of addictive – I just wanted to keep making them!
With a little fabric manipulation, pressing and trimming, I transformed all of the blocks into one seam flying geese.
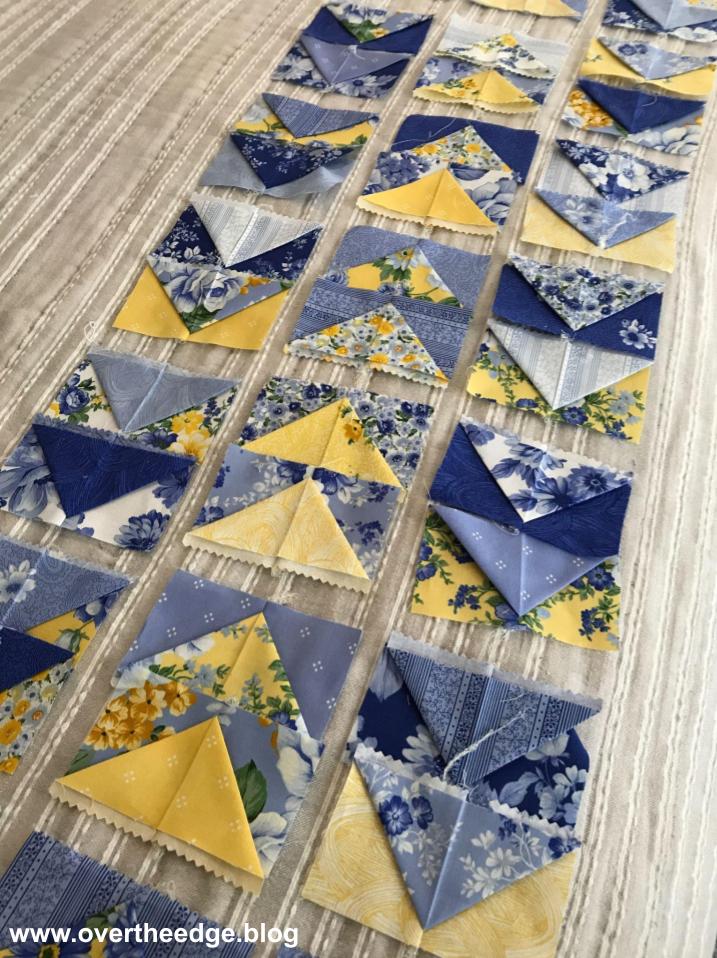
I Have a Bunch of Flying Geese – Now What?
Most people begin with a pattern when they create a quilt. Sometimes I do too. But not this time. I serged all these geese without a plan for what to do with them. I simply laid out all the blocks and moved them around until I liked the arrangement. These geese decided to become a table runner.
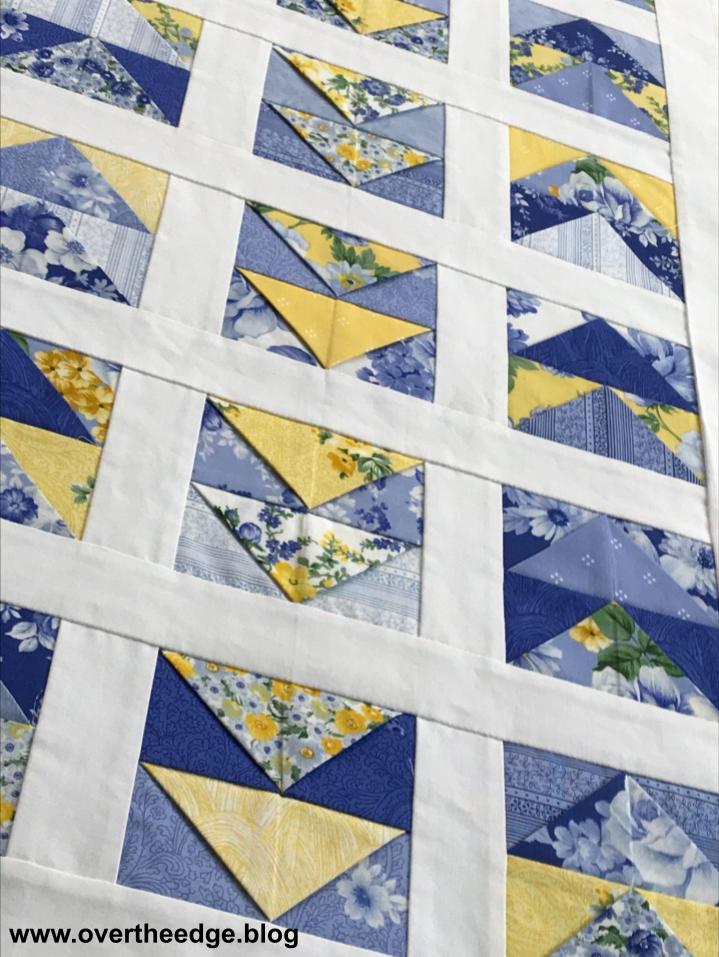
Sashing and Borders
I serged the geese blocks together in groups of two and added sashings and borders.
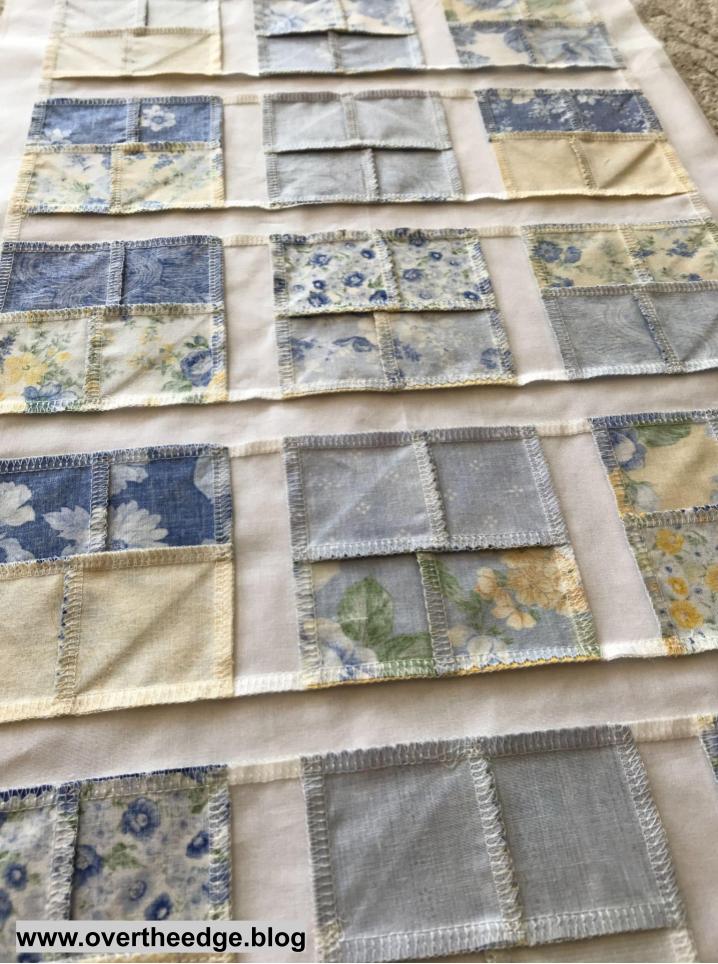
The Results of my Experiment
From the front side you might think the table runner was sewn with a sewing machine. But from the back side you can see all the neat and tidy serged seams.
My one seam flying geese blocks became my cheerful Spring Migration Table Runner!
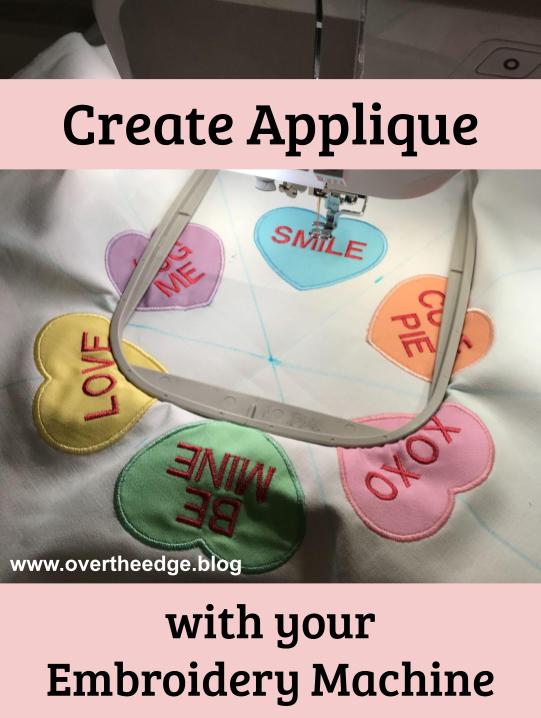
Learn how to create applique with your embroidery machine. Hmmm. What does that have to do with serging? Nothing really, but my serger is busy working on another project that is not quite ready to share. So with Valentine’s day right around the corner, I thought I could spread a little holiday cheer with my colorful and cheerful conversation heart appliques.
My Inspiration
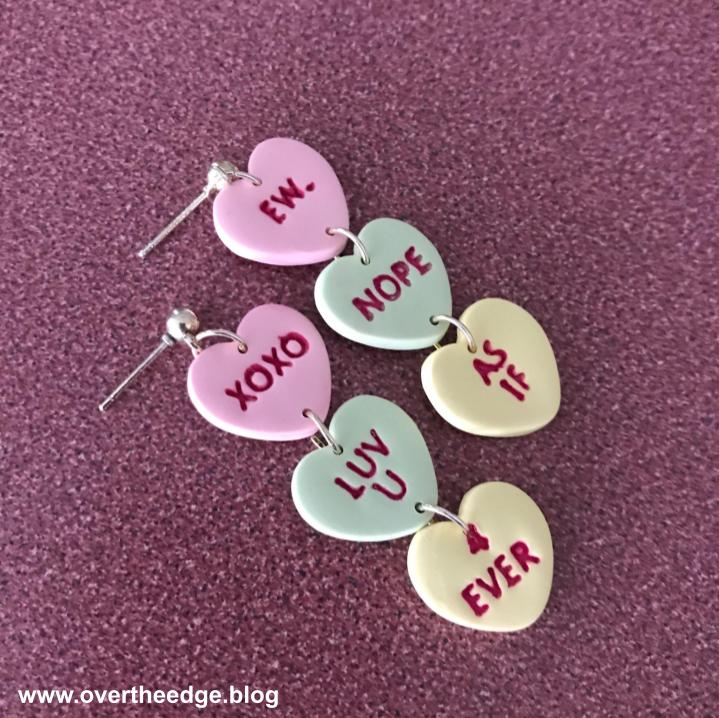
Are you familiar with those cute little heart candies with the words? Some people call them candy hearts and some call them conversation hearts. I’ve always known them as conversation hearts. Well, my daughter recently made these adorable conversation heart earrings for Valentine’s Day. Inspired by her earrings, I set out to make a conversation heart creation of my own.
February is National Embroidery Month
In the sewing machine world February is National Embroidery Month. Every year at the store we try to do something creative to celebrate this month. Since February also includes Valentines day, I thought a machine embroidery project that focused on hearts or love of sewing would be good. I recently learned how to “create” appliques using the built in frames in my embroidery machine. So I created my own machine embroidered applique conversation hearts.
I had so much fun making them that I put them on everything. Well maybe not everything, but a lot of things! I made several samples for inspiration and created free handouts to give out at the store. I thought that I would share them with you too.
Create Applique with your Embroidery Machine
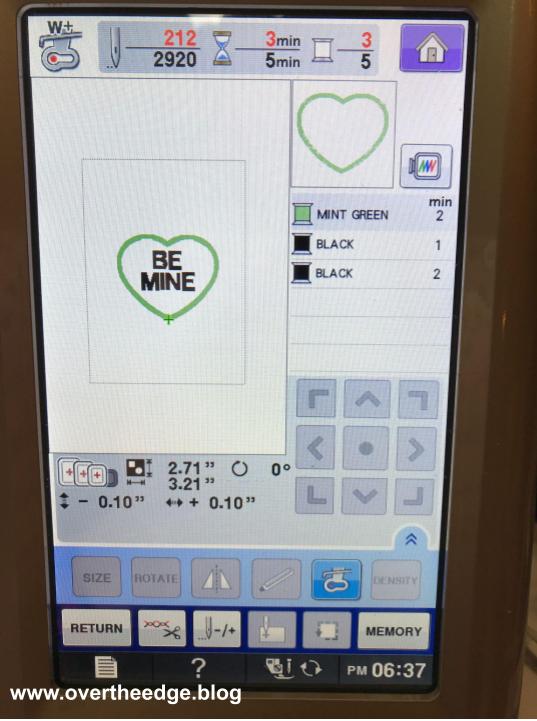
Some embroidery machines are capable of creating new designs, but most can simply modify existing designs. I own a Baby Lock Unity sewing and embroidery machine. It’s a wonderful machine with good sized hoops, but it can not create designs, only modify them.
To “create” an applique on my machine I need to begin with a design or shape that already exists. There are many different built-in frame shapes in my machine. One of those shapes is a heart. And the heart frame is available with several different types of borders which can be used to create an applique.
There are several different steps to creating an applique on an embroidery machine. First there needs to be a placement line so you know where to place the applique fabric. Then there needs to be a tack down line that stitches the applique fabric to the background. The fabric needs to be trimmed. And then a line of satin stitches needs to be placed on top to cover up the raw edges of the fabric. And if you want you can add words or other designs on top of the applique. Even though there are several steps you need to do to create appliques this way, it’s really pretty easy once you understand the process.
This technique will work with all of the current Baby Lock embroidery machines (may not work with some of the older models). You can even do this on the entry level Baby Lock Verve. I’m not an expert on embroidery with other brand machines but if your machine has built in frame styles then you can probably do this with your machine too. The following link will take you to my instructions for creating applique with your embroidery machine using frames. https://overtheedge.blog/tutorials/conversation-heart-mug-rug/
Conversation Heart Mug Rug Free Pattern
After I created my conversation heart applique design on my machine, I tested it out on a plain piece of cotton fabric. The test was a success! So I turned the fabric with the appliqued heart into a mug rug. I added some decorative stitches and quilted it with my sewing machine. WIthout an embroidery machine you can still make this project. The only difference is that you would have to create the applique by sewing it instead.
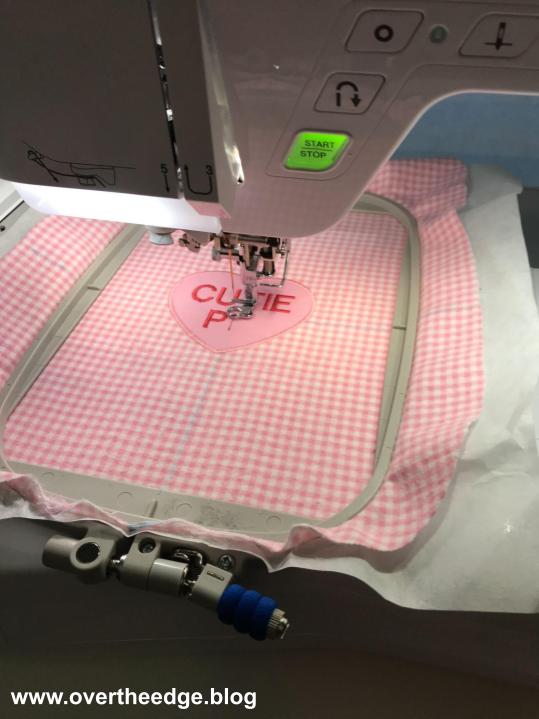
Isn’t my model a cutie pie?! Adding applique to a bib is another quick and easy project. I made my bib using flannel on the front and thin terry cloth on the back. But you could save some time by adding an applique to a purchased bib. I used a free bib pattern from MadeEveryday as the basis for my conversation heart bib. See the resources section of this blog post for the link to the free bib pattern.
Conversation Heart Table Topper
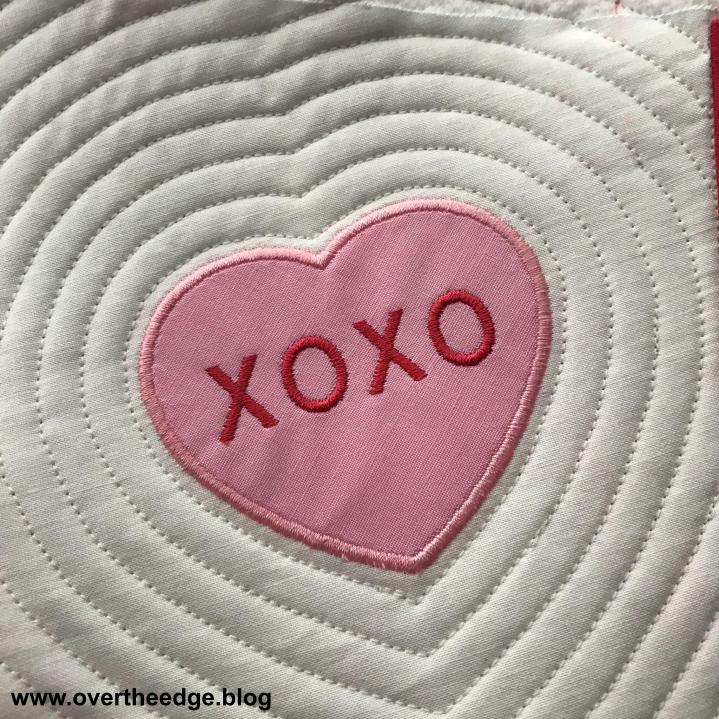
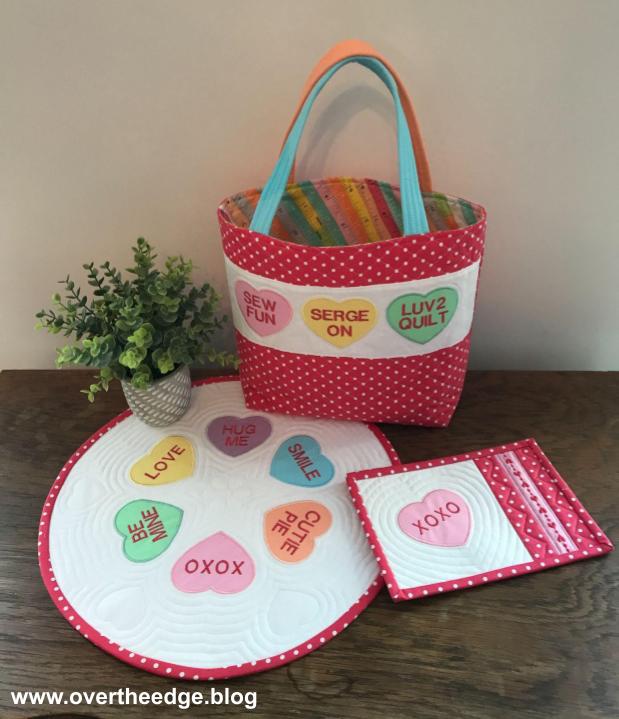
My conversation heart table topper was created from one piece of fabric which I embellished with appliques. After creating my quilt sandwich, I quilted the topper with a combination of echo quilting and small hearts using my sewing machine. A straight stitch, a standard presser foot and a lot of pivoting were used to quilt this project. The auto pivot function on my Baby Lock Unity is awesome!
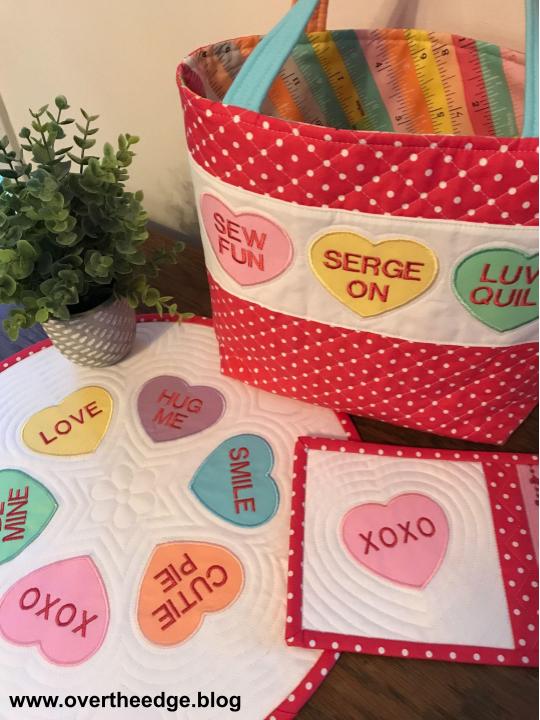
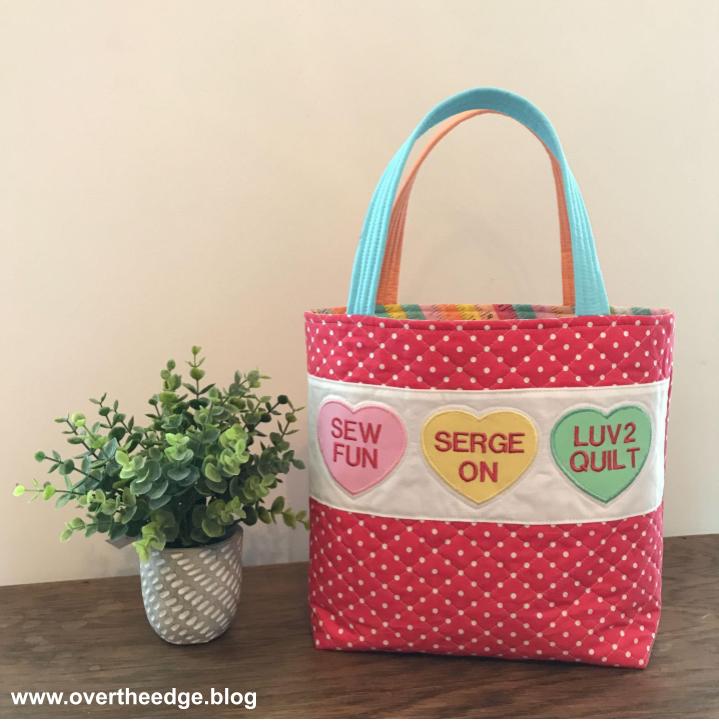
Conversation Heart Tote
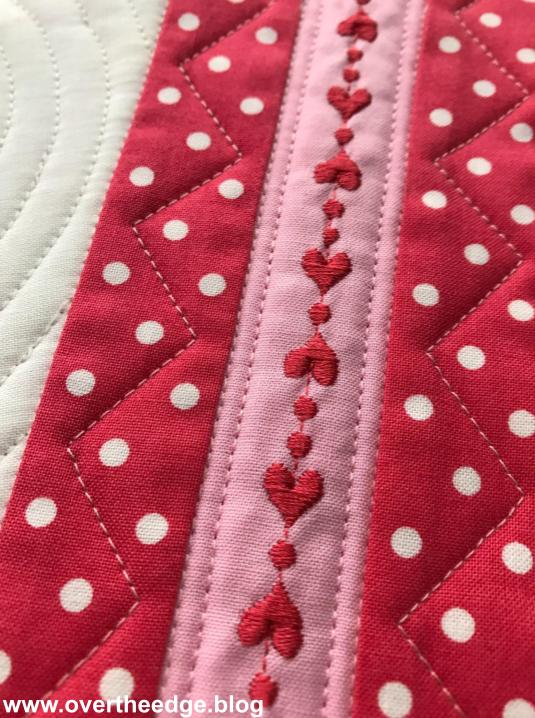
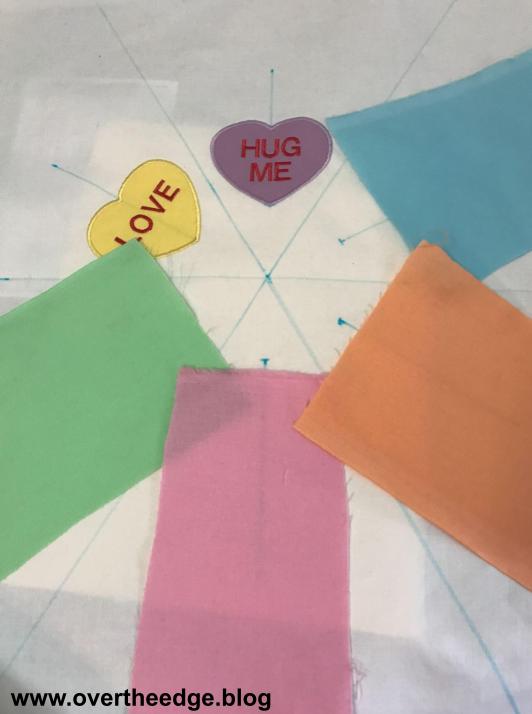
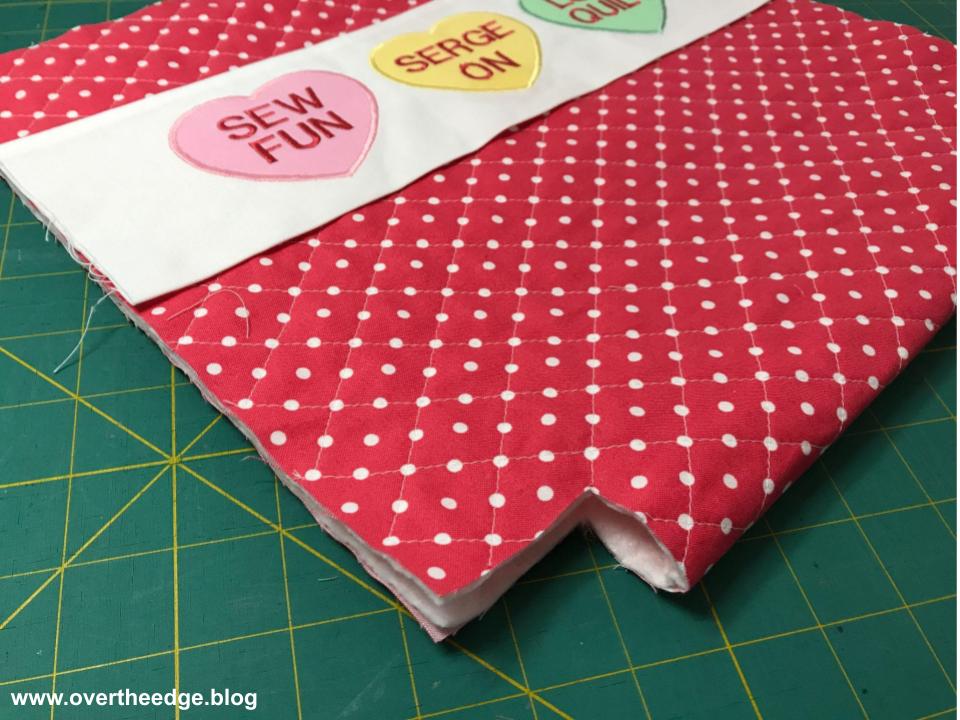
The final sample project I created was a tote bag. I used a free tutorial from SewCanShe as the basis for my bag, but added a few of my own special twists. The diamond quilted fabric was easy to make. All I had to do was to stitch lines across the polka dots! And I simply added a fabric strip with the appliqued conversation hearts on top of the quilted fabric. But instead of using traditional words on my conversation hearts, I used sewing themed words. Which means I still managed to work serging into my applique – Serge On! See the Resources section at bottom of this post for the link to the free tote tutorial.
Create Applique with your Embroidery Machine
The possibilities are endless. You can add these applique conversation hearts to just about anything! And you could have used your serger to make parts of these projects. My samples were all made with a sewing and embroidery machine because my serger was busy on another project…..
I hope you enjoyed my post about creating appliques using frames built into your embroidery machine.
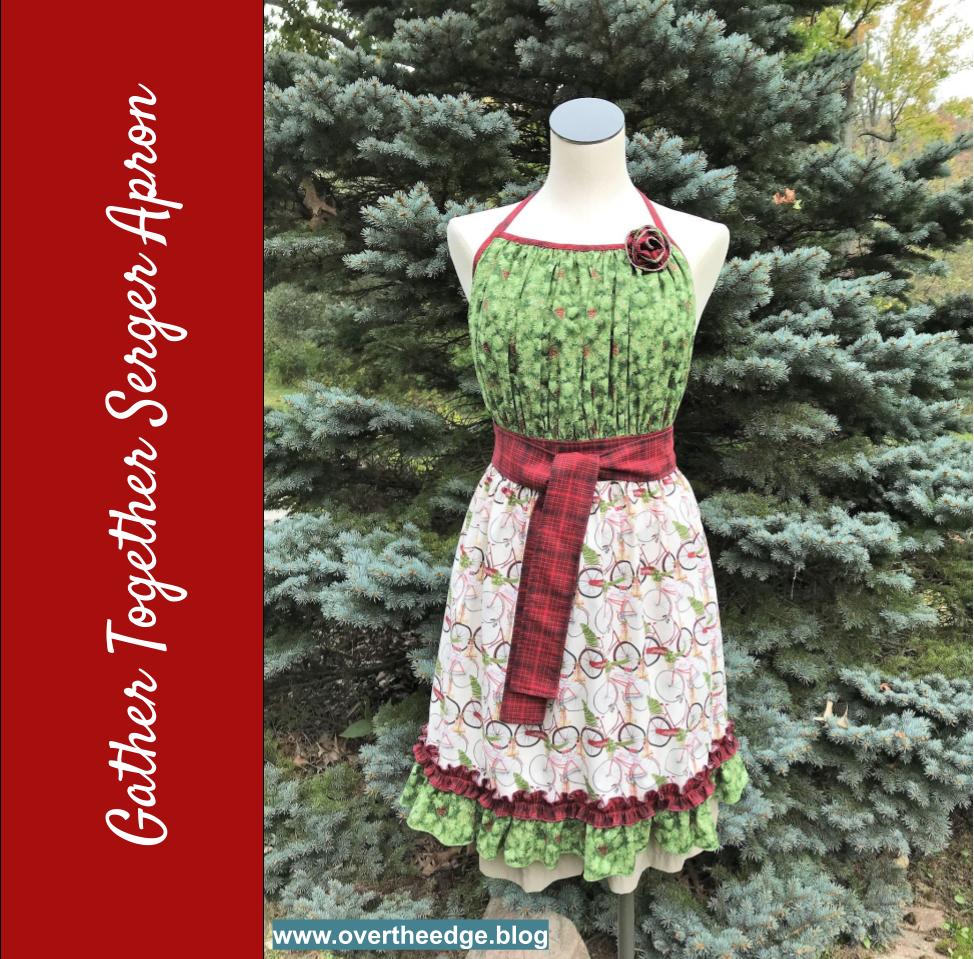
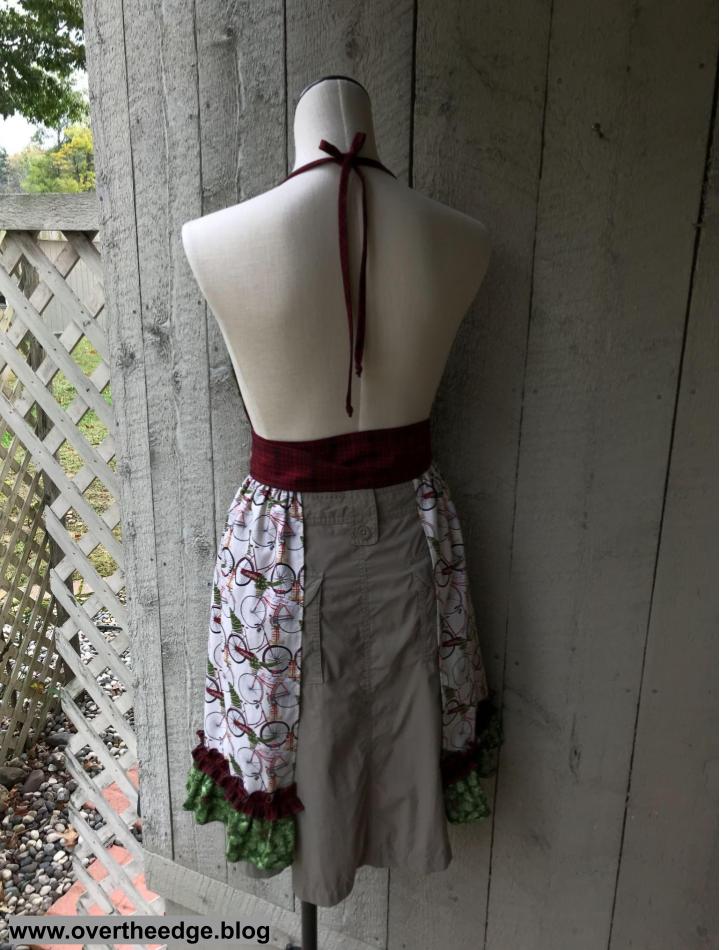
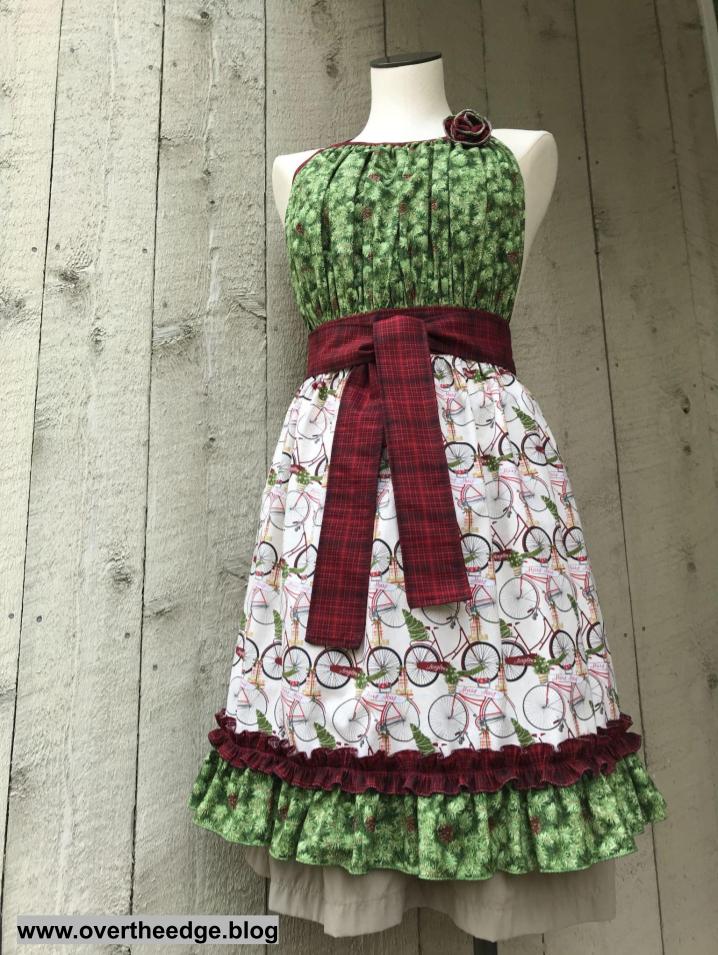
Every year my fellow employees and I sew up holiday aprons to display in the store. For my 2021 holiday apron I made the Gather Together Serger Apron by Baby Lock.
The Gather Together Serger Apron pattern was based on a sewing pattern by Pat Bravo of Art Gallery Fabrics, which was adapted for serger construction. See links to both apron patterns in the Resources section of this post.
How I Used My Serger
I serged the entire apron using only my Baby Lock Evolution serger. It’s a great apron pattern to try making with your serger. You can use your serger to make as little or as much of the apron as you like.
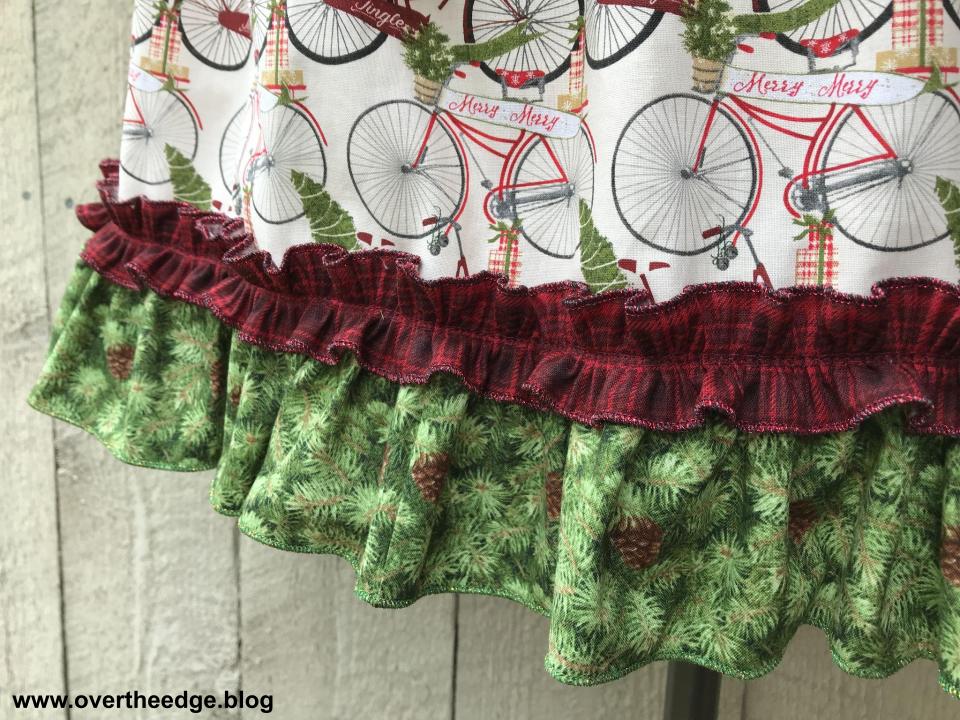
Edge Finishes
I used a variety of edge finishes to complete this apron, which utilized different stitches and/or attachments.
Overlock stitch to keep raw edges from unravelling
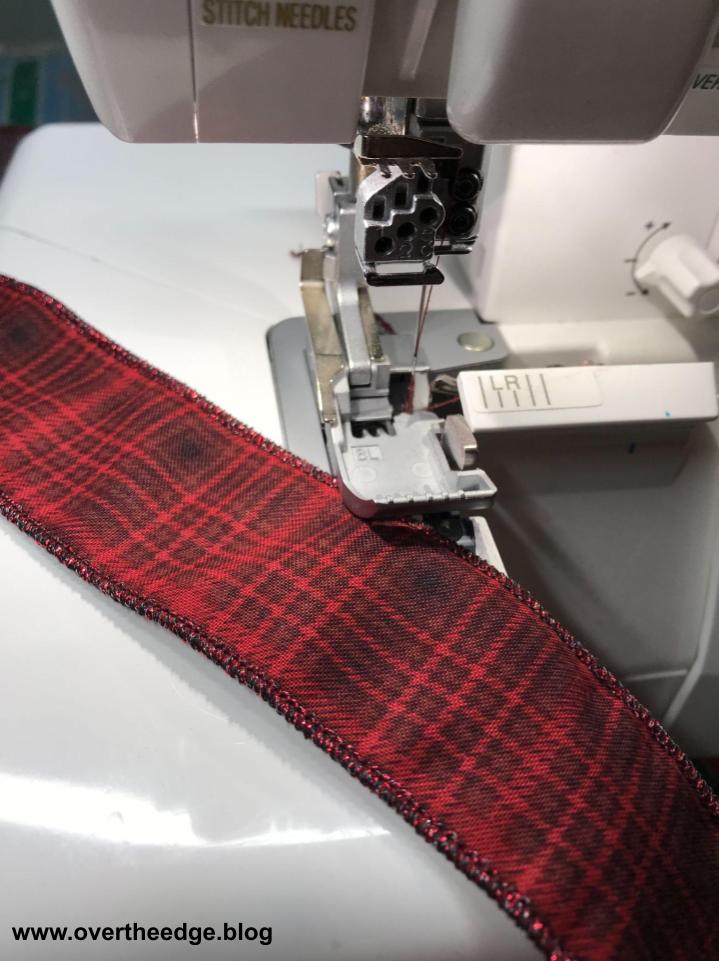
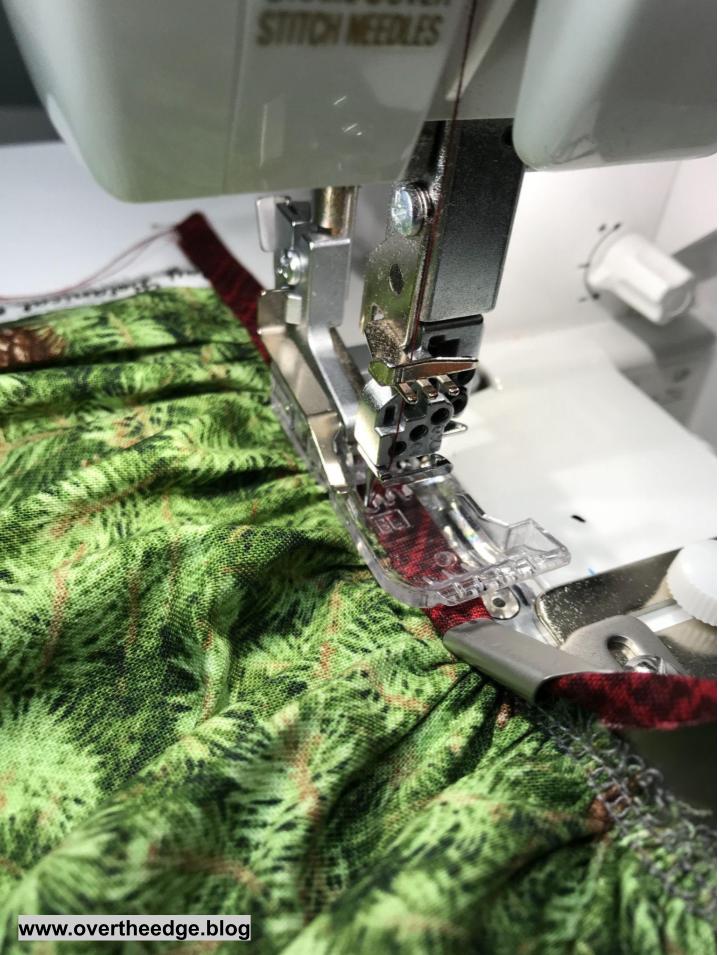
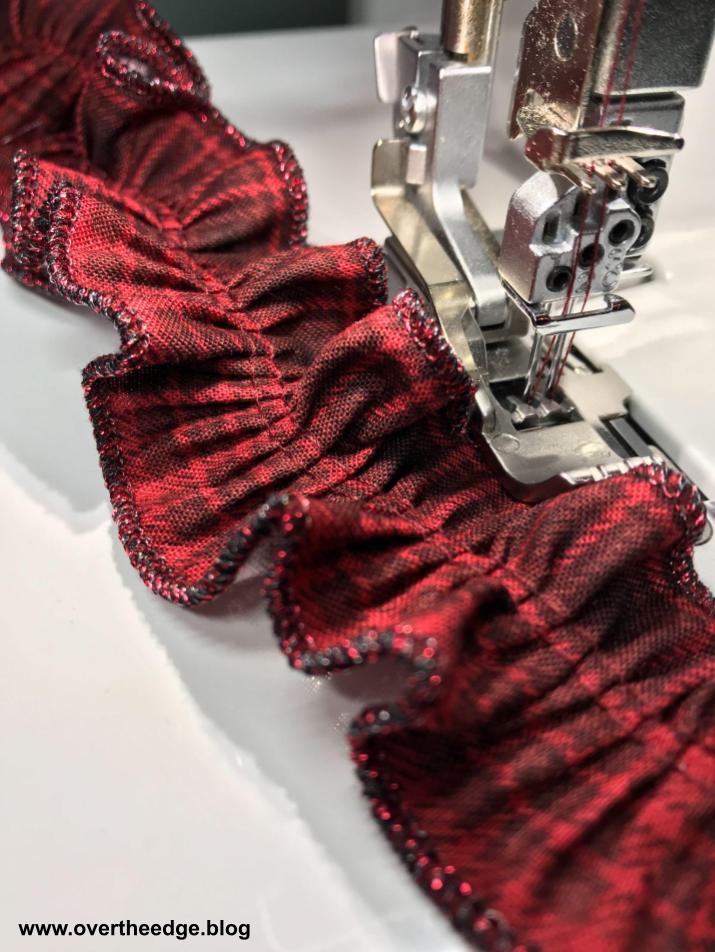
Rolled hem stitch for ruffles
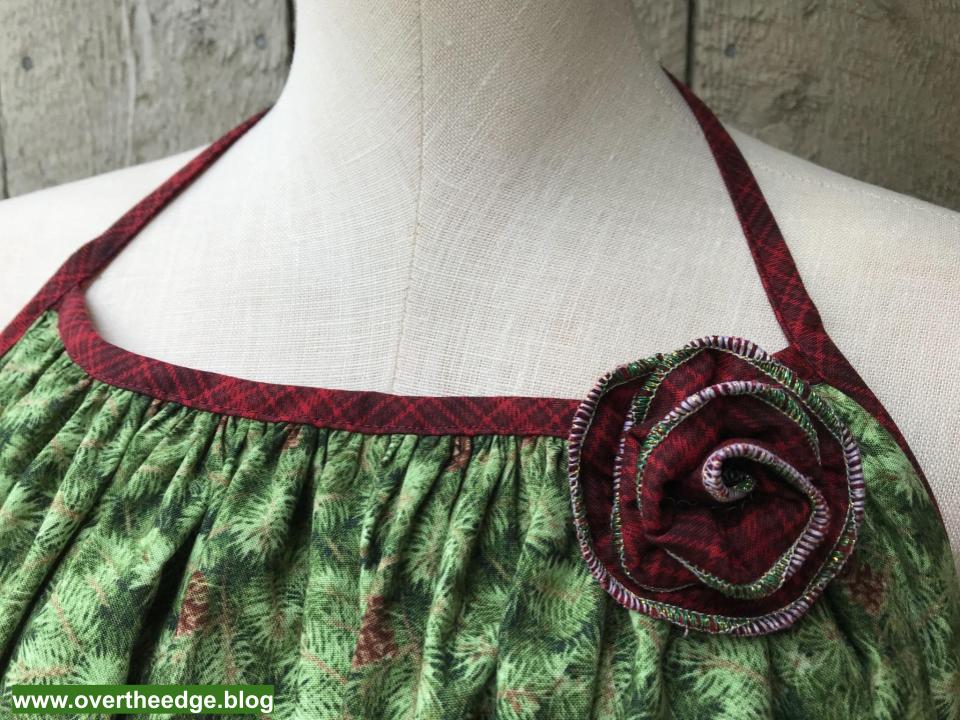
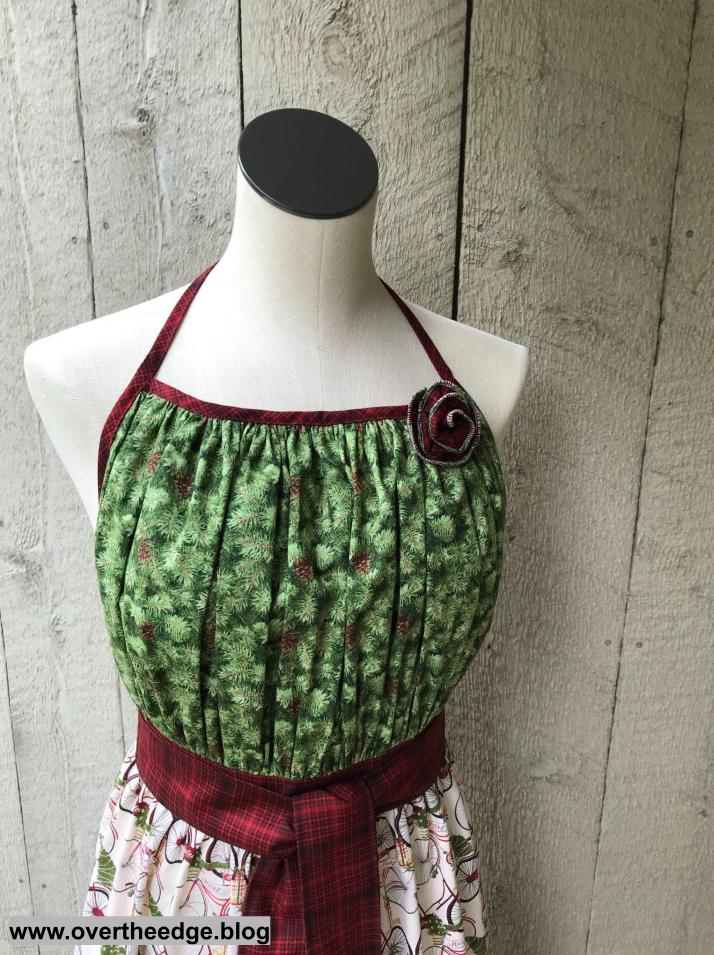
Wave stitch for fabric flower
Hem sides of apron with ¼” plain hemmer attachment and chain stitch
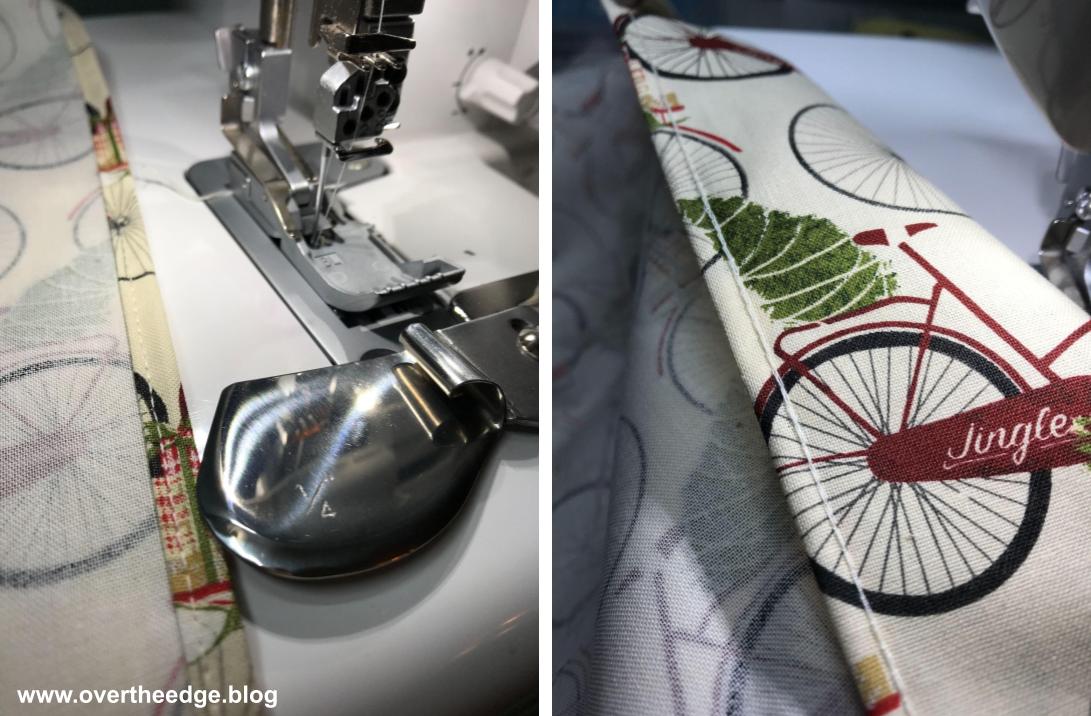
Encase edges of bodice and make neck straps with a double fold bias binder and chain stitch
Gathering and Ruffles
I gathered the ruffles using two different techniques.
Four thread overlock technique which makes adjustable gathers, similar to a double row of basting stitches using a sewing machine. This technique is perfect for gathering fabric where you need to adjust the gathers to fit.
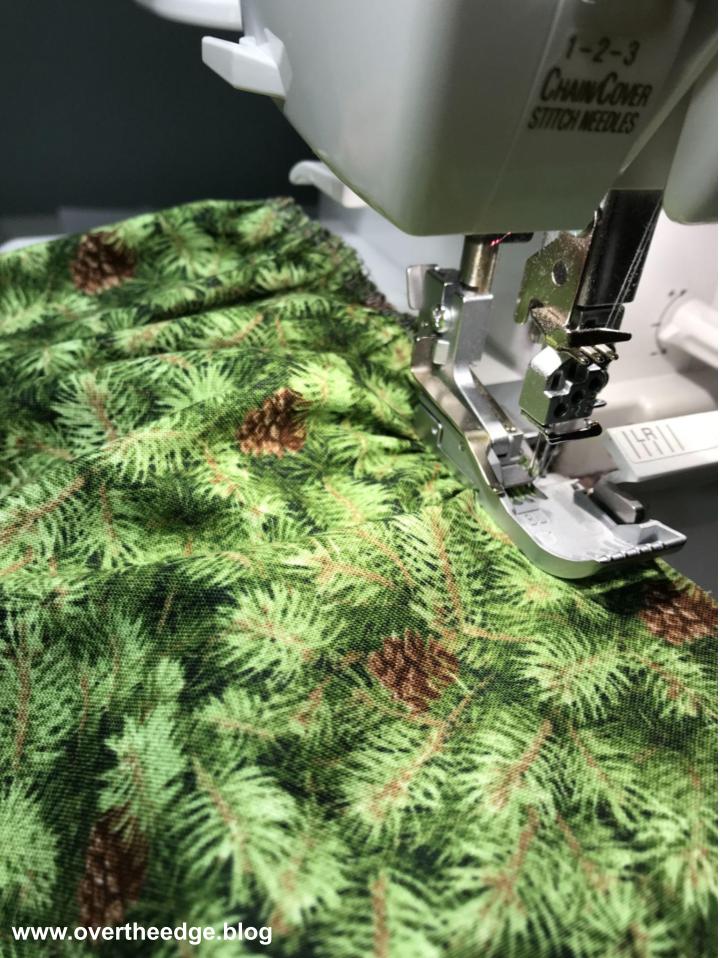
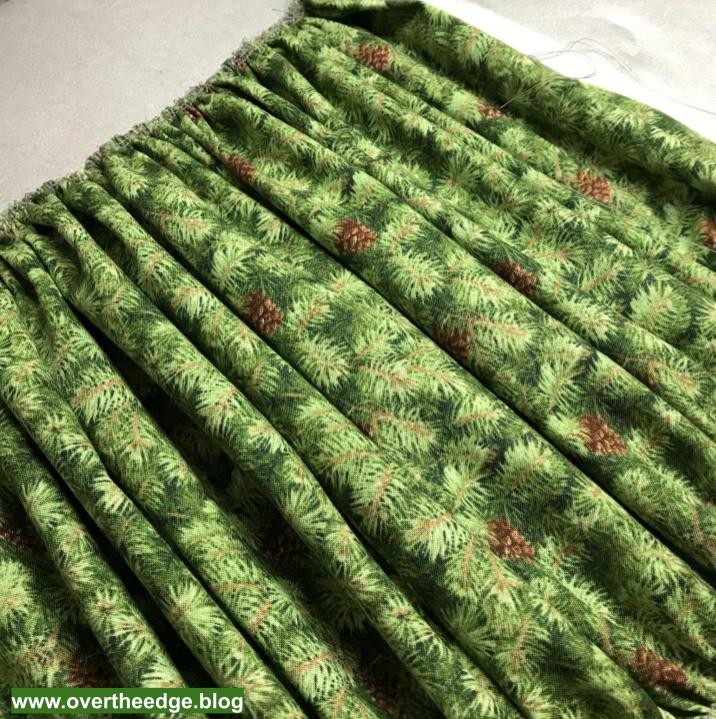
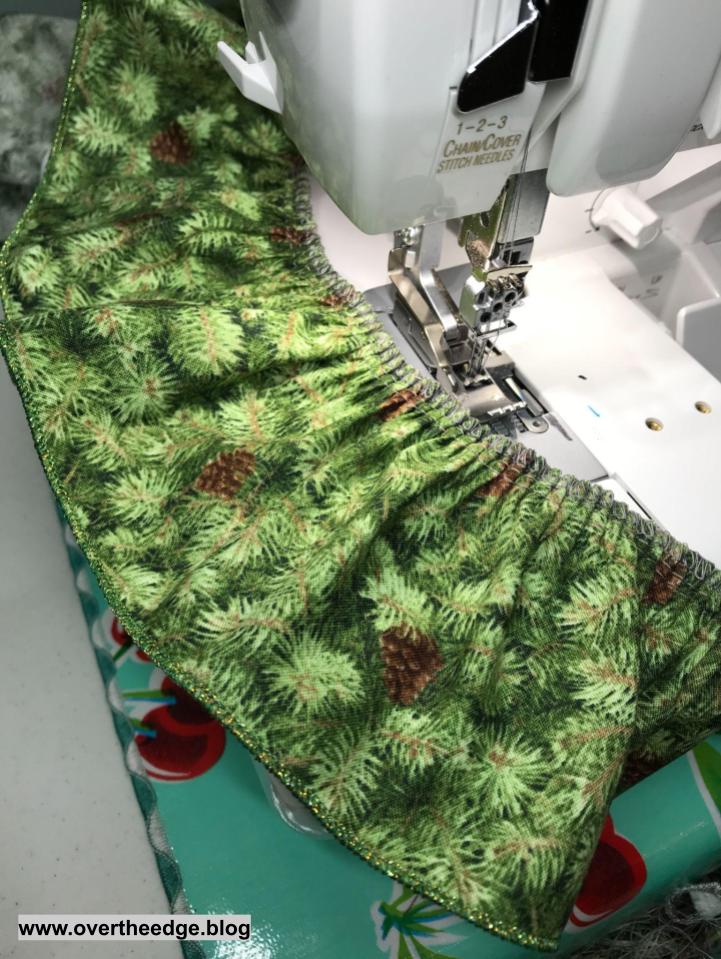
Narrow cover stitch technique which makes permanent gathers. The gathers created by the cover stitch are much fuller than those created by an overlock stitch. However, they can not be adjusted.
Long stitch lengths and differential feed are used in both gathering techniques.
Seams and Construction
I serged all seams using a chain stitch.
Feet and Attachments
I used the following feet and attachments to construct the Gather Together Serger Apron:
Double fold bias binder 36mm
Plain hemmer ¼”
Cover/chain stitch foot
Clear foot. The pattern did not call for this foot, but I like it’s visibilty. I thought the visibility of the foot made it easier for me to attach the double fold bias binding to the apron bodice.
Standard foot
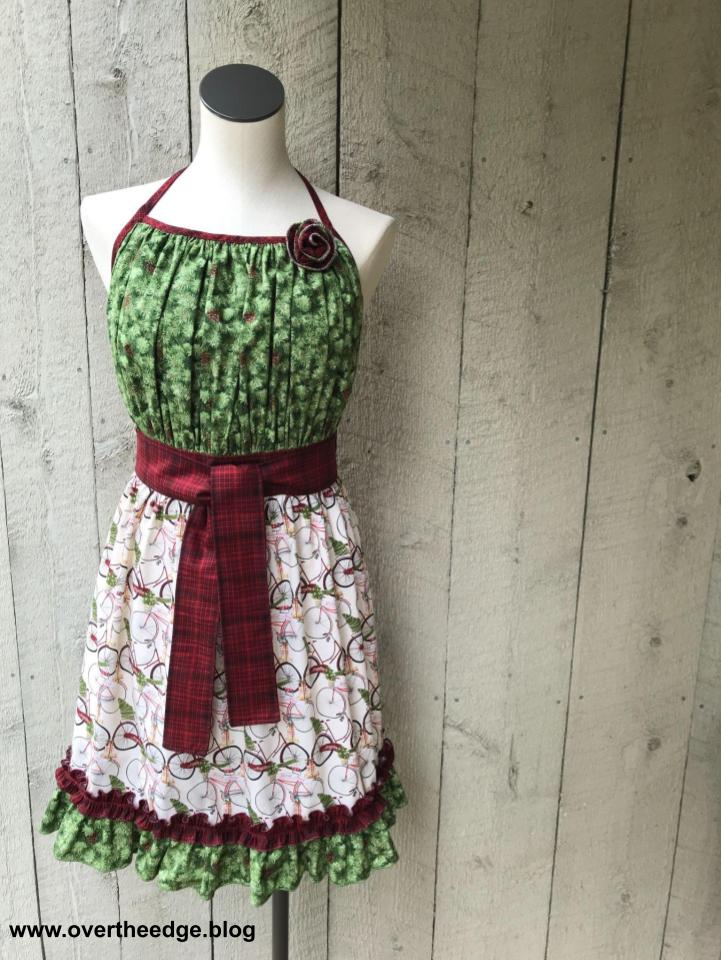
Photo Overview of my Gather Together Serger Apron
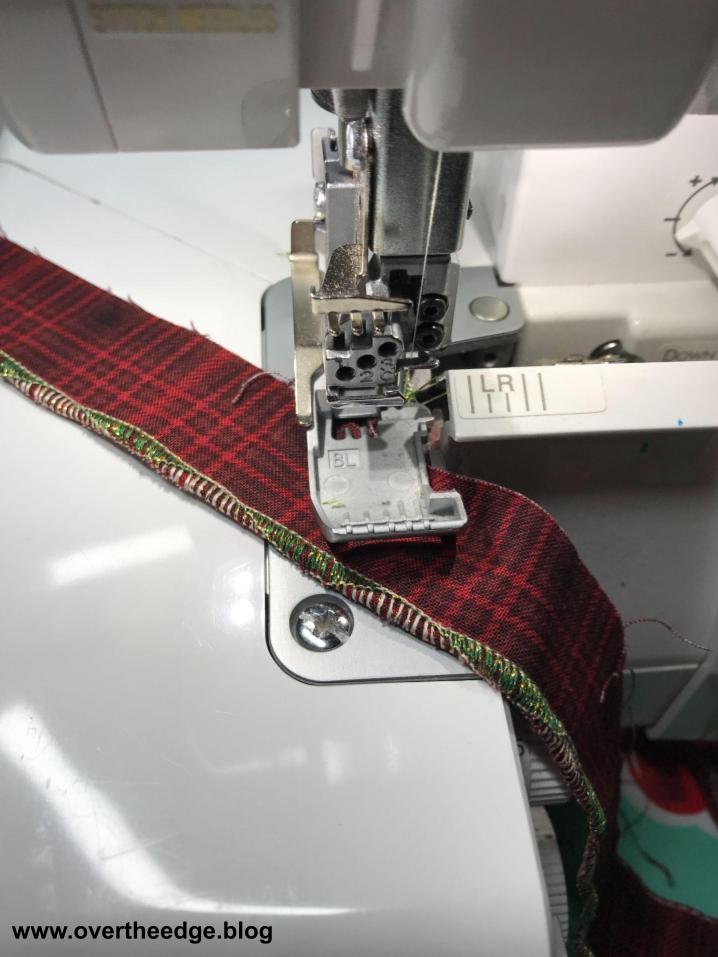
Wave Stitch
I used the wave stitch to finish the edges of the fabric flower. Metallic thread in both loopers gave the edges a bit of holiday sparkle. If your serger isn’t capable of the wave stitch you could substitute a rolled hem or three thread overlock stitch.
Three Thread Rolled Hem
I used a three thread rolled hem to finish the edges of the ruffles, with metallic thread in the upper looper.
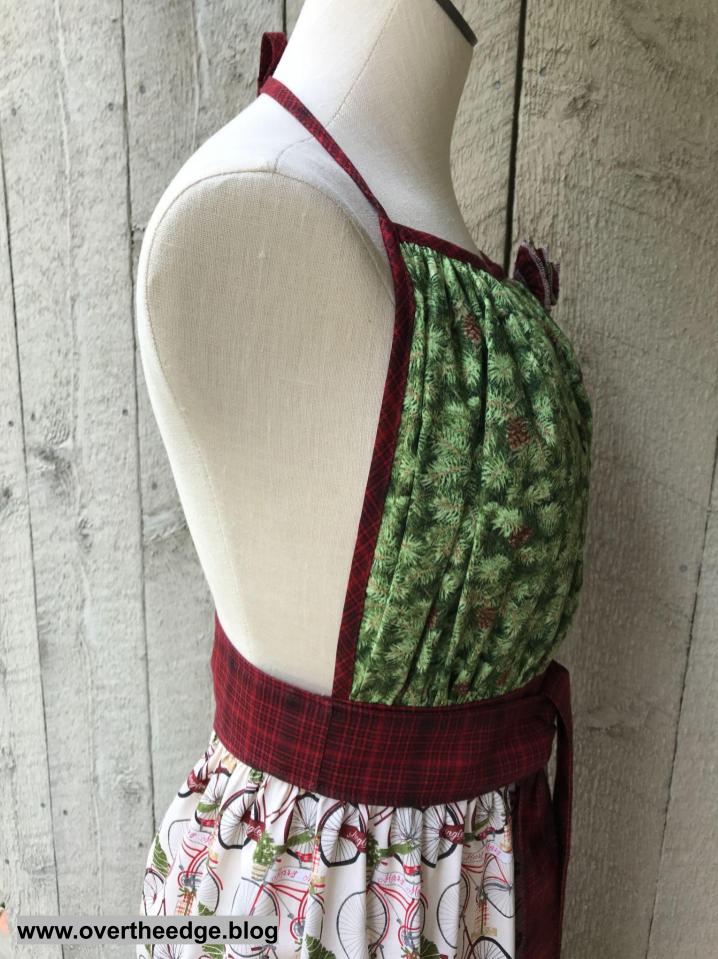
Gathering The Bodice
The bodice of the apron was gathered using a four thread overlock stitch. After gathering with my serger, the bodice still needed a bit more gathering. Gathers created with the four thread overlock are adjustable. So I slid the fabrics along the needle threads adjusting the bodice edges to the proper dimensions. See link about gathering in the Resources section of this post.
Hem Sides of Skirt with ¼” Plain Hemmer Attachment
I love to try new things with my serger. Using the serger plain hemmer was a new experience for me. I hemmed the side edges of the apron’s skirt using the ¼” plain hemmer, a chain stitch and a standard presser foot. My practice piece turned out perfectly. It must have been beginner’s luck because the first hem on the actual project took me three tries to get it right. I figured out that I needed to generously turn/roll the edge of the fabric in advance and keep it turned as I fed it into the attachment. Then the plain hemmer worked really well. The second side hem of the apron looked beautiful on the first try! See the link in the Resources section for tips for using a serger ¼” plain hemmer.
The plain hemmer rolls the hem to the top side as it is serged. So you feed your fabric into the attachment with the wrong side up. The needle thread will be seen on the back side of your finished project. The chain looper thread will be seen on the right side of your project.
Finish Edges of Bodice and Create Straps Using a Double Fold Bias Binder Attachment
I followed the video class/instructions to make the apron. However, instead of making the top edge and neck straps all one piece, I bound the top edge first. Then I bound the side edges of the bodice and continued the binding from the sides to make the neck straps.
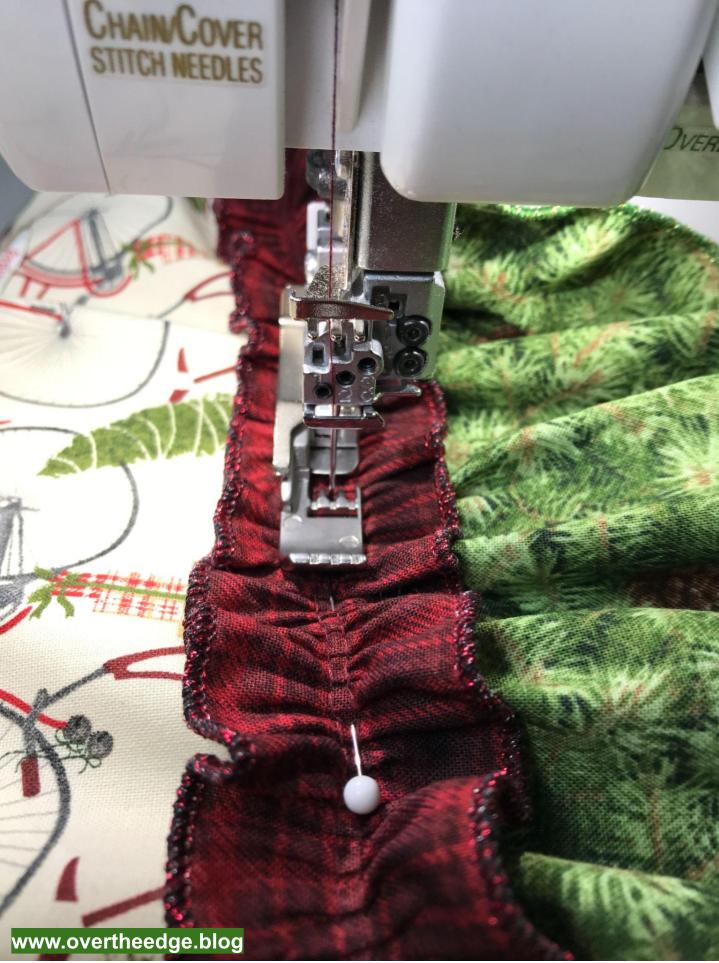
Gathering Ruffles Using a Narrow Cover Stitch
I used a narrow cover stitch along with the cover stitch foot to gather the narrow ruffle strip, bottom ruffle skirt and flower. The narrow cover stitch gathers fabric much more tightly than gathering with an overlock stitch. But the cover stitch gathers are not adjustable like the gathers made by serger overlock stitching.
Construct Seams
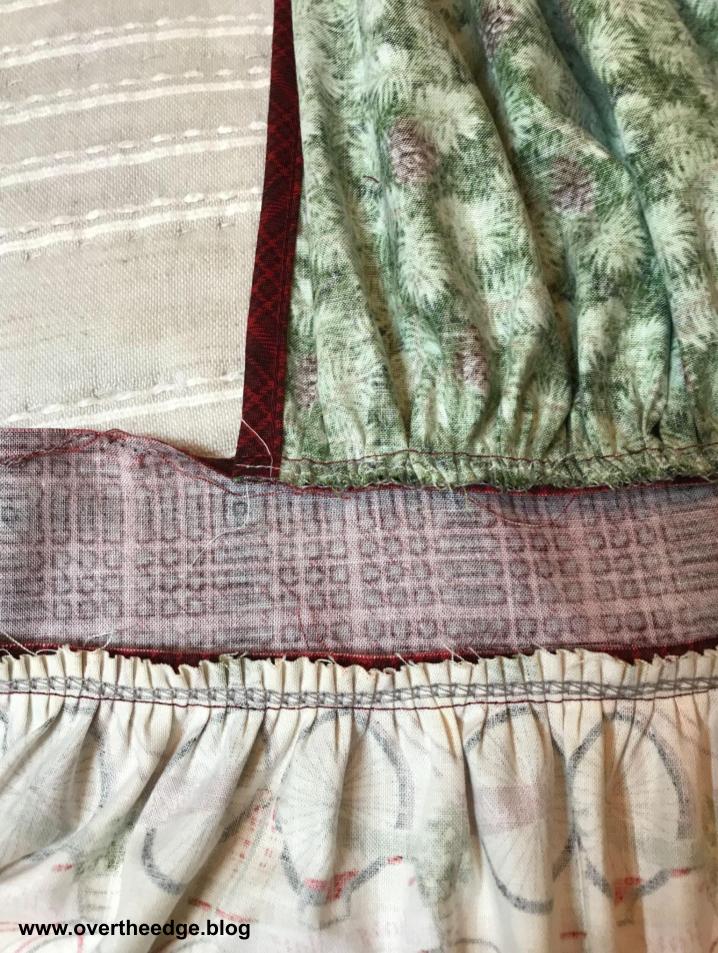
I used the chain stitch to serge the seams of the bodice, skirt and waistband/ties. Serging with a chain stitch is very similar to using a sewing machine straight stitch.
I attached the narrow ruffle and bottom ruffle to the skirt of the apron using a chain stitch too.
Gather Together Serger Apron
I hope you enjoyed learning about how I serged my Gather Together Serger Apron.
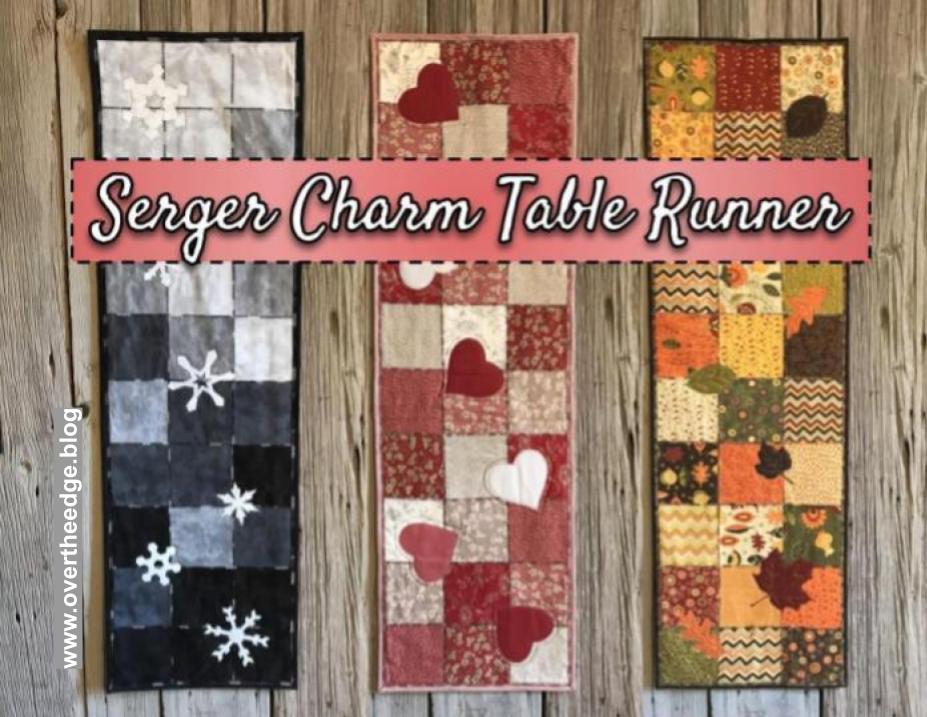
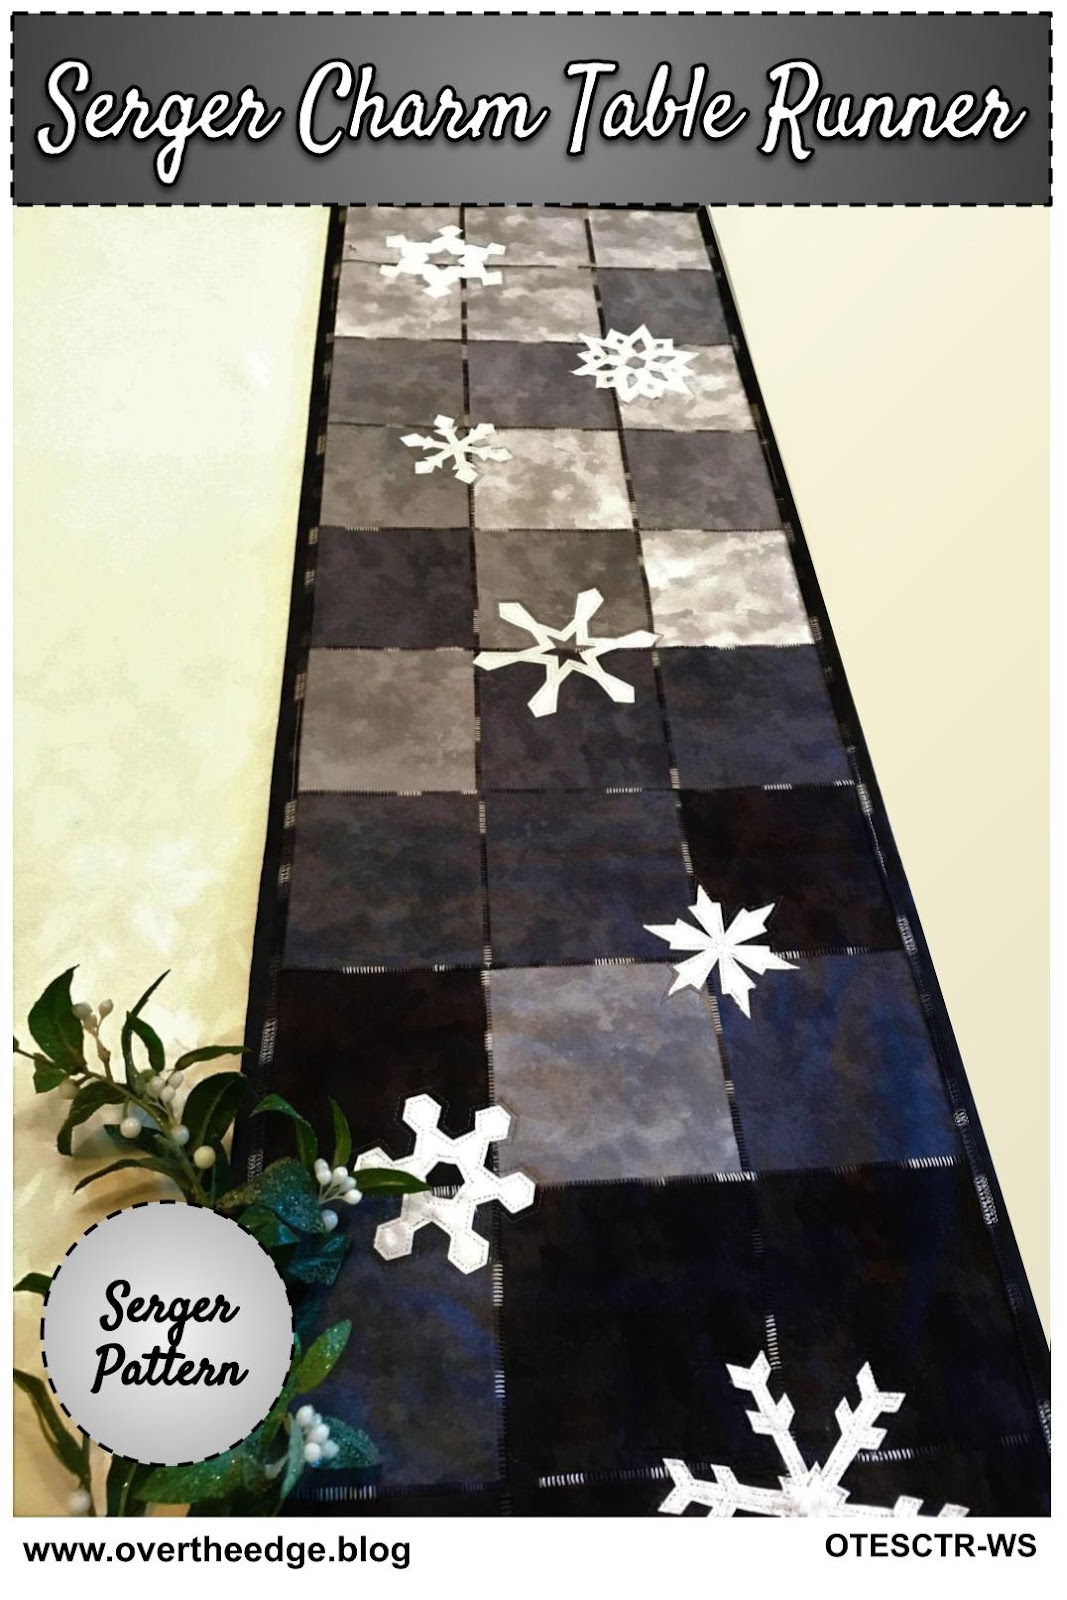
I finally completed the official pattern for my Serger Charm Table Runner design. It’s hard to believe that six years have passed since I first taught this design in a serger class. It’s time to get charmed by a serger!
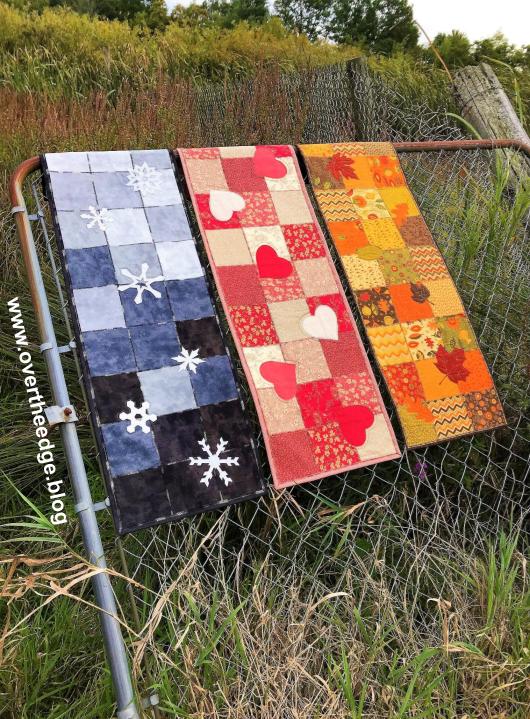
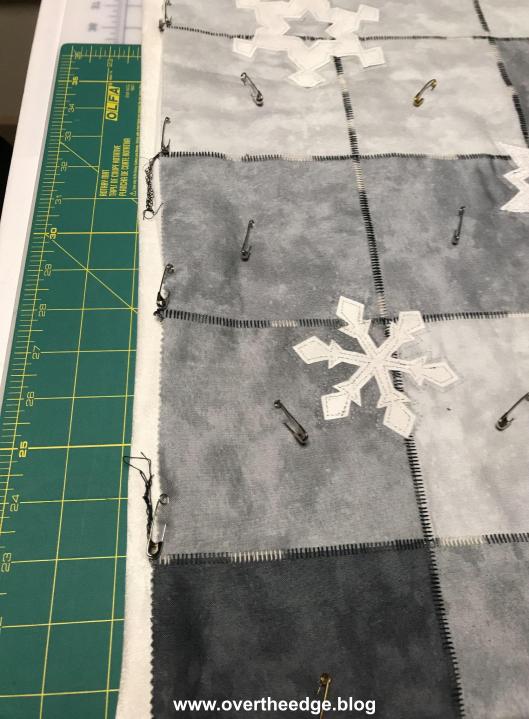
My serger charm table runner quilt is made from charm squares that are pieced together with a serger flatlock stitch. It even has overlock embellished binding. I included all three layouts and applique shapes in the pattern: Winter Skies, Hearts a Flutter and Falling Leaves. And of course, the step by step instructions have lots of diagrams and photographs. Keep reading to learn all about the table runners I made as samples for my pattern.
The Flatlock Stitch and Piecing a Quilt
There are many different ways to use a flatlock stitch. Most involve serging with part of the loops hanging off the edge of the fabric. You need a steady hand (or a special presser foot) and a little practice to get it just right. But with flatlock piecing you don’t need a special foot. Your standard presser foot will work just fine. You guide the raw edges of your fabric next to your blade, and just trim off the stray threads. So the entire stitch lays on the fabric with no overhanging loops.
Charm squares are 5” squares that are cut from a collection of cotton quilting fabric and sold in packages. There are typically 40-42 squares per pack, but the number can vary. I used one package of charm squares for each of my table runners.
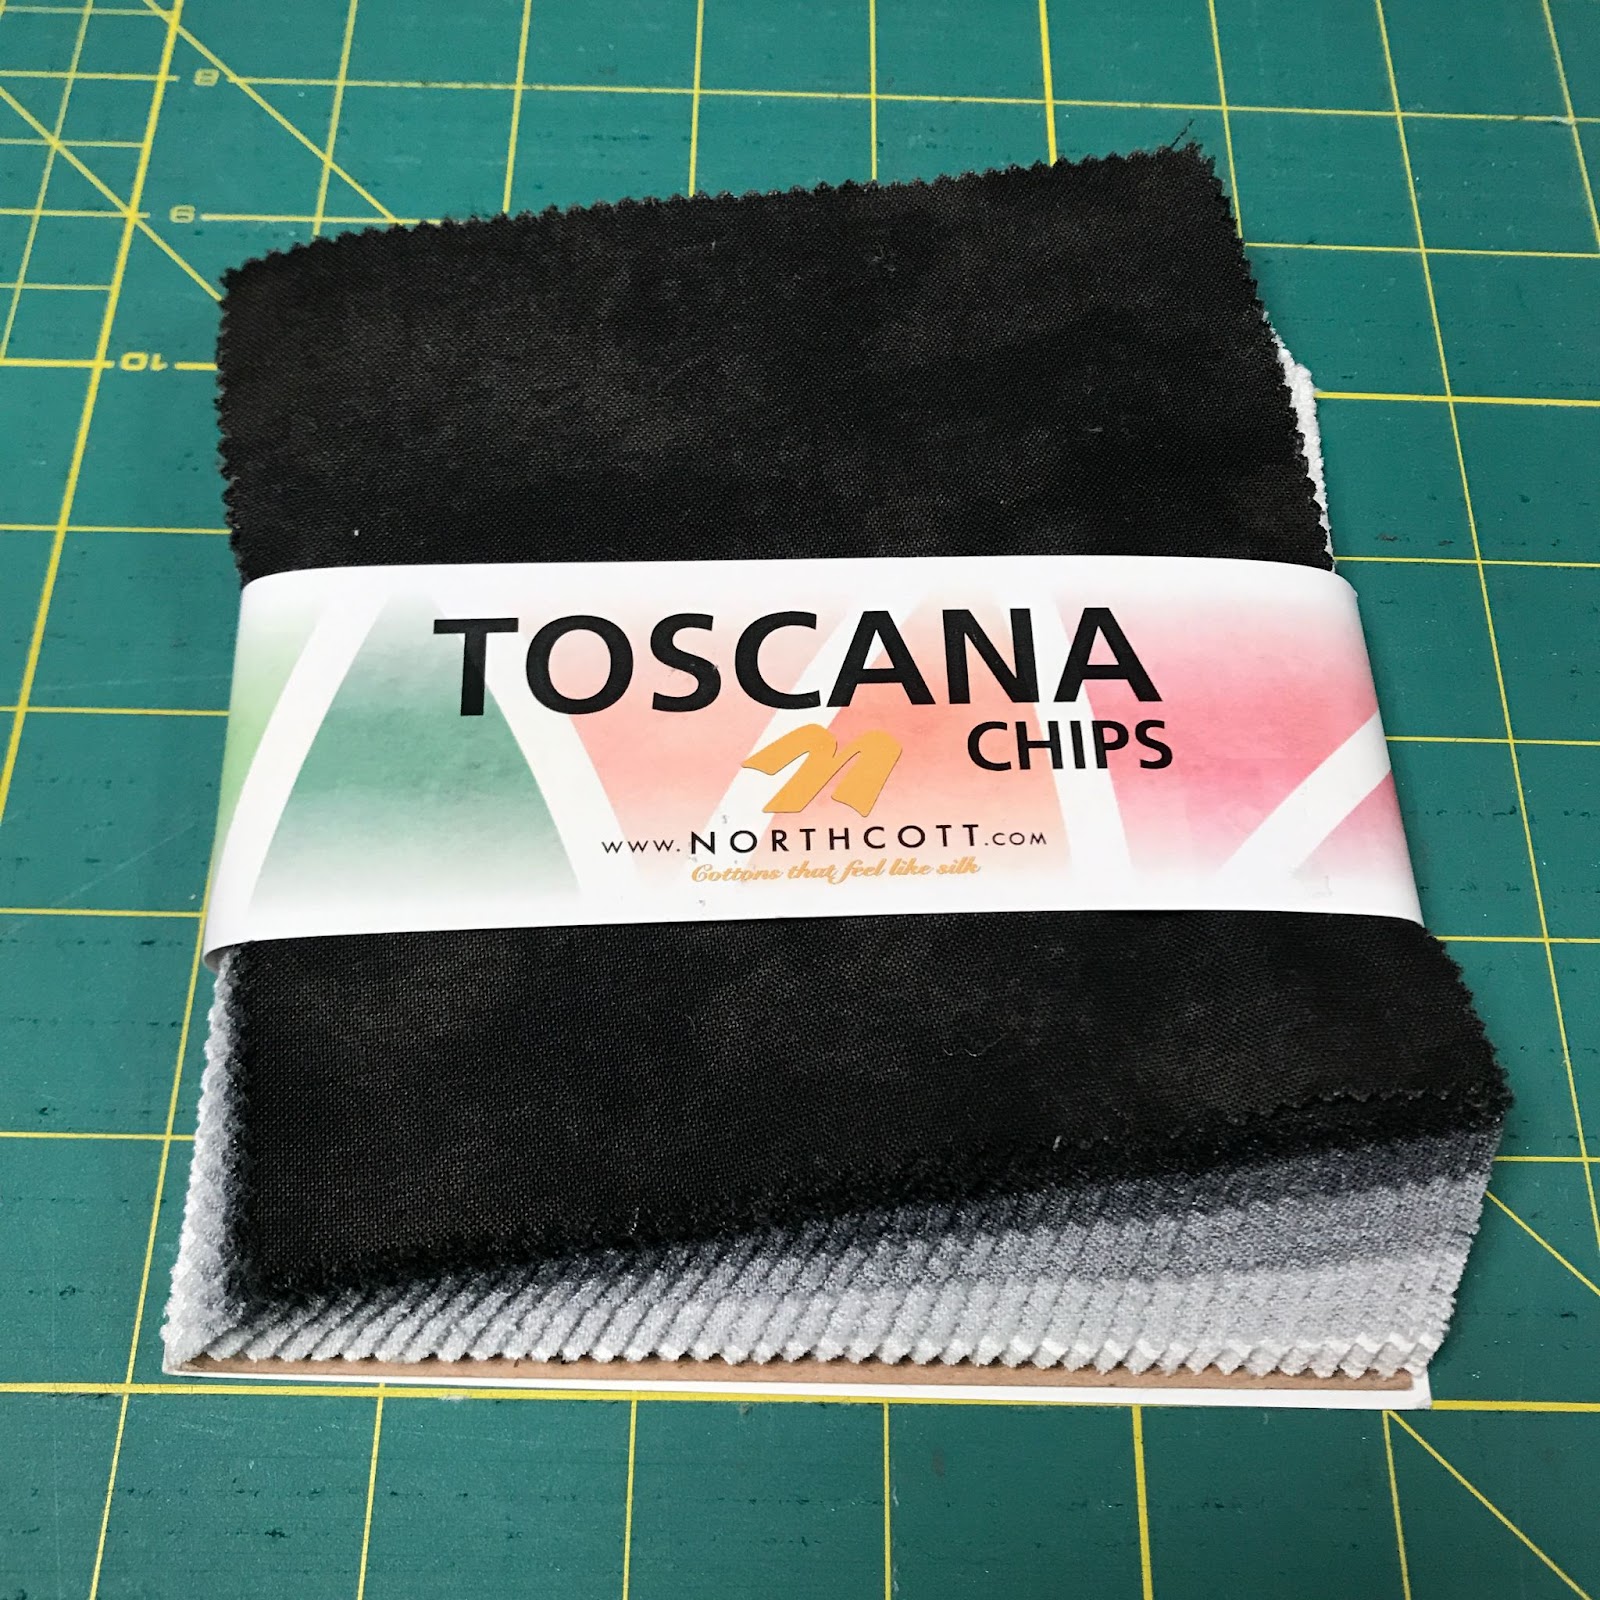
Winter Skies – I used a Northcott Toscana Evening Shadow Chip Pack
Hearts a Flutter – I used a Moda French General Favorites Charm Pack
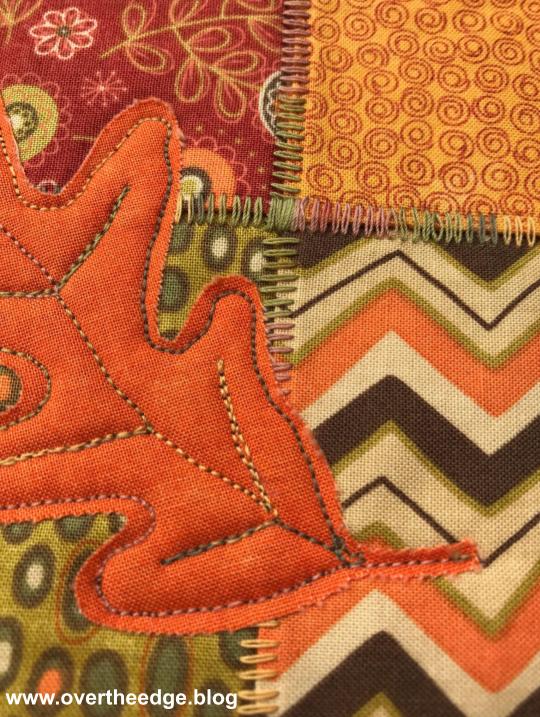
Falling Leaves – I used a Moda Hello Fall by Sandy Gervais Charm Pack
Both the background squares and the applique squares in my table runners came from the charm packs. The Northcott Toscana charm pack had 5 colors in it with multiples of each fabric. The Moda Hello Fall charm pack had very few repeats. The Moda French General Favorites charm pack had some repeats. You can always add in some applique fabric from your stash if the charm pack doesn’t have the solids or blenders you need for the appliques. I was lucky because the charm packs I chose had just the right amount of blenders for appliques. Or you could always cut your own collection of 5” squares for this table runner.
Quilt Top
The table runners were pieced together using flatlock stitch. I love the look of the flatlock stitches in decorative quilts where the thread can be a focal point. And I love the way it looks with variegated thread. It really adds interest to a quilt. I’ve used both 30 wt and 40 wt variegated cotton threads by Sulky and YLI. The squares with the flatlocked seams look great as a background for applique.
Applique
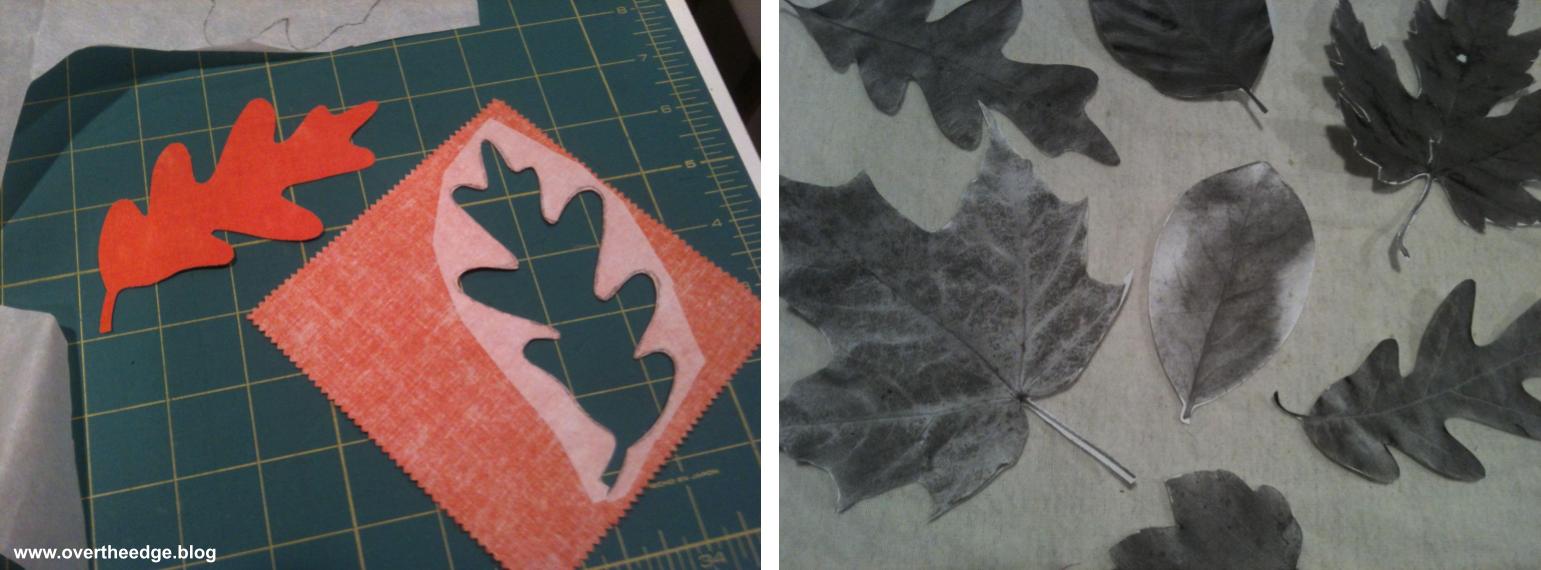
I had fun designing the applique shapes for this pattern. Real tree leaves were the inspiration for my Falling Leaves table runner. It’s amazing what you can do with real leaves and a copy machine! I learned how to make my own six sided paper snowflakes and picked my favorites to add to my Winter Skies table runner. For the Hearts a Flutter table runner I cut out several different paper hearts from folded paper and tested them on the runner before choosing my favorite.
I used the raw edge applique technique to apply my shapes using a sewing machine. But other forms of applique would also work. If you have a serger with a large throat space you could applique with the chain stitch. You could even machine embroider some of your favorite applique designs on your table runner.
Batting
Choose your favorite. I’ve made mine with thin fusible fleece, cotton quilt batting, and flannel. I like them all, but each is a little different. Flannel is the thinnest. Fusible fleece was a little more “stiff” and cotton quilt batting was the fluffiest. I think the fusible fleece fused to the back side of the quilt top fabric helps to hold the fabric and flatlock stitches in place, but I’ve had good success with all of these battings.
Quilting
You can quilt this table runner with as little or as much quilting as you like, based on your selected batting. Some battings require quilting stitches every 3-4” or some like flannel can be quilted 8-10” apart. My table runners are decorations and are spot cleaned as needed (rarely), so quilting distances are not that important. I did minimal quilting on my table runners so that my variegated thread and flatlock stitches would stand out and be a focal point of the quilts. I quilted my table runners using both a sewing machine and a hand sewing needle.
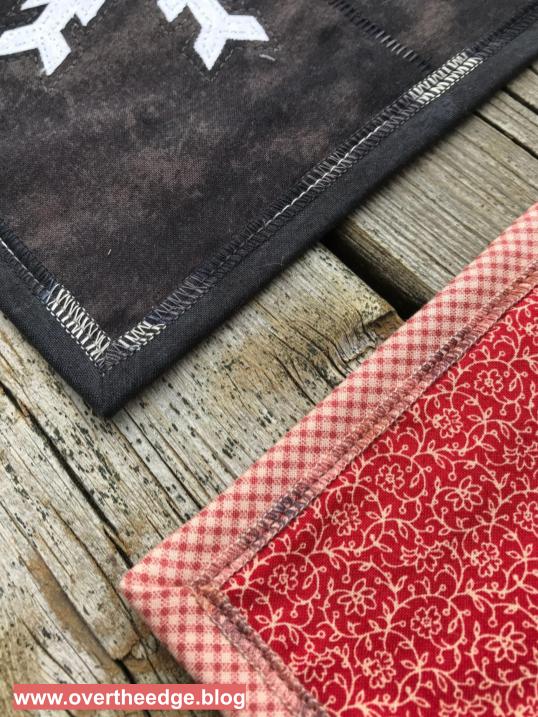
Binding
Although any method of binding would work for this table runner, I chose to embellish my binding with a three thread overlock stitch. The serger stitches on the binding really help tie together the quilt with the flatlock stitching around the squares. I attached and top stitched the binding to these table runners using a sewing machine, but a serger using a 4 thread overlock and/or a chain stitch would work as well.
Other Ways to Use a Serger for this Project
You can serge a table runner just like mine using the instructions in the pattern. A standard serger capable of a three thread flatlock stitch and a sewing machine are all you need.
Would you like to get more creative with your serger? Here are a few additional ways to use your serger that are not included in the pattern:
Use a rolled hem on the binding instead of an overlock
Attach the binding with a four thread overlock stitch or a chain stitch
If you’d like to try making the Serger Charm Table Runner be sure to visit my etsy shop and get your own copy of my pattern. Use the coupon code SERGERCHARMNOV2021, which will give you a 20% discount on this pattern through November 30, 2021. Click on this link to take you directly to the pattern section of my shop. https://www.etsy.com/shop/studiojsewing?coupon=SERGERCHARMNOV2021
I hope you enjoyed learning about the making of my serger charm table runners.
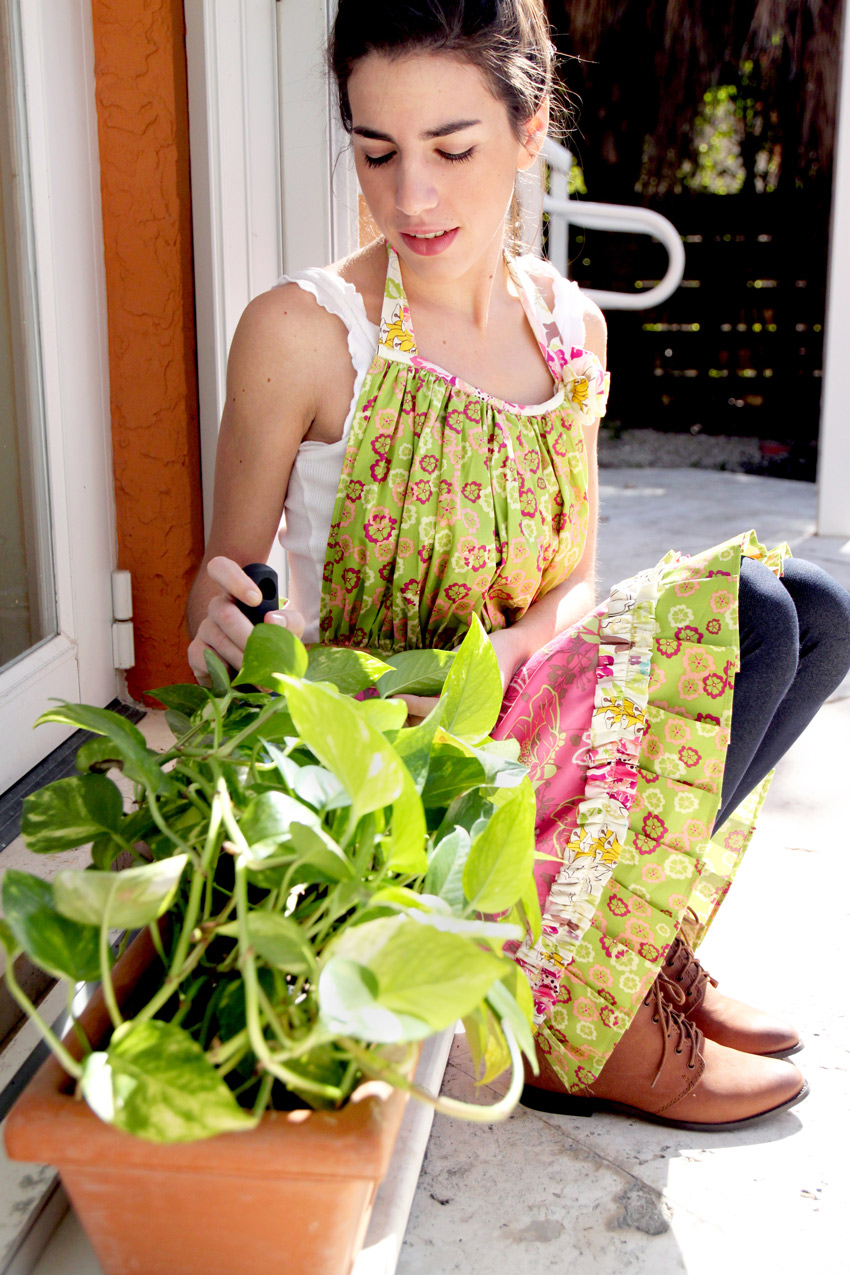
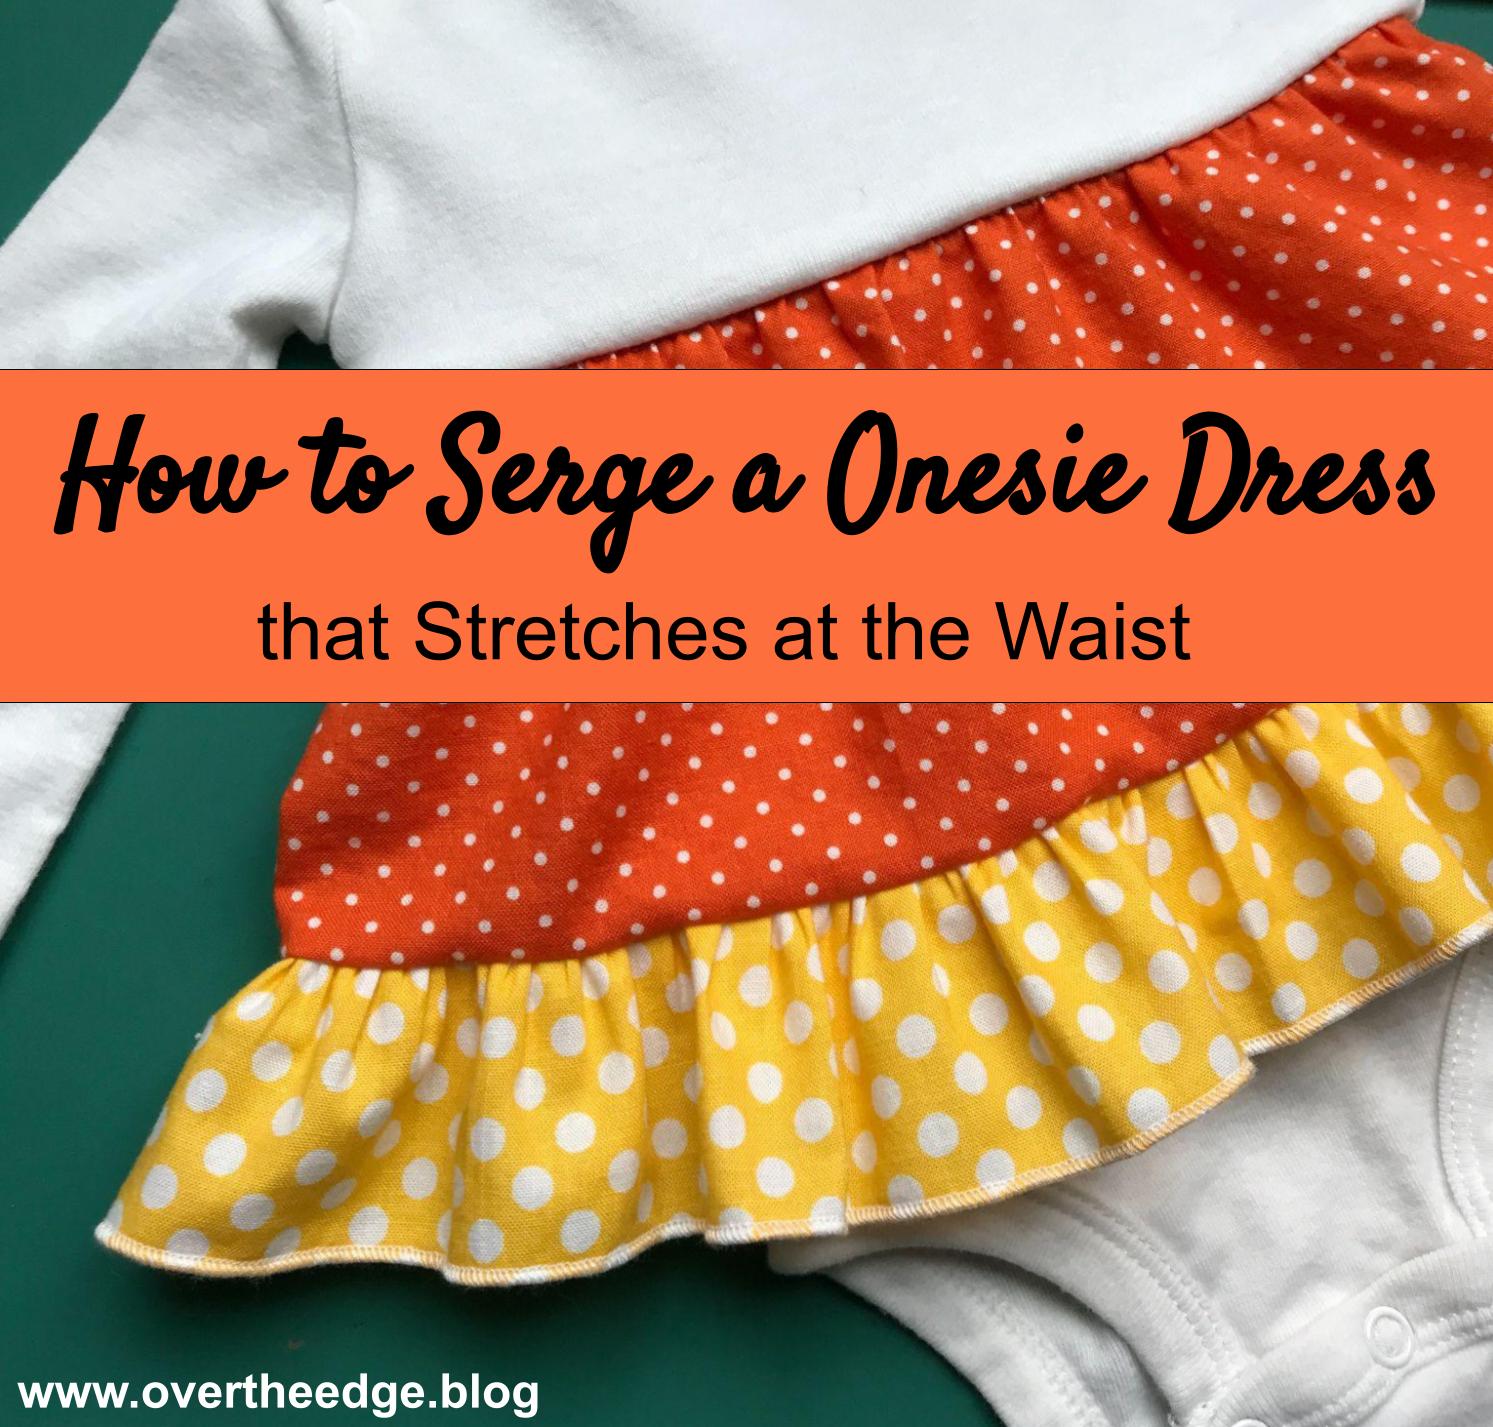
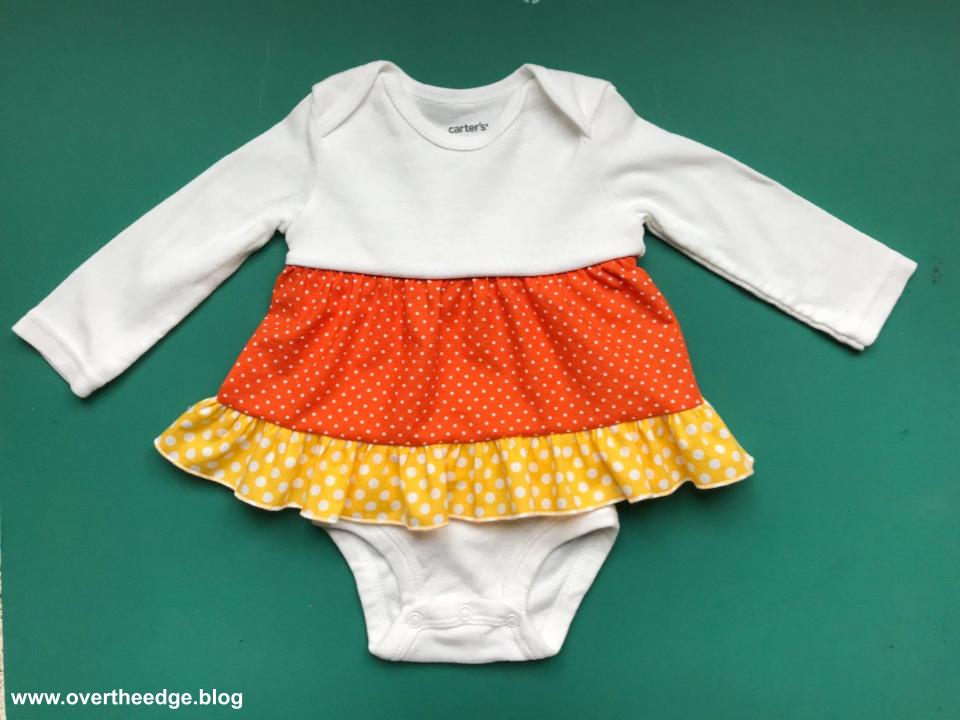
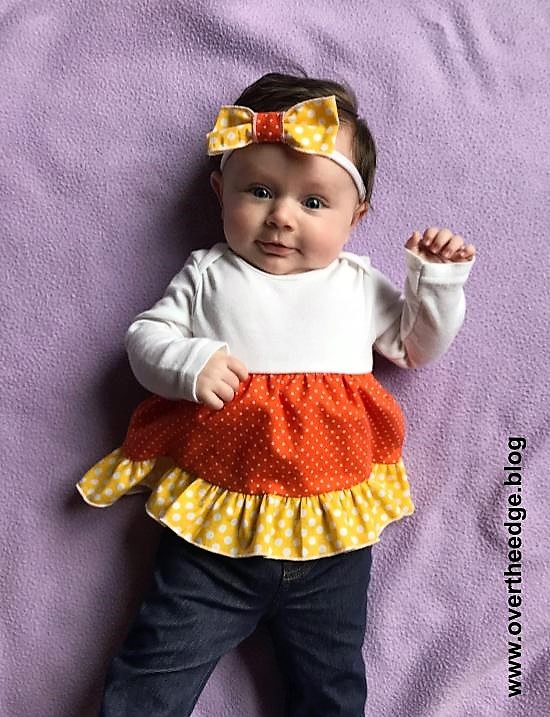
Surfing the internet one day, I stumbled across a photo of a cute little girl’s dress that reminded me of candy corn. Right then I knew my baby granddaughter needed her own version of that dress. Instead of a regular dress though, it needed to be a onesie dress. Onesies are the perfect base for a baby dress or shirt because they stay tucked in and don’t ride up and expose little belly buttons! And of course, I had to use my serger to make it. After a little experimentation I figured out how to serge a onesie dress that stretches at the waist. This blog post is a summary of my process. In the future I plan to create more detailed instructions for this style onesie dress using several different serger techniques. So stay tuned!
The Typical T-Shirt or Onesie Dress
There are many great tutorials on the internet for making cute onesie and t-shirt dresses. The typical method for creating a onesie or t-shirt dress is based on gathering a piece of cotton fabric with long basting stitches and then stitching the gathered fabric to the t-shirt or onesie. I’ve made t-shirt dresses like this before, but I’ve found that the woven fabric skirt limits the stretch of the waist seam. In the previous dresses I’ve made, the waist seam stretches very little or not at all. If the t-shirt is loose and baggy there is usually enough wiggle room to get the dress on a child without popping seams, even if the seam doesn’t stretch. But with a close fitting onesie, it’s really difficult to get it on a baby if the fabric at the waist doesn’t stretch.
How to Serge a Onesie Dress that Stretches at the Waist
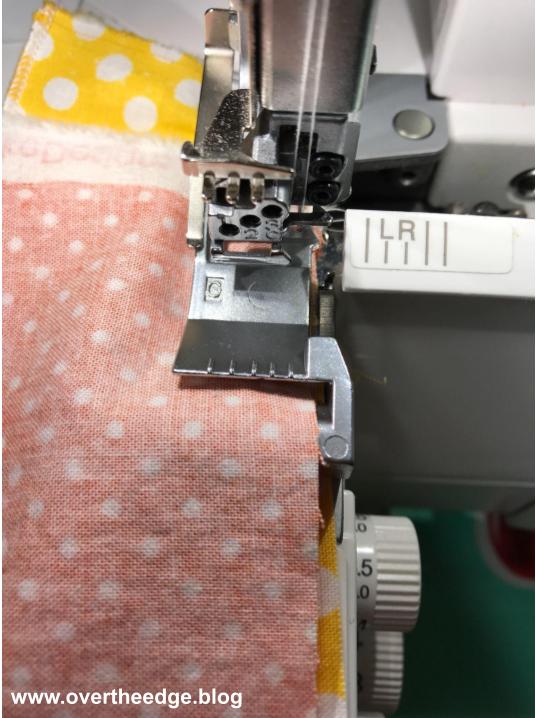
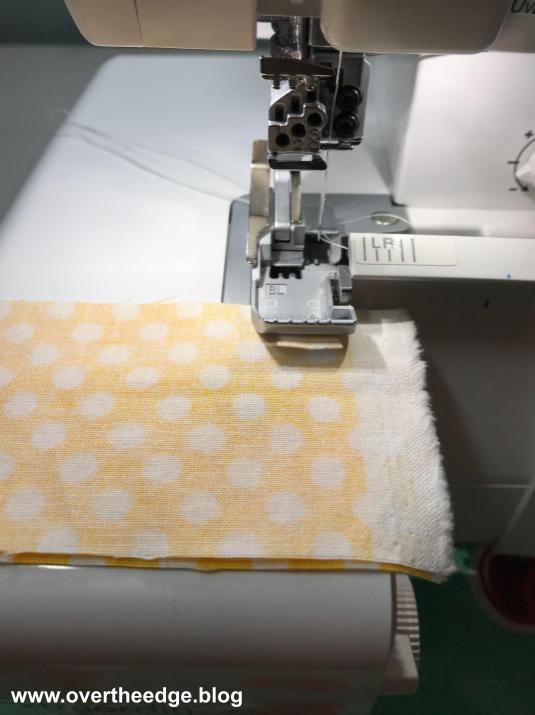
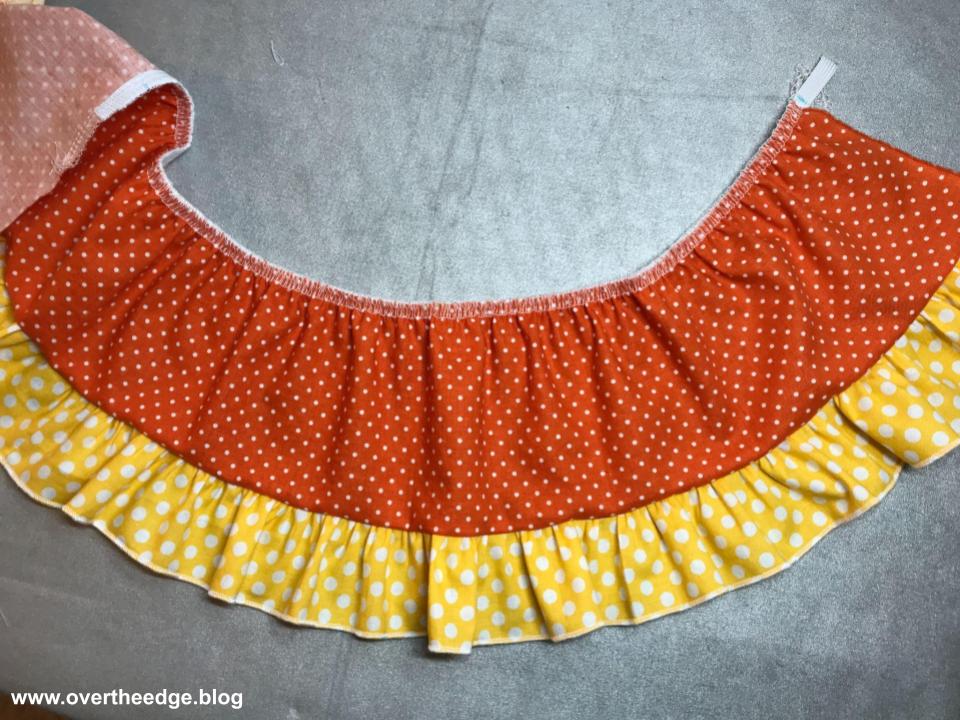
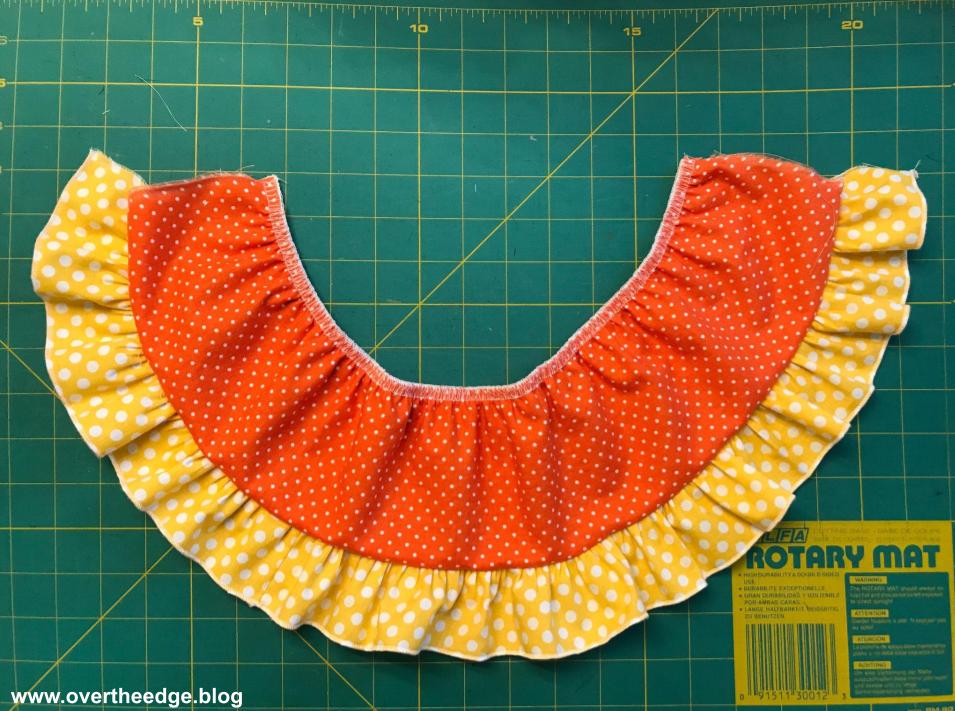
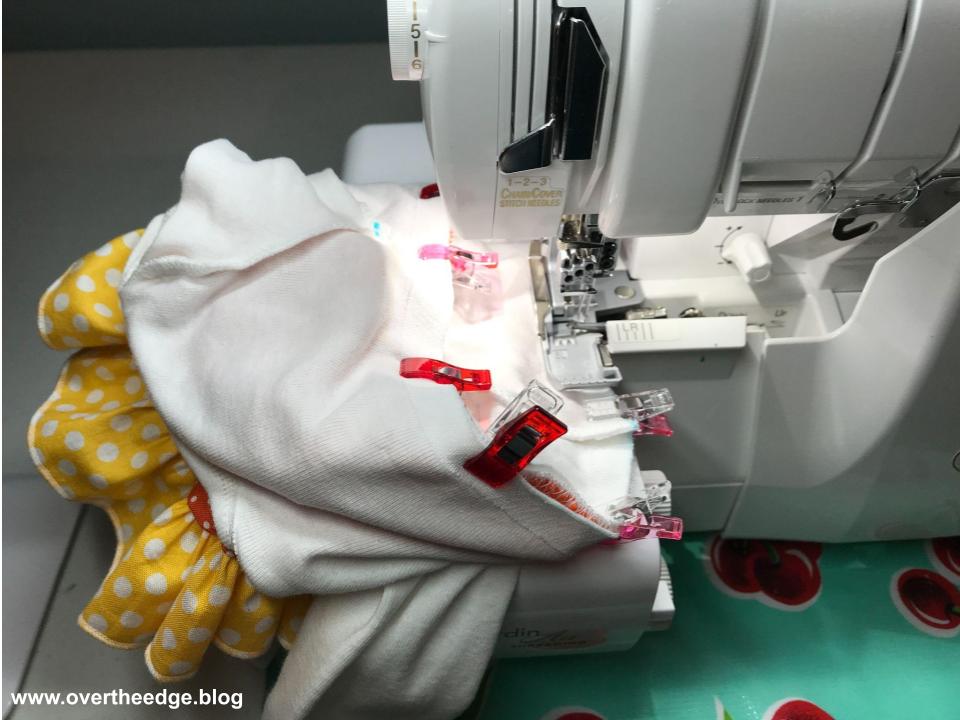
To create my candy corn skirted onesie I wanted to use a couple of cute woven cotton polka dot prints. So I had to figure out a way to add a skirt to my onesie without losing the stretch around the waist. I decided the best way for me to do this was to use my serger, along with an elastic foot to gather the top edge of the skirt using elastic.
I also used a ruffling foot to simultaneously gather and attach the bottom ruffle to the skirt.
The ruffling foot and elastic foot are presser feet that help you gather fabric or attach elastic to fabric. You can gather fabric or attach elastic to fabric using a serger without these specialty feet. The feet just make the process quicker and more professional looking.
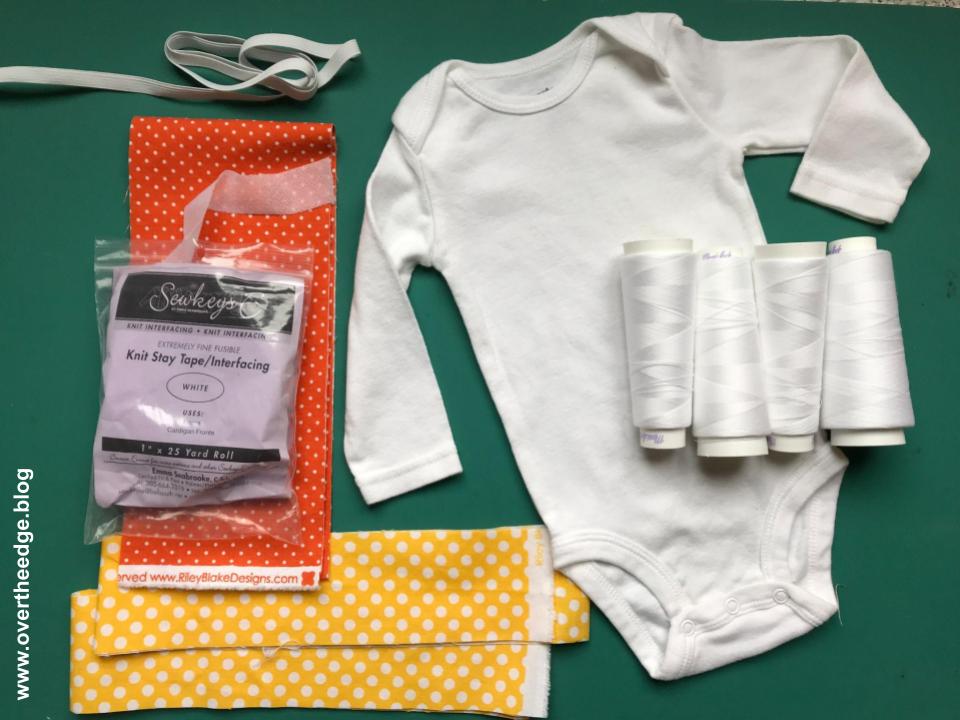
Supplies
Baby onesie – I used size 6 month long sleeved by Carters
4½” x 45” wide cotton print fabric for main skirt
Two – 2½” x 45” wide strips of cotton print fabric for bottom ruffle
⅜” wide elastic – 2X the width of the onesie (where you will attach the skirt) plus 6”
Serger thread for overlock and rolled hem stitches
Optional – 1” thin fusible knit knit stay tape – 2 x the width of the onesie (it helps to stabilize the onesie where you cut it so the edges don’t stretch out as you handle/serge)
Supply Notes
Since I added a seam at the waist, the onesie did get a little shorter (about ½-¾” shorter). Keep this in mind when selecting your onesie. You may need to select a onesie that is a little bit longer than the length you actually need.
I made the skirt on the onesie shorter so the onesie looked more like a skirted shirt than a dress. I wanted more of a shirt that she could wear with pants. Feel free to make your skirts any length you desire.
Tools
Serger capable of 4 thread overlock and 3 thread rolled hem
Elastic foot for serger – helpful, but not required
Ruffling/gathering foot for serger – helpful, but not required
Serger accessories and manual
General sewing supplies
Sewing machine for basting (optional)
Summary of Steps
The steps below are a summary of the steps I took to make my “Candy Corn Skirted Onesie” for the blog post “How to Serge a Onesie Dress that Stretches at the Waist.” This style onesie consists of cutting apart the onesie and inserting a gathered skirt.
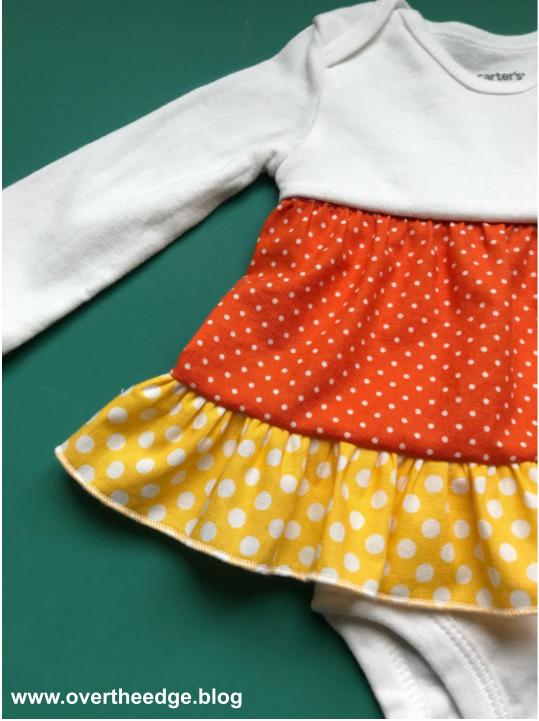
Step 1: Seam the Bottom Ruffle
I used a narrow three thread overlock stitch to seam my two bottom ruffle pieces together into one long strip.
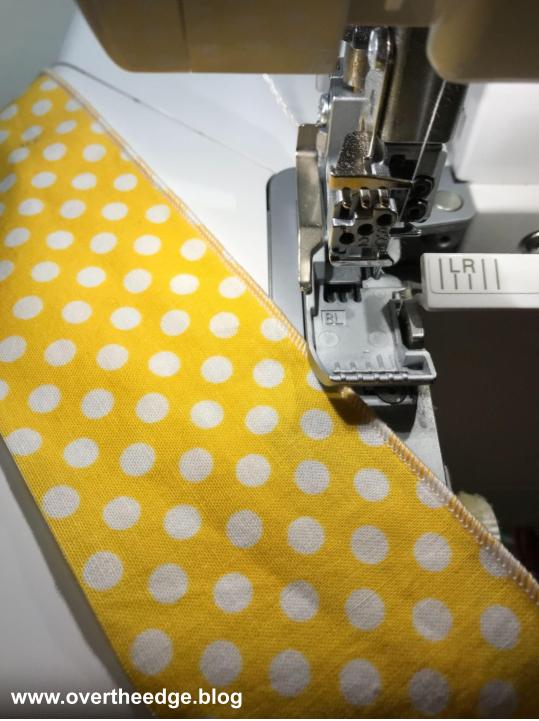
Step 2: Finish Bottom Edge of Ruffle
Next I used a three thread rolled hem stitch on my serger to finish the bottom edge of my long ruffle strip.
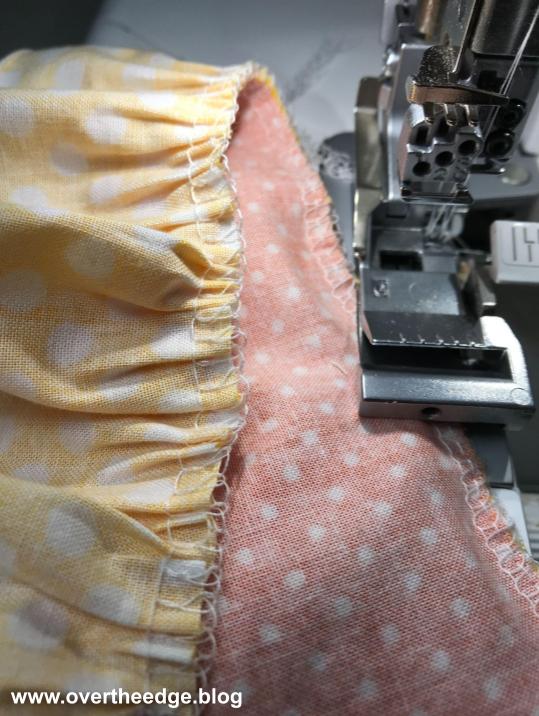
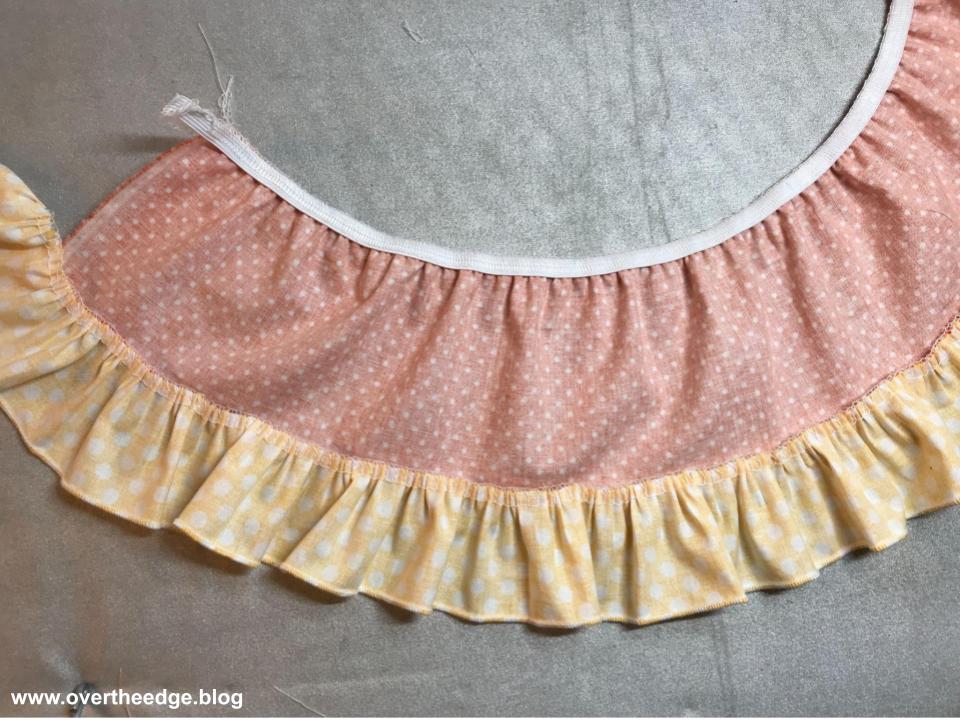
Step 3: Gather Bottom Ruffle and Attach to Main Skirt
I simultaneously gathered my bottom ruffle and attached it to the main skirt piece using the ruffling foot for my serger.
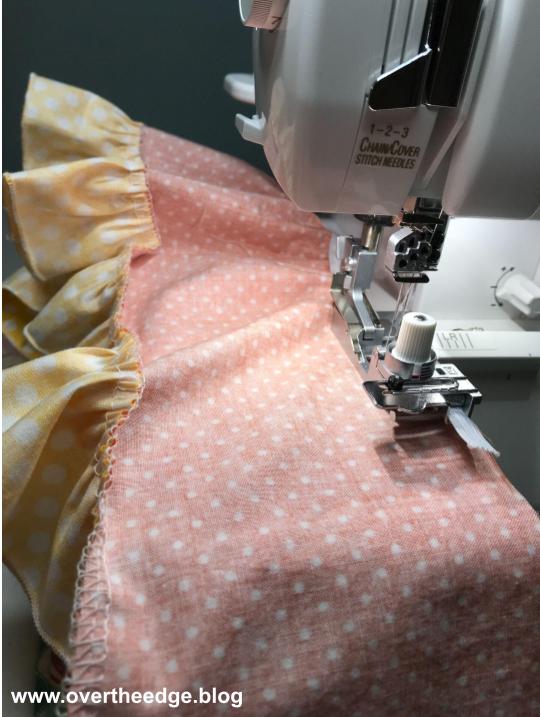
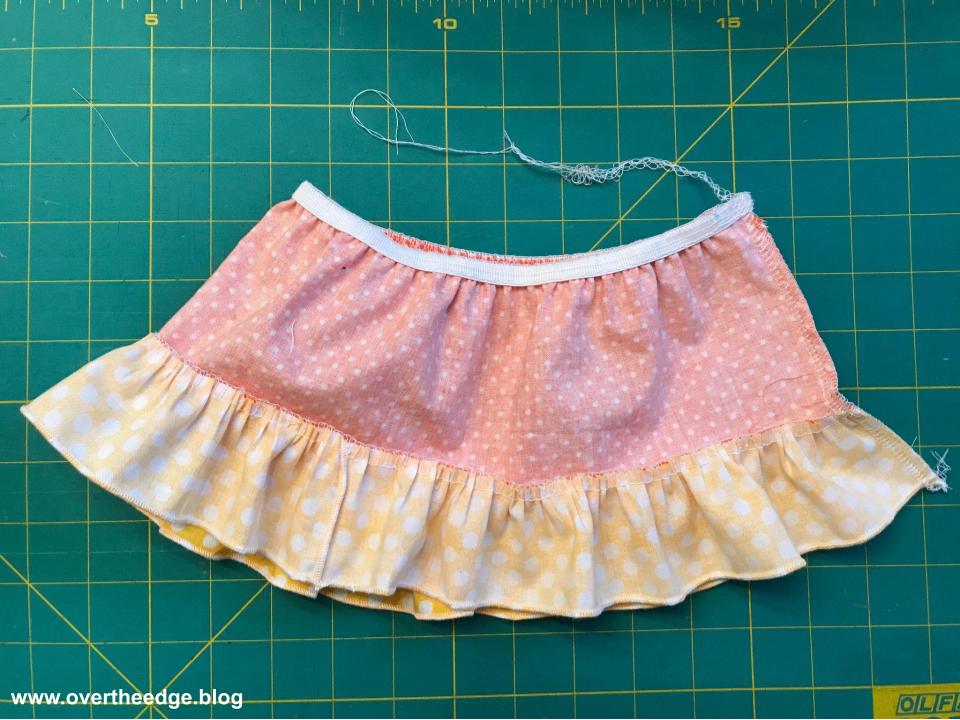
Step 4: Gather Top Edge of Skirt Using Elastic
I used my elastic foot and elastic to gather the top edge of the skirt fabric. There are many variables that determine how much fabric will be gathered to the elastic using an elastic foot – things such as the type of fabric, the type of elastic, how the fabric is guided into the foot, etc. Because of these variables I factored in a some wiggle room and used a little more fabric than I actually needed for the skirt. Because I could easily cut it to size in a future step (step 6). It’s much harder to add fabric than to take it away!
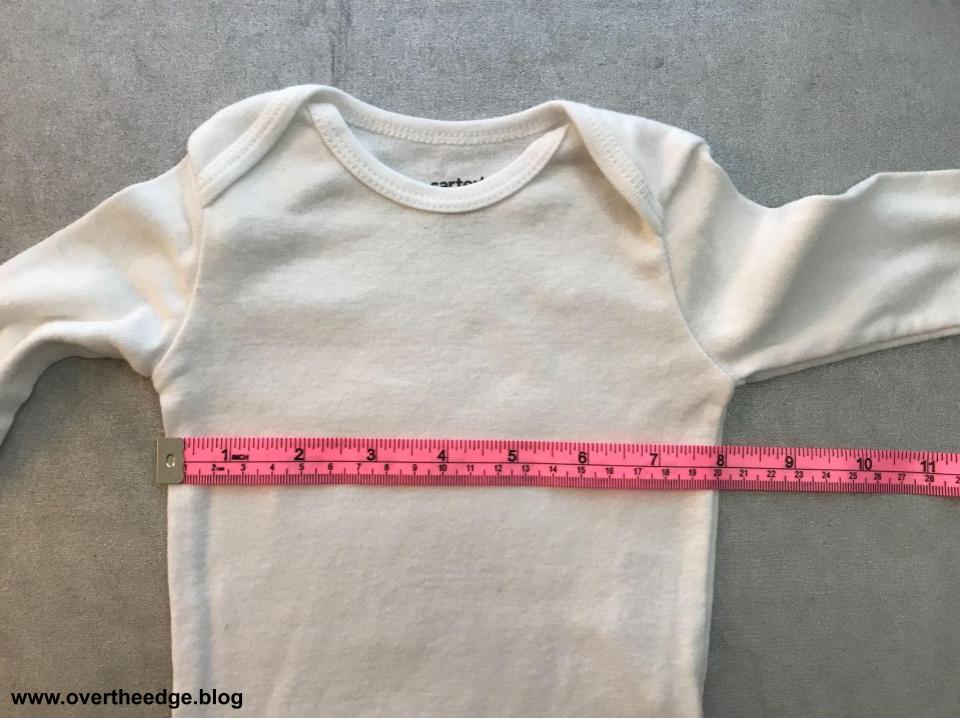
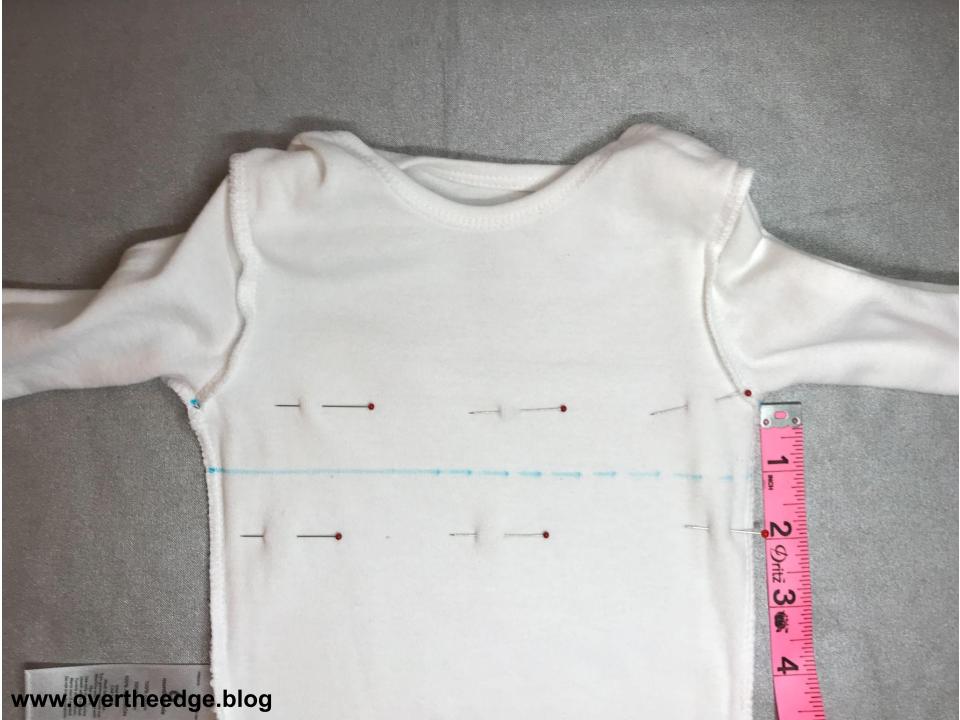
Step 5: Prepare Onesie
I measured down 1” from the armpits and marked a line across the front and back of the onesie. I also added a fusible knit stay tape over the cutting line to add stability to the future cut edges at the waist. Then I cut the onesie apart at the line.
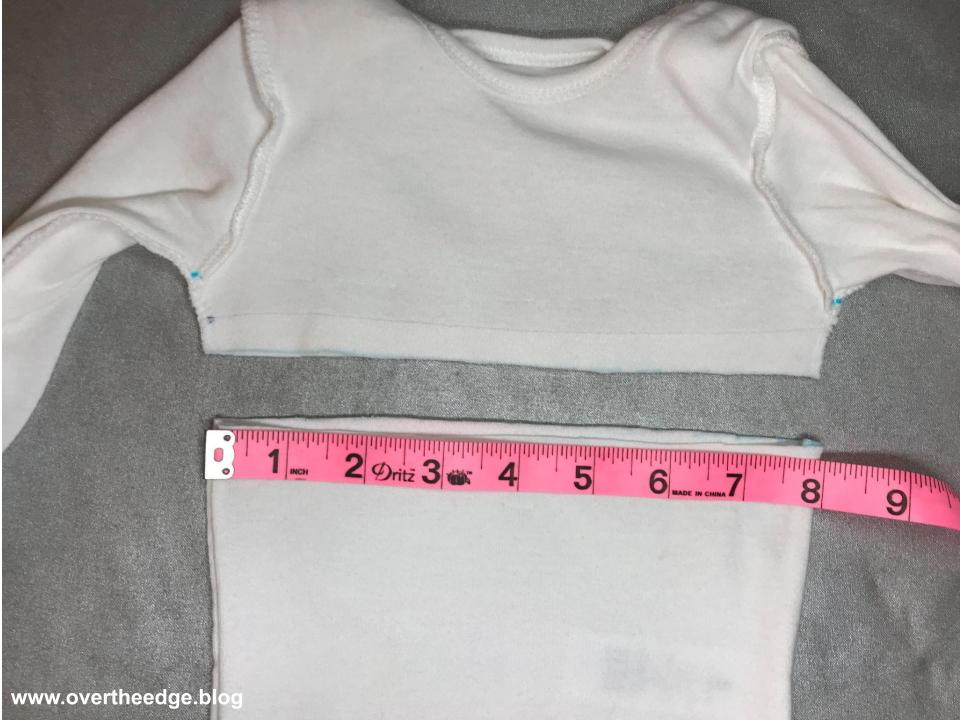
Step 6: Prepare Skirt for Attaching
I measured the cut edge of my onesie and cut my elastic gathered skirt piece to match (2X this measurement plus 3/4” for seam allowances.)
I serged the short edges of the skirt seam together using a standard four thread overlock stitch.
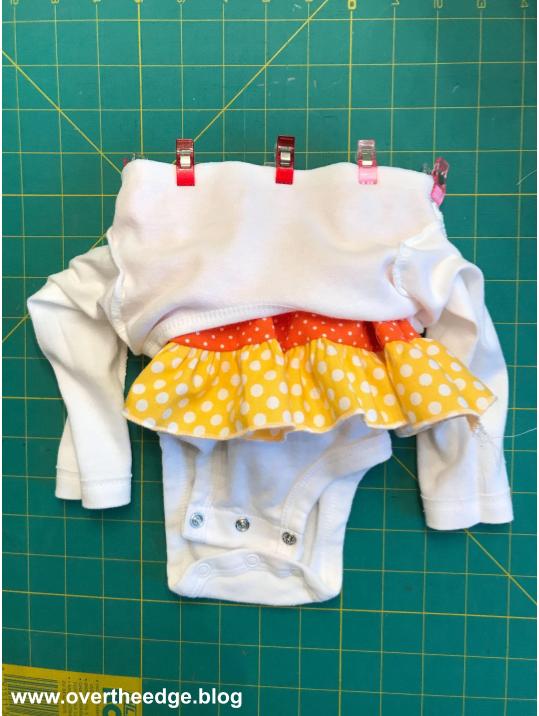
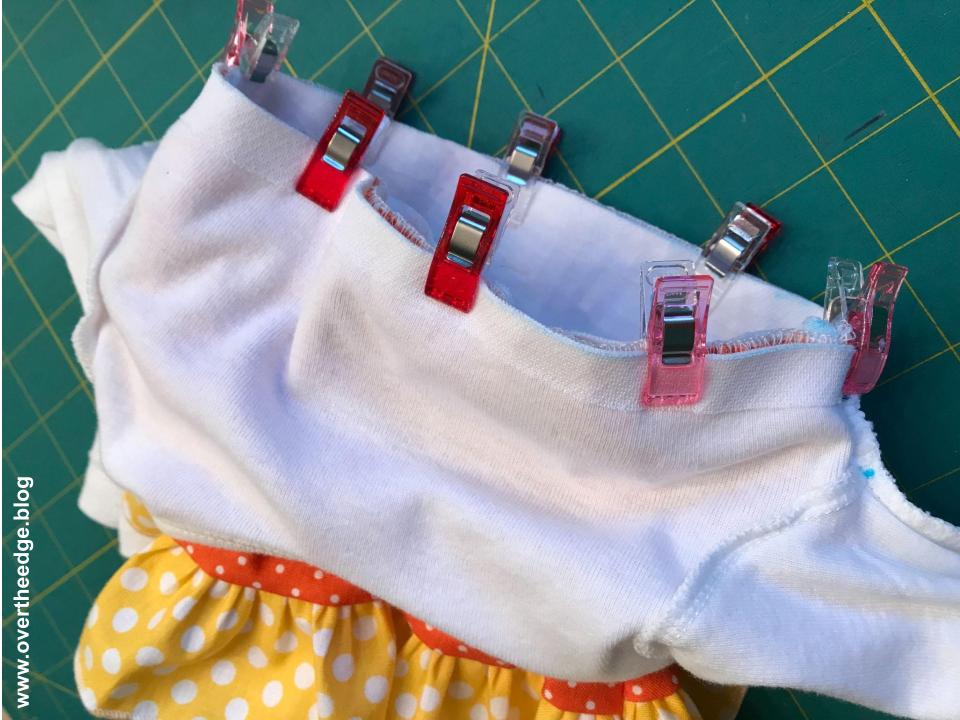
Step 7: Insert Skirt and Serge Waist Seam
I placed the wrong side of the skirt against the right side of the bottom half of the onesie, lining up the raw edges. Using my sewing machine, I basted the skirt to the onesie bottom.
Then I placed the right side of the top half of the onesie against the right side of the skirt, lining up the raw edges of all three pieces (the top half of the onesie, the skirt, the bottom half of the onesie.)
Next, using a standard four thread overlock stitch, I serged all the way around the waist seam.
And that is how I created a fun and functional serger onesie dress that stretches at the waist. But I wasn’t quite done yet. There were a few more things I needed to do.
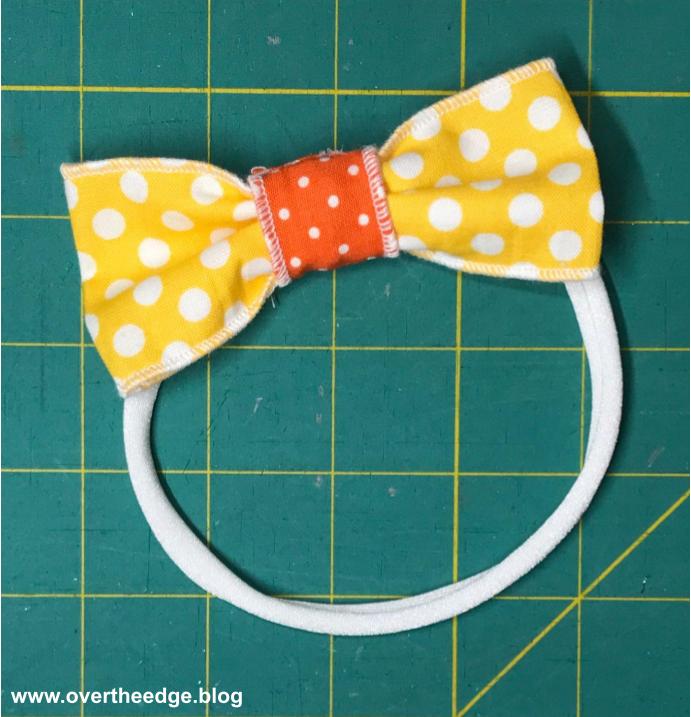
Step 8 – Make a Matching Hair Bow
I took the scraps of fabric leftover from the skirt and made a matching hair bow.
Step 9 – Find a Model and Take Photographs
Isn’t my model cute?!!! I call her my Candy Corn Cutie. The candy corn skirted onesie is the perfect outfit for my granddaughter to wear this October!
How to Serge a Onesie Dress that Stretches at the Waist
I hope you enjoyed my post about How to Serge a Onesie Dress that Stretches at the Waist.
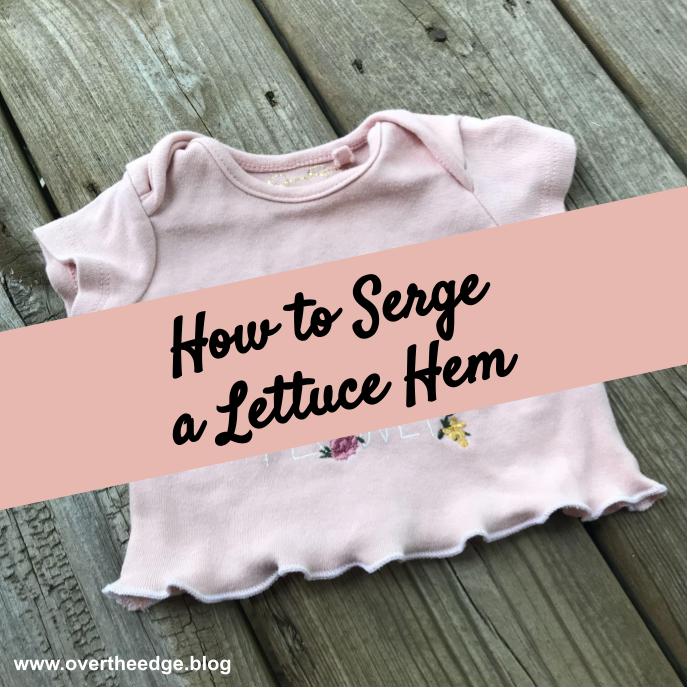
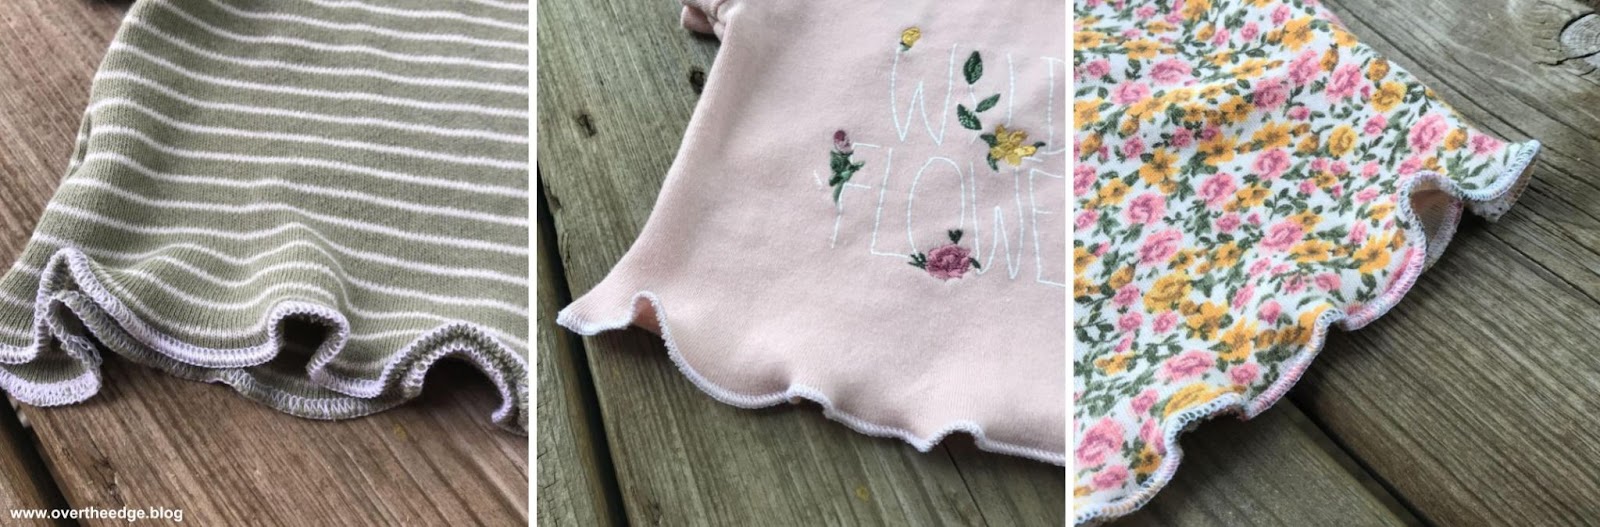
Serge a lettuce hem quickly and easily using a three thread rolled or narrow hem stitch. You only need a few things to create this lovely hem: a serger with a rolled hem stitch, some thread and a piece of knit fabric.
Lettuce Hems Using a Serger
Can you guess why this ruffled hem is called a lettuce hem? Maybe because the edge of the fabric waves and curls like the edges of a lettuce leaf?!
The lettuce hem is created by stretching the fabric as you serge the edge. It can be used on the edges of light to medium weight knit fabrics. The greater the stretch of the fabric, the more the hem waves and curls. I use this technique to transform the hems on t-shirts, scarves and more.
Which Serger Stitch to Use for a Lettuce Hem?
I’ve used two similar (but different) stitches to serge a lettuce hem. Both the 3 thread rolled hem and the 3 thread narrow hem will work. Both are tiny hems. The serger is threaded the same way for both stitches, but the tension settings are different. Consult your manual for how to set up your serger for these stitches. On my serger the stitch selector is set on “D” for a rolled hem and “C” for a narrow hem. Click on the link to my napkin tutorial below for more details about the difference between the rolled hem and narrow hem. https://overtheedge.blog/tutorials/quick-easy-serger-napkins/
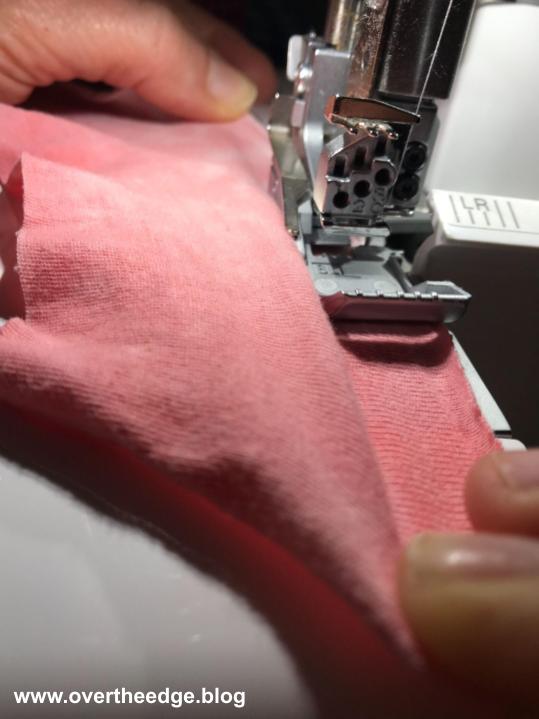
How to Stretch the Fabric as you Serge
Some people use the differential feed on their serger to create some extra stretch in their hems. Adjusting your differential feed to a setting less than 1 will create some stretch in your fabric as it feeds through the serger.
Others prefer to stretch the fabric manually. Keep your differential setting at normal (N or 1). Gently and equally stretch the fabric in front of and behind the needles as you serge, but let the feed dogs move the fabric. You will need to stop and reposition your hands as you serge around your fabric. If you try to pull the fabric through as you serge you may cause the needles to bend or break.
For my lettuce hem baby tees I had better results when I stretched the fabric manually.
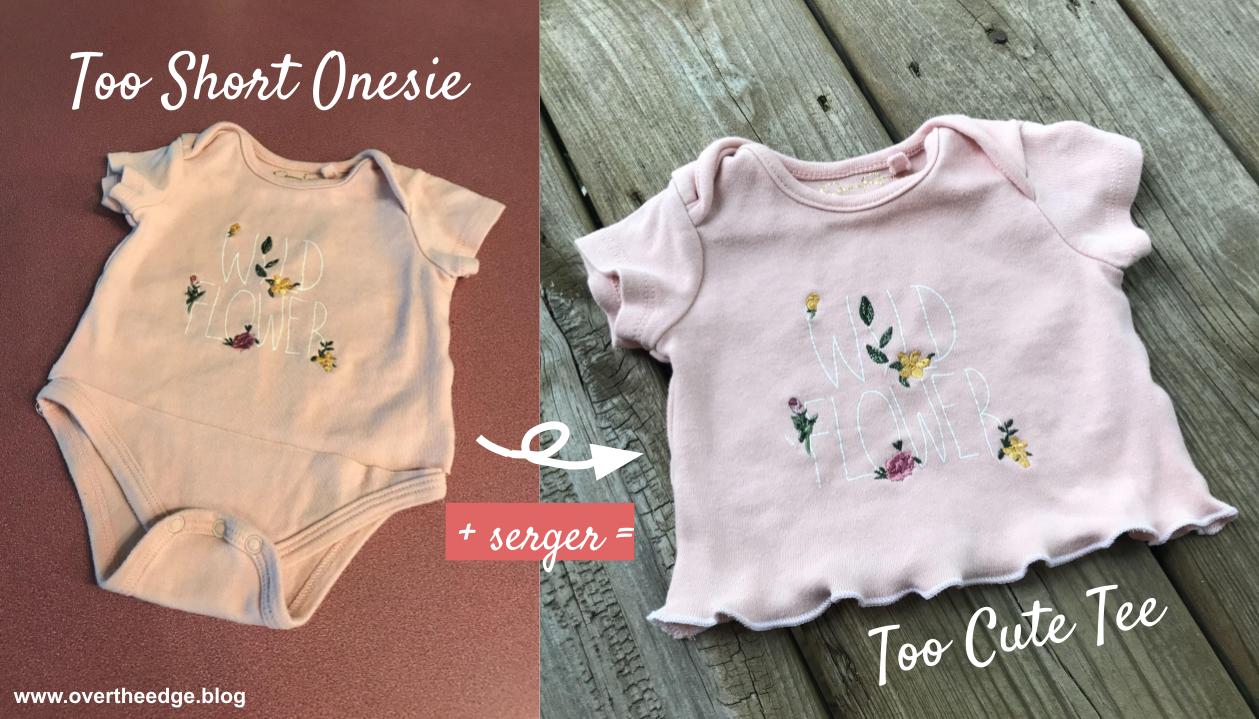
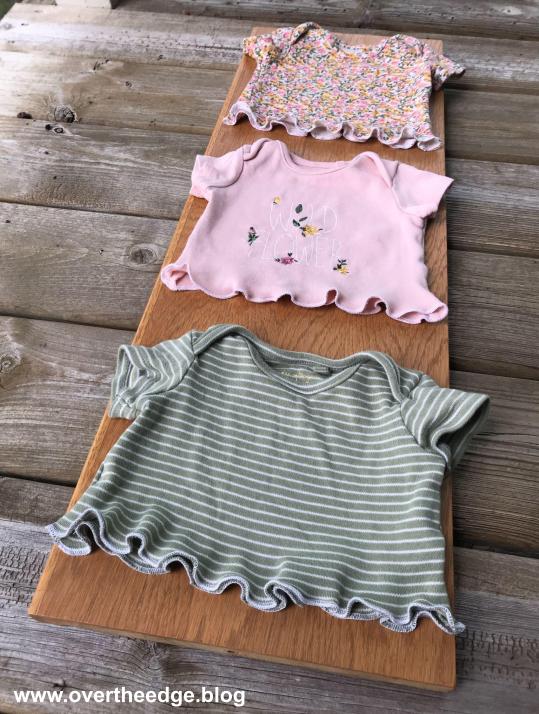
Serge a Too Cute Tee from a Too Short Onesie
My granddaughter was gifted a bunch of really cute newborn onesies when she was born. But she grew out of them very quickly. The onesies were too cute to put away, so I turned the too short onesies into too cute tees! I guess you could call this a quick and easy “onesie refashion” project.
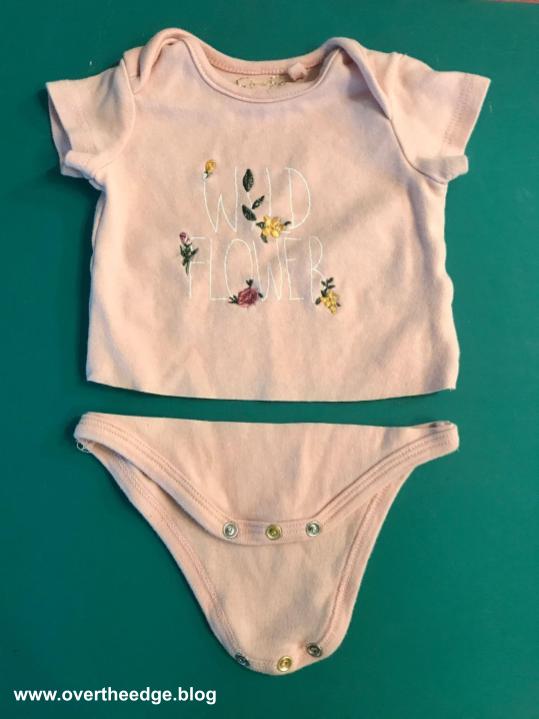
I started by cutting the onesie off at the leg openings.
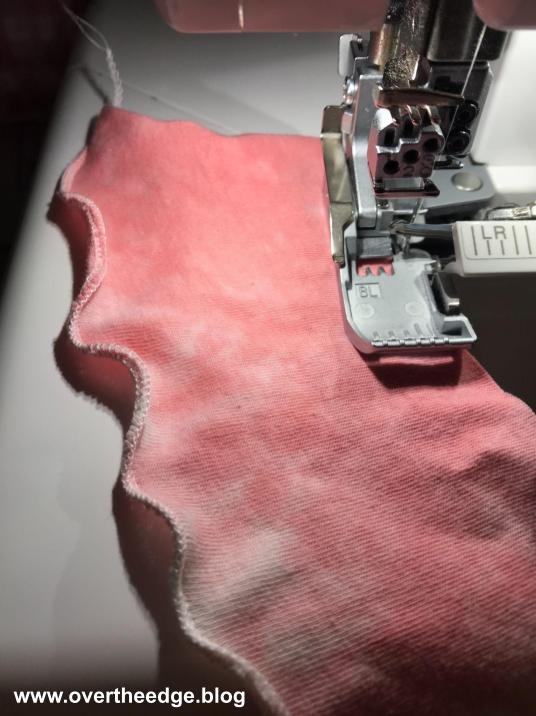
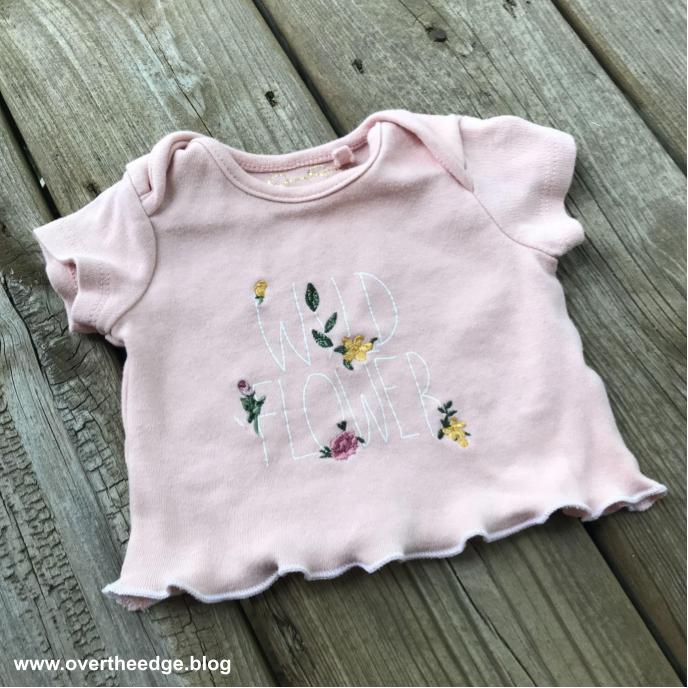
Next I set up my Baby Lock Evolution serger for a 3 thread narrow hem (stitch setting C) and a stitch length of 1.5. I used Maxi Lock thread, but you could choose more decorative thread for your loopers if you desire.
I serged the bottom hem of the t-shirt in the round, trimming off just a slight amount of fabric and stretching the fabric in front of and behind the needle.
After serging, I gave the hem a good stretch to help it “lettuce” even more. Then I buried the thread tails in the hem and trimmed off the extra thread tails.
Isn’t she a cute little wildflower in her new t-shirt?!
Now my granddaughter can get a little more use out of those too short onesies as too cute tees!
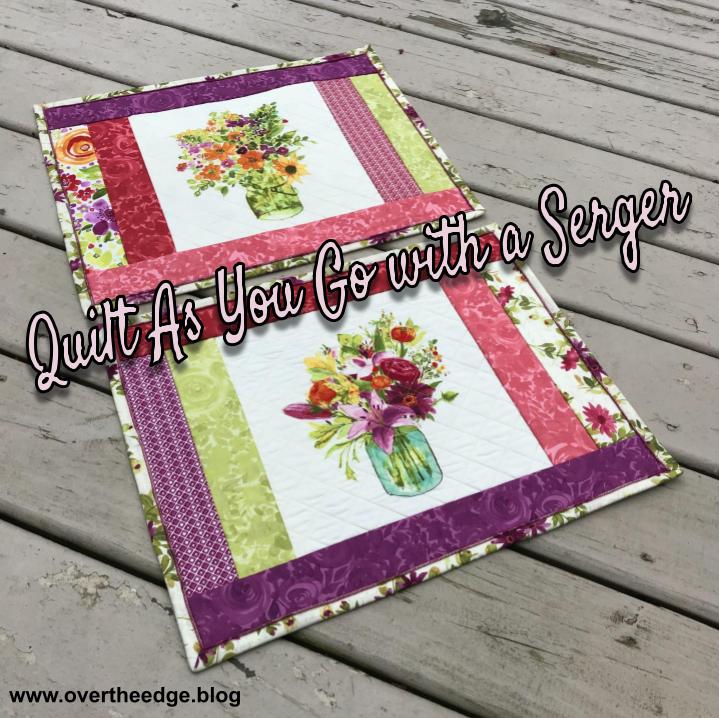
Quilt as you Go (QAYG) is a term used to describe the process of piecing and quilting each block in a quilt as you assemble it. In QAYG when the quilt top is done, so is the quilting!
QAYG with a serger is similar to QAYG with a sewing machine, but the way the pieces are layered and assembled is different. The end result is a reversible project where all the layers are connected at the seam lines. And it’s fast because you save a step. The “stitch in the ditch” machine quilting is done at the same time the layers are serged together.
Typically, you assemble your quilt in strips or log cabin style, working from the middle outwards, or side to side or top to bottom. This technique is not just limited to quilts. I’ve made placemats, lap quilts, picnic quilts, table toppers, table runners and tote bags using quilt as you go with a serger.
Why would you want to try Quilt As You Go with a Serger?
It’s fast. Some people refer to this method of quilting projects as “fun and done”.
A four thread overlock seam is approximately ¼” wide, which is a typical seam width in a quilt. The serger compresses the seam so the multiple layers aren’t too bulky. And it’s secure due to the 4 threads in the seam.
It’s great for projects with simple quilt designs without complicated seams.
Project Inspiration
I’ve done a variety of different projects with QAYG on a serger. Below I’ve included photos and information about several of my own serger QAYG projects. And you can find many tutorials and YouTube videos on the internet for inspiration.
If you would like to try a strip placemat without the center panel see the brothersews tutorial. You will find a link in the resources section at the bottom of the post.
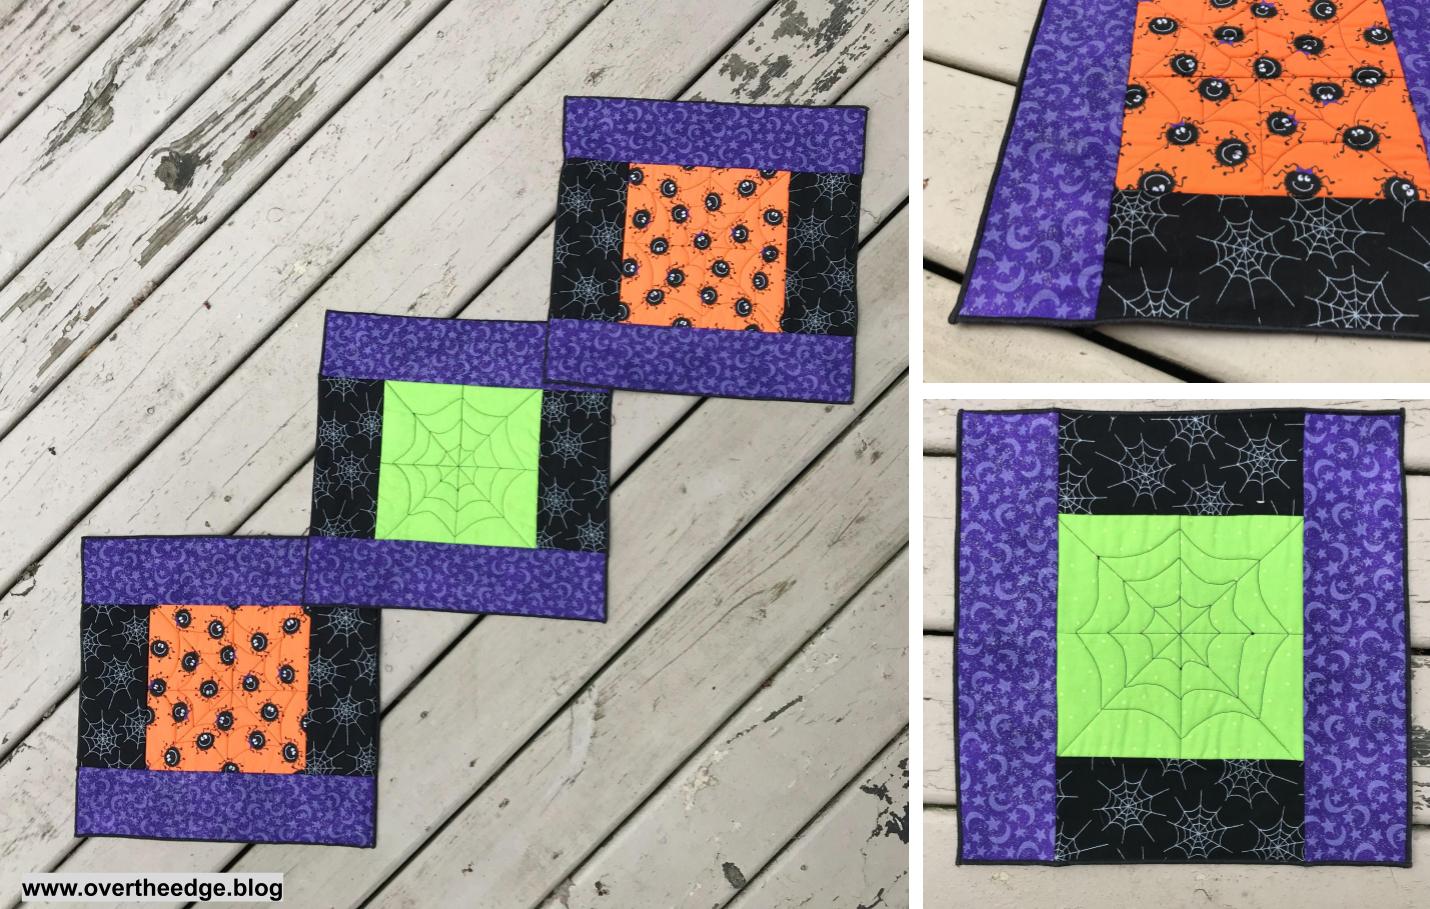
Is it a Table Runner or are they Placemats?
These three reversible Halloween placemats I designed can be used individually as placemats or overlapped and laid out as a table runner. One side is orange and one side is green. I quilted the center panels on my sewing machine with a spiderweb design. Then added the borders using the serger quilt as you go technique. Instead of traditional binding, I serged the edges with a decorative thread.
Lap or Baby Quilt
Serge this reversible lap or baby quilt together quickly and easily. It’s also a great quilt project to donate to charities. And you could serge the edge with a decorative thread like I chose to do, instead of binding it the traditional way. The width of the strips is only limited by the batting and it’s maximum quilting distance. I used a polyester batting that could be quilted up to 6” apart. So I cut my strips 6.5” wide x WOF. This project used 9 strips of fabric on the front, 9 strips of fabric on the back and 9 strips of batting. The finished size of my ladybug quilt is approximately 42” x 52”.
Heirloom Creations and Sara Gallegos of the Decorative Stitch have some helpful youtube videos on making lap or baby quilts with this method. For more of a log cabin style quilt check out Kay Wood’s video on youtube. See my resources section for links.
Picnic Quilt
I decided to scale up the serger quilt as you go technique to make a bigger picnic quilt. At first glance the quilt below looks like a traditional quilt. It is actually assembled in strips just like my lady bug lap quilt. This project was a bit more involved, but worthy of trying. I used cotton batiks for the top, a super thin batting, and a water resistance nylon for the back and binding. It was a gift for my daughter who uses it frequently for the beach and just hanging out in the yard. When I have some extra time, I plan on writing up a pattern for this design.
Table Topper
I made this patriotic reversible table topper using the serger QAYG method. The pattern came from the book, Simple Serger Sewing. I applied the binding to the front with a sewing machine and then turned it to the back and hand stitched it in place. This method begins in the middle with a pre-quilted center square and then works its way outward using triangles and border strips. See resources section for more information.
Tote Bag
I designed this tote bag by experimenting with an extra panel from my serger QAYG placemats and a bunch of extra jelly roll strips. It was a fun experiment! Some day when I have time I may write up a pattern for this serger QAYG tote.
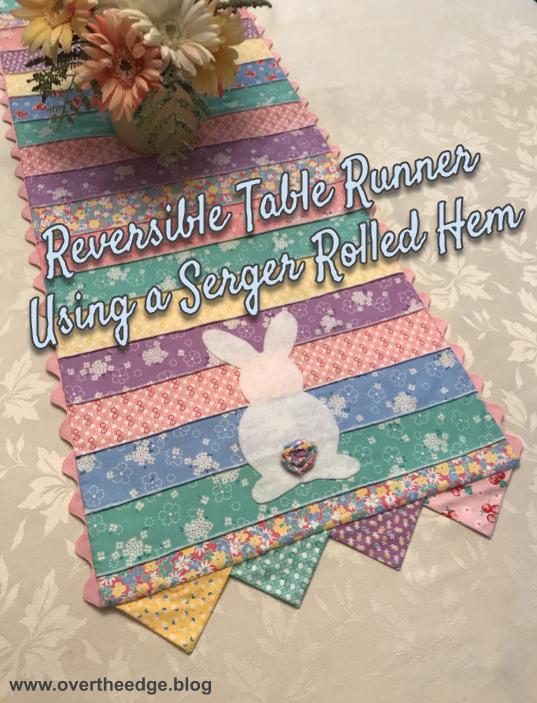
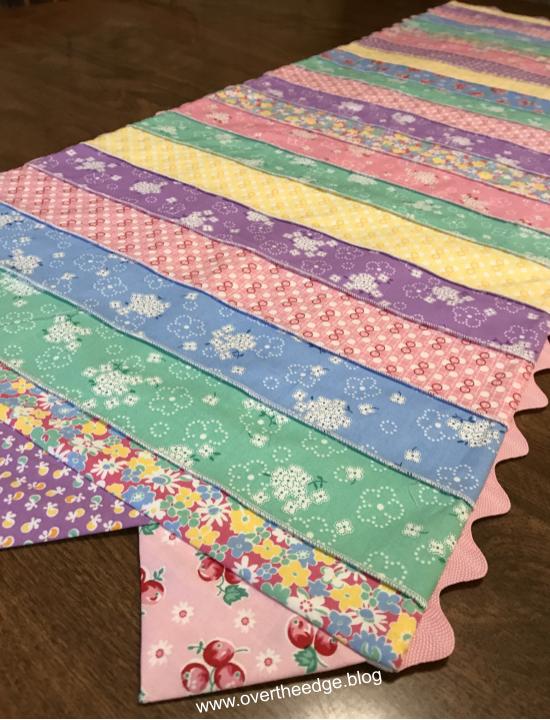
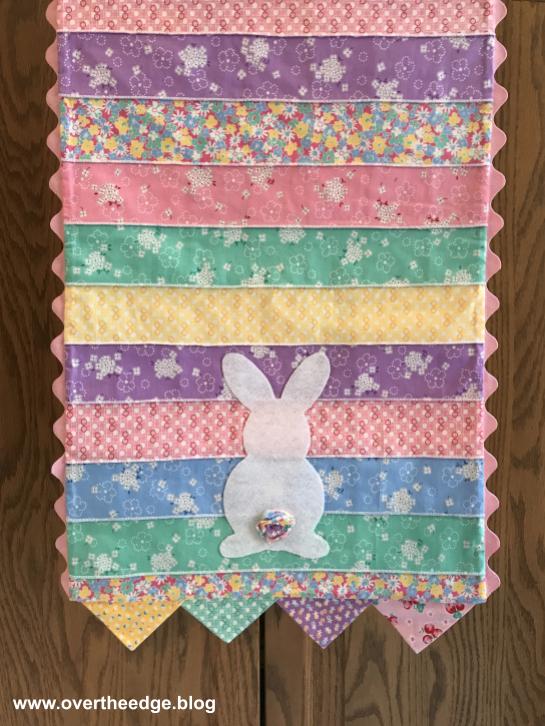
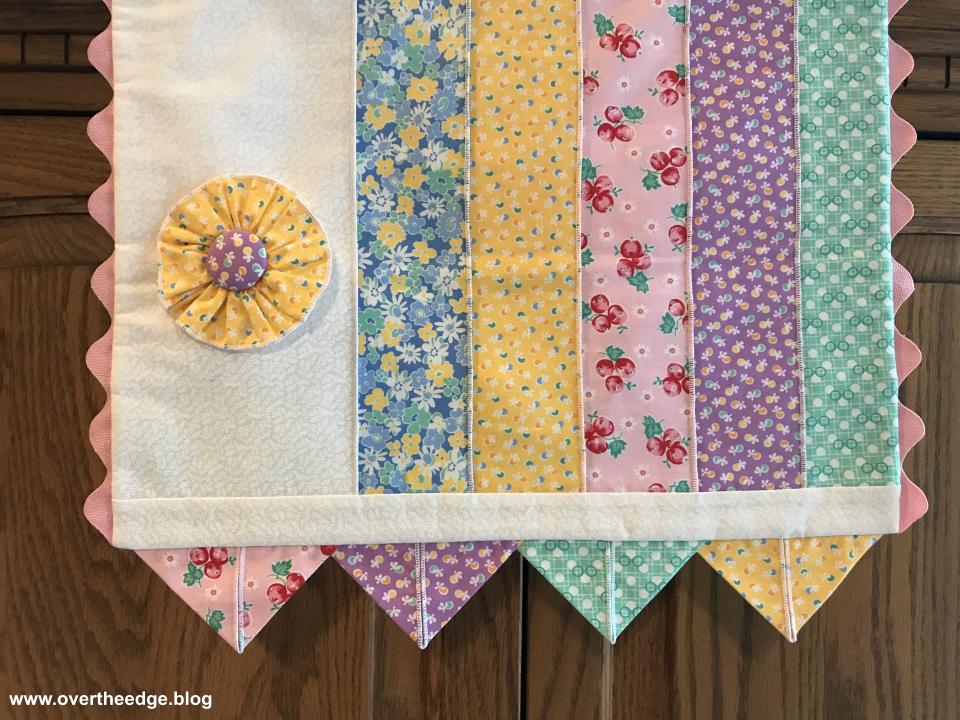
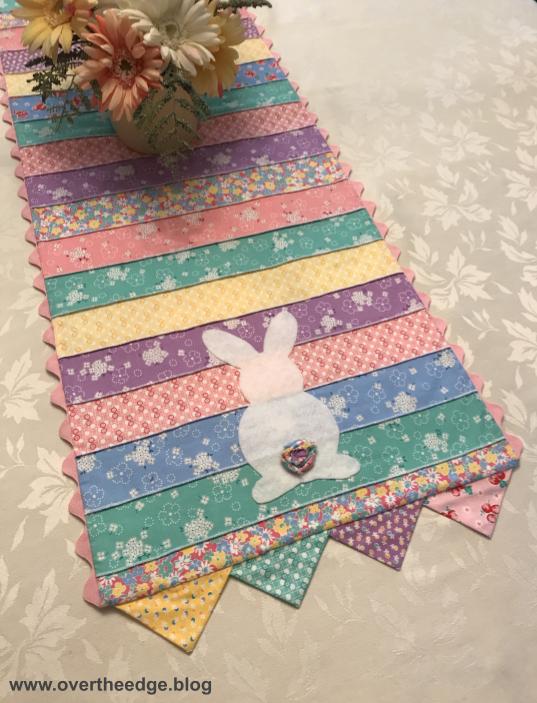
Spring is in the air! The sun is shining and the snow has melted. It’s once again time to dress the table with my colorful and reversible serger table runner. It’s full of texture with exposed seams, prairie points, bunny tails and fabric flowers.
Reversible Serger Table Runner Inspiration
I designed this table runner a few years ago using a bunch of leftover jelly roll strips from another project. And of course I challenged myself to use my serger to make it. My vision began with a “stripey” table runner with texture, and evolved as I serged.
Creation of Table Runner
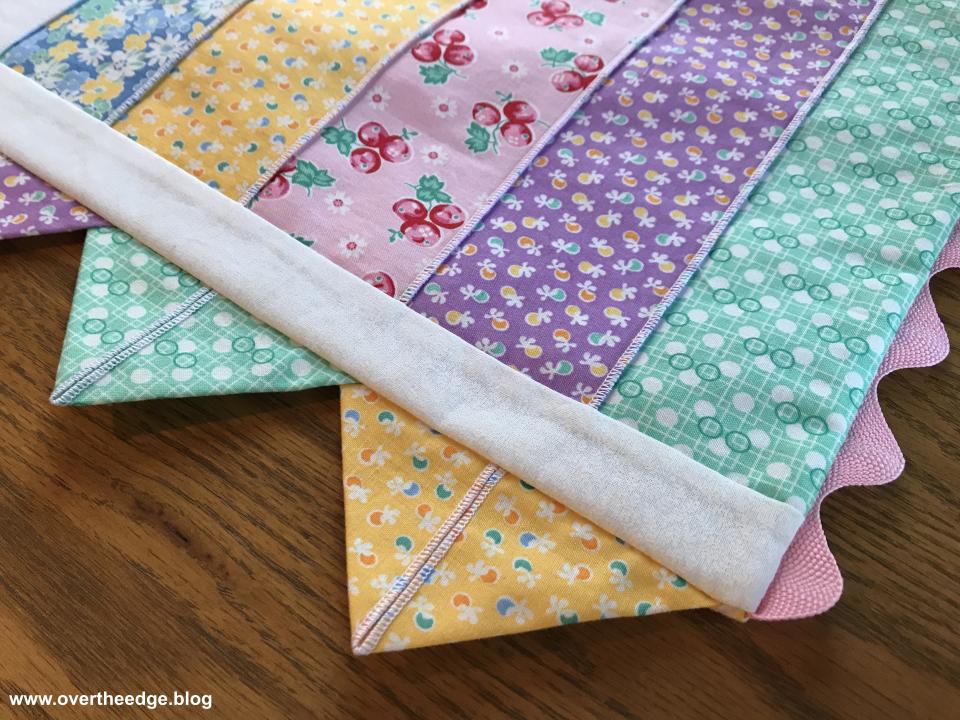
I pieced the strips together with the 3 thread rolled hem stitch. I serged the strips wrong sides together so the rolled hem would show on the right side of the table runner. Then I cut the strip sets into two sections and serged the sections together to end up with a rectangle about 16” wide by 48” long.
A Second Runner
I still had a few more jelly roll strips left so I decided to make a second but different runner. I serged these strips together with a three thread rolled hem stitch, adding in a wider strip of white fabric. Then I cut the strips into squares, alternated the layout and added sashing strips in between the squares.
The Reversible Serger Table Runner
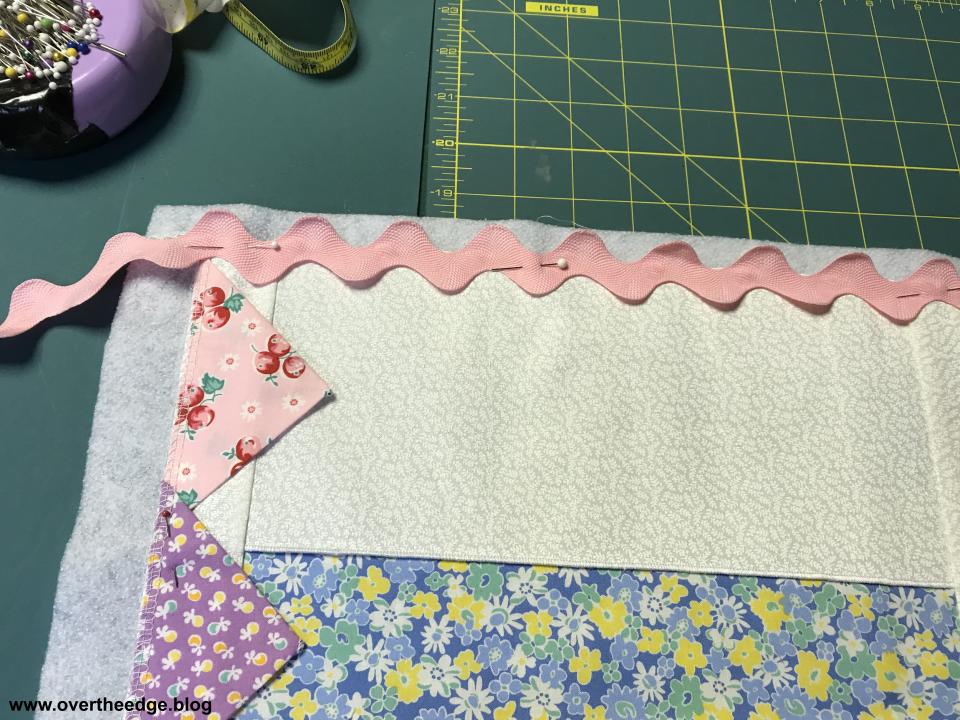
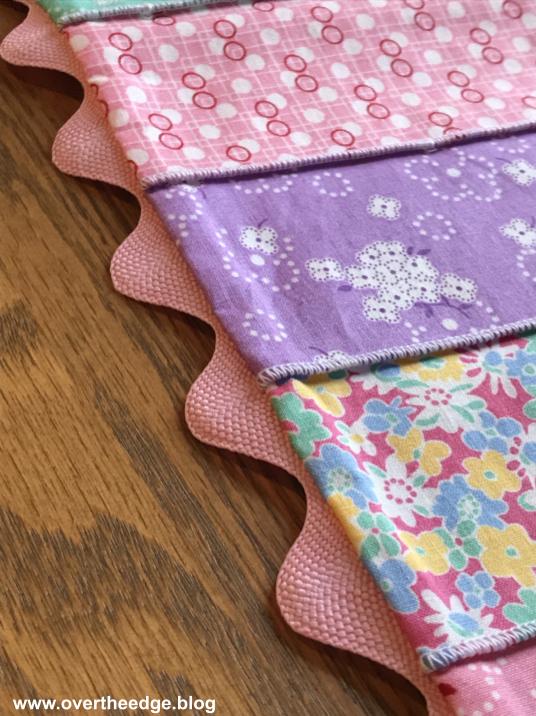
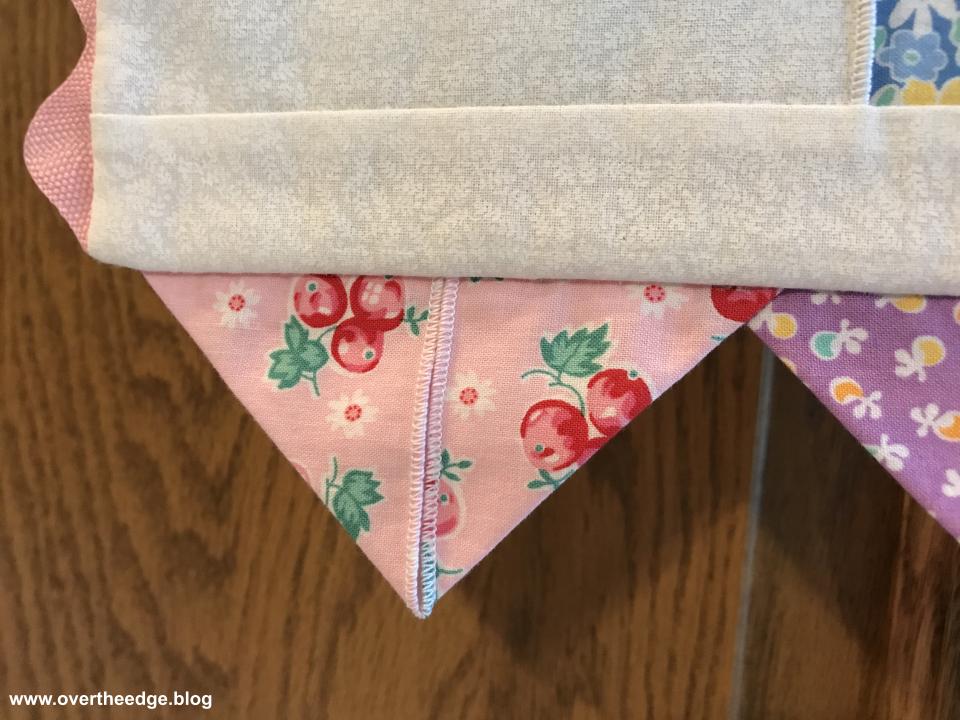
Instead of two separate table runners, I decided to make one reversible table runner. I added a wide ric rac trim to the long sides and prairie points to the short sides.
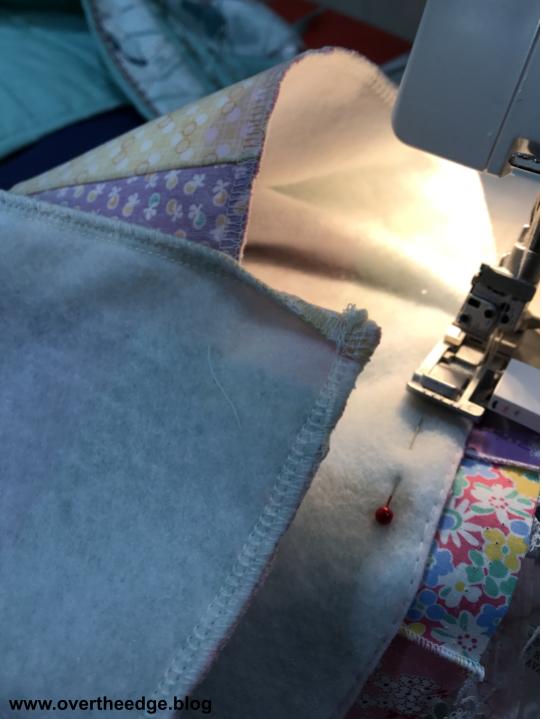
I then layered the two table runner tops right sides together, along with a layer of batting and serged around the outside edges, using a 4 thread overlock stitch.
Here is a closeup of the wrapped corners technique I used at the corners so I didn’t need to trim away any fabric at the corners. For more information about how to wrap a corner with a serger visit my pillowcase tutorial at: https://overtheedge.blog/tutorials/his-hers-serger-pillowcases-tutorial/
I left an opening on one side for turning and closed it up using a fusible web and an iron.
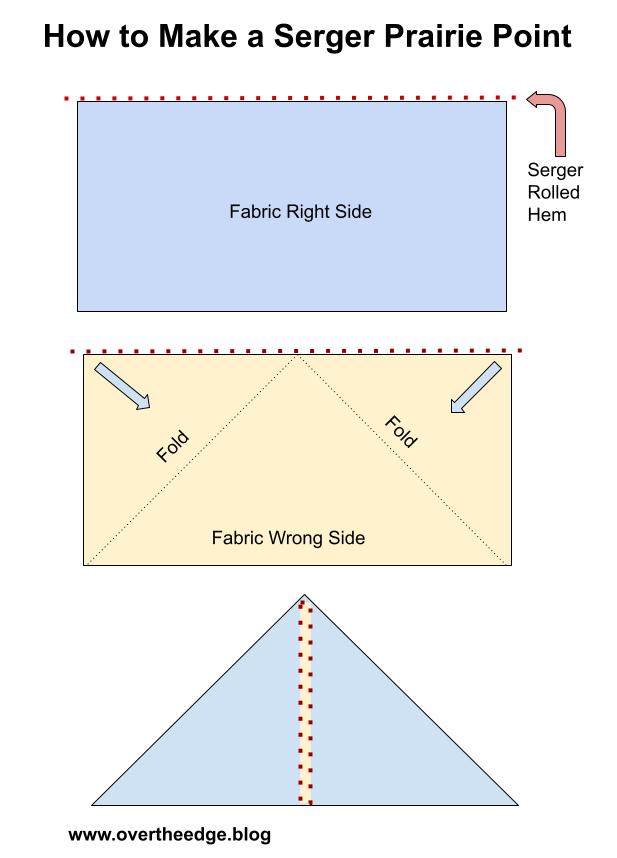
Serger Rolled Hem Prairie Points
My prairie points started as rectangles that were 5” long and 2.5” wide. I serged one long edge of the rectangle and then folded two corners to the middle to make the prairie point. The rolled hem edge ends up in the center of the prairie point.
Finishing Touches
The reversible runner turned out nicely, but I thought it needed a little something extra to make it compete. So I added bunnies on one side and flowers on the other. Adorable!
My Felt Bunnies
I cut out two bunny shapes from some white felt and glued the bunnies to the ends of the table runner. The bunny tails were made from fabric trimmings that were cut off to even up the edges of the table runner. I took the strips and twisted them and then rolled them into a circle to form the tails.
My Fabric Flowers
I had a few more leftover jelly roll strips that I transformed into fabric flowers. To make a flower, I serged one edge of a fabric strip using a 3 thread rolled hem. Then I set up my serger to gather and serged the other long edge to gather the fabric. Pulling on the needle threads, I gathered the fabric a bit more before shaping it into a flower. And I added a fabric covered button to create the flower center.
So they could be easily removed when I wanted to display the bunny side, I pinned the flowers to the table runner.
Reversible Serger Table Runner
I hope you enjoyed learning about how I made my bunnies and flowers reversible serger table runner! And in case you didn’t know, April is National Serger Month. Now would be a good time to serge something fun for spring!
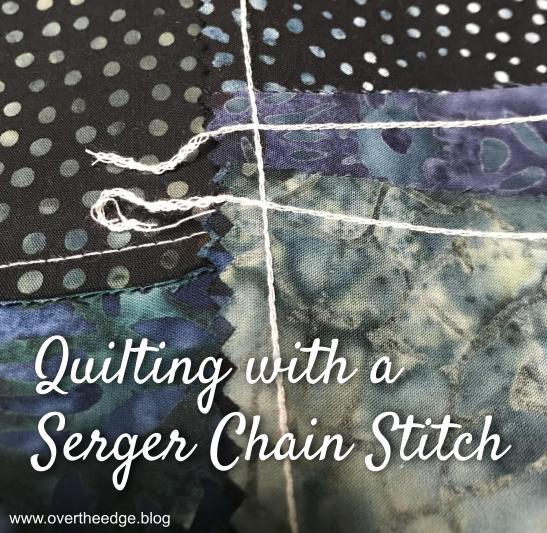
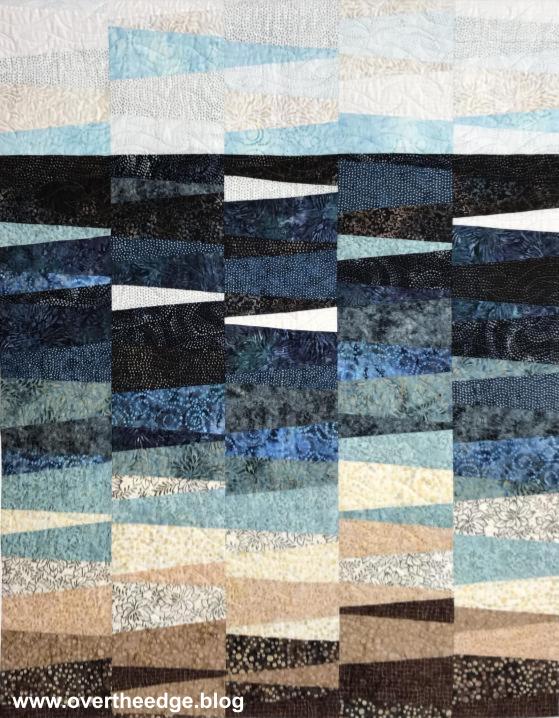
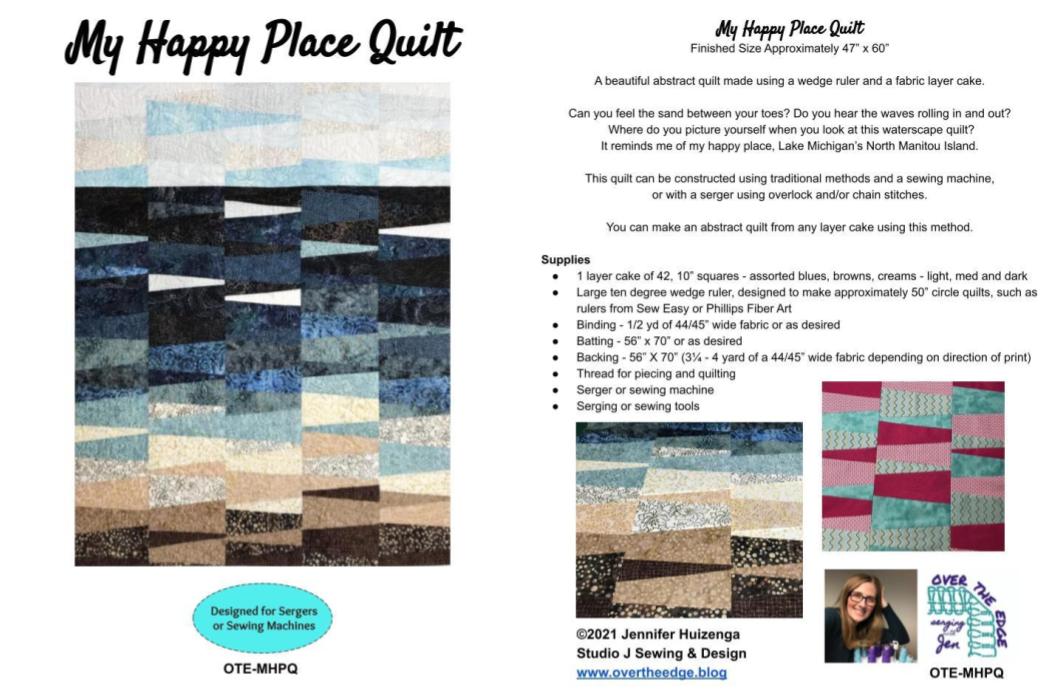
Did you know that you can serge a quilt with a chain stitch? I tried it, and I am so excited to share with you my latest quilt by serger. My Happy Place Quilt is an abstract waterscape quilt designed with a layer cake and a ten degree wedge ruler. I’ve made serger quilts using many types of serger stitches and techniques. But this is the first quilt I have pieced and bound exclusively using a serger chain stitch.
I was so happy with the results that I decided to create an official pattern for the quilt. The pattern is full of step by step photographs and diagrams. And the quilt can be made using a serger and/or a sewing machine. If you’d like to make your own My Happy Place Quilt, you can find the pattern for sale in the Shop section of my blog: https://overtheedge.blog/shop/
Story Behind the Quilt
I created the quilt as a personal design challenge for National Quilting Month this year. And of course, I chose to use my serger to make it. So I guess it counts for National Serger Month too!
I wanted to use my ten degree wedge ruler for another project.
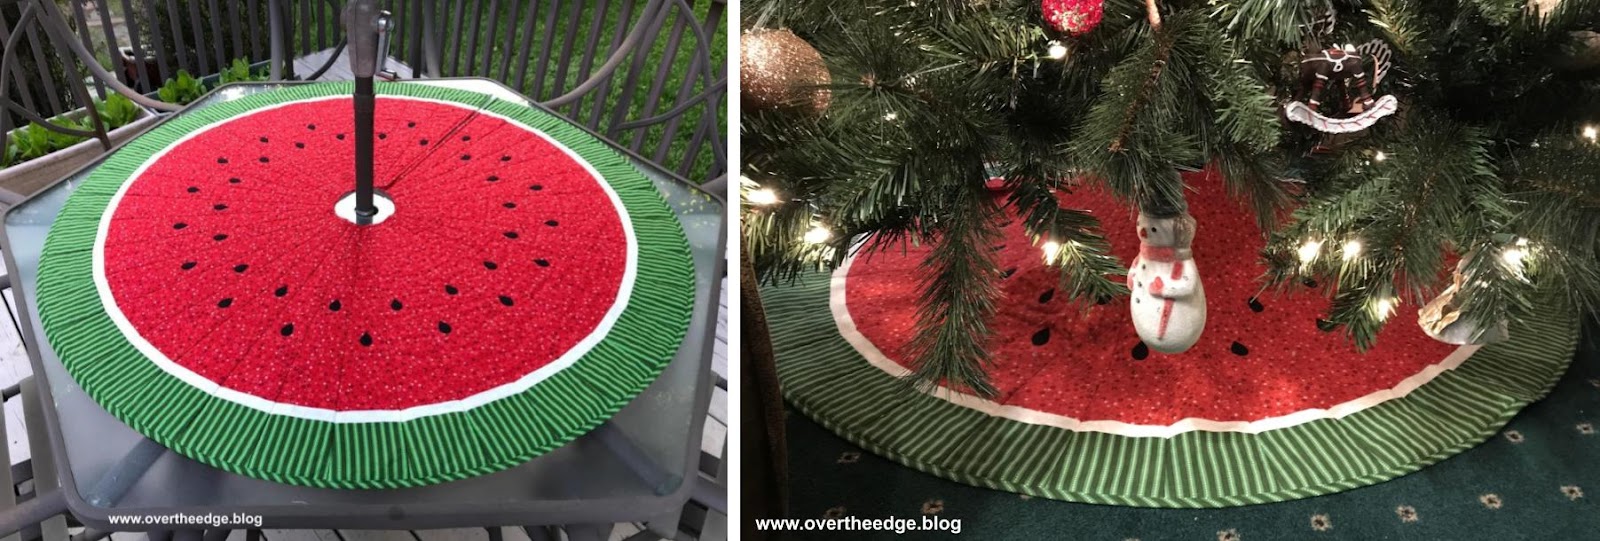
You may remember that last year I used my serger and ten degree wedge ruler to create a watermelon quilt. I’ve used the quilt as both a patio table topper and a tree skirt.
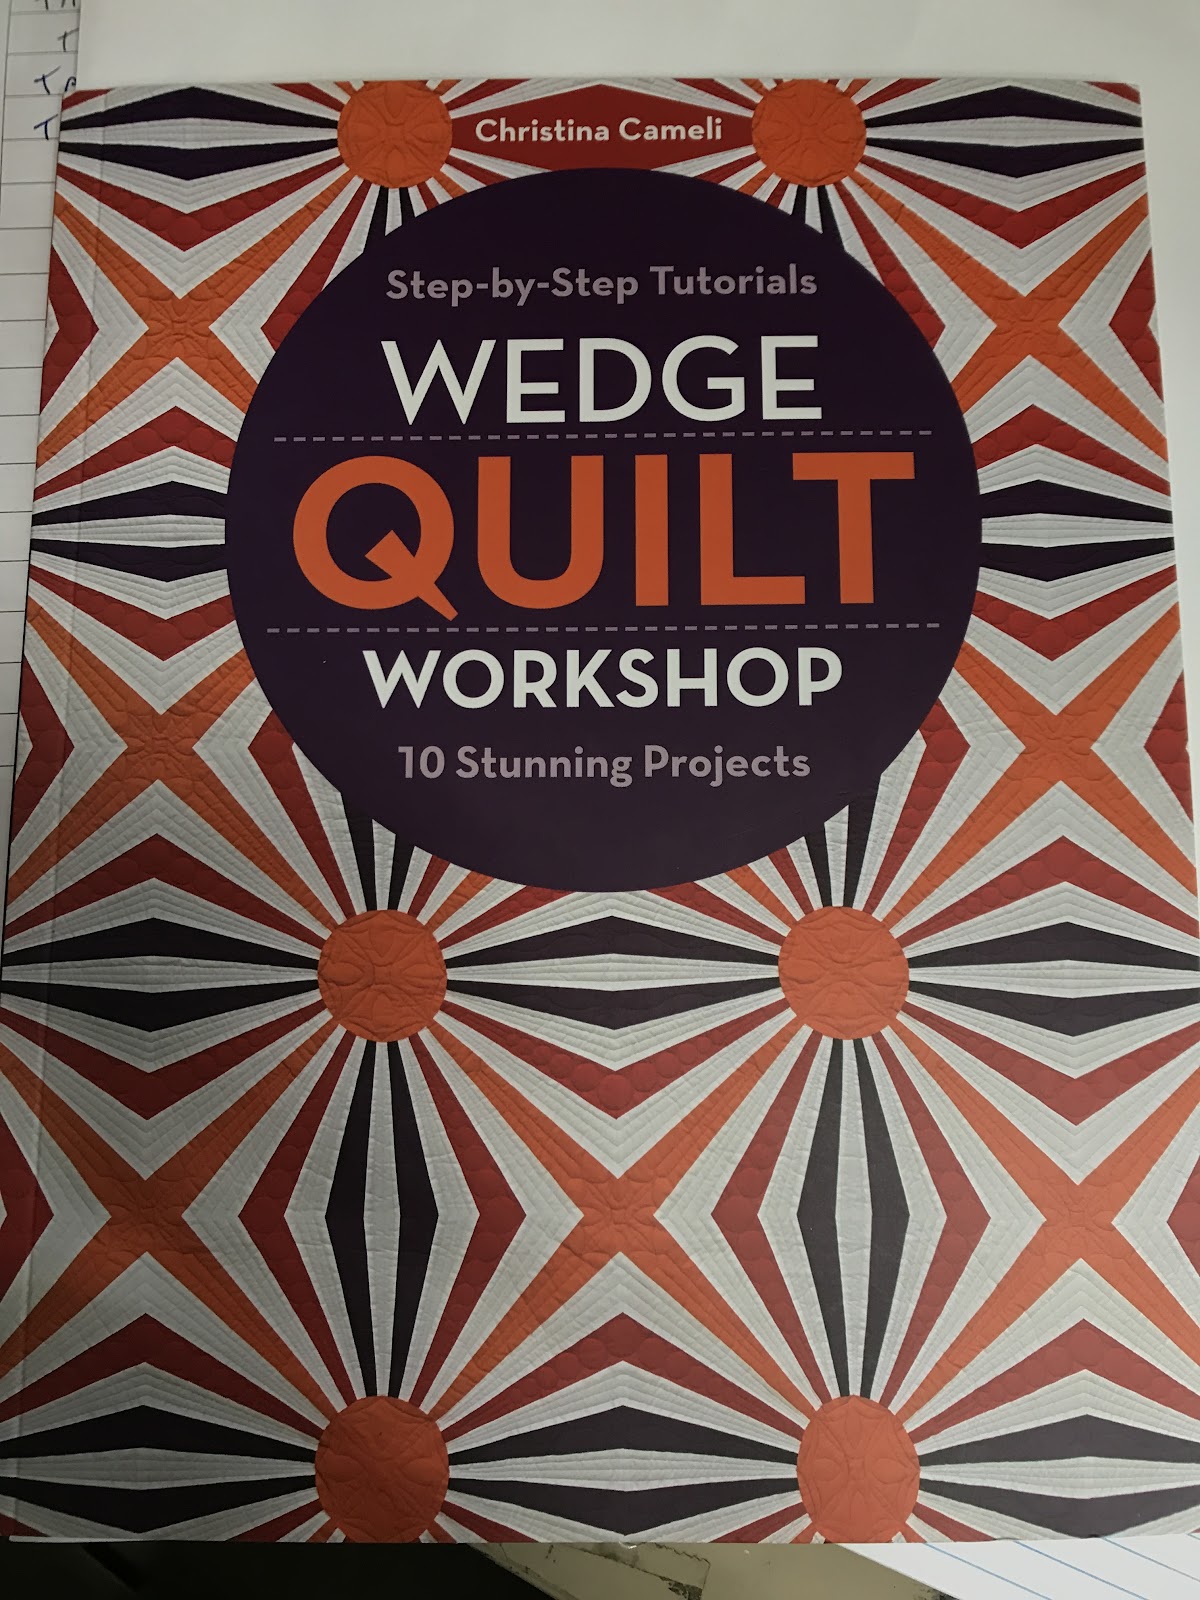
I found a few wedge style quilts online that seemed interesting. But when I saw the “It Takes All Sorts” quilt from Christina Cameli’s book, Wedge Quilt Workshop, I was instantly inspired.
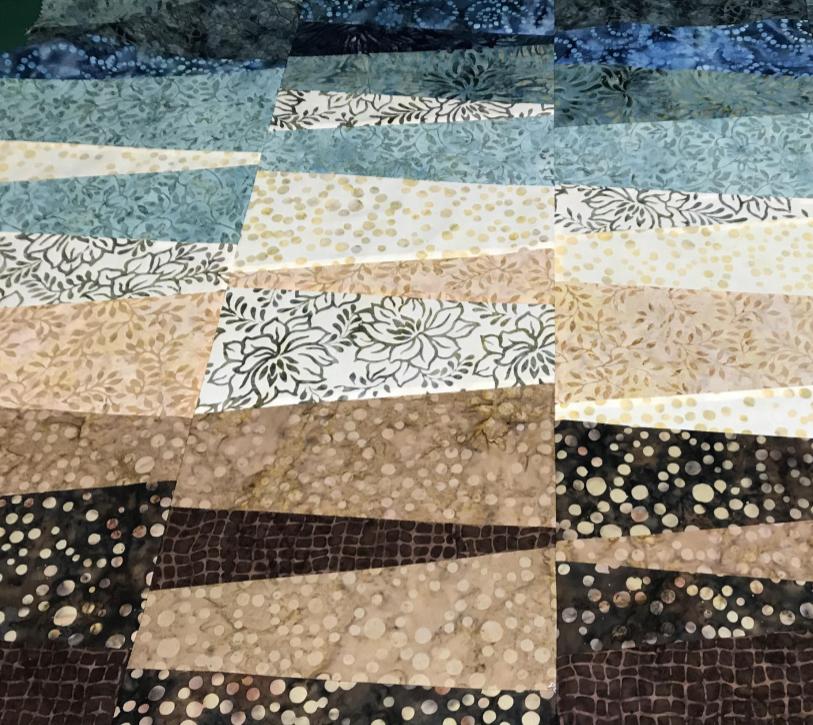
I had the idea, but now I needed the perfect fabric. I found it in the sale rack where I work. It was the Ocean Stone batik layer cake from Boundless Fabrics by Craftsy. The blues and browns reminded me of Lake Michigan. And I love layer cakes because they are complete collections of coordinated fabric. The less time I spend choosing fabric is more time I can spend serging! At first I thought I would do something completely abstract, but as I experimented with my wedge layout, the abstract waterscape began to materialize.
How to Serge a Quilt with a Chain Stitch
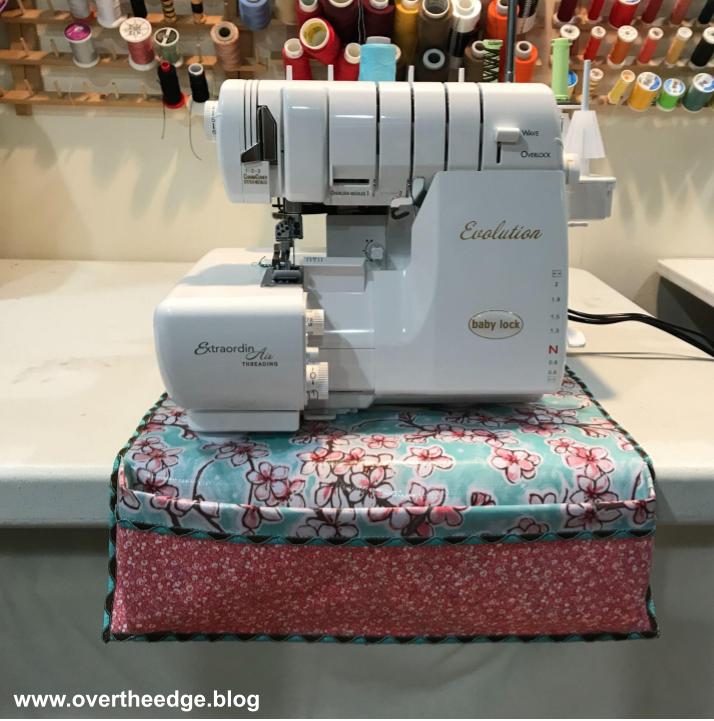
Not all sergers are capable of making a chain stitch. But if your serger does, you can use a chain stitch to serge a quilt. I have a Baby Lock Evolution serger, which is both an overlock and a cover stitch machine.
Here are some useful tidbits about serging and quilting with a chain stitch.
Seams can be pressed to the side or pressed open
Uses two threads, similar to a sewing machine
Can be quickly and easily removed if you make a mistake
Blades are disengaged so no accidentally cutting into your seams
Stitch length is usually a little longer than when sewing, about 2.75-3
Don’t have to worry about running out of bobbin thread
Can be used for piecing, binding and quilting
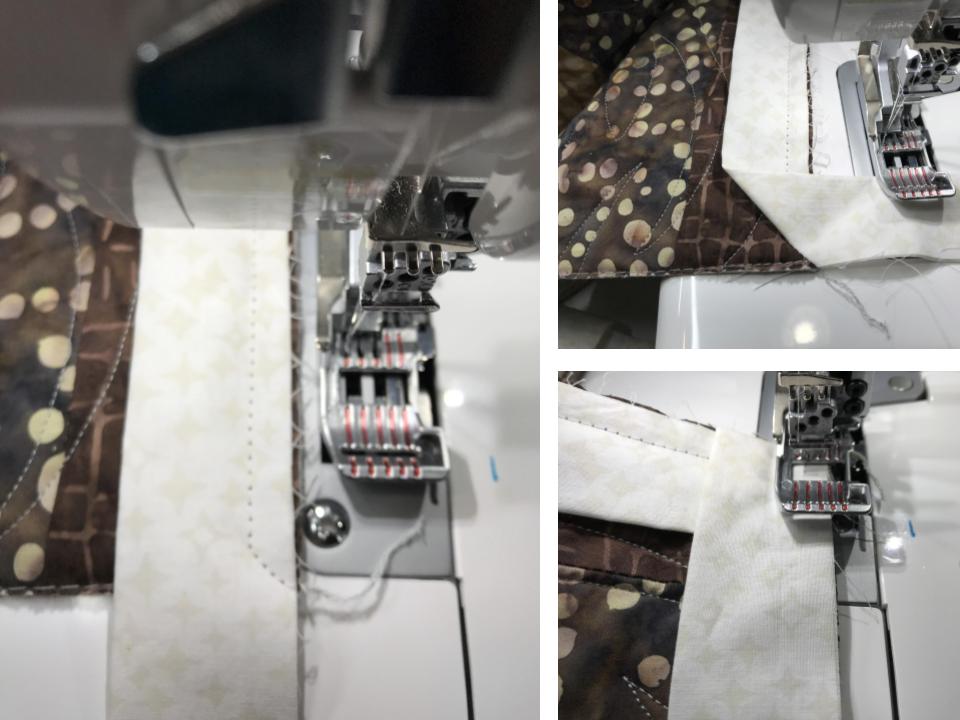
Piecing with a Serger Chain Stitch
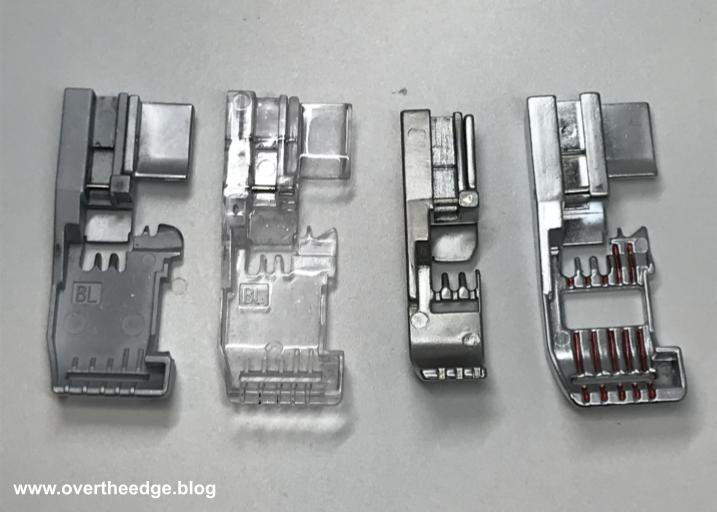
I pieced together all of My Happy Place Quilt using a chain stitch and the cover stitch presser foot. Several different feet can be used – standard foot, clear foot, open toe foot, cover stitch foot, etc. Check your manual for the best settings and presser foot to use for your serger. Any foot that has good visibility makes it easier to get accurate ¼” seams. For chain stitch quilting I prefer the cover stitch foot or the open toe foot.
Pictured below are a few presser feet I use to quilt with my Baby Lock Evolution serger. From left to right: standard foot, clear standard foot, cover stitch foot, open toe foot.
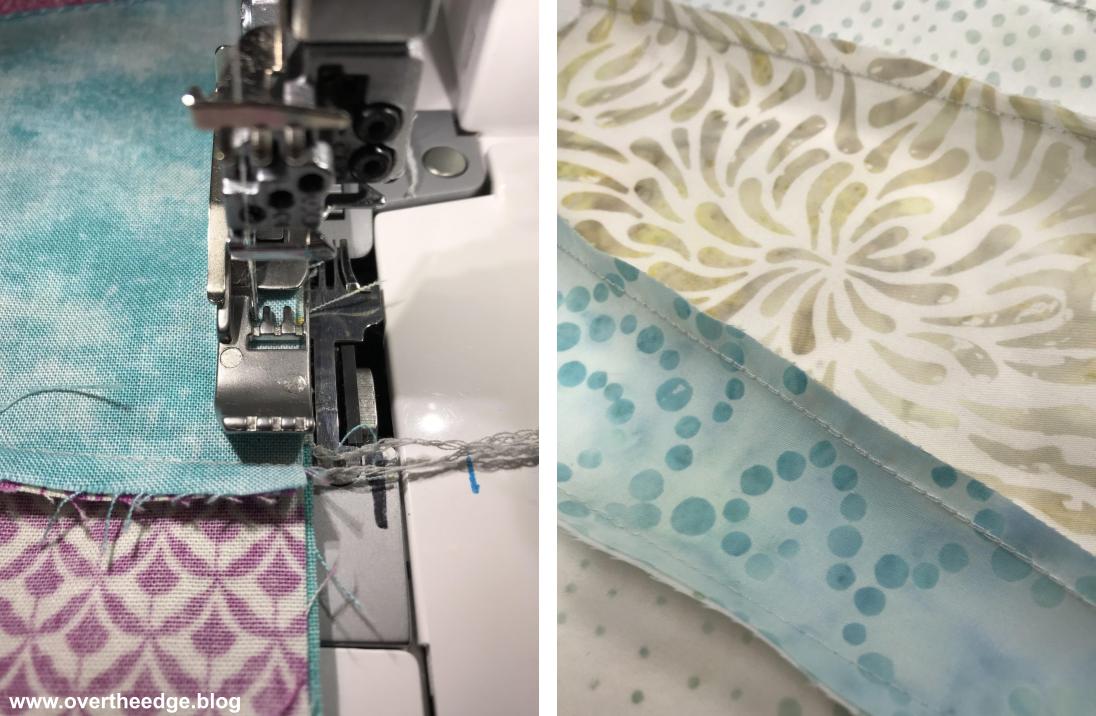
I used my left needle and guided the fabric along the right needle marking on the toe of my presser foot. Guiding the fabric this way gave me accurate ¼” seams. I used standard serger cone thread in my needle and chain looper.
Attach Binding with a Chain Stitch
Applying binding with a serger chain stitch is just like applying binding with a sewing machine. You stitch the binding onto the front or back of the quilt and then wrap it around the edges and stitch it down by hand or machine.
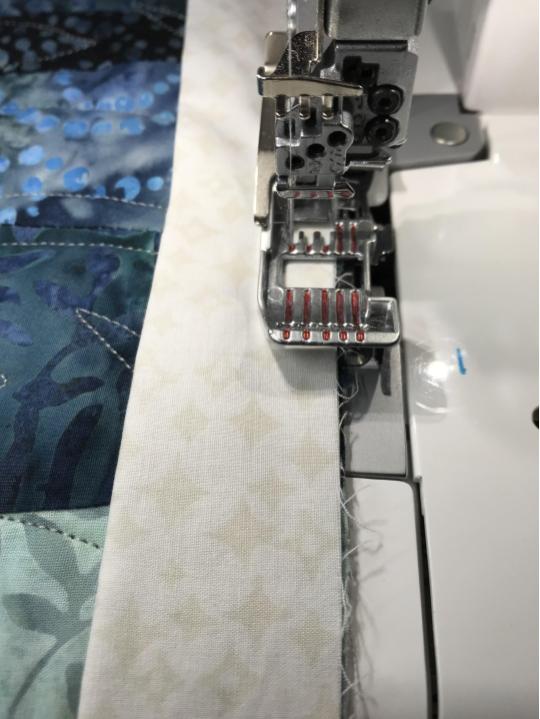
I used this binding method for my quilt because I wanted two layers of fabric in the binding at the raw edges of the quilt. I used a very light color binding and did not want the dark fabrics in the quilt to show through. After testing the seam allowances I decided that a scant ⅜” seam allowance was best. The binding on the back would be perfectly secured by the “stitch in the ditch” stitches from the front. A scant ⅜” seam allowance from my left chain needle is between the third and 4th red marking from the left on the toe of my open toe presser foot as seen in the photo below.
I even chain pieced my binding strip seams with the chain stitch on my serger.
When I approached the corners, I simply turned the quilt clockwise and serged off the corner on a diagonal. Then I folded the binding at the corner and serged back on to the next side of the quilt, just like I would on a sewing machine.
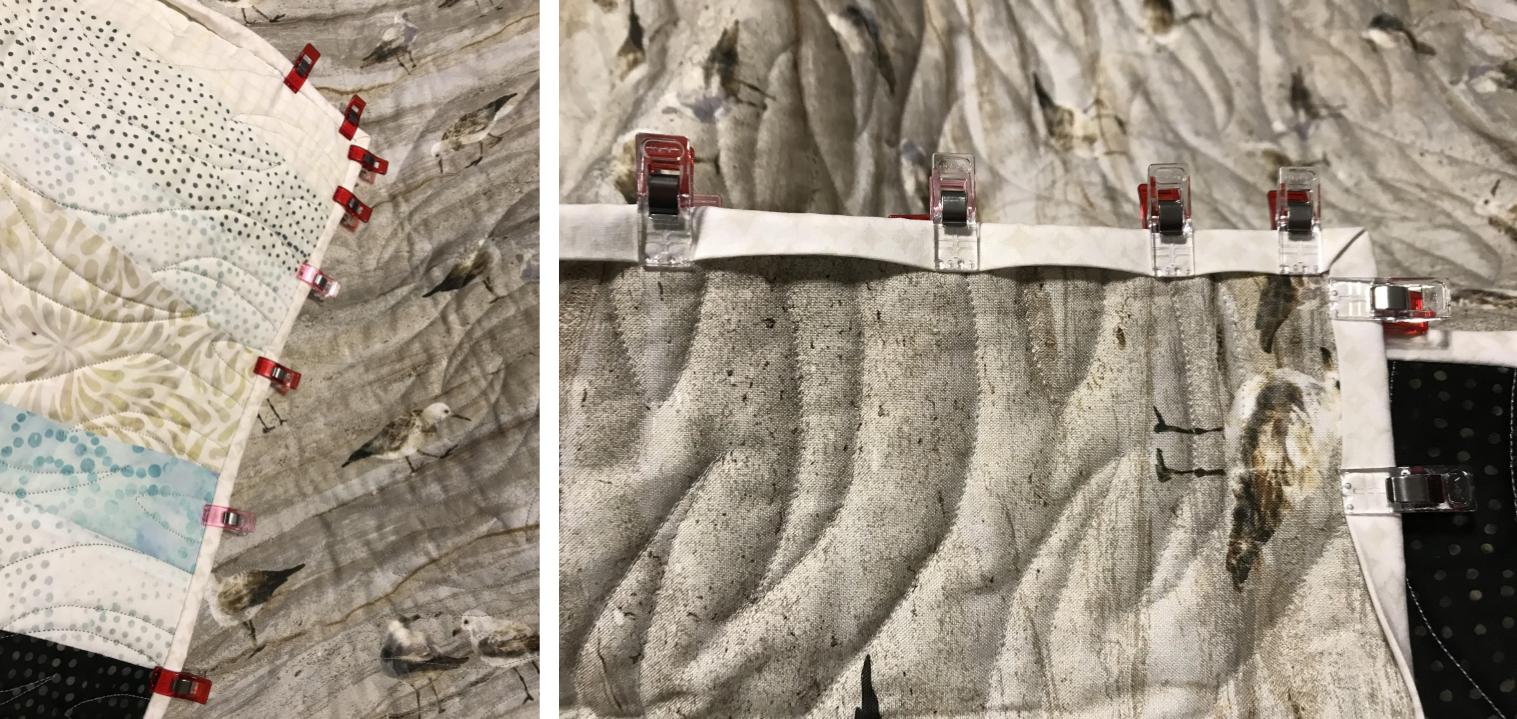
After the binding was attached to the front of the quilt, I turned the folded edge to the back and clipped in place.
Finish Binding – Stitch in the Ditch Method
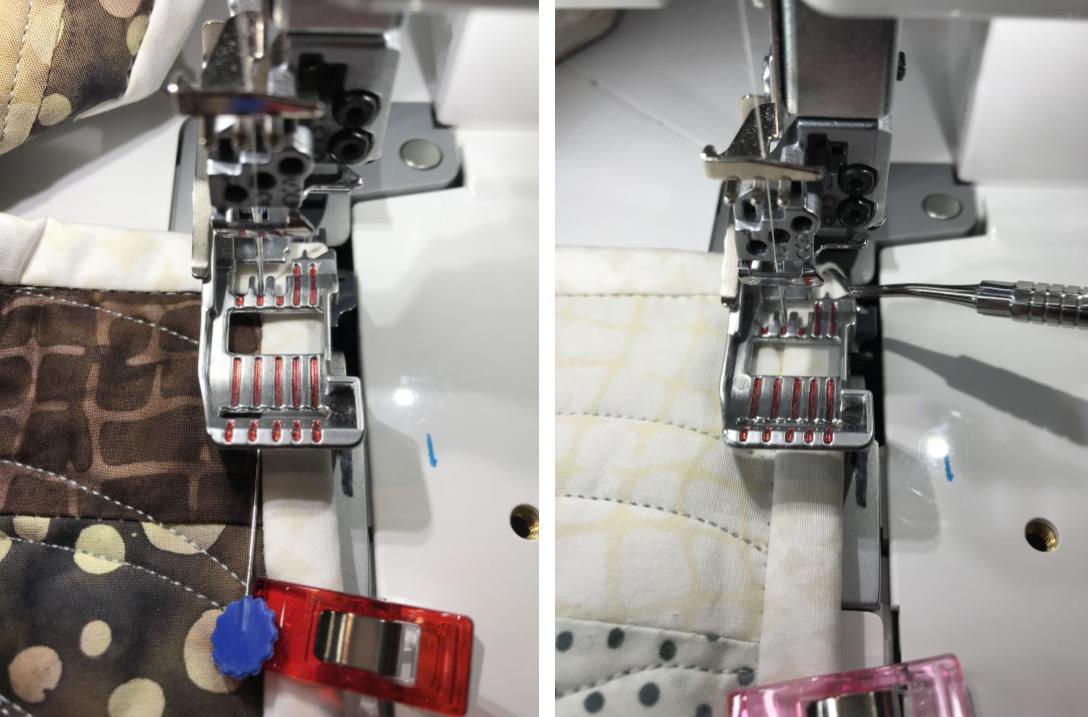
The last step of binding a quilt is stitching down the folded edge of the binding on the front or back of the quilt. It can be stitched by hand or by machine. I completed this last step of my quilt binding by serger, using a chain stitch and the “stitch in the ditch” method from the front side of My Happy Place Quilt. For the best visibility of the “ditch” between the binding and the quilt, I used my open toe foot and the center chain needle position.
You do have to turn your corners just a little bit differently with a chain stitch. When you get to the corner, stop with your needle down in the fabric. Then turn the hand wheel until the eye of the needle just peeks out above the fabric.
Next lift the presser foot and carefully rotate your fabric counter clockwise. Once positioned, start serging again. You may need to use a stiletto or other tool to gently pull or push on the fabric to keep the bulky corner from getting stuck after the turn. I used a pin to hold the binding in place near the corner and removed it after I took a few stitches, since wonder clips are too bulky to use close to the corner.
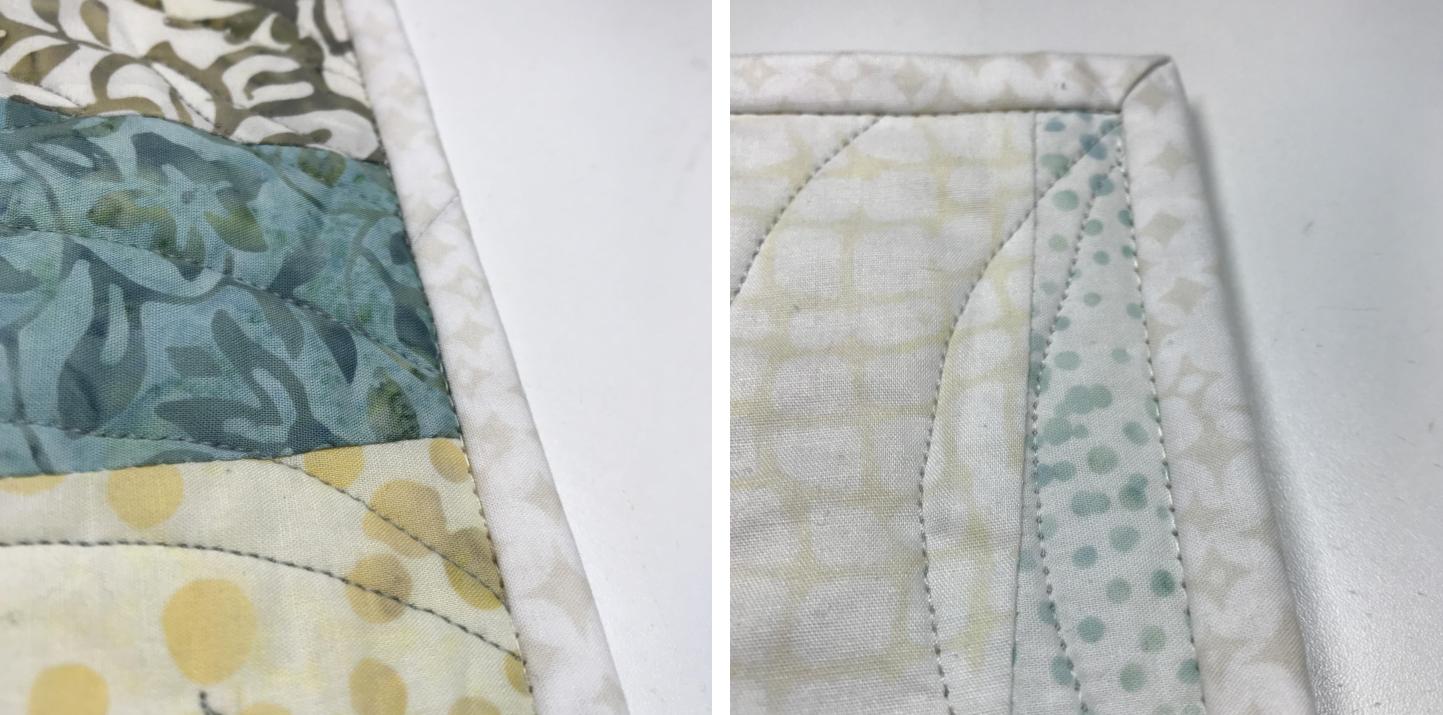
Here’s a view of the chain stitch in the ditch from the right side of the quilt.
Here’s a close up of the chain stitch on the binding on the back side of the quilt.
Tips for Serging with a Chain Stitch
When piecing my quilts with a chain stitch, I like to trim the thread chain tails to about an inch past the edge of the fabric. The extra inch of thread gives me a little wiggle room, just in case the chain starts to unravel as it is handled.
If you need some assistance with the mechanics of serging with a chain stitch, check out my tutorial: Tips for Serging with a Chain Stitch athttps://overtheedge.blog/tutorials/tips-for-serging-with-a-chain-stitch/. In the tutorial I share tips on how to start and end a seam, how to secure the ends of the seam, and how to easily remove a chain stitched seam.
How to Serge a Quilt with a Chain Stitch
I hope you enjoyed learning about My Happy Place Quilt and how to serge a quilt with a serger chain stitch.
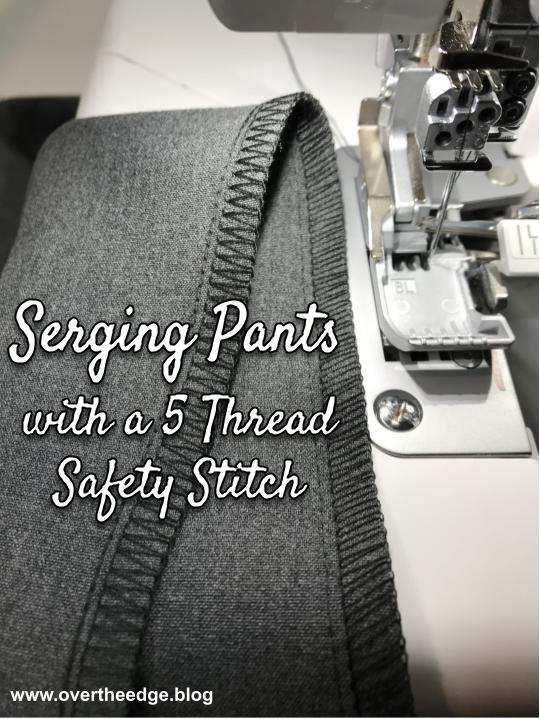
Serging pants with a 5 thread safety stitch might be one of my favorite new uses for my Baby Lock Evolution serger. This stitch combines a 2 thread chain stitch with a 3 thread overlock. You need to have a serger capable of both a chain stitch and an overlock stitch to create this stitch.
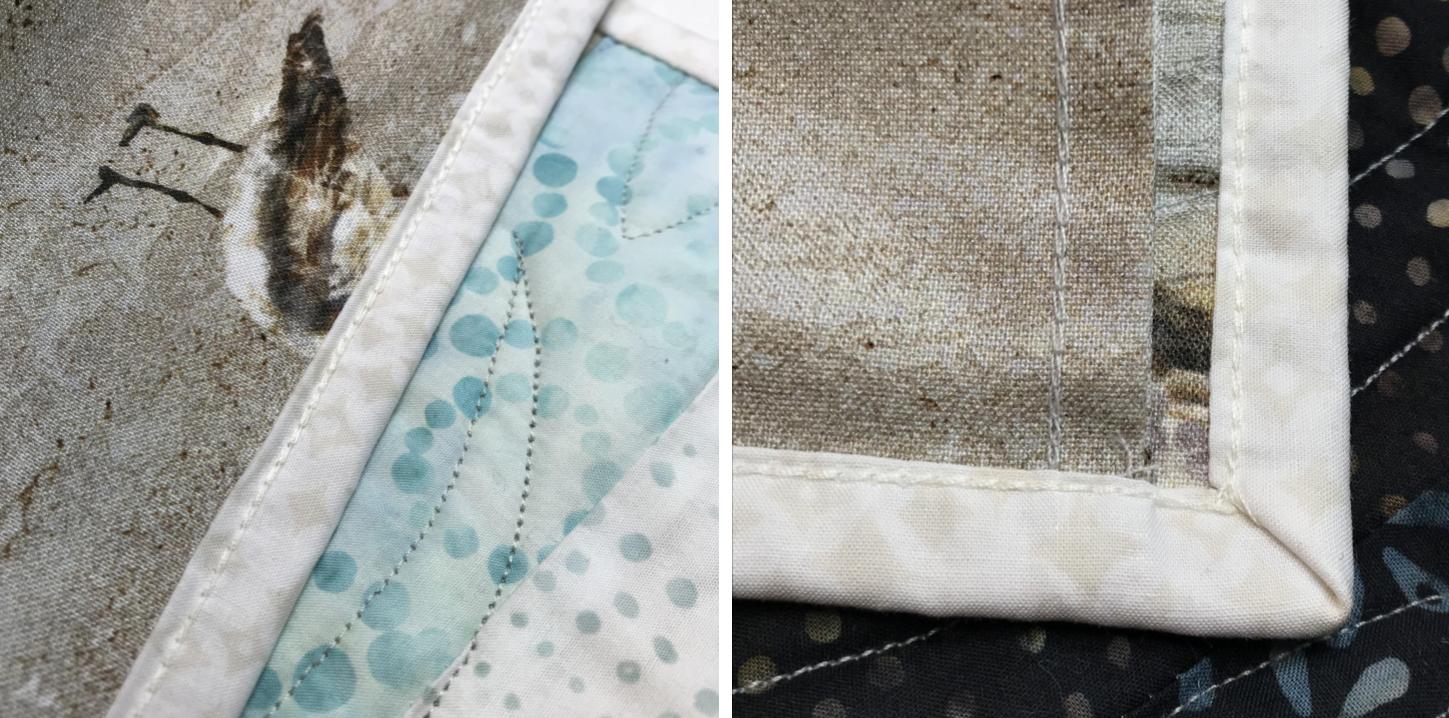
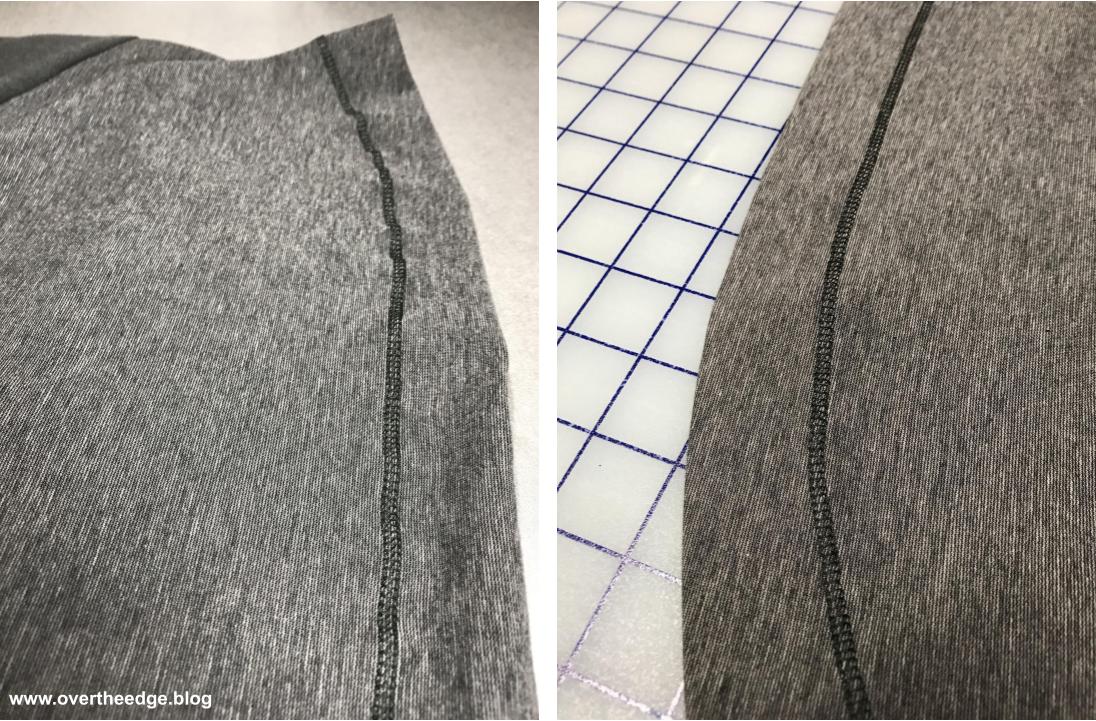
The 5 thread safety stitch makes a strong, secure seam and is commonly used in ready to wear garments like pants. Take a look at the inside seams of some of your store bought pants. The 5 thread safety stitch is probably one of the stitches you will see. The seam in the photo below is from one of my favorite pairs of stretch woven pants (I bought at Kohl’s.)
Serging Pants with a 5 Thread Safety Stitch
Since this seam method is commonly used to construct ready to wear pants, I thought it was about time I gave it a try. This was the first time I have serged a garment with the 5 thread safety stitch. Most of the garments I have serged were made from stretchy knits that I seamed with a 4 thread overlock and hemmed with a coverstitch.
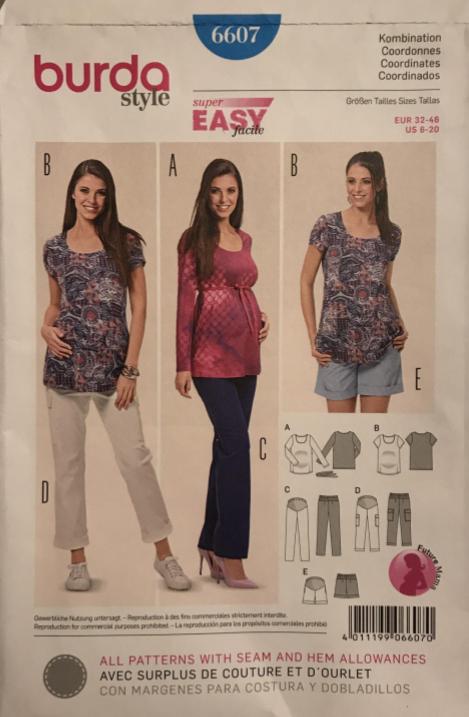
Burda 6607
My project was a pair of maternity pants for my daughter using Burda pattern 6607, View C. The pattern wasn’t specifically written with a serger in mind, but it was easy to adapt. I used a stretch woven fabric with an unknown fiber content for the pants. It was probably a poly blend, maybe with a little wool. I prewashed it in my washing machine in cool water and dried it on low heat in my dryer. It washed up really nicely. I used a rayon lycra blend for the stretch tummy panel.
Prepare Pattern Pieces
I began by altering the pattern pieces to fit my daughters 5’2” frame. Then I cut out all the pieces from my fabric.
Back Darts
I used my sewing machine to make the darts. Everything else was done with the serger.
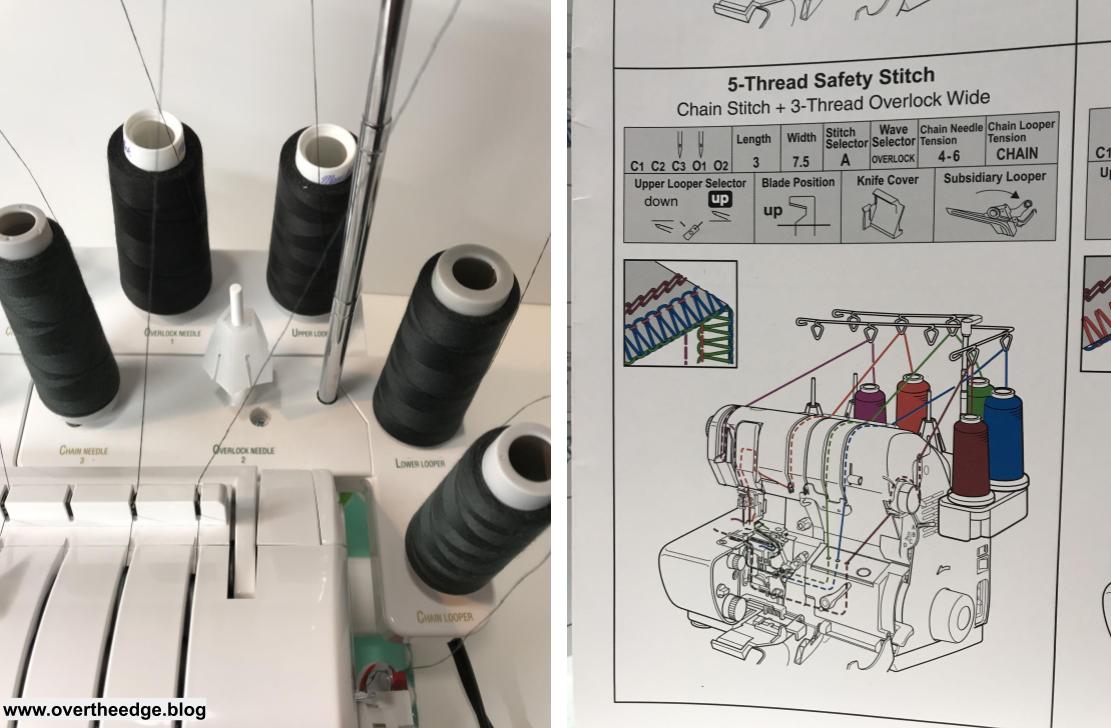
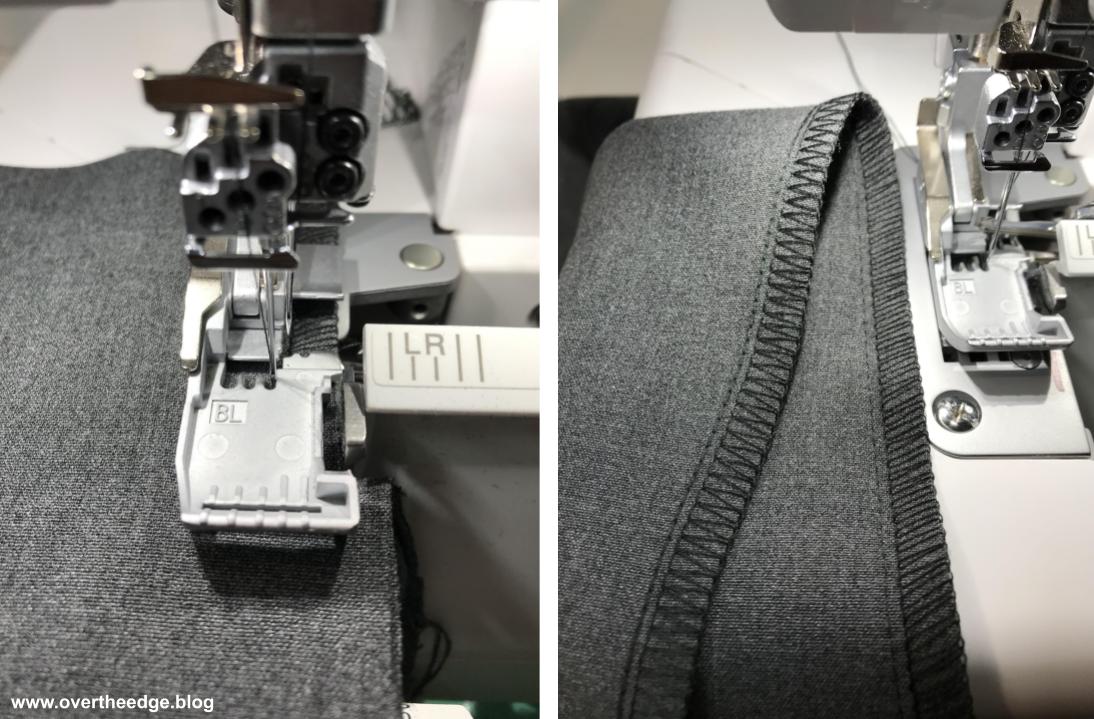
Serger Set Up
I set up my Baby Lock Evolution serger for a 5 thread safety stitch, which is a chain stitch combined with a 3 thread overlock. I used the far right needle (C3) for my chain stitch and the left needle (O1) for the 3 thread wide overlock. This seam finishes about ⅜” wide. Depending on which needle you use, you can also make this stitch ½” or ⅝” wide. I used standard serger cone thread in all positions. Using a scrap of the pant fabric, I tested my stitch. I was happy with the stitch that was produced by using the settings from my quick reference threading guide.
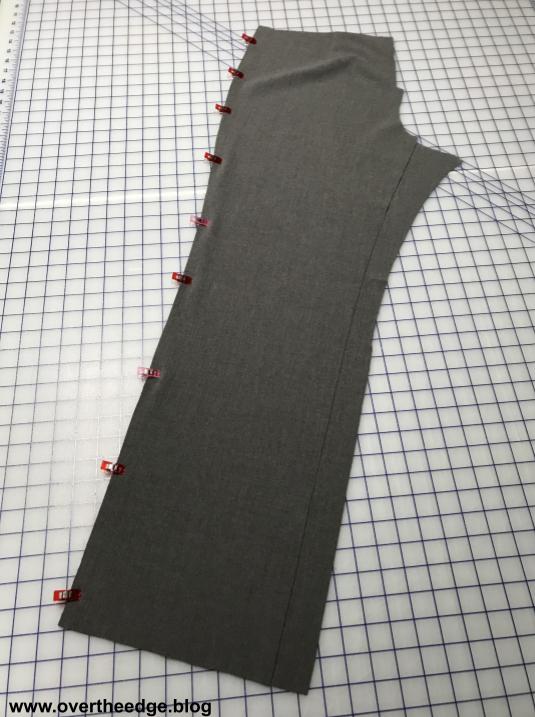
Side Seams
I pinned (with Wonder Clips), then serged each leg front to leg back at the side seams using the 5 thread safety stitch.
Seam Allowances
The pattern calls for a ⅝” seam allowance. The L mark on my knife cover indicates a ⅝” seam allowance from the left overlock needle (O1). But my seam for the 5 thread safety stitch is at the C3 needle position. The C3 needle is ⅛” to the left of the left overlock needle, so I guided the raw edges of my fabric along the first line to the left of the L mark on my knife cover. About a ¼” of the seam allowance was trimmed off with the blades.
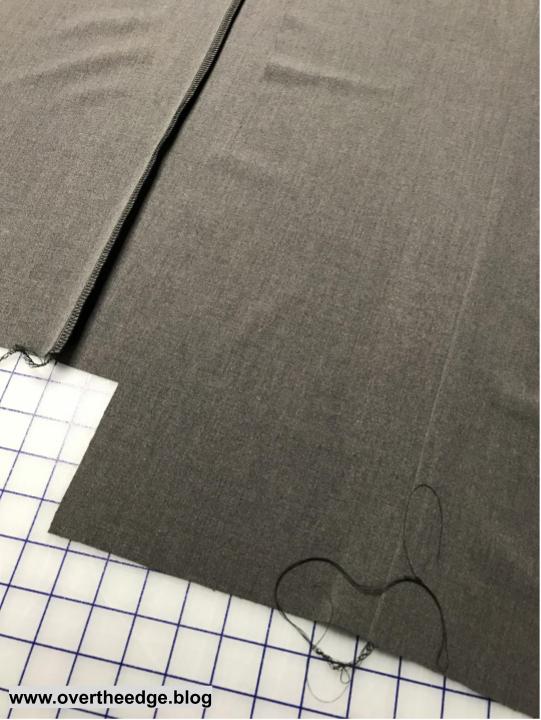
Here is a photo of the serged side seams.
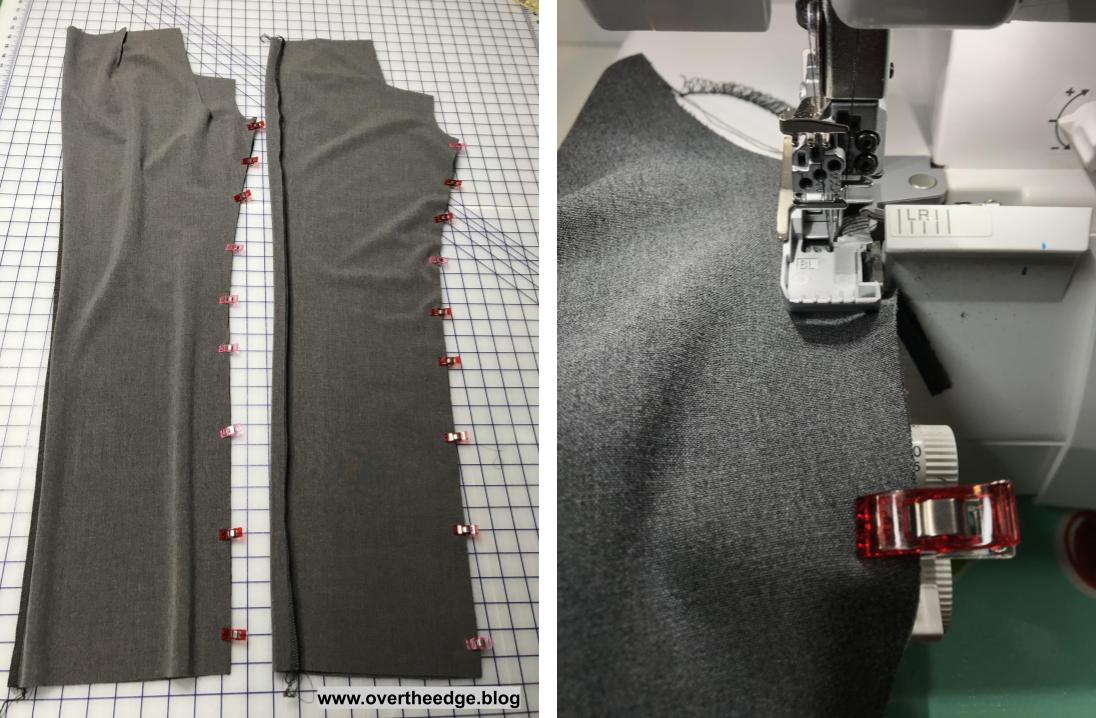
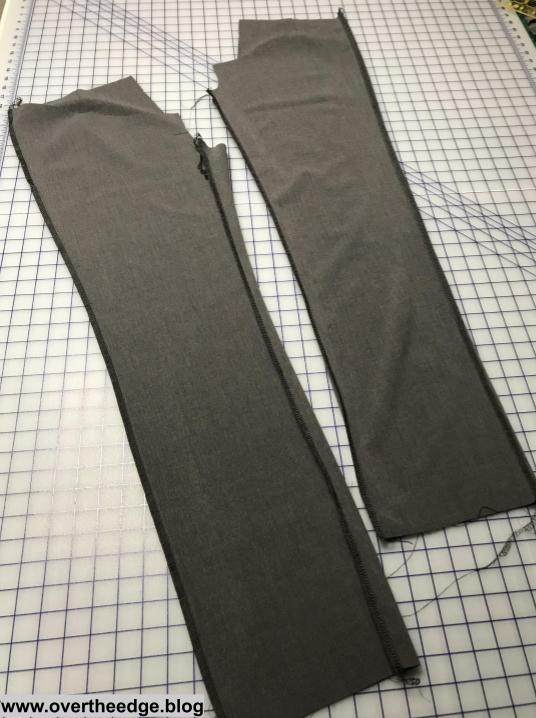
Inner Leg Seams
I pinned, then serged the front to the back of each leg at the inner leg seams, still using the 5 thread safety stitch.
Crotch Seam
I turned one leg right side out and inserted it inside the other. Then I pinned and serged the crotch seam with the 5 thread safety stitch.
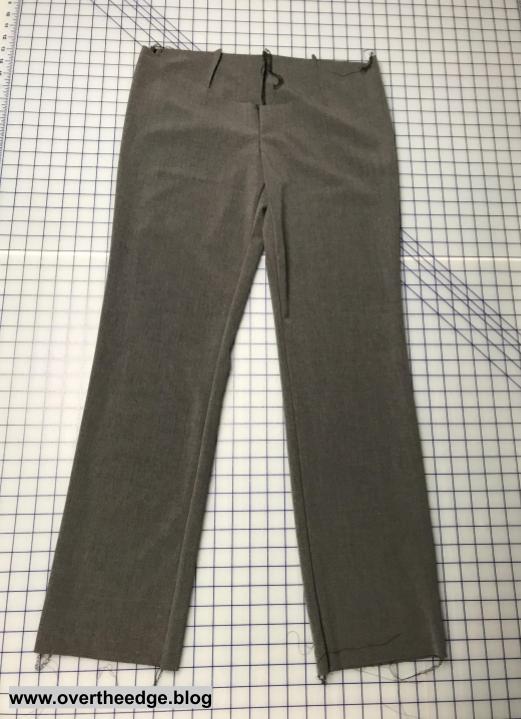
I turned the pants right side out to evaluate my progress.
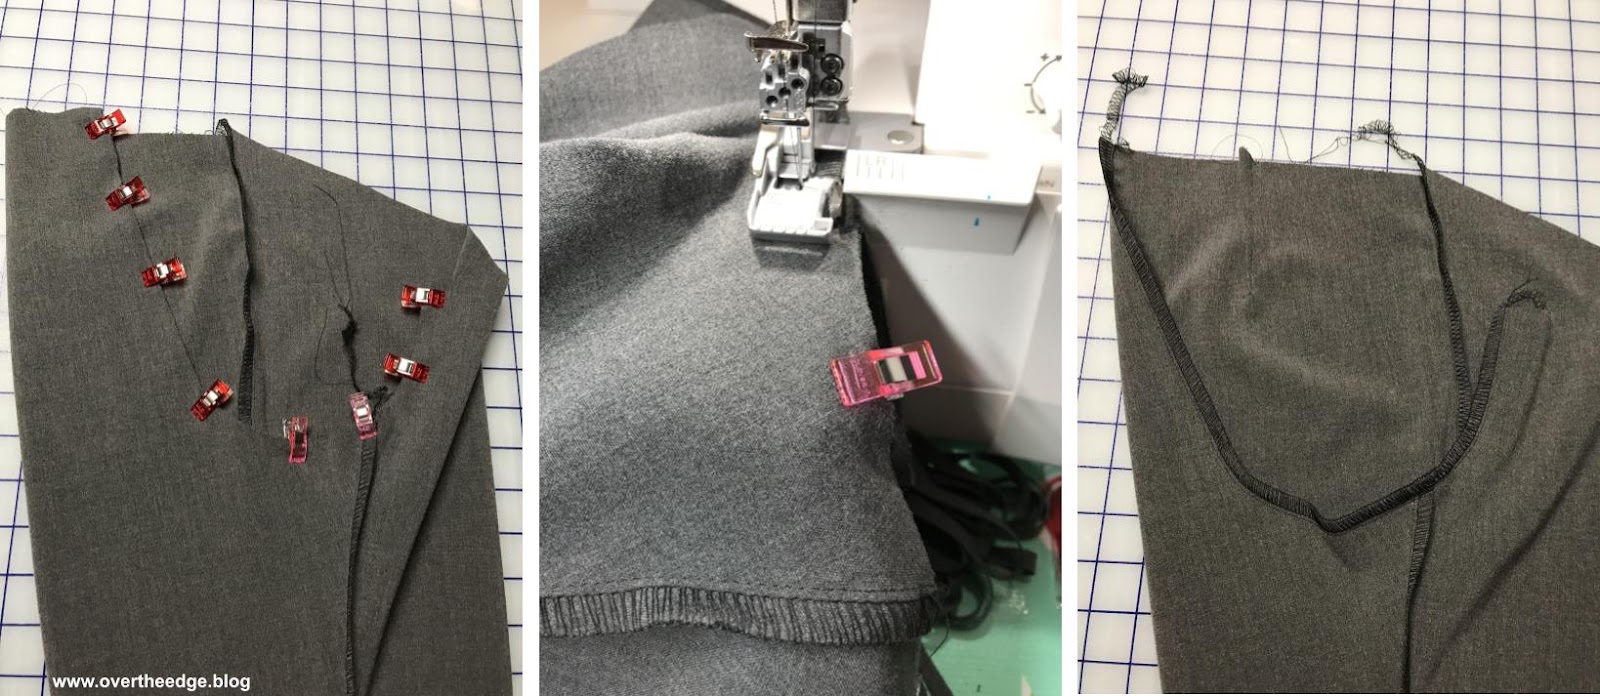
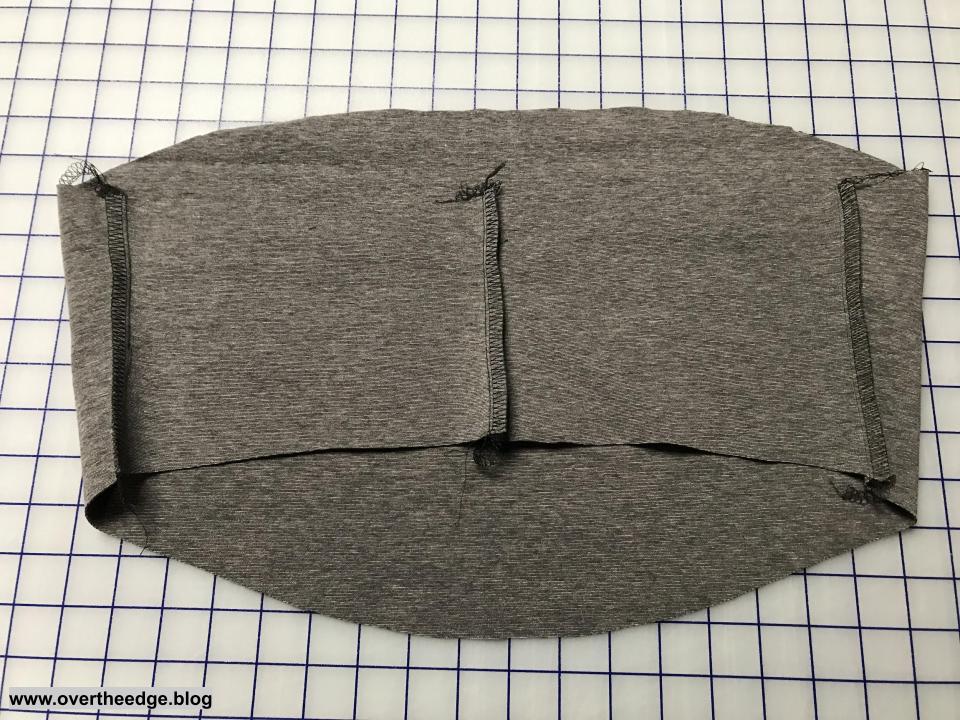
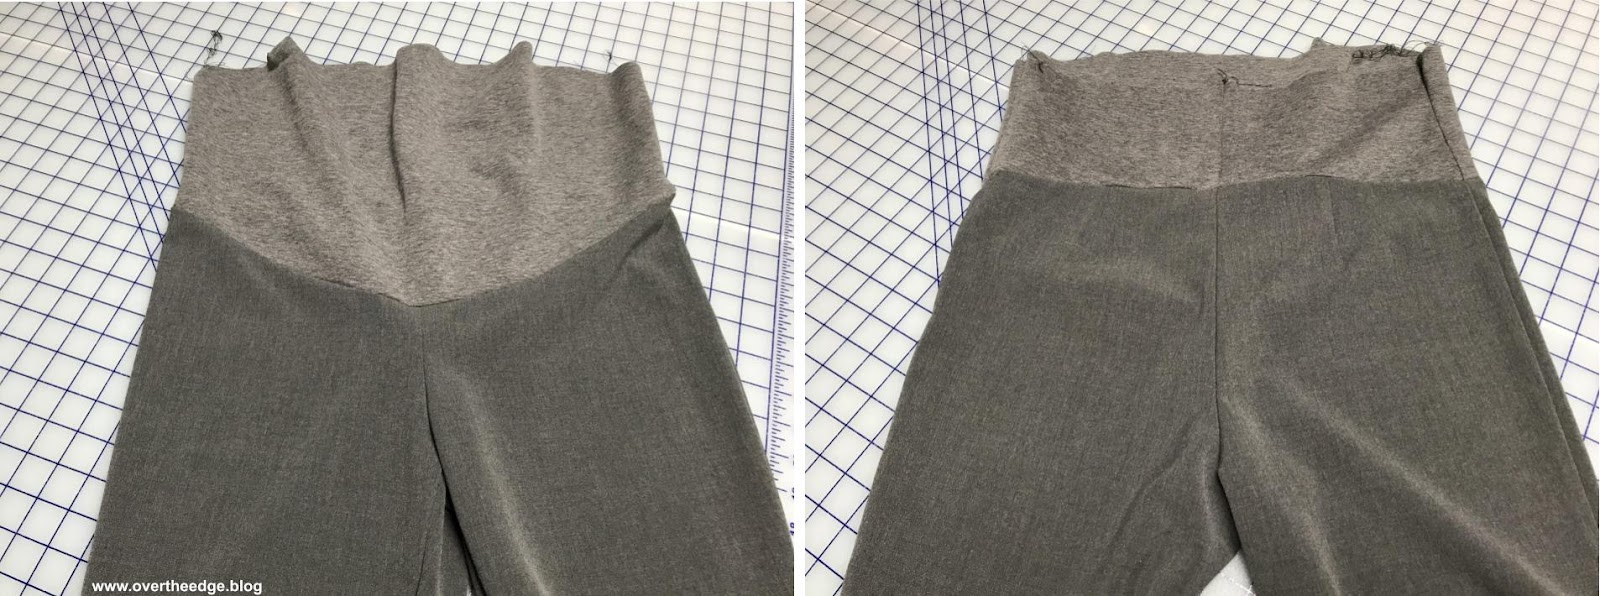
Stretch Tummy Panel
Next I made the stretch panel for the tummy. I serged the back pieces together and then attached them to the front panel piece using the 5 thread safety stitch.
Then I pinned the stretch panel to rest of the pants and serged them together with the 5 thread safety stitch.
Fixing an Oops
At this point I realized I forgot to leave one of the side seams open at the top edge for the waist casing. So I got out the seam ripper and ripped out a few stitches. I secured the end of the seam with a few tacking stitches on my sewing machine, so the chain stitch didn’t pull out.
Waist Casing
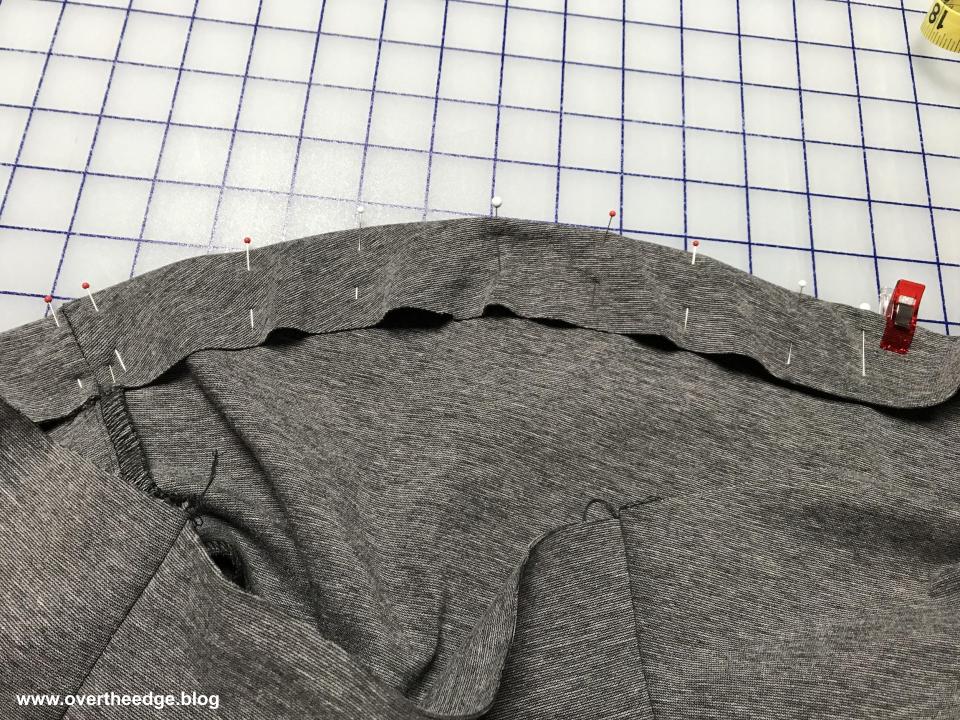
This pattern didn’t have a separate casing piece for the waist. The casing was formed by folding the top edge down, and stitching it in place. Because the edge was curved and the raw edge was wider, the fabric was wavy when I turned the edge under.
In a woven fabric garment I would have run a row of basting stitches along the raw edge and pulled on those stitches to gather the edge and ease it into the garment hem. But the tummy panel was a stretchy knit. So I didn’t ease it in first. I eased it in as I serged using my narrow cover stitch.
Switch Serger to Narrow Cover Stitch
I set up my serger for a narrow cover stitch using standard serger thread and the standard presser foot. Sometimes I use the cover stitch foot for this technique, but this time I chose to leave the standard presser foot on my serger.
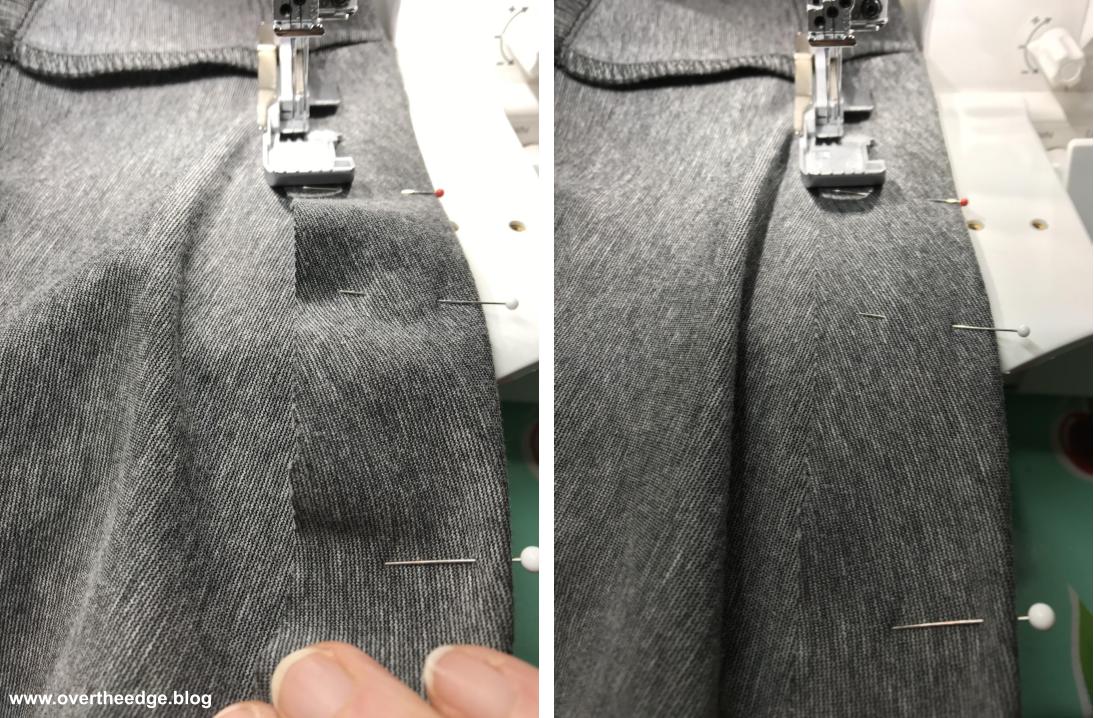
I serged with the wrong side of the casing facing up, so I could see the raw edge of my fabric and make certain I caught the raw edges of the fabric in the stitches. The looper stitch ended up on the right side of my garment and the needle side of the stitch on the inside of the waist casing.
Easing the Curved Edge
To ease in the raw edges on the curved hem, I very gently stretched the casing as I serged. I grasped the casing on both sides of the presser foot and simply stretched it until the raw edge was flat and then serged. Basically I used the same technique to stretch the casing as I do when I apply elastic to the raw edge of a garment with a serger.
Ending the Cover Stitch in the Round
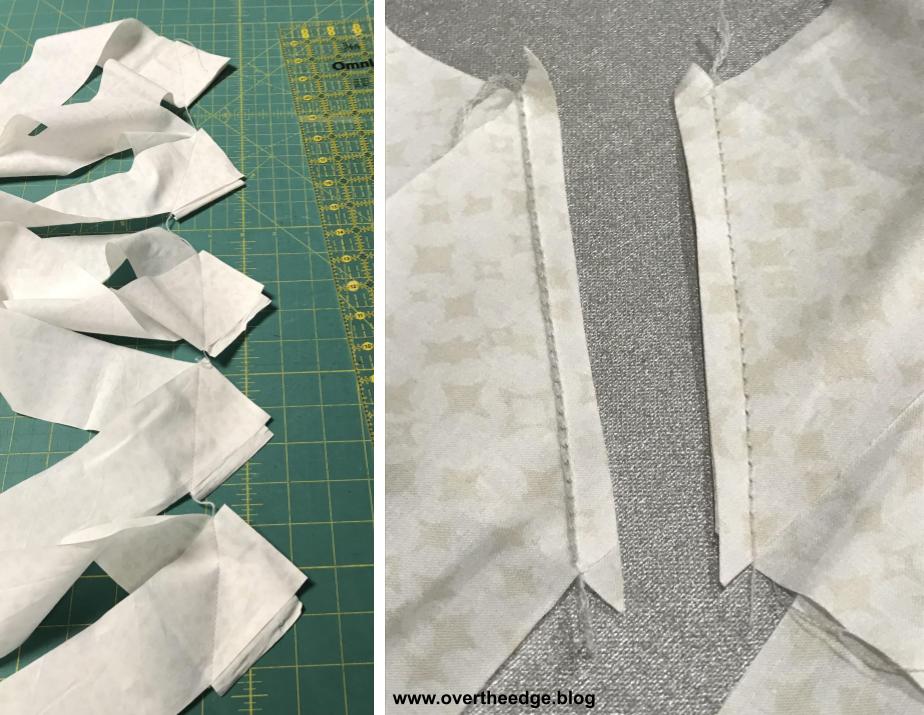
I did my cover stitching of the casing in the round. But because I serged with the wrong side of my fabric up, I couldn’t use my special technique for ending a cover stitch in the round. (see link in resources section at bottom of post.) If I did it this way I would have pulled my needle threads to the right side of my garment and then I would have had to pull them back to the wrong side again with hand sewing! So, I used the standard method to end the cover stitching.
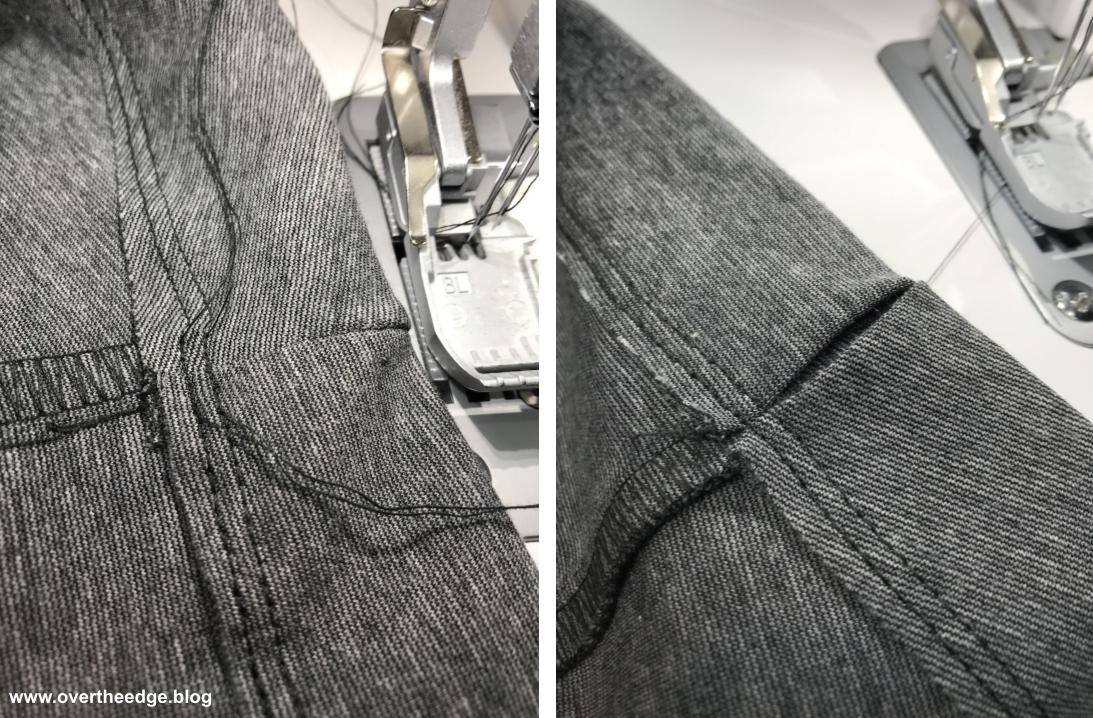
The photo below shows the cover stitch on the casing at the side seams. On the left you will see the overlap at the beginning and end of the cover stitch seam at one side seam, with the needle threads showing on the wrong side of the garment. On the right you will see the opening in the casing at the other side seam which was used to insert elastic.
Standard Method for Ending a Cover Stitch in the Round
Stop serging when you have overlapped your beginning stitches by a few. Turn the handwheel toward you until the needle is at its lowest point. Then turn it backwards until the needle is at its highest point. After doing this the threads should have released from the stitch fingers, so the fabric can be removed. Firmly grab the threads at the base of the fabric and the fabric and remove the fabric from the serger. Be sure to hold the threads firmly or you may inadvertently pull out some of your cover stitch as you pull. Always leave several inches of thread tails at the end of your cover stitch. Don’t trim them short or you may find the cover stitch unraveling easily from the end.
Press Casing and Insert Elastic
The casing hem was a little wavy after stretching and serging it. So I gave it a light press and all the ripples disappeared.
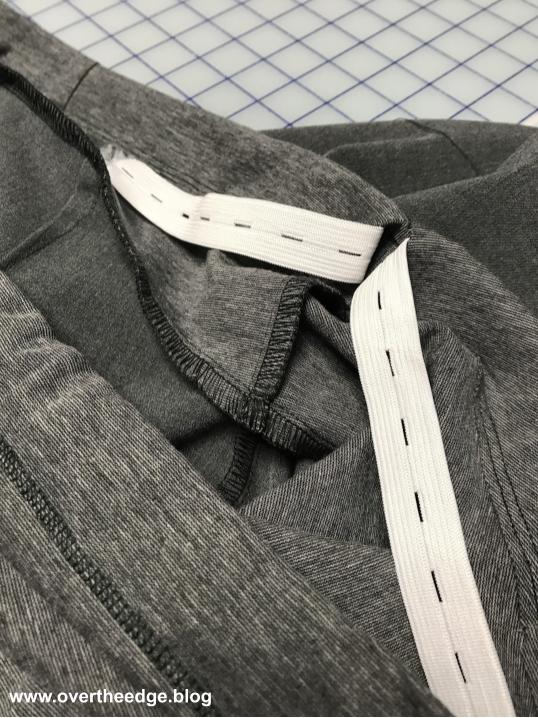
After pressing I inserted the buttonhole elastic into the waistline casing.
Here’s what the finished casing looked like with the elastic inserted.
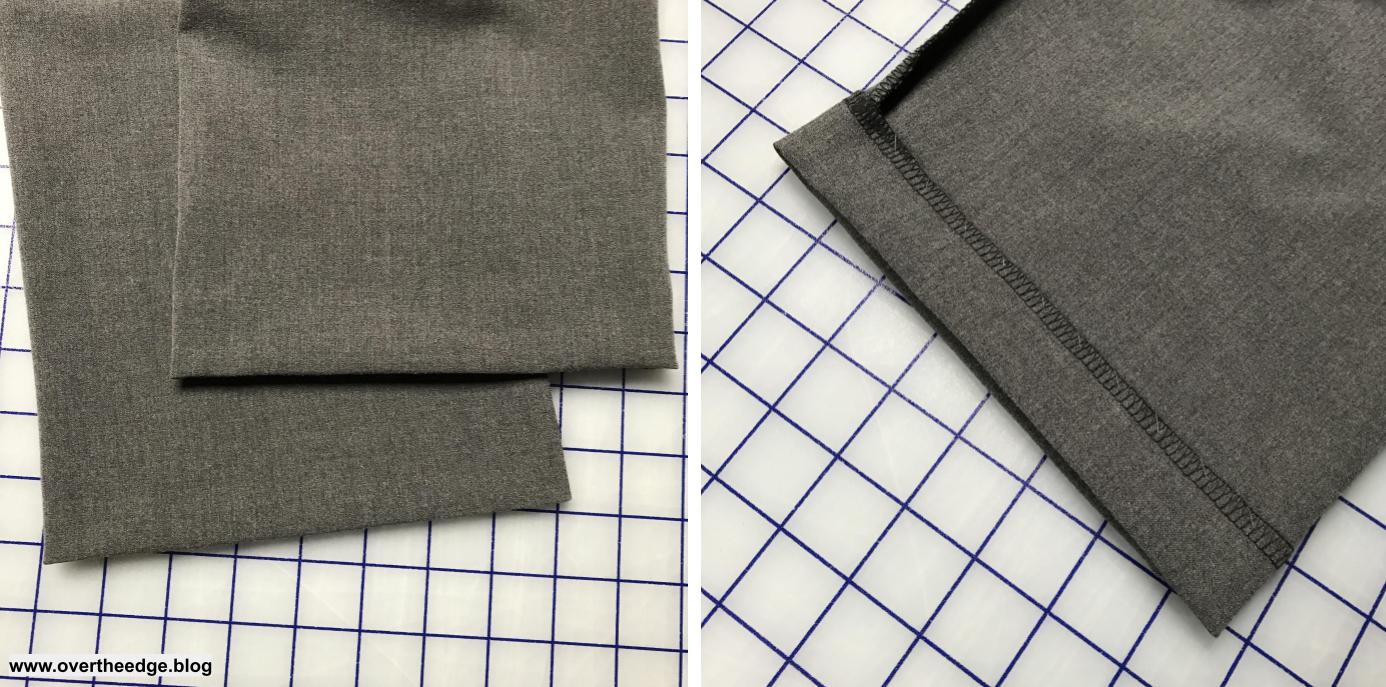
Pant Leg Hems
Last step was to finish the leg hems. Since the fabric in these pants looks “dressy” I thought the pants needed a truly “blind” hem. I switched my serger over to a 4 thread overlock stitch using standard serger thread. I serged the raw edge of the hems to keep them from unraveling. Then, I turned them up an inch and pressed. The last step was to stitch the invisible hem in place by hand.
Completed Pants
Here is a front and back view of the maternity pants. Sorry, the photo isn’t great. These pants did not photograph well without a body in them!
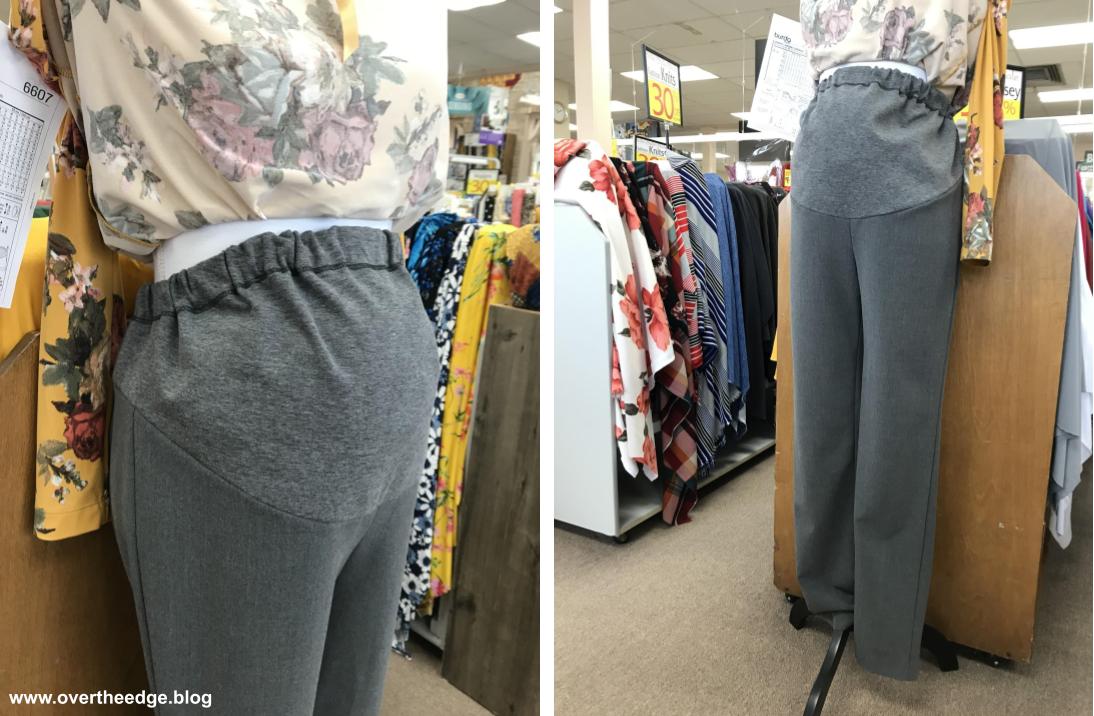
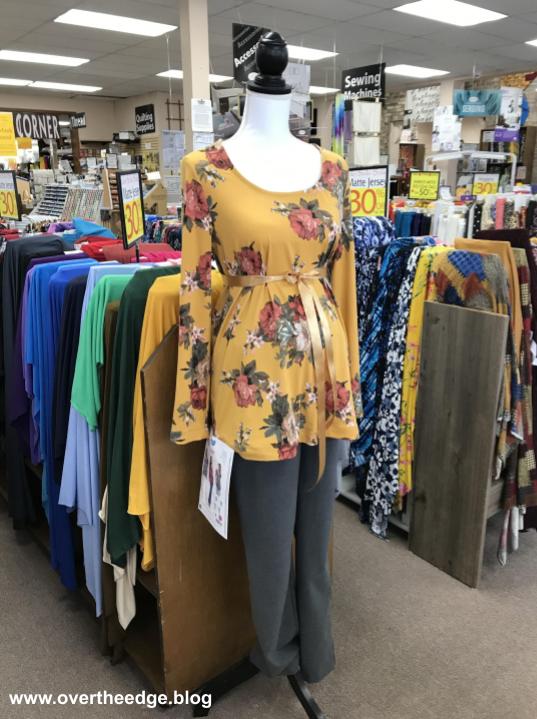
Here are a few photos of the pants on our store mannequin. I lifted the shirt so you could see the tummy panel. The pants are a little baggy on the mannequin (even with the “batting” baby bump added to the mannequin). It’s hard to believe that they will be tight on my daughters belly near the end of her pregnancy!
Serging Pants with a 5 Thread Safety Stitch
I hope you enjoyed learning about my experience serging pants with a 5 thread safety stitch.