What is the secret to successfully binding a quilt or other project using a serger double fold bias binder? Understanding the features and limitations of your tools! My serger double fold bias binder tutorial is packed full of information and tips that I have gathered through experience. I hope you can use what I have learned to make your next binding project a success!
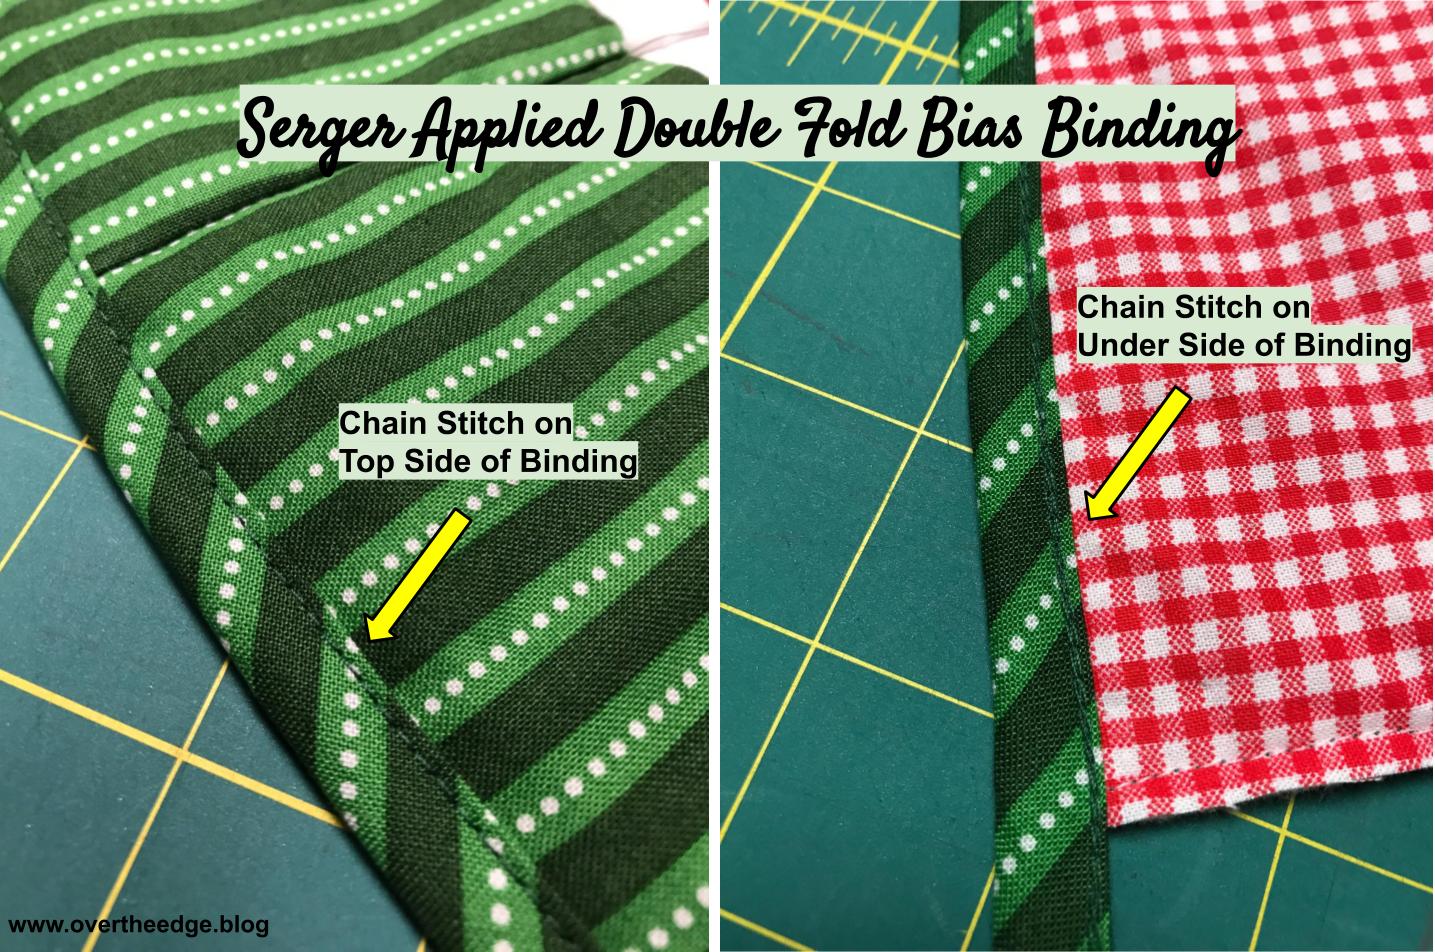
Baby Lock Double Fold Bias Binder for Sergers
This wonderful attachment is available for Babylock’s chain stitch and cover stitch sergers. Those sergers include the Evolve, Evolution, Accolade, Ovation, Triumph and Coverstitch machines. It can also be used with Babylock’s Sashiko machine. It is available in both a 28mm size and a 36mm size. The size corresponds to the approximate size of the bias fabric strip prior to folding it. The 36mm double fold bias binder creates a finished edge that is a little more than ⅜” wide. I like the look of the binding made from the 36 mm double fold bias binder, which is what I am using in this tutorial. Other brands of sergers offer a similar attachment as well.

How to Attach the Double Fold Bias Binder
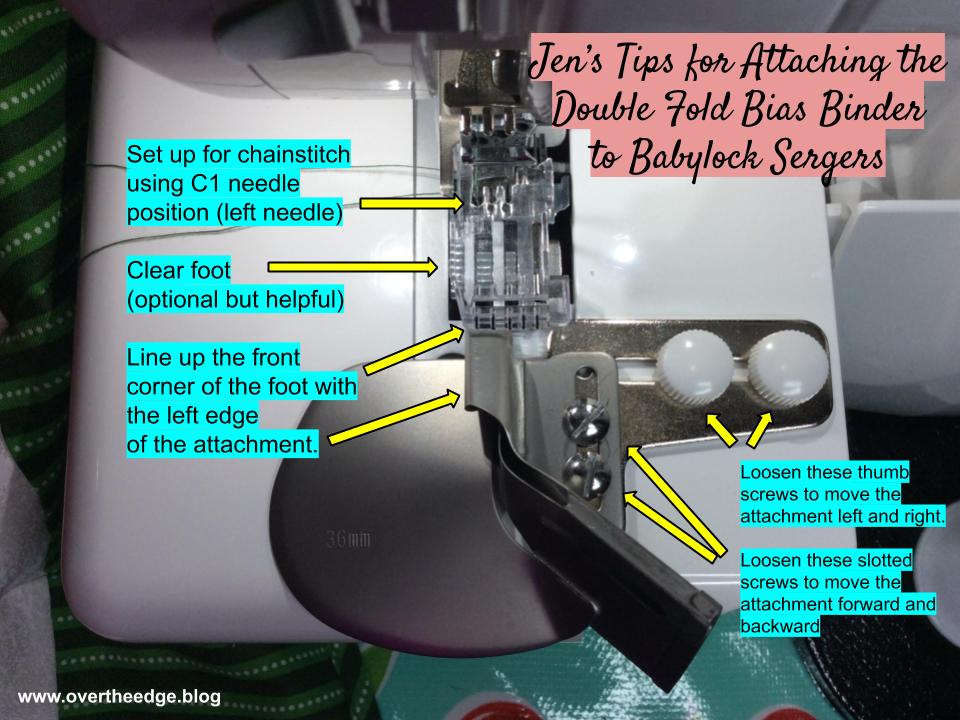
I set my serger up for a chain stitch in the C1 needle position (left needle). The instructions say to use C3 (right needle), but I was much more successful with the C1 needle position. I have a theory for why this worked better for me which I will explain later on. I used the clear foot for this tutorial, so everything could be seen better. Some other feet that could be used with this attachment: a standard foot, a curve foot, a coverstitch foot.
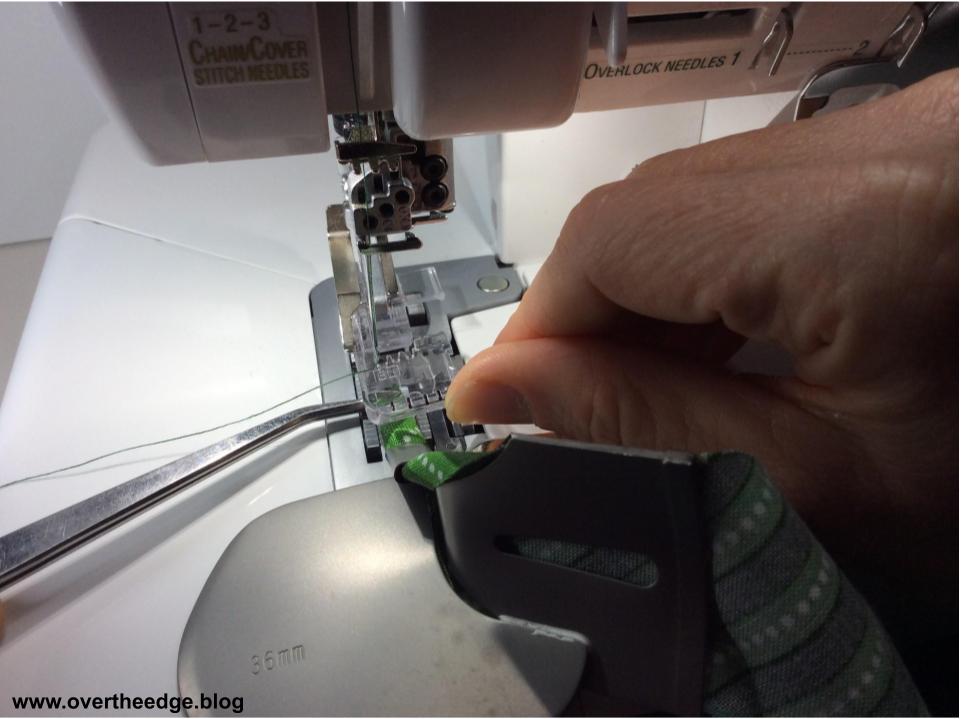
Using the C1 needle position for a chain stitch I experimented with best alignment for the binder attachment. I found the best place to position the binder on my evolution was to line the left edge of the binder to the left front corner of the presser foot (see photo below). That corner of the foot is about ⅛” to the left of where the C1 needle stitches into the fabric. I highlighted the presser foot toe needle marks with a permanent marker to make them easier to see. If you are using a different needle position you will need to line up the attachment in a different position. You need to use both thumb screws or your attachment will shift. Loosen them to slide the attachment right and left. Then tighten them down when you have the attachment positioned where you want it.
You may need to loosen the two slotted screws to position the attachment front to back. You want the attachment to be close to the toe of the foot, so the folded bias doesn’t have a chance to unfold before it gets to the foot. Different feet are different sizes, so you may need to reposition based on the foot you are using.
C1 or C3 Chain Stitch Needle Position?
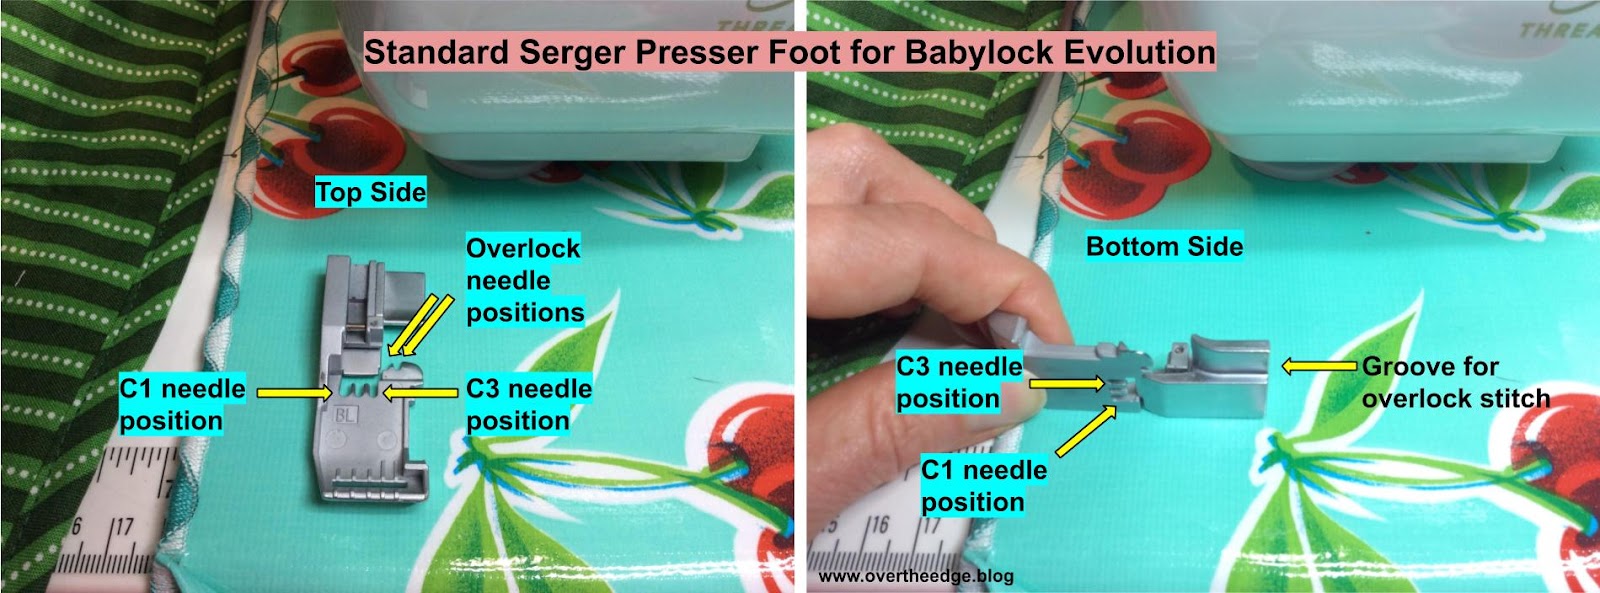
Here is my theory on why the C1 needle position worked better for me than the C3. If you look at the bottom side of the Babylock standard presser foot for my Babylock Evolution, you will see a groove corresponding to where the overlock needles are and where the overlock stitches form. The bottom of the foot that aligns with the coverstitch needle is smooth and flat with no groove.
If you use the C3 needle, part of your bias binding is under the flat part of the foot and part of the bias binding is under the grooved part of the foot. When using the C3 needle, my bias binding tended to migrate toward the groove, causing my needle stitches to stitch off the inner edge of my bias binding, not catching the bias binding in the stitches. When I used the C1 needle position on the left, all of my bias binding was under the flat part of the foot as I stitched and I didn’t have any problem with it migrating toward the groove.
In conclusion, the C1 needle position gave me much better results with applying the binding to my projects using the 36mm attachment. If you have struggled with getting good results in the C3 needle position as the instructions say, try the C1 instead. C1 works great for me!
Prepare Your Bias Fabric Strip
After placing the attachment on the serger, the next step is to prepare your bias fabric strip. I made my bias fabric strip using the continuous method. There are many tutorials on the internet on how to do this, so choose your favorite. I like the tutorial from Sew at Home and I have included a link to it in my Resources section at the bottom of this tutorial.
The instructions for the attachment say to cut the fabric at 1⅜” wide for the 36mm double fold bias binder. I tried this and it seemed that the back side wasn’t quite long enough and didn’t always catch in the chain stitch. So I increased my bias fabric strip width by ⅛” to 1½”. The width of 1½” seems to work a lot better for binding my quilts and other projects.
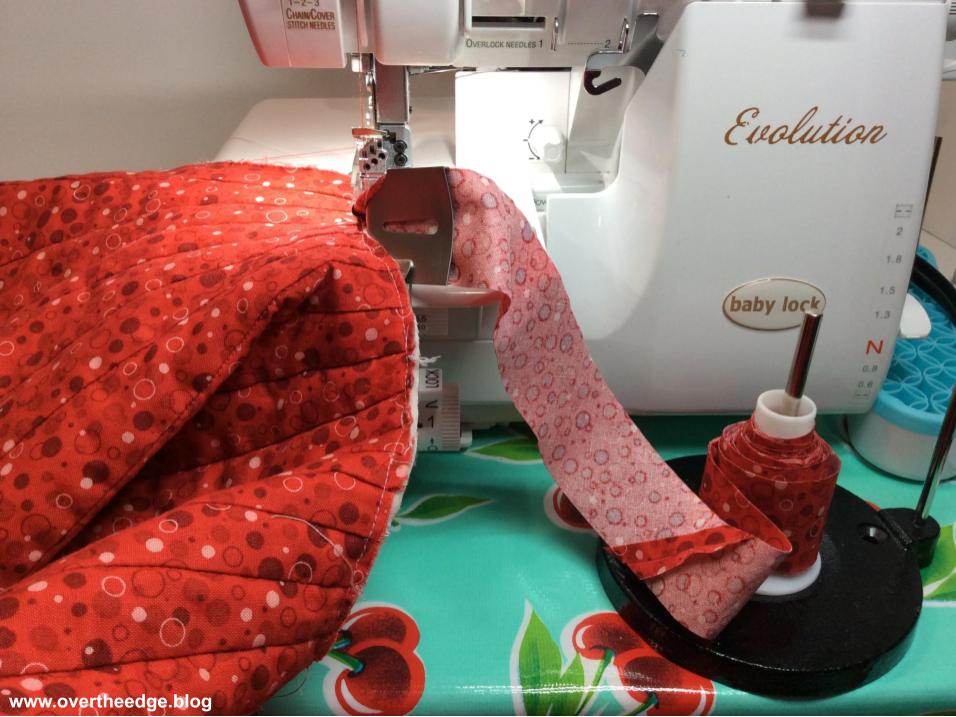
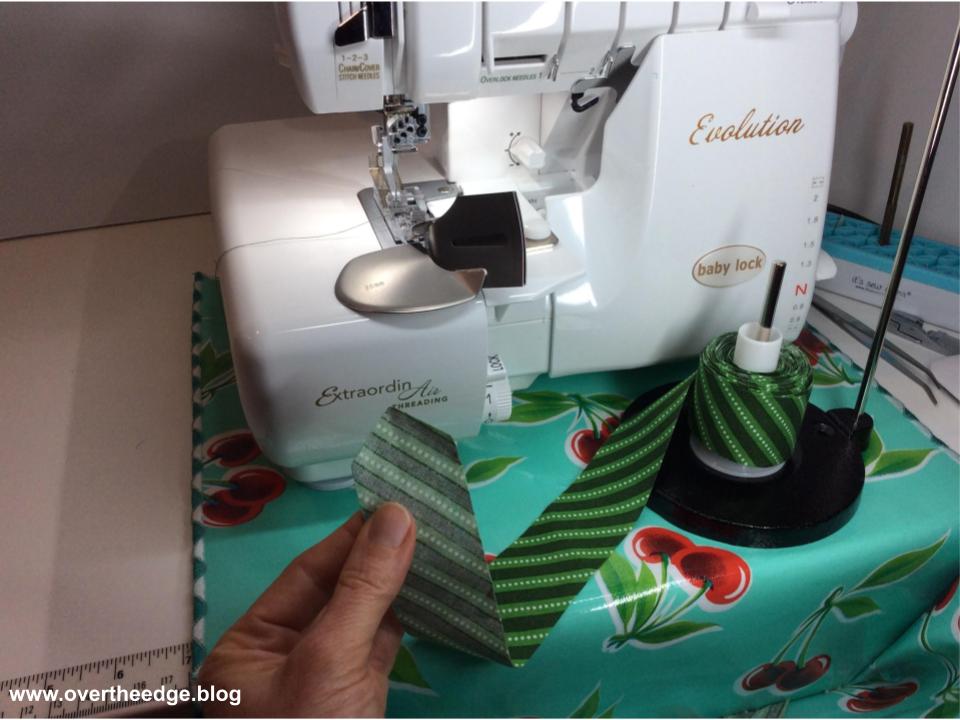
After I created the long bias strip, I needed a way to make it easier to handle and use. Here’s a helpful tip I developed to make it easier for me to use with the attachment. I rolled my bias fabric strip onto an empty serger thread spool/cone like a spool of ribbon. My empty spool was from the Gutermann Toldi Lock brand, which is like Maxi Lock Stretch, Madeira Aero Flock or YLI Wooly Nylon.

Then I put my spool of bias strip fabric on my stand-alone thread stand (see photos below). My thread stand has a sturdy metal base. I only use the base for this application. This method makes it easy for me to control the fabric. The fabric strip stays neat at my serger work station, and it reels off the spool easily as I am serging.
Feeding Bias Fabric Strip into the Attachment
Begin by cutting a point into the end of the bias fabric strip, to make it easier to feed into the attachment.
Use tweezers, or the allen wrench for the needles, to push the fabric into the attachment using the slot (see photo). Fabric should be oriented with the wrong side facing you.

If the fabric starts to flip backwards as it enters the folder section of the attachment, simply flip it forward with your finger to help it begin folding.
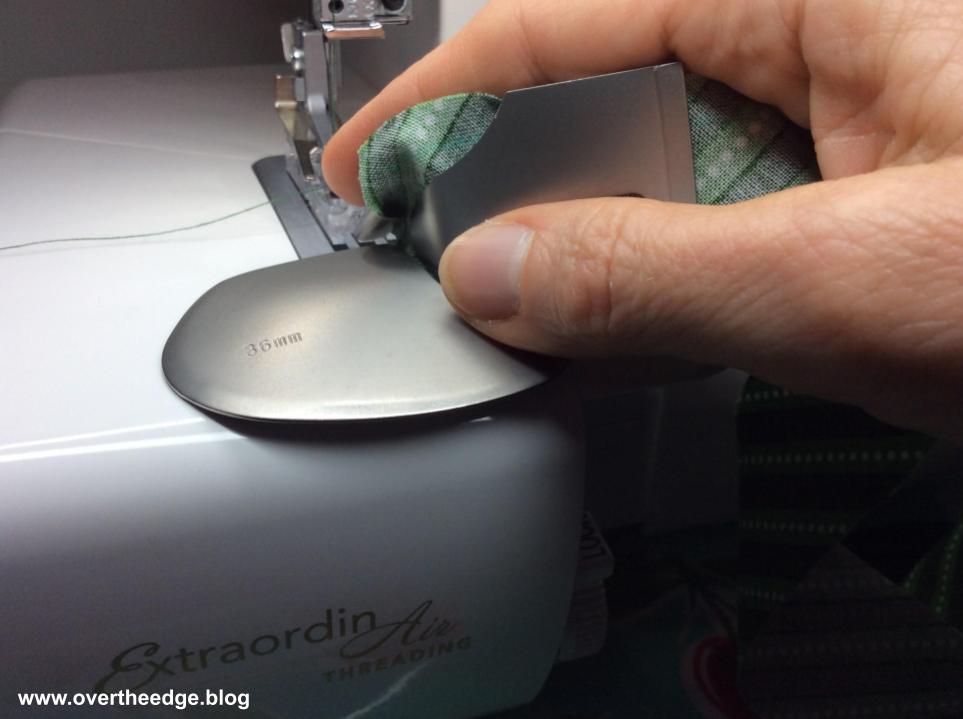
As the fabric begins to fold, you may need to relocate your tweezers to the folder portion of the attachment. Using your tweezers, continue pushing the fabric until it exits the folder tip near the presser foot. See photo below.
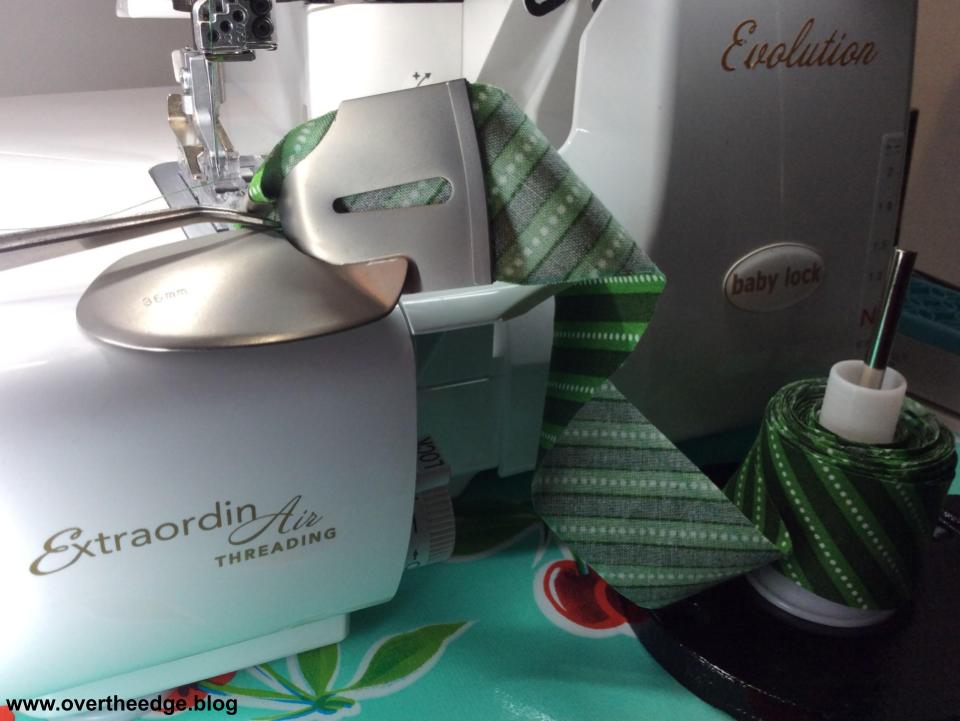
Make certain your presser foot is raised for this part. When the folded fabric strip emerges from the tip of the attachment, grab it with your tweezers using your left hand, lift the toe of the presser foot with your right hand and pull the bias tape under the foot and needle. Lower the presser foot. Take a few turns of the hand wheel to begin stitching and then serge a little bit to test your alignment. You may need to adjust the attachment to the left or right. Once you are happy with the alignment it’s time to apply the double fold bias to your project.
Apply Bias Binding to Your Project
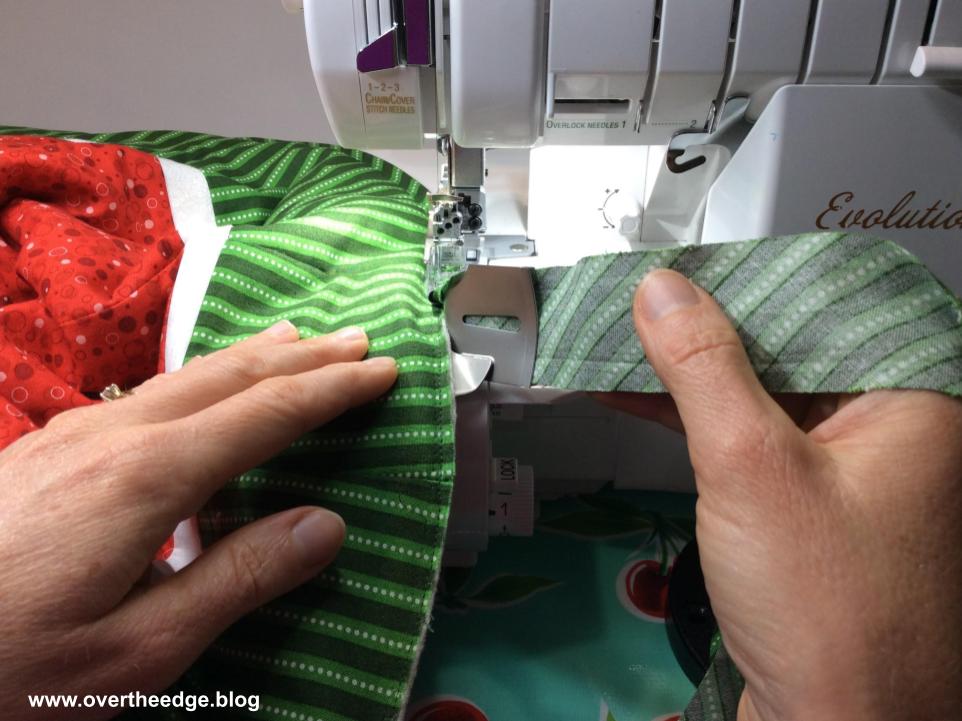
Feed your quilt or project into the attachment from the left, butting the edge of your quilt firmly into the folder part of the attachment on the right. This is important. If the raw edge of your quilt wanders away from the folder, you risk the chance of not catching the quilt in the binding as it feeds through your serger. Push the quilt into the attachment all the way to the presser foot. Once it reaches to the feed teeth, the feed teeth will begin to feed the quilt into the serger.
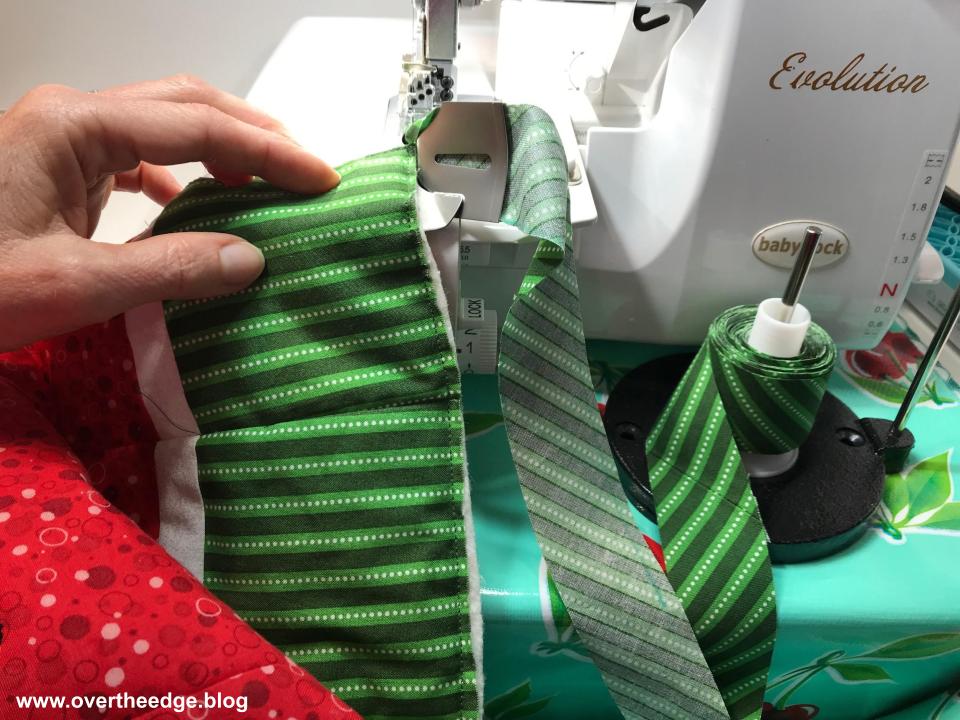
It takes a little practice to get used to feeding your quilt with your left hand AND the bias fabric strip with your right hand. Having the bias strip rolled on the spool and winding off the spool/thread stand really makes this process much easier. The strip feeds more freely into the attachment and you don’t have to worry about it flopping loosely around your table.
Bias fabric strips have seams where the pieces are joined together. These seam allowances should be pressed open to reduce bulk in the binding. Pay attention to your bias strip seam allowances as you serge. They may want to flip over as they go through the attachment, but you don’t want this. You want them to stay open. Use your tweezers to help the seam allowance stay open as it enters the attachment. Your binding will look much better if you do. In the beginning, when I missed this and my seam allowances folded together, I noticed that the bulk caused the binding to shift to the right and caused my needle stitches to get closer to the edge of the binding (and sometimes fall off the binding).

Here’s a photo of my quilt binding in progress.

Finishing Corners and Ends of Bias Binding
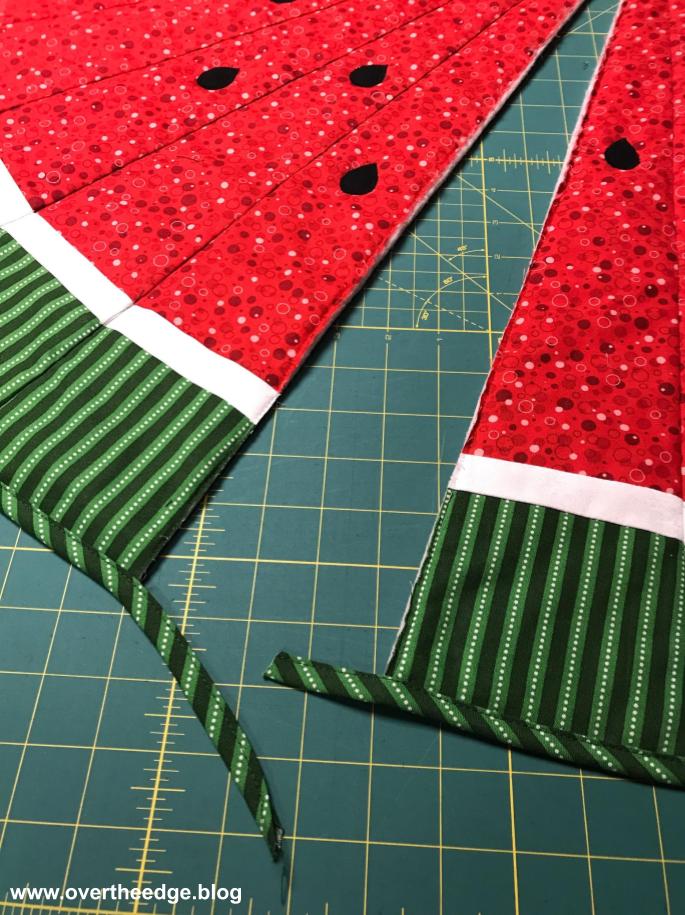
You can not turn corners using the attachment, so you must serge on and serge off at every corner. You must leave extra bias tape at the beginning and end of each edge. The corners can be covered with the bias binding from the other edge, or you can fold the extra binding under at the corner and stitch it down by hand or with your sewing machine. If you need perfectly mitered corners, you will need to choose another method of applying the binding.

Other Tips on Using the Serger Double Fold Bias Binder Attachment
- Always make more bias fabric strips than you think you will need. You will need to use this extra to test the alignment of your attachment, and for the extra needed at the beginning and ending of each edge to finish the corners.
- I find it is easier to get good results with straight edges and gentle curves. Deeper curves take a little more maneuvering and practice. With deeper curves you will need to stop more frequently with the needle down, lift the presser foot and pivot to keep the raw edges encased within the binding.
Jen’s Video
With some techniques it is nice to have both a written tutorial and a video tutorial to help you learn. Using the Serger Double Fold Bias Binder is one of those techniques, so I also made a video to help you learn. Here is the link to the video version of my serger double fold bias binder tutorial, in case you want to check it out: https://overtheedge.blog/how-to-use-a-serger-double-fold-bias-binder/
Jen’s Watermelon Patio Table Topper Quilt
Here is a photo of the finished project that is featured in the Serger Double Fold Bias Binder Tutorial. It’s basically a Christmas tree skirt for summer! The opening in the quilt fits around my patio table umbrella. In the future I hope to create an actual pattern for my design. But for now I will just enjoy my finished quilt while dining outside this summer!


Resources
Babylock Double Fold Bias Binder https://youtu.be/w47_5FtYUis
Serging with a Bias Binder, Superior Threads https://youtu.be/DtOQUfPfRGw
Deb Canham shows how to use the 28 mm double fold bias binder to make pleated facemasks. https://youtu.be/MZtLnW1cZ8c
How to make your own continuous binding. https://sew4home.com/how-to-make-your-own-continuous-bias-binding/