
In this tutorial I share with you my tips for success using a serger plain hemmer attachment on my Baby Lock 8 thread serger. Although I used the 1/4″ plain hemmer, the same tips also apply to the other size plain hemmer attachments. And the Baby Lock plain hemmer attachments are not just for sergers. They can also be used with the Baby Lock Jazz and Sashiko machines.
As the packaging says, the 1/4” plain hemmer attachment helps you to create a perfectly straight ¼” double fold hem on a piece of fabric without any pre-project pressing. It is designed to be used for straight hemming only using a chain stitch or narrow cover stitch. It works with most light to medium weight fabrics. Polar fleece and sweatshirt fleece are too thick to roll properly in the attachment. Be sure to read the instructions for your serger’s plain hemmer attachment.
Pros and Cons of using a Serger Plain Hemmer Attachment
- Pros – The hem does not have to be pressed before serging which saves time and saves fingertips from getting steamed.
- Cons – As with any special foot or attachment, it takes a little practice to perfect your technique.
Tips for Good Hems Using the ¼” Plain Hemmer Attachment
Below you will find each step of the instructions included with the hemmer attachment, along with my tips and notes for success.
“1. Secure the attachment to the table using the guide fixing screws.”
The fixing screws are the ones with the white plastic caps that attach to the table of the serger and are used to adjust the hemmmer to the left and right. These screws help to align the attachment with the needle(s).
I also like to use the two metal slotted screws on the attachment to adjust it forward or backward, aligning it close to the front edge of the presser foot.

“2. Turn under ¼” and press with an iron.”
Hmm. Why do the instructions say to press when the description of the attachment states that no project pre-pressing is required?
Fortunately, you don’t need to pre-press your entire hem. However, it is helpful if you press over the first few inches at the beginning of the hem with an iron before inserting the fabric into the attachment. Since I used a 1/4″ hemmer, I pre-pressed a 1/4″ fold at the beginning of my hem. The pre-pressed fold helps the fabric to roll as you are inserting it into the attachment and makes it easier to get started.
“3. Raise presser foot. Slide fabric into the attachment with the wrong side facing up, turning up and over to the left.”
“4. With a sewing awl, slide folded fabric under presser foot to the needle.”
“5. Lower the presser foot. Turn the handwheel 3-4 times to secure the fabric.”
Pre-pressing the first few inches of the hem makes it easier to turn the fabric up and to the left to get it to fold/roll within the attachment at the beginning. A stiletto or tweezers will also work instead of an awl to help you slide the folded/rolled fabric under the presser foot. Taking a few stitches by manually turning the handwheel helps you to make certain the fabric is feeding properly under the foot before you start serging.
“6. Align the attachment with the needle to sew the fabric edge.”
Hmm. Which part of the attachment should align with the needle? You may find you need to run a few samples to determine the best attachment alignment for the fabric you are using.
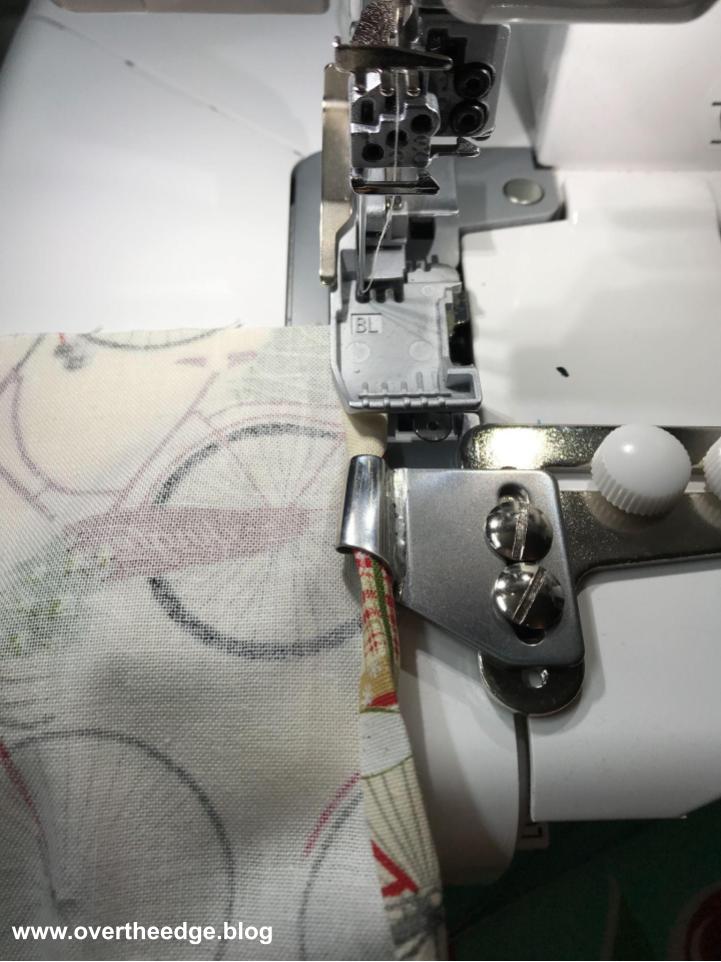
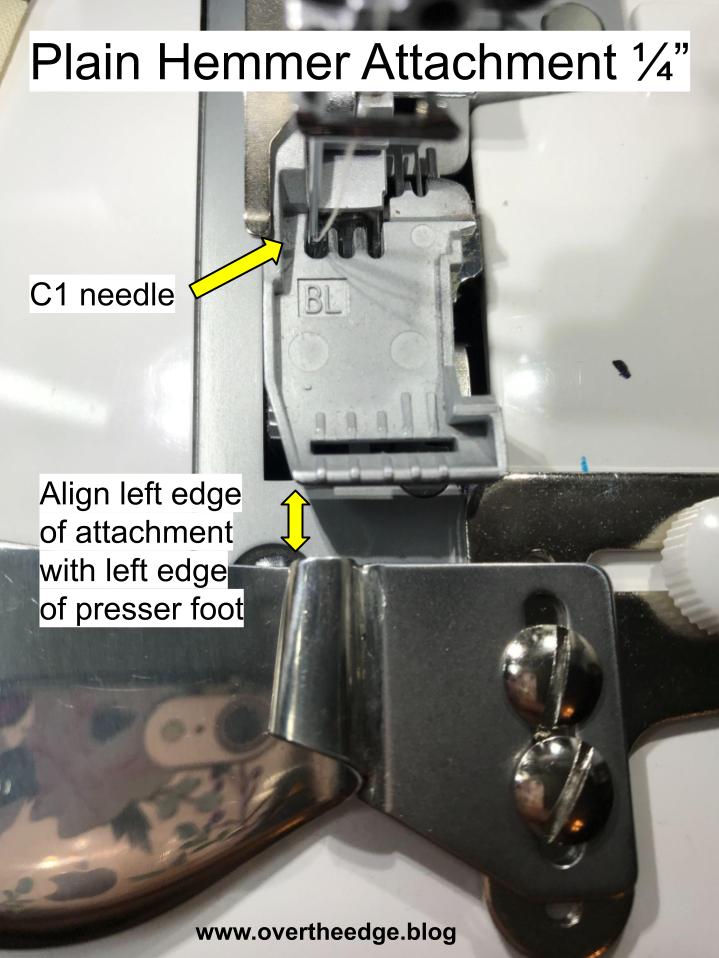
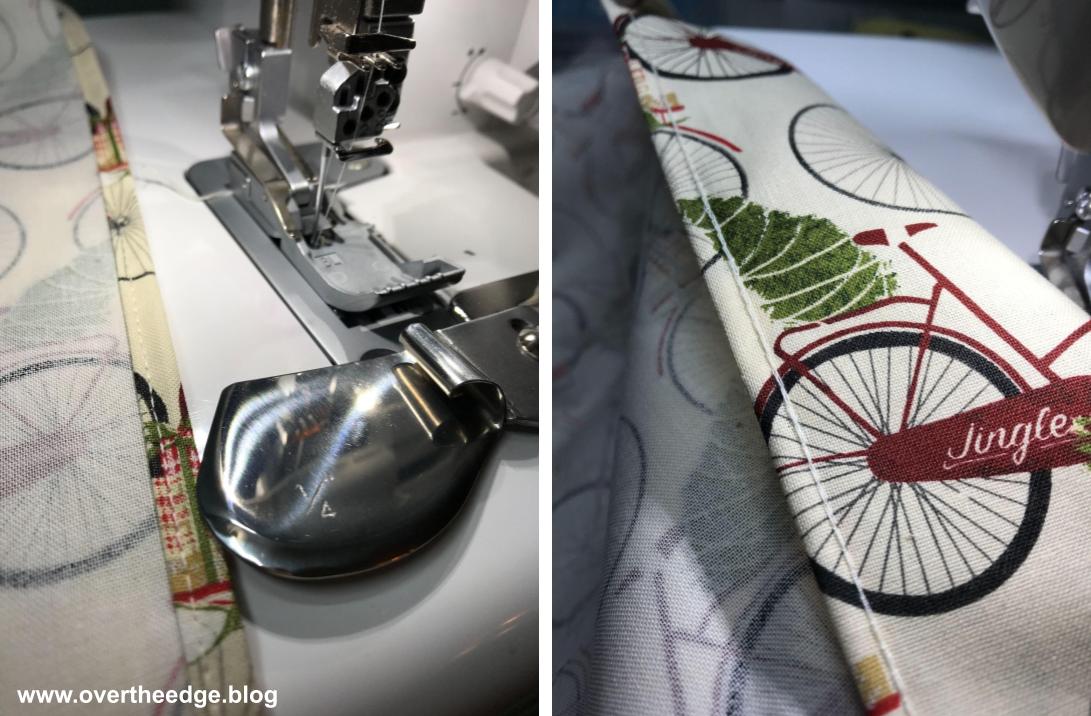
I used the C1 (left) needle and lined the left edge of the attachment with the left edge of the standard presser foot. See photo below. The instructions that came with my plain hemmer attachment say to use the C2 (middle) needle for chain stitch, but I used the C1 (left) needle. It seems to work better for me.
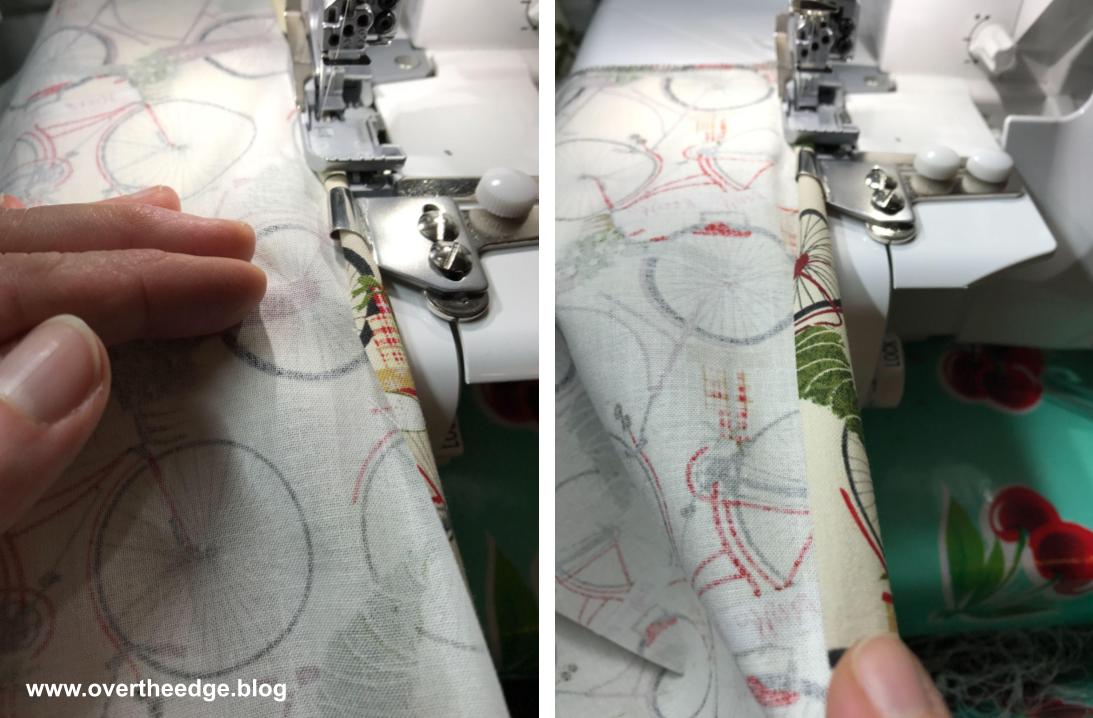
“7. With the right hand, keep hem turned while left hand is guiding folded fabric into the hemmer.”
Yes, this is the part that takes a little practice because each of your hands is acting a little differently. But not that much practice. After a few tries I was able to get the hang of it.
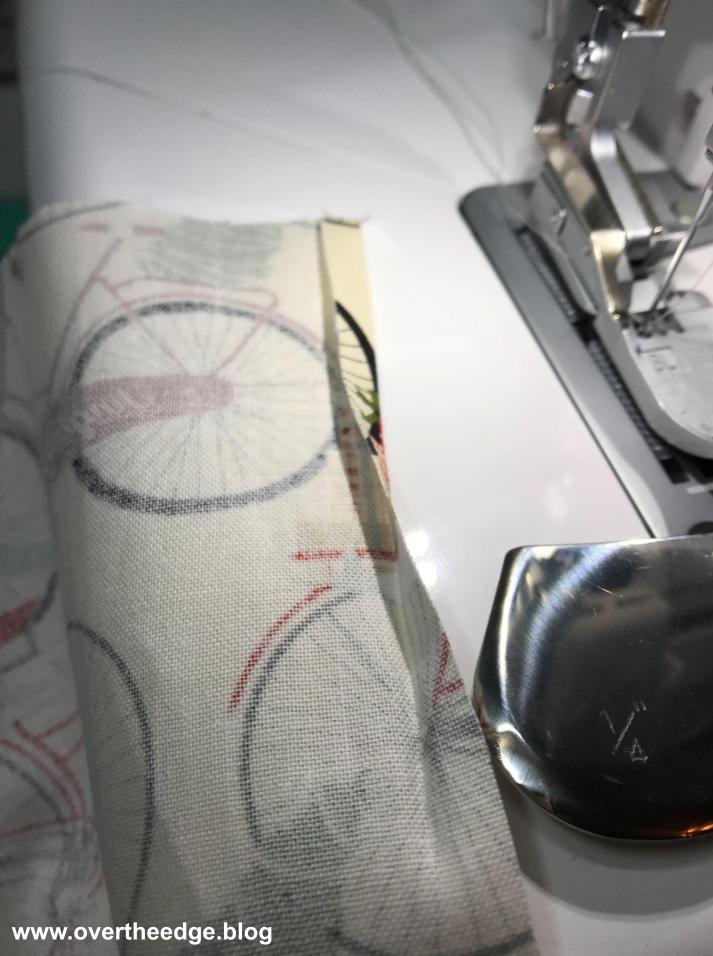
WIth your left hand guide the fabric into the attachment, making certain there is enough fabric entering the attachment to be rolled properly into a double fold hem. I would describe guiding the fabric with the left hand as pushing the fabric from left to right into the attachment. Make certain the fabric doesn’t migrate to the left and start to slip out of the attachment. See photo below.
With your right hand, keep the raw edge of the fabric generously turned (rolled) as it feeds into the attachment. The amount of fabric that should be rolled is about double the hem that is created. So for the 1/4″ hemmer, about 1/2″ of fabric should be folded over to the left before it enters the attachment.
I needed one hand to operate the camera so you will only see one hand in each of the photos below. But while I am serging with the plain hemmer attachment, I am using both hands. :)
Finished Hems Using a Serger Plain Hemmer
The plain hemmer rolls the hem to the top side as it is serged. So you put your fabric into the attachment with the wrong side up. The needle thread will be seen on the back side of your finished project. The chain looper thread will be seen on the right side of your project.
Make a Test Strip
I recommend practicing with some scrap fabric before attempting to hem your actual project. Below is a photo of the test strip I made the first time I used the attachment.
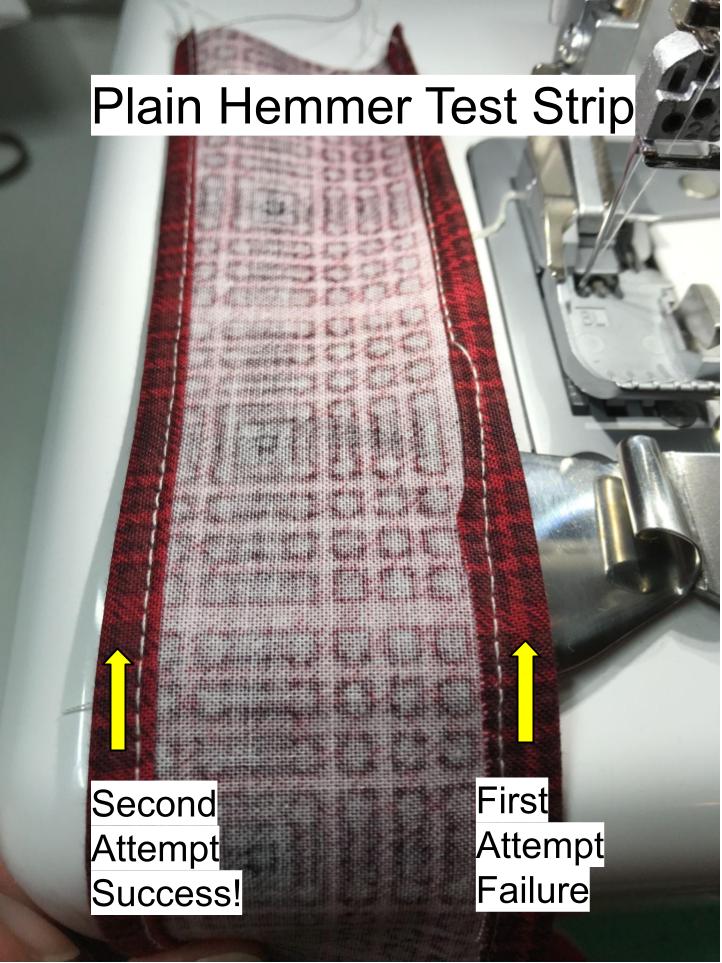
First Attempt – Failure
The finished hem had exposed raw edges that didn’t fold under. What did I do wrong? Hmm. Operator error? Definitely operator error! I did not guide enough fabric into the attachment with my left hand, so the attachment couldn’t fold the raw edges under properly. I also lifted the presser foot to try and reposition the fabric, but my needle was up and so my fabric moved much more than I intended, leaving a big shift in my stitching.
Second Attempt – Success
Much better! The hem looks good. But what did I do differently this time? This time I made sure the fabric didn’t migrate away from the attachment as I serged. And I made certain that I generously turned/rolled the raw edge of the fabric as it entered the attachment.
Tips for Success Using a Serger Plain Hemmer Attachment
I hope these tips help you to serge hems with success using your plain hemmer attachments.

Resources
Link to an apron project that utilized the plain hemmer. https://overtheedge.blog/my-fun-and-festive-gather-together-serger-apron/
https://youtu.be/7iAmHCnCrZU – Baby Lock UK YouTube video on how to use the plain hemmer attachment on 8 thread sergers.