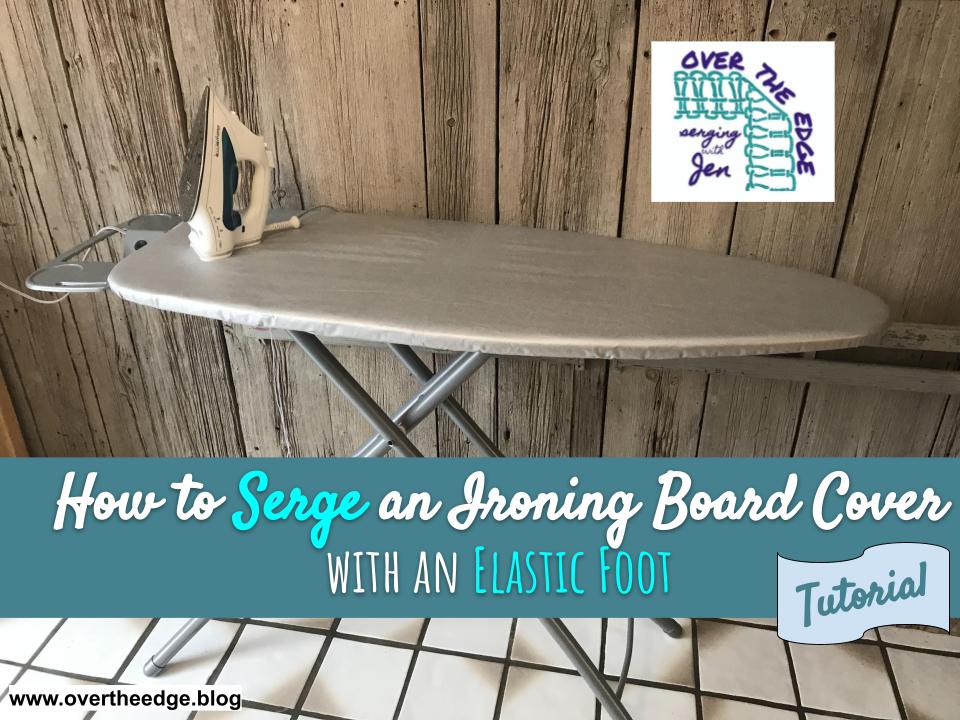

Learn how to serge an ironing board cover quickly and easily using fabric, thin cording and a serger elastic foot.
Supplies Needed to Serge an Ironing Board Cover
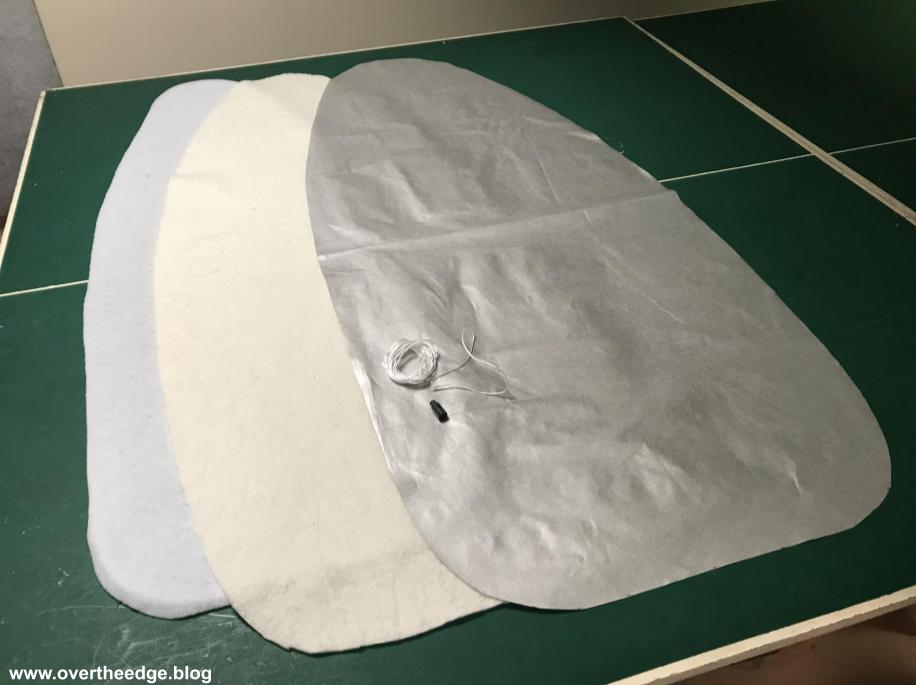
- Old cover from your Ironing board to use as pattern
- Cotton batting or other padding same size or larger than old cover
- New cover material, a few inches larger than your old cover (I used a silver heat resistant utility cloth. It was 60” wide so I needed ⅔ yard to cover my 18”x49” ironing board.)
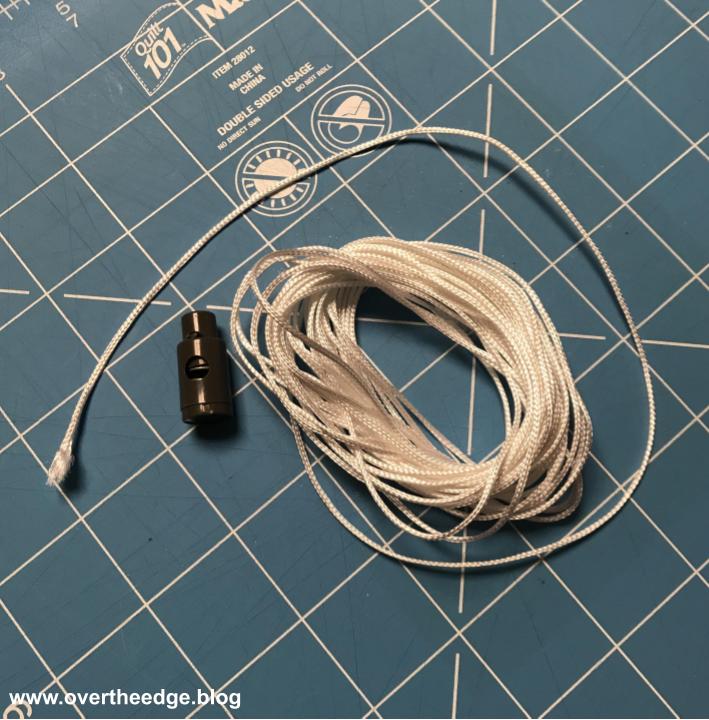
- Thin, strong cord, for gathering and securing new cover (The cord should be a foot or two longer than the outside edge of your old ironing board cover. I used about 4 yards of cord. The cord should be thin enough to fit in the groove of your serger elastic foot.)
- A cord stop – optional (You could simple tie the ends of your cord into a bow to secure.)
- A serger capable of a wide three thread overlock stitch
- A serger elastic foot or other foot capable of guiding thin cord into the overlock stitches
Remove the old Cover and use it as a Pattern
Take off the old cover from your ironing board, flatten it out and use it as a pattern to cut out a new cover. I used a heat resistant silver utility fabric for my cover, but you could use pretty cotton prints as well, or maybe even linen. I wanted my cover to wrap a little more to the underside of my ironing board, so I added 1” all the way around.

You may also need to cut out some new padding/batting using the old ironing board cover as a pattern. I reused the old layer of padding, but it wasn’t quite enough. So I added an additional layer. In my stash I found a leftover piece of cotton batting from a quilt project. It was just large enough to cut out one piece of batting the same size as the old cover.

Prepare to Serge
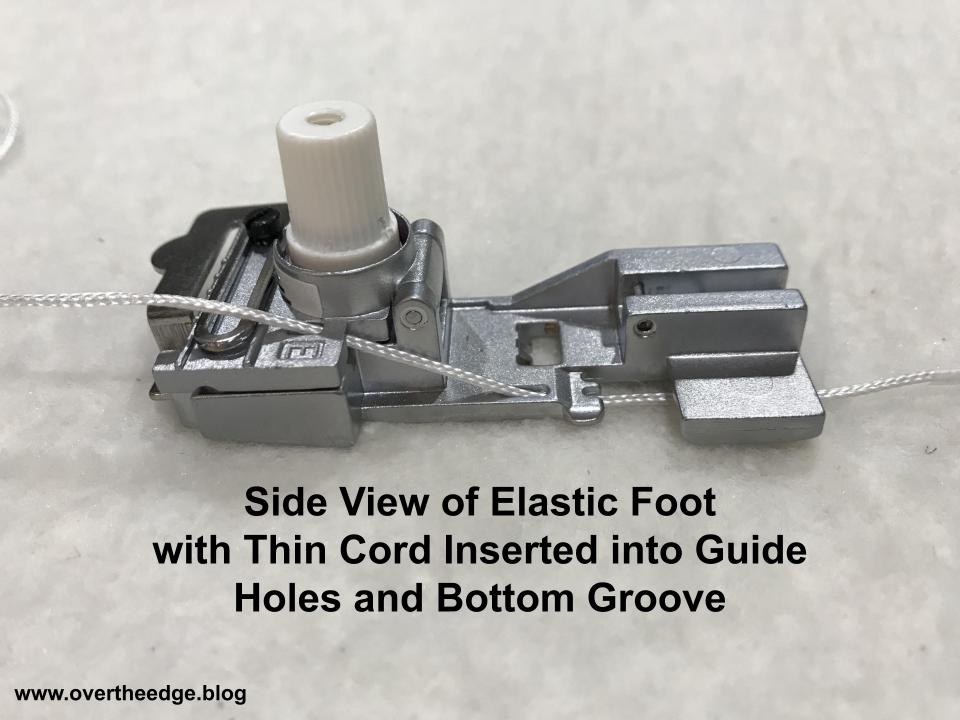
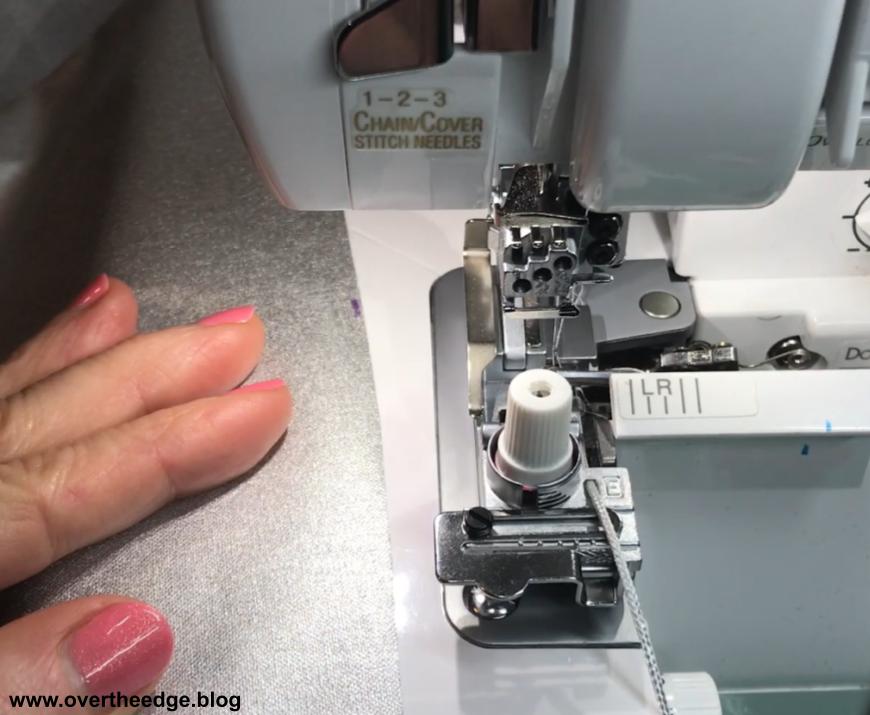
Set up your serger for a wide three thread overlock stitch using the left needle and standard serger thread in the needle and the loopers. I set my stitch length to 3 and my width to M, which is about 6 mm on my Baby Lock Evolution.
Insert your thin cord into the guide holes on top and into the groove on the bottom of the foot. And then attach the elastic foot to the serger. You should have some extra cord extending out the back of the foot.


Serge Edges of Cover
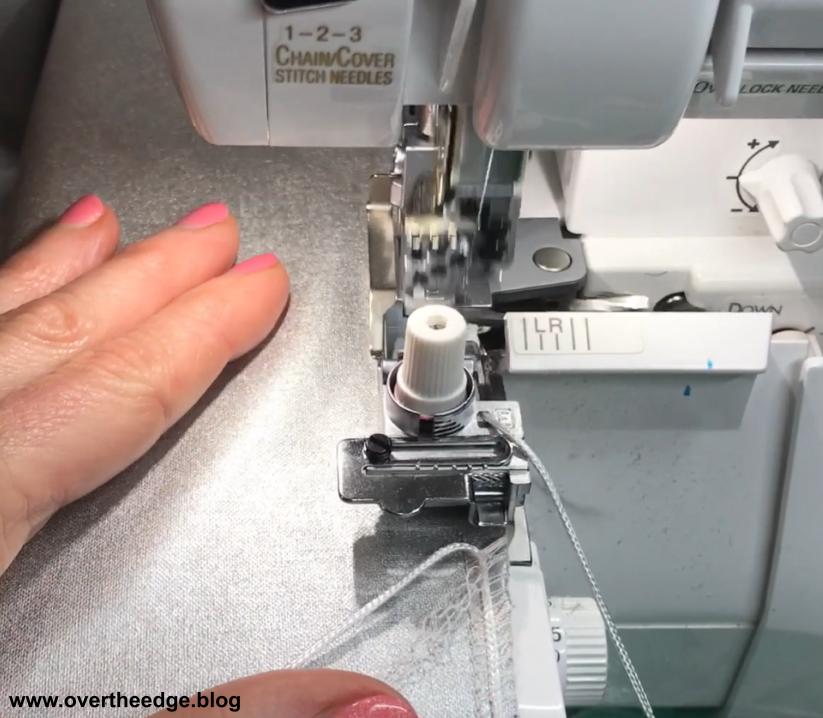
Start serging in the middle of one long side. Insert the fabric under the foot and next to the blade at your desired starting point. Make certain the thin cording is still positioned in the groove on the bottom of the foot. Begin serging, guiding the fabric with your left hand and the cording with your right hand. Trim just a tiny bit of fabric off as you serge. You don’t have to do much with the cording except to make certain it is feeding smoothly into the guide hole on top of the elastic foot.
How to Finish Serging
Serge all the way around the outside edge of your cover material. Stop when you are almost back to where you started.
Move the cord and serger tail from the starting point to the left and out of the way of the blade. About ½” -1” from the starting point, turn your fabric 90 degrees to the left and serge off the edge. Make sure you do not overlap the stitches at the starting point or you won’t be able to pull the cord. Continue serging off until you have about 6” of thin cord covered in serger stitches hanging off the edge of the fabric. Trim the cord, leaving a tail.

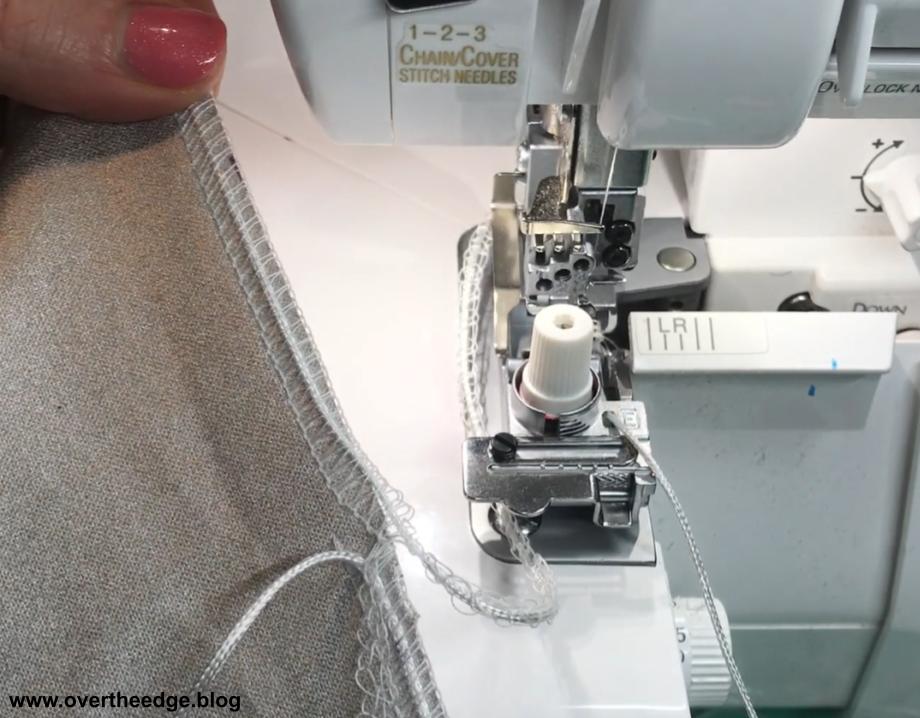
Back at the fabric edge, locate the needle thread and pull it out of the loops, so that the stitching falls off the end of the cord.
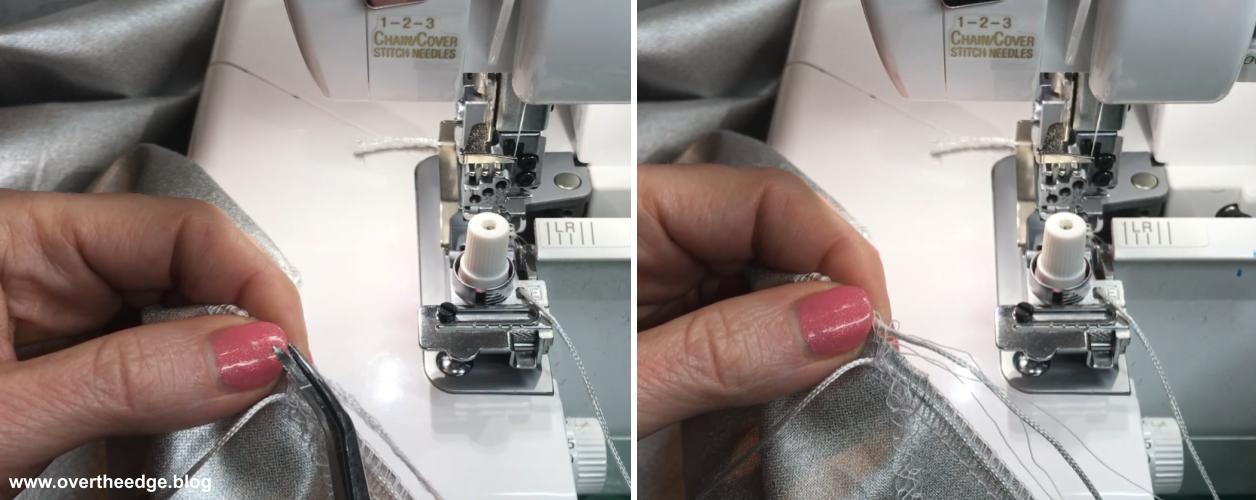
Here’s another sample of the end of the cord with the serger chain over it, and after the needle thread has been pulled and the loops release from the cord.

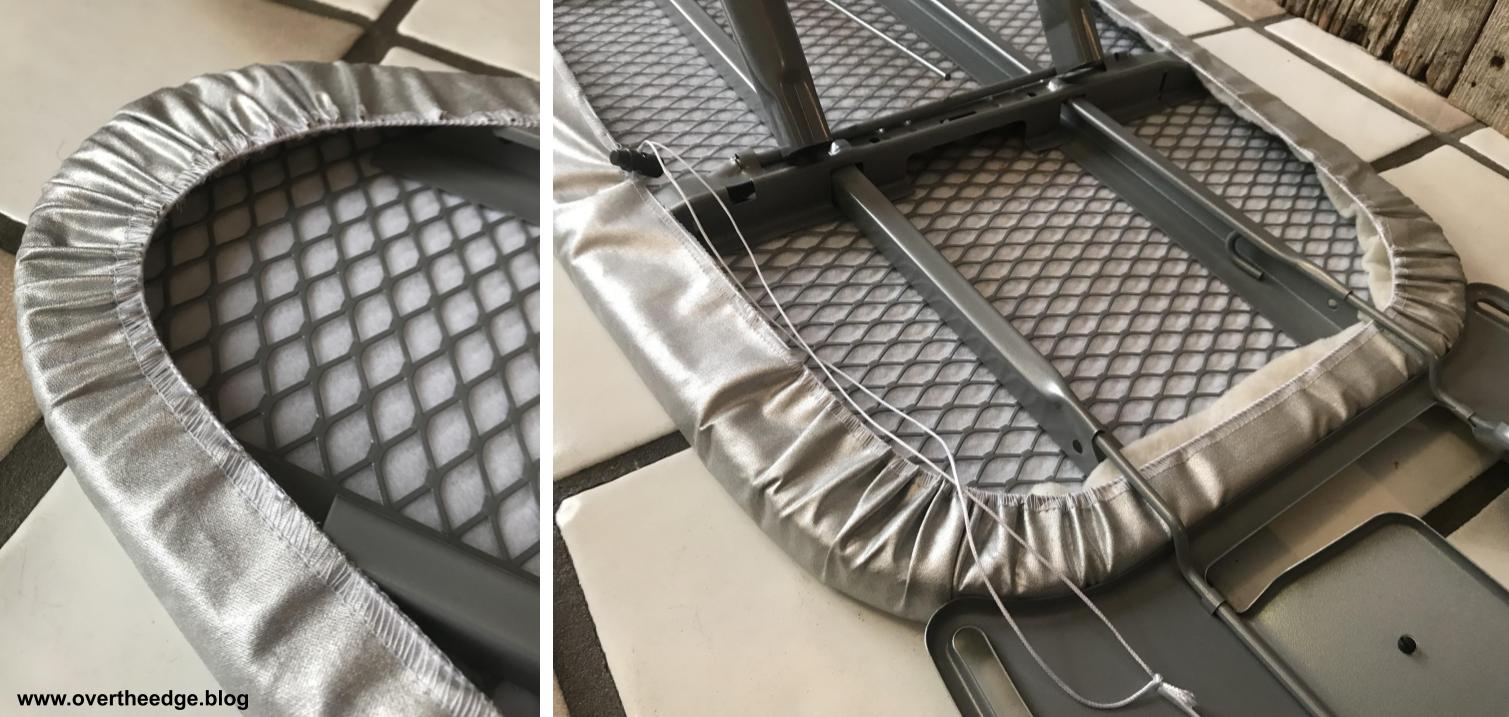
Tie the beginning and ending serger tails into a knot to secure. You should have several inches of loose cording at the starting and ending point of the serged edge that will be used to gather the edge of your cover. See photo below of serged cover, ready to install on ironing board frame.

Install New Cover
I didn’t take photos of this step because I was focused on the installation. I think it took me longer to wrestle with tightening the cords than it took me to serge around the edges of the cover!
Begin by placing your layers of batting on the ironing board. Then place the cover on top. Pull the cording slowly and carefully to gather the edge of the cover. If you can’t pull the cord to gather, check to make certain you didn’t accidentally stitch through you cord. (The loops should go over the cord not through it.)
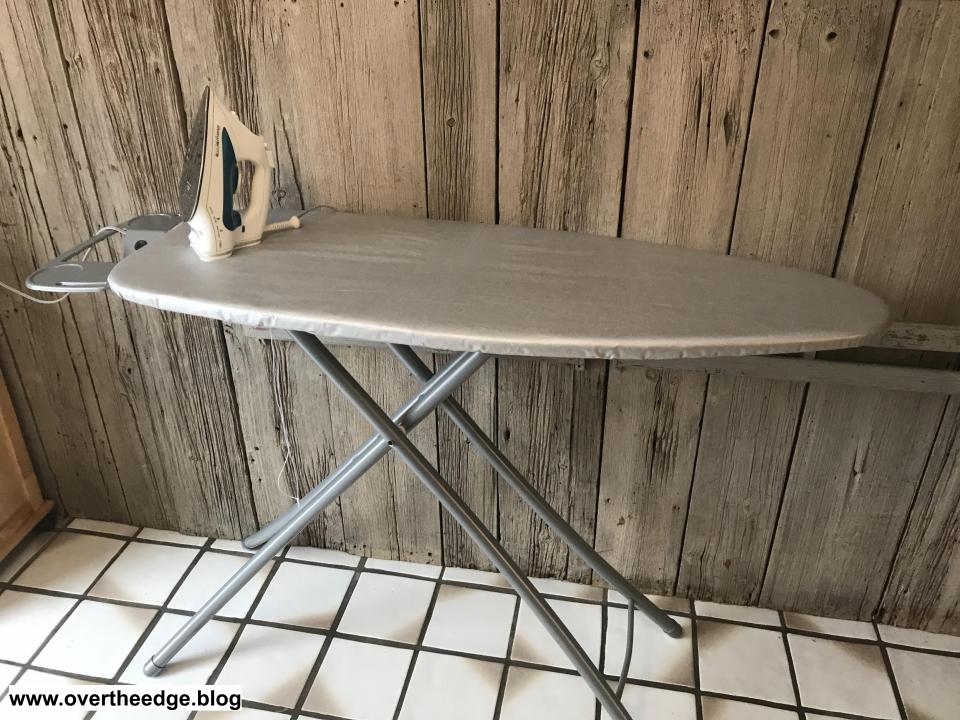
The edge of the cover will wrap around the metal frame to the back side. Once you have it gathered to your liking, you can secure the ends of the cord by tying the cord in a knot or using a cord stop. Here are some photos of my completed, 100% serger made ironing board cover. I love my new ironing board cover!

How to Serge an Ironing Board Cover
I hope you enjoyed this practical tutorial on how to serge an ironing board cover with an elastic foot. I also made a video of the elastic foot in action in case you prefer to follow along with a video. https://youtu.be/j8stKXTvEeQ
Now that I know how easy it is, I will be changing my ironing board covers more often!

Resources
If you would like more information about the story behind my tutorial, visit my blog post, Jen’s Serged Ironing Board Cover:
https://overtheedge.blog/jens-serged-ironing-board-cover/
Here is a short YouTube video about the Baby Lock Elastic Foot for 8 thread sergers: