

Serge a trim catcher and spend less time cleaning up trimmings and more time serging! Jen’s Serger Trim Catcher & Mat Tutorial will yield a trim catcher & mat that measures 15″ x 18″. Most four thread sergers and smaller eight thread sergers such as the Babylock Evolution, fit nicely on the mat.
Supplies
- Grip shelf liner (or rug grip) 15” x 18”
- Oil Cloth 15” x 18”
- Oil Cloth 6” x 19”
- Cotton print fabric 6” x 19”
- Sulky Solids 12 wt cotton 2 spools to coordinate (or other thread as desired)
- 1 cone of Maxilock serger thread for needle
- 12” wooden dowel (about ¼” thick) or a 12” piece of boning for stabilization. The top edge of the pocket will be more rigid with the dowel and more flexible with the boning.
- Wonder Clips

Serger Set Up
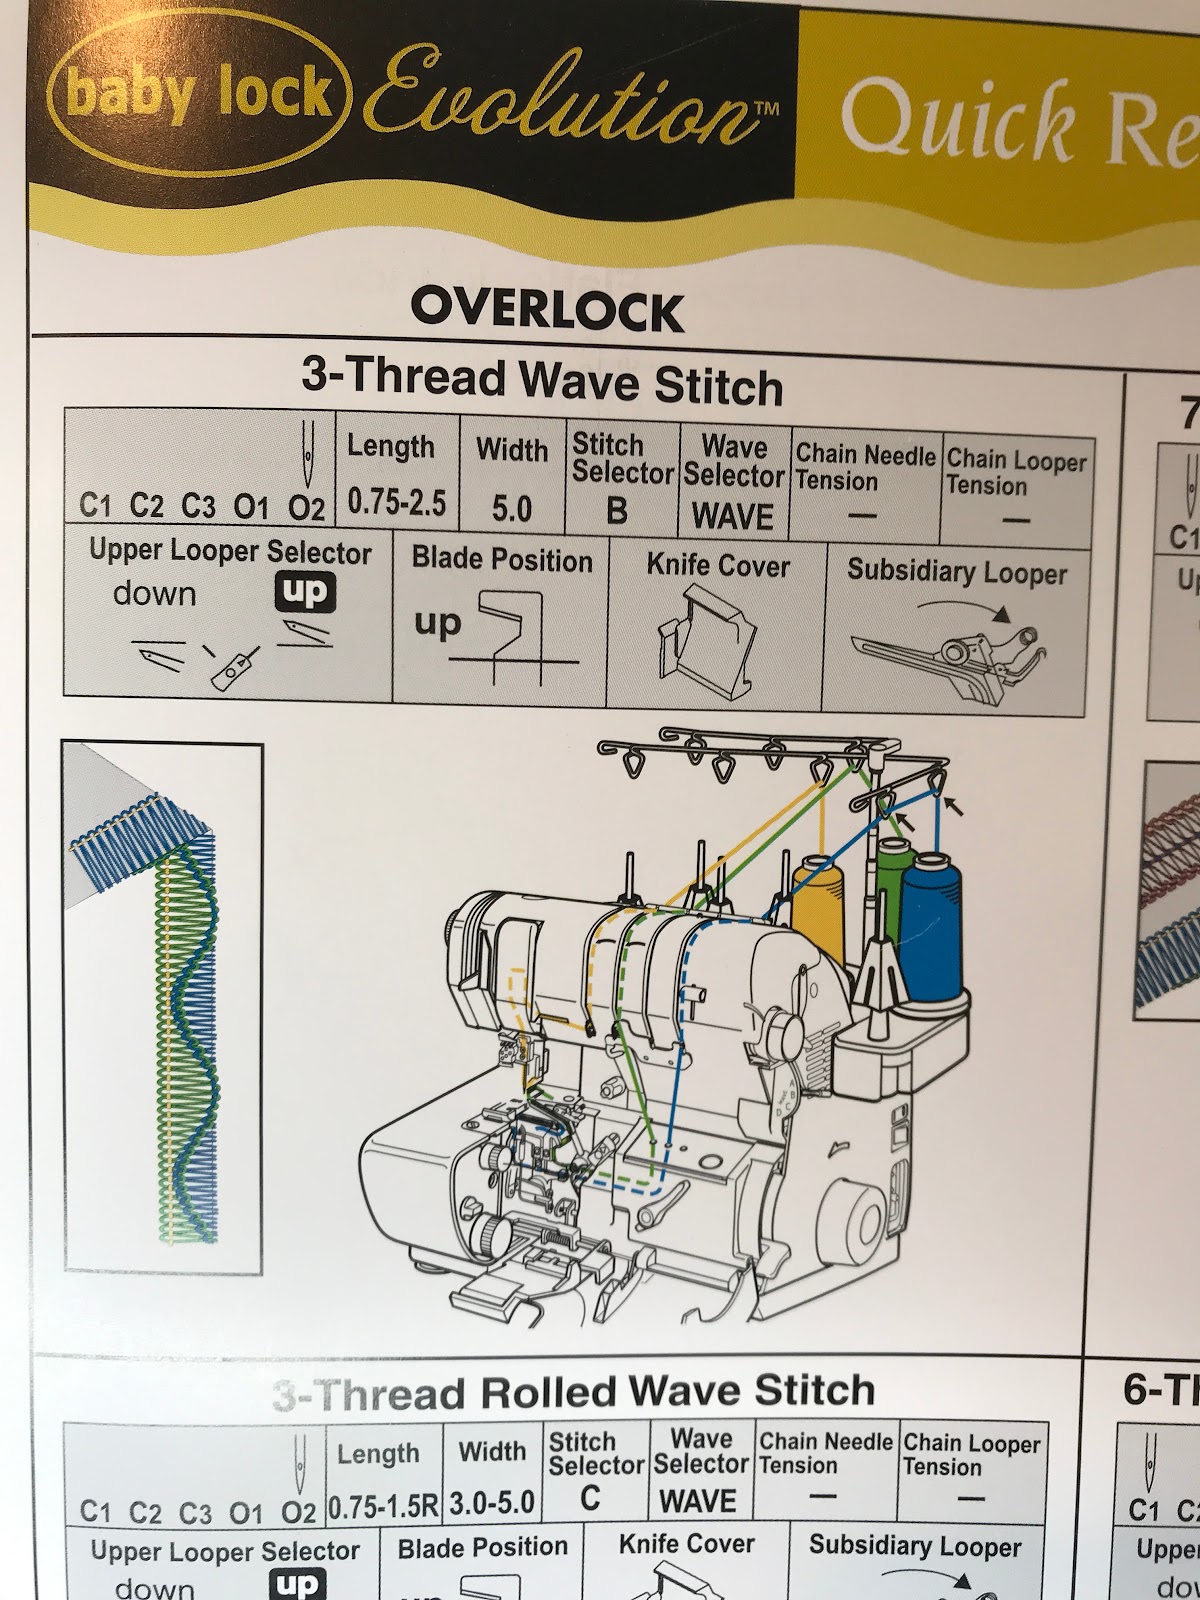
Set up your serger for a three thread wave stitch. I used Sulky 12 weight cotton thread in the upper and lower loopers and Maxilock thread in the needle. Other decorative threads such as Maderia Glamour, Decora or Cotona also work well in the loopers and make a nice looking wave stitch. Pay special attention to your instructions for setting your serger up for the wave stitch. One of the differences in set-up for the wave stitch is that you thread the upper looper partially through the right needle threading path. If you need help setting up your wave stitch check out this YouTube video by Babylock – https://youtu.be/q4Oubcz_qsU

Test and Determine Your Stitch Length
Make a small sample test strip of the oil cloth and the grip liner. Set your stitch length to 2 and begin serging. After a few inches, adjust your stitch length to 1.5 and continue to serge. Continue to decrease the stitch length and serge until you are satisfied with the density of the wave stitch. Based on my combination of thread and fabric, I liked the look of the 1.25 stitch length for this project.

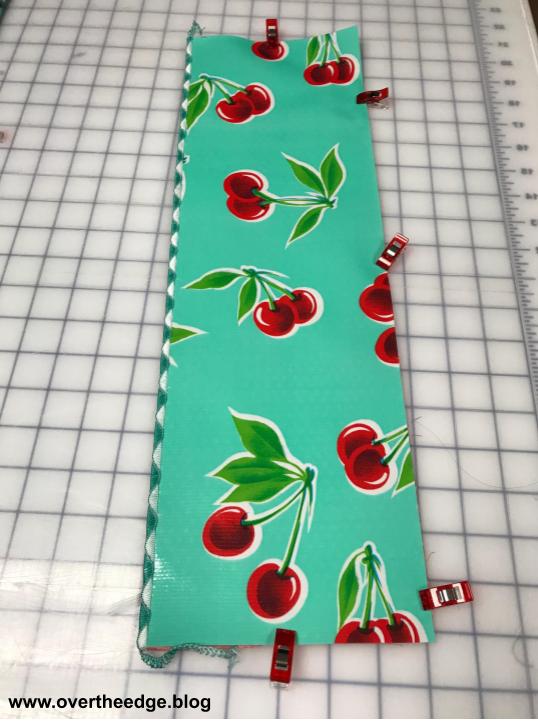
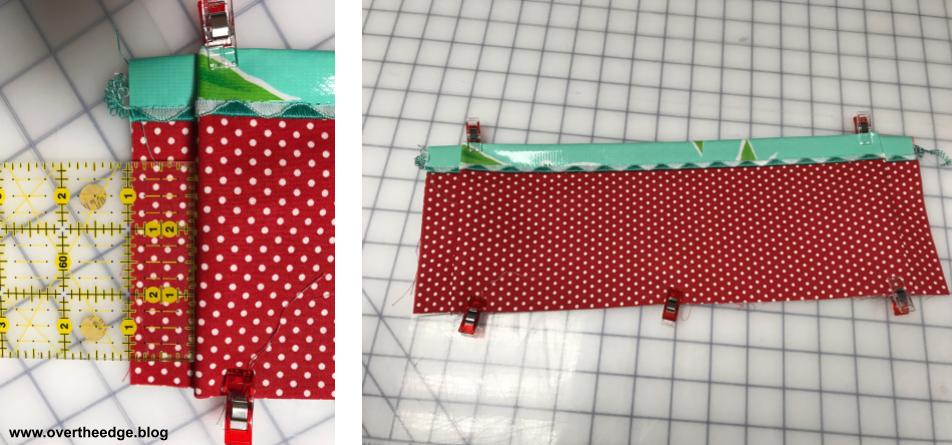
Prepare Front Pocket
With wrong sides together, use Wonder Clips to secure the oil cloth pocket piece to the cotton pocket piece. Serge along the top edge of the pocket using the wave stitch, having the oil cloth side on top.


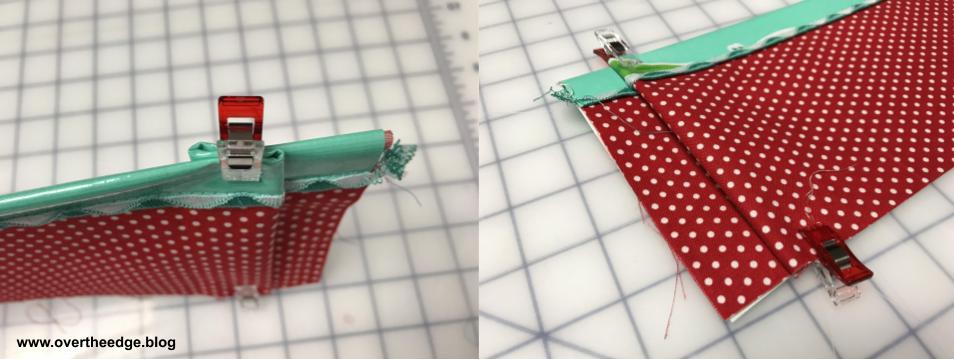
Fold the top edge of the pocket down 1″ so that the wave stitch shows on the outside of the pocket. Use wonder clips to hold the folded edge in place. The cotton fabric should be on the outside of the pocket, with 1″ of the oil cloth showing along the top edge. The oil cloth fabric is the inside surface of the pocket. Use your sewing machine to top stitch next to the wave stitch and create a casing for the dowel. You may need to use a teflon foot to keep the oil cloth from sticking to the sewing machine foot. (You could also use the serger chain stitch to top stitch the casing.)

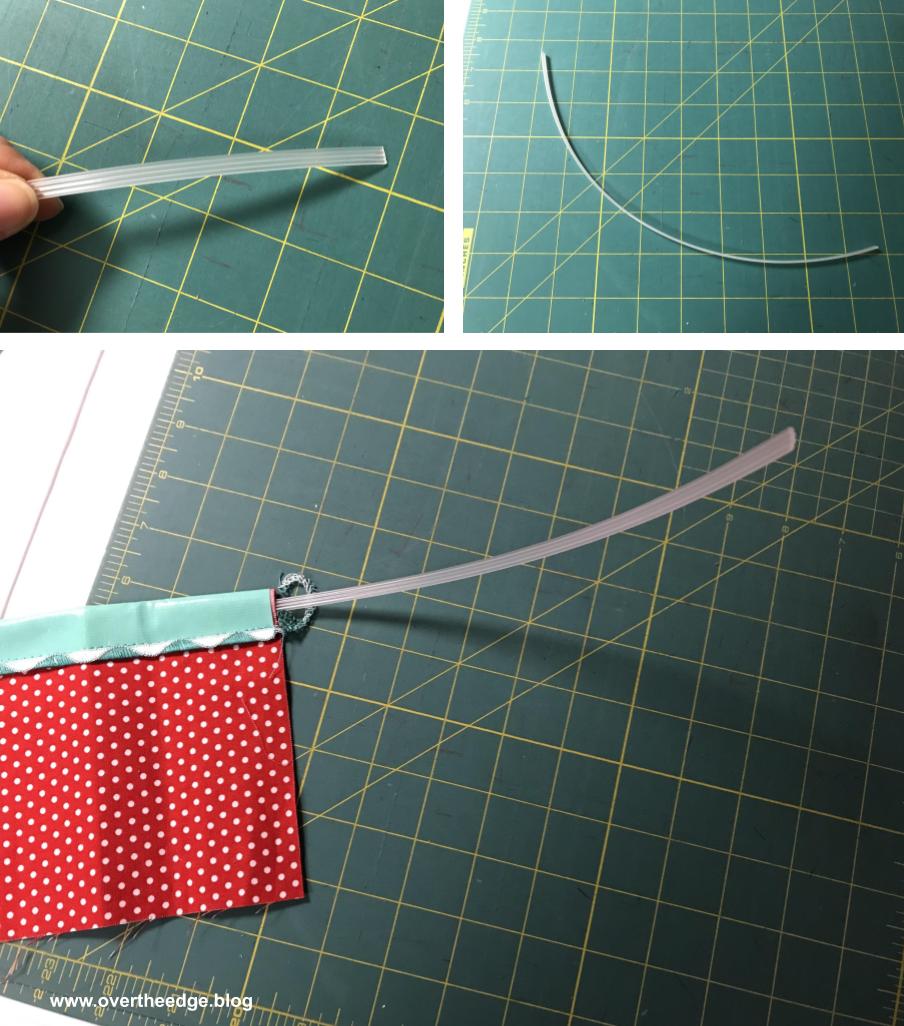
Create a vertical pleat close to both short sides of the pocket. Begin by making a mark at 1” and 3” from both side edges of the pocket. Fold the pocket at the 3” mark and bring the fold to the 1″ mark, making a pleat. Use a few Wonder Clips to hold the pleat in place. After making the first pleat, insert the wooden dowel or plastic boning into the casing, placing one end close to the first pleat. Now make a pleat on the other side. The pleats should be 1” from the side raw edges of the pocket. The pocket should measure 5″ x 15″ after making the casing and pleating.
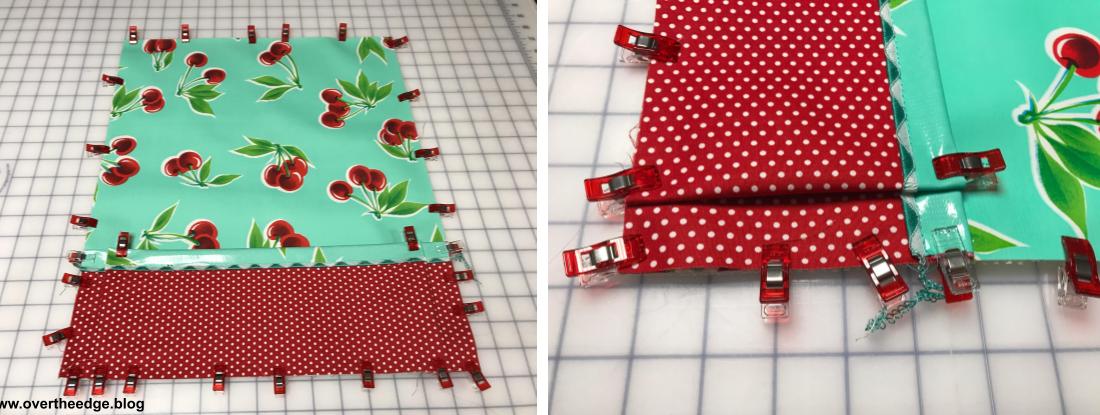
Prepare Base
Use Wonder Clips to secure the oil cloth base to the grip shelf liner, wrong sides together. Make certain both pieces are smooth and flat.

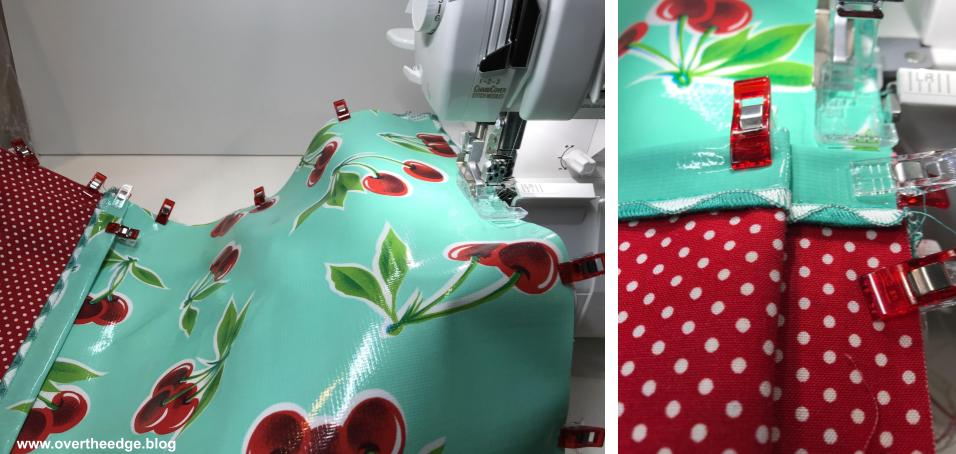
Place the pocket piece at the bottom of the base piece, lining up the raw edges at the bottom and sides. Use Wonder clips to hold in the pocket in place. Don’t be skimpy with the wonder clips. You don’t want any fabric to shift during serging.
Wave stitch all four edges of the trim catcher mat. Pay special attention to the top edge of the pocket and the pleats to make certain they do not slip or shift as you serge over them. At each corner you can use the “turning corners” technique or you can serge off the edge at the corner, line up the new edge and begin serging again. Serge slowly while supporting the project to keep it feeding smoothly.

After serging all four sides, bury any thread tails into the stitches on the bottom side of the mat.
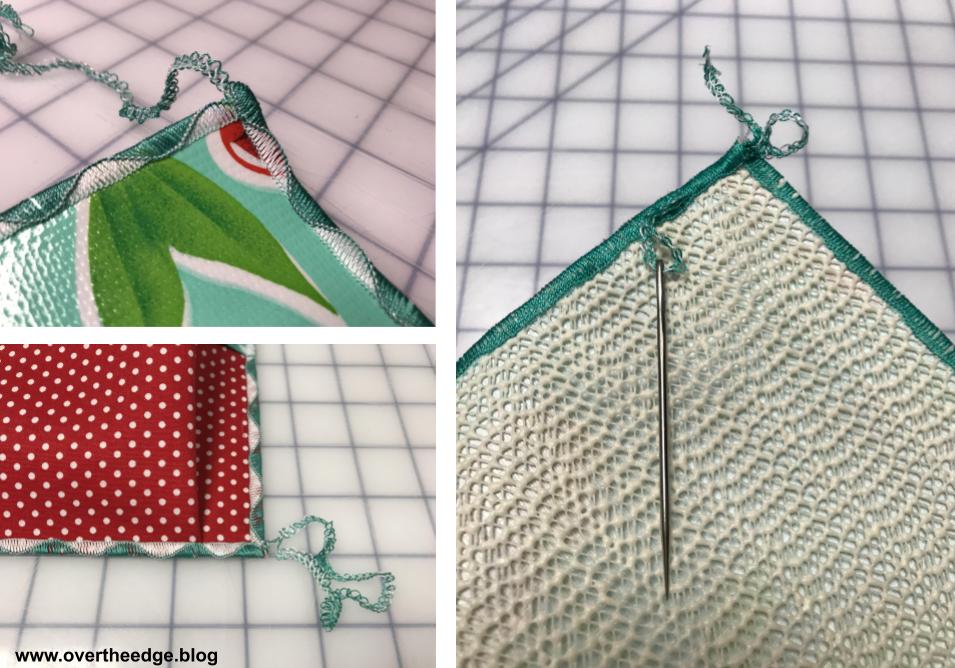
Your serger trim catcher & mat is now ready to use! Enjoy!


Jen’s Serger Trim Catcher & Mat Tutorial
I hope you enjoyed this tutorial and are inspired to use your serger!
For more information about the design process for this project, please follow the link below to my blog post: Serger Trim Catcher & Mat
