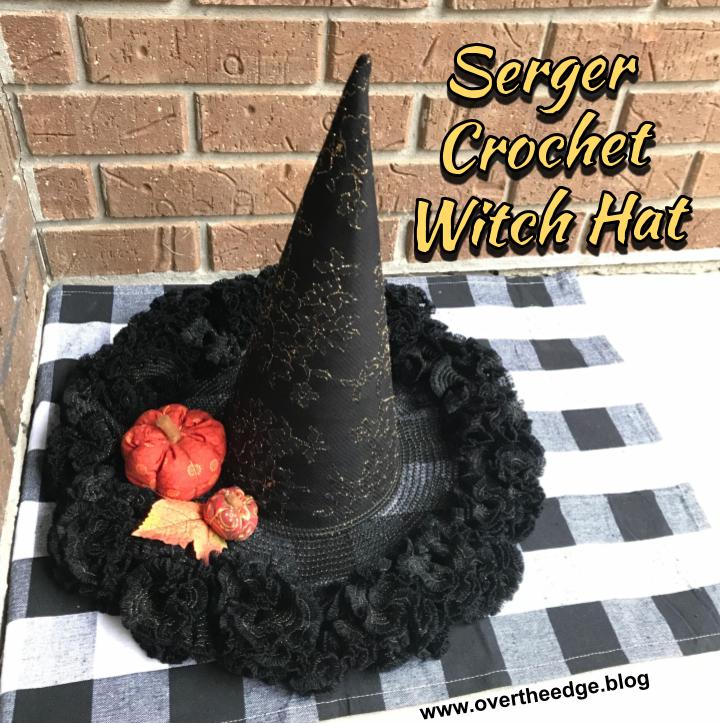
How to Make a Witch Hat with Serger Crochet

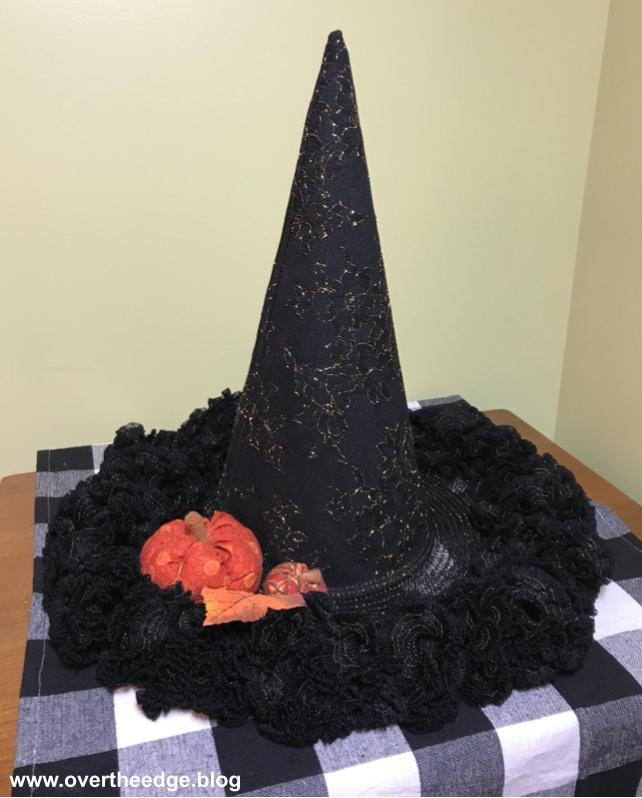
Did you know you can “crochet” with your serger? Some people call it serger crochet, while others refer to it as serger thread lace. The technique involves serging “on air” with just thread and no fabric. The project is an elegant Halloween centerpiece project designed by Joan Friedrich. Follow along with me as I show you how to make a witch hat with serger crochet.
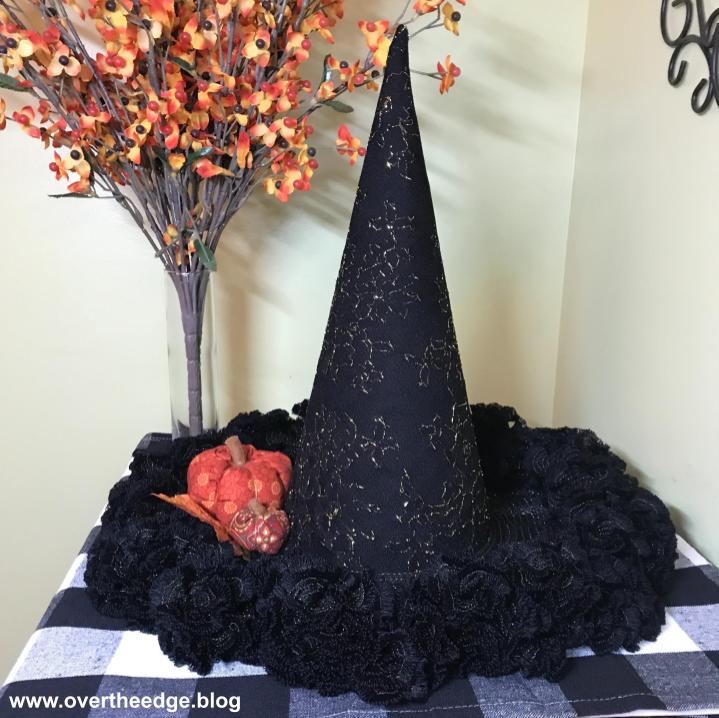
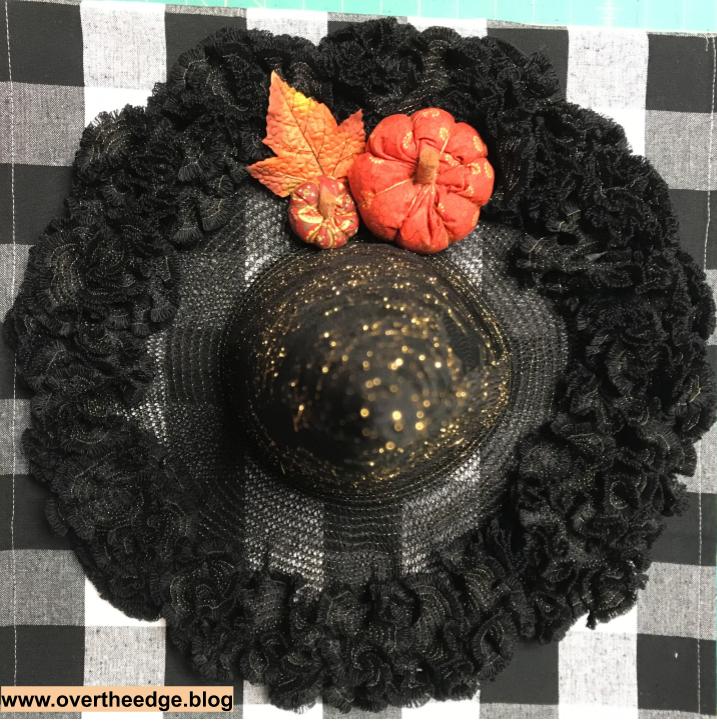
I’ve done serger crochet before, but nothing quite as dramatic as this witch hat. It was easy to do using my Baby Lock serger. However, it is not a quick project to “crochet” the lacy brim. (To actually crochet it by hand would have taken me a lot longer!) My witch hat appears to have a lot more ruffling than the hat in the project instructions. I love it that way because all of the ruffles can be shaped to look like flowers.
It’s been one of those projects that’s been on my to do list for a long time. It always feels great to check something off a to do list! It’s a free project on Baby Lock’s website. You will find the link to the project in the Resources section at the bottom of this post.
Making the Hat Pattern
We all love free projects, right? But sometimes with free projects the instructions aren’t always very detailed. Which is the case with the free project for the Serger Crochet Witch Hat on Baby Lock’s website. The instructions say to make the center of the hat from a triangle shape. The instructions give you the starting dimensions, but don’t tell you what to do to make it into a cone. You might already know this, but you can’t turn a triangle into a cone unless you make a curved base. So here is what I did – I hope it helps.
Drawing the Center Cone
Start with a piece of paper at least 16” x 26”. Draw a triangle with a base of 26” and a center height of 16”. Then draw a line from the center point to the left and right sides of the base. Measure down 16” on each side of the triangle. Then draw a curved line from the 16” mark on one side through the bottom center and to the 16” mark on the other side. You can tie a string onto a pencil and the other end onto a pin. Put the pin at the top point of the triangle and use the string and pencil to draw your partial circle. Your cone is basically a section of a circle that has a radius of 16”. If you need help drawing the curved base, see the resources section for a link to a circle drawing tutorial.

Fabric
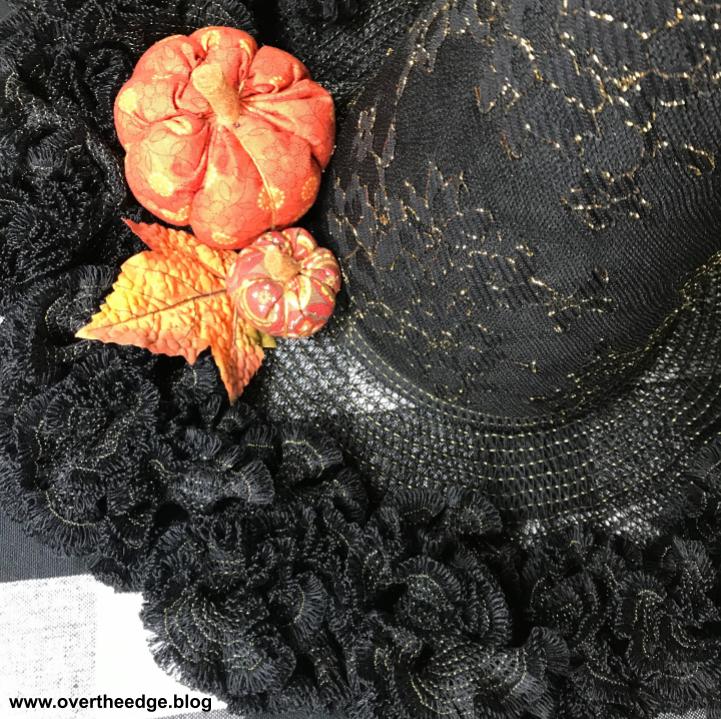
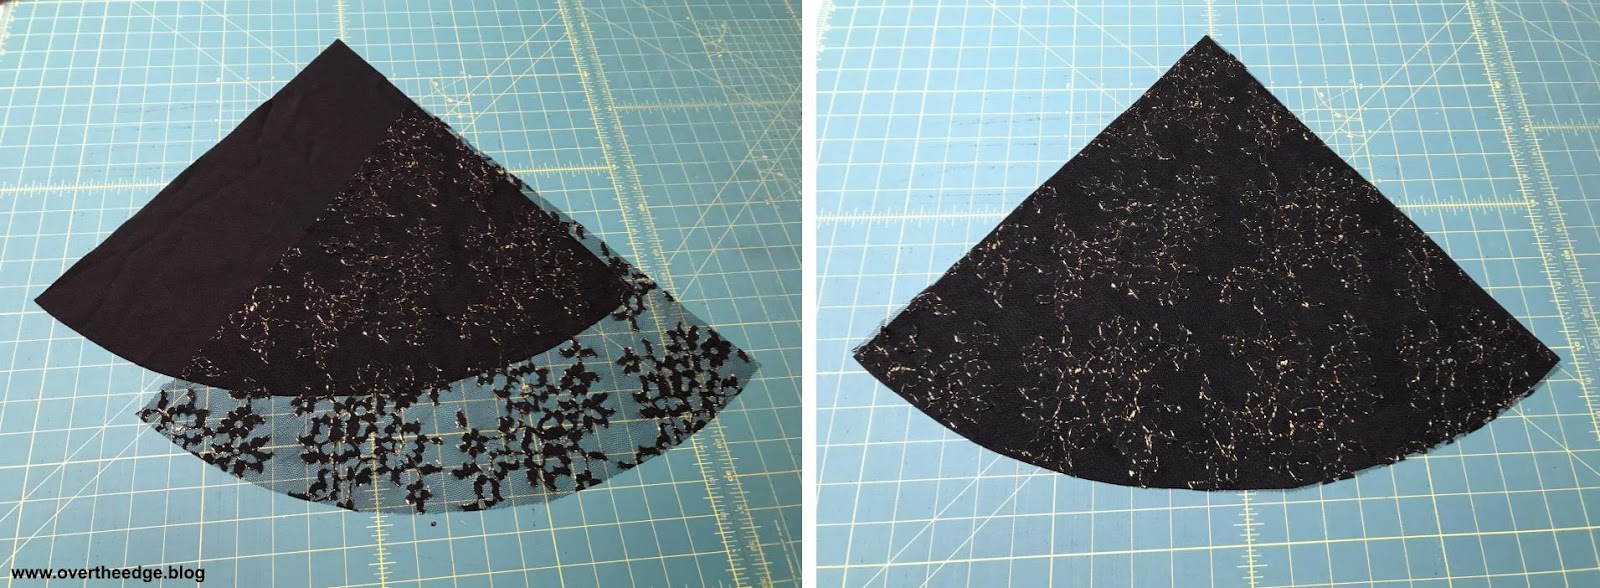
For the center cone of the hat, I used a black sturdy double knit as my base fabric with a sheer black and gold lace as an overlay.

Making the Cone
After cutting out the cone shape from the knit and lace fabrics, I basted the two pieces together with my sewing machine. My serger was set up for a four thread overlock stitch with standard serger thread. Next, I serged the side seam with the fabric right sides together.

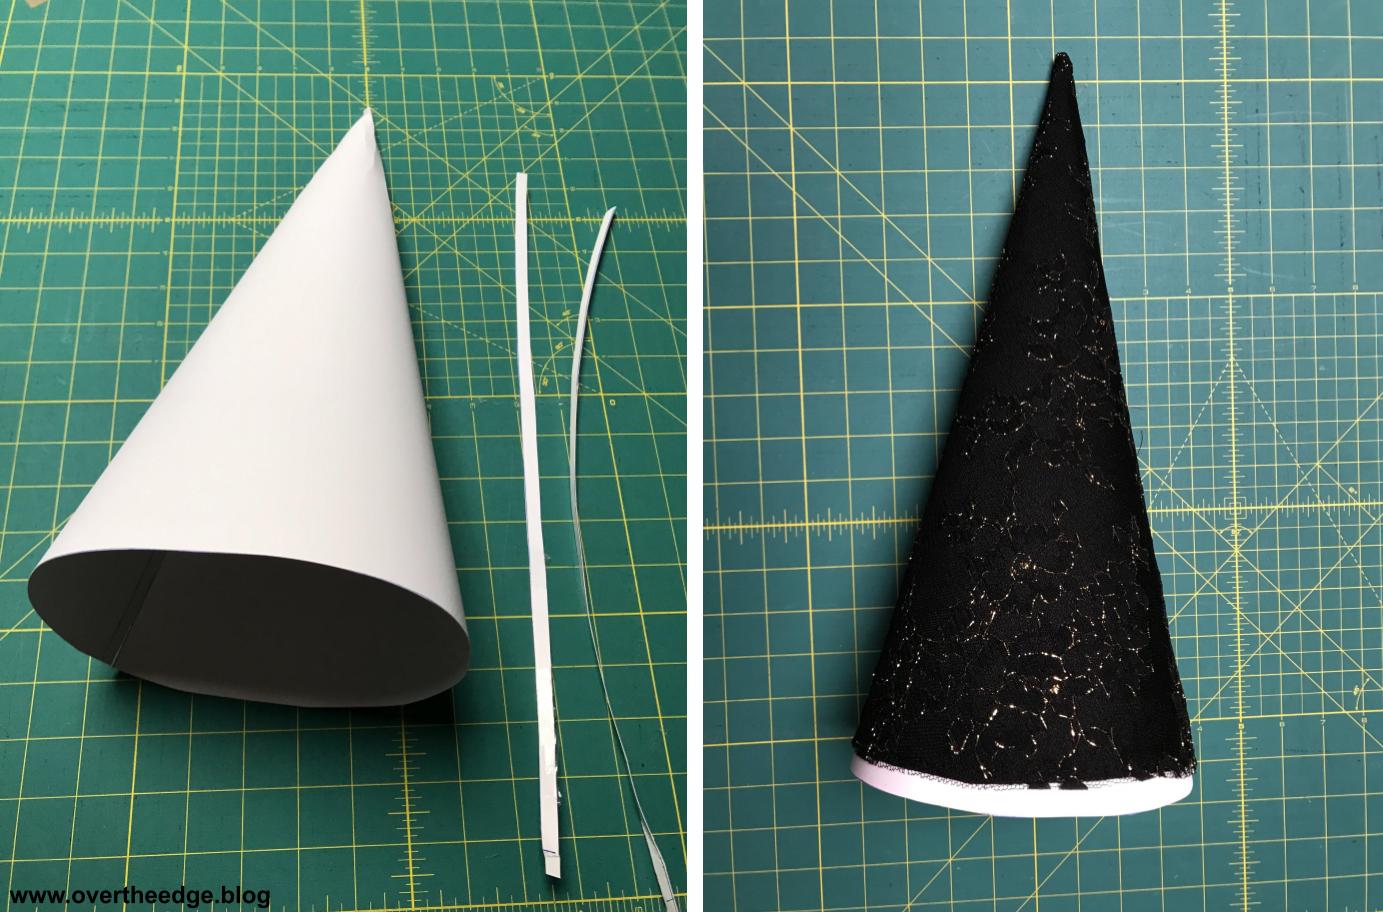
Making the Cone Support for the Witch Hat
The center cone needs support to hold it upright. The instructions say to use a styrofoam floral cone or poster board. I did a brief search on the internet and couldn’t find any cones the right size. So I made my own poster board cone. I traced the pattern on poster board and cut off the ¼” seam allowances from each side. Then I butted the side edges together and taped the seam well. The bottom edge of the poster board stuck out from under the fabric cone, so I cut a little off the the bottom edge and top so that it was concealed under the fabric.
Thread
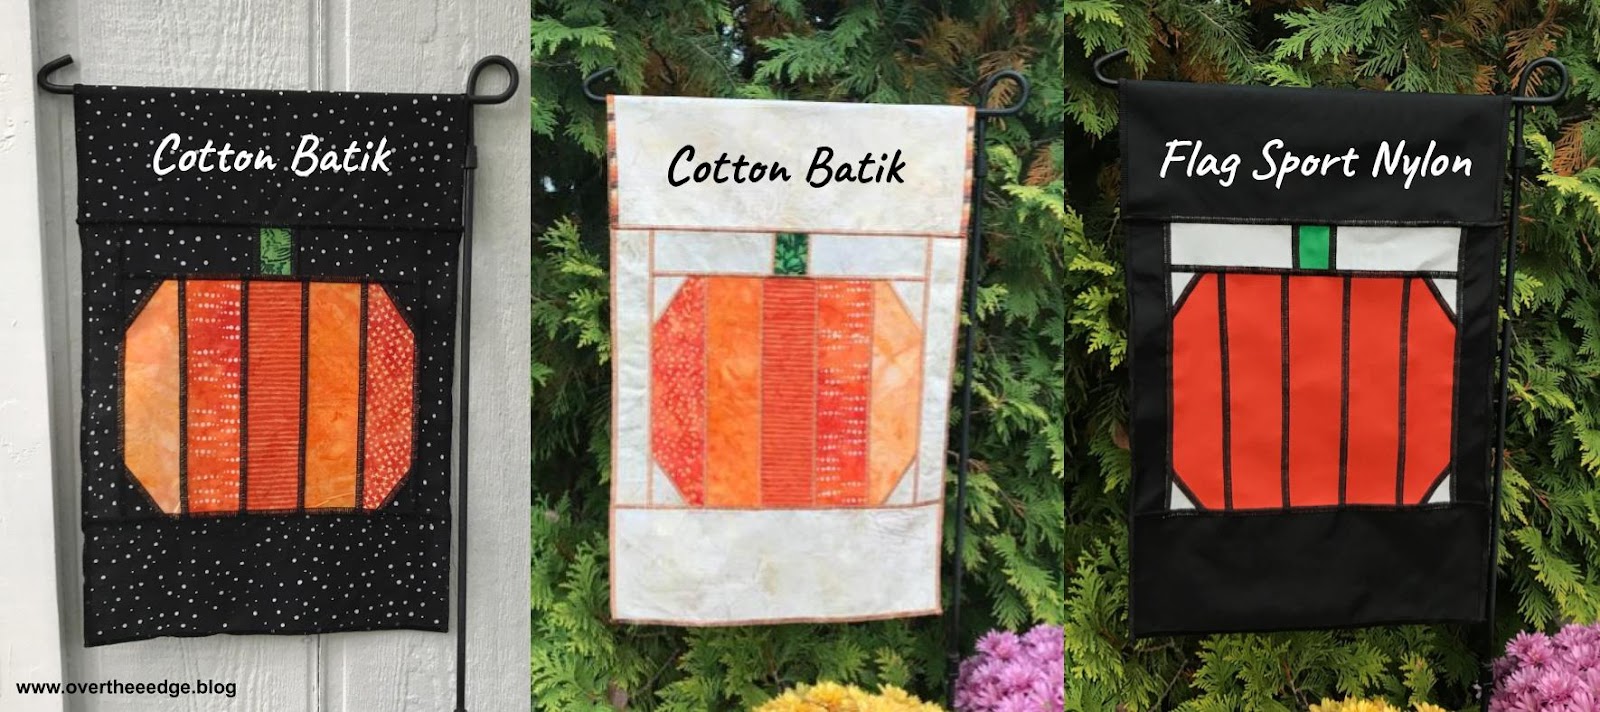
I used the recommendations from the free project for my thread. For my 12 weight thread in the loopers, I used two cones of Sulky 12 weight black cotton thread. I bought 2100 yard cones, because I knew I was going to be doing a lot of projects with this thread. (The garden flags I make with my serger also use this 12 wt. thread. Check them out at https://overtheedge.blog/which-fabric-makes-a-better-flag/ ) I really don’t have a clue as to how much thread I used for this project because I still have quite a bit left on my big cones. The instructions say you need two spools of 12 weight thread. A normal spool of Sulky 12 weight cotton is 300 yards. I think I used more than that for my hat, but my hat is extra ruffly. For my needle thread I used one spool of Sulky gold metallic embroidery thread.
I like the look of the thicker threads for my lace. The thick threads make the lace more substantial. Some people like to use lighter weight thread to make a more delicate lace. Experiment to see what combination you like.
FYI – The upper looper uses more thread in the stitch than does the lower looper. If you are using the 300 yard spools, you may need to switch the position of your spools part way through, so both spools empty at approximately the same time.
Serger Set Up
- I set my serger up for a wide three thread overlock at a width of 7.5 (my widest) per the instructions. I think the lace looks better with wider loops.
- If you have a clear foot, use it for serger crochet. I think a clear foot is the secret to great results! Many tutorials just use the regular foot, which is probably fine for small lace edges. But it’s easier to miss the loops and get gaps when you can’t see the thread loops. The clear foot allows you to see exactly what is happening as you feed your loops under the foot and you can make adjustments before it’s too late.
- Serger extension table like a Sew Steady table. This is optional, but it is really useful for supporting the wide lace on the brim and keeping the loops flat. On a smaller project like a narrow lace edging an extension table is probably not needed.
Serging the Witch Hat Brim
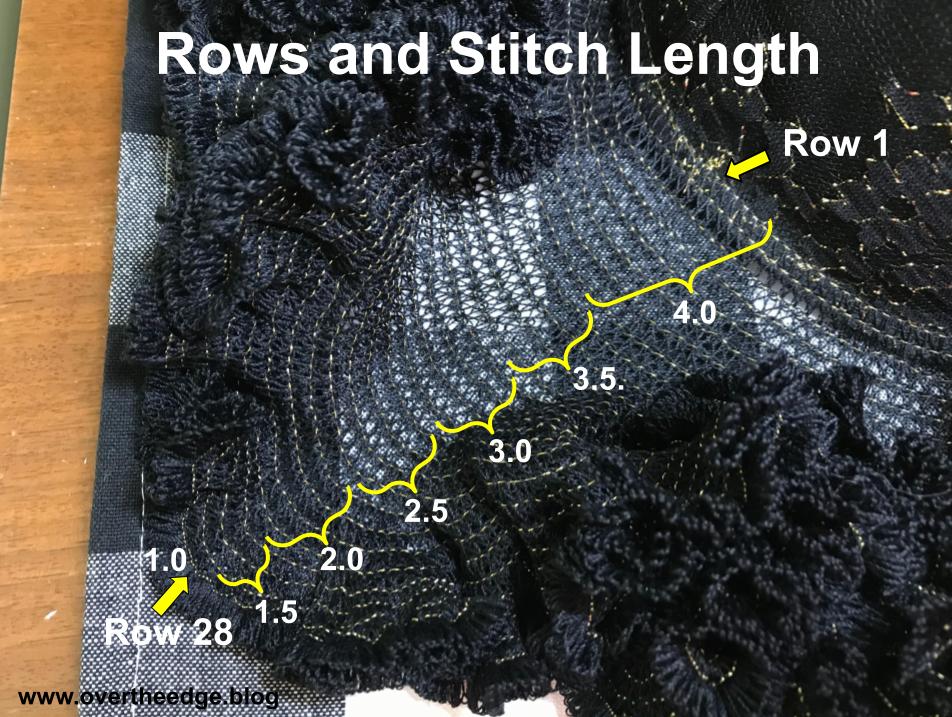
All serging is done in the round, so there is no serging on and off except at the beginning and the end of the serger crochet. The instructions said to start with 8 rows at a stitch length of 4 and end with the last row at a stitch length of 1. The instructions also said they used 28 rows total for their sample (27, plus the last row at a stitch length of 1.) I thought the instructions for the rows in between were a bit vague, but maybe that’s where we were given creative flexibility to create the lace our own way. Just in case you want to repeat what I did, here are the number of rows and the stitch lengths I used to create the brim of my serger crochet witch hat:
- 8 rows of SL 4
- 4 rows each of SL 3.5, 3.0, 2.5, 2.0
- 3 rows of SL 1.5
- 1 row of SL 1.0
Row 1
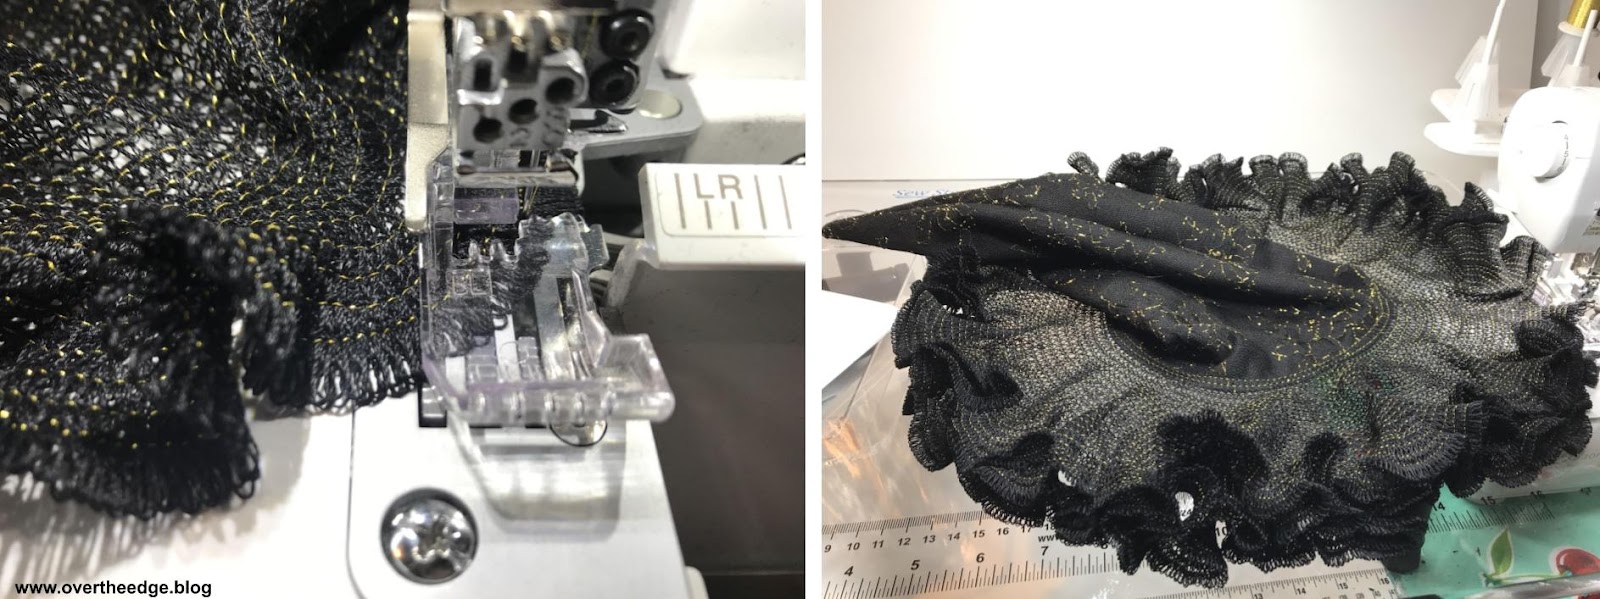
The first row is the only row that is serged completely on fabric. I kept my blade engaged for the first row, serging on the right side of the fabric, trimming off the edge of the fabric to even it up. Then I lowered my blade for the rest of the rows, so I didn’t accidentally cut my crochet. I also started serging with the fabric right side up and the cone inside out, because it was easier for me to maneuver the curve. Later on when the brim was wider, I turned the cone right side out so that the brim could lay nice and flat as I serged.

Row 2
When I completed the circle and got back to the seam, I guided the project slightly to the left, so my needle was penetrating the fabric close to the raw edge and my loops were hanging about halfway off the fabric. I serged all the way around this time with my loops hanging off the edge.

Row 3 and All Other Rows
At row 3 I began serging “on air”, just on thread. At the start of each row, I guided the thread lace slightly to the left so I was serging on the edges of the thread loops from the previous row. I serged on the thread loops with the needle in the middle of the loops or a little closer to the edges, being sure to catch all the loops.

Middle Rows
As I began to decrease my stitch length, the thread “fabric” began to wave and ruffle and flounce. I had to work a little harder to guide the edges of the loops to the needle because now I was serging more of a curve.
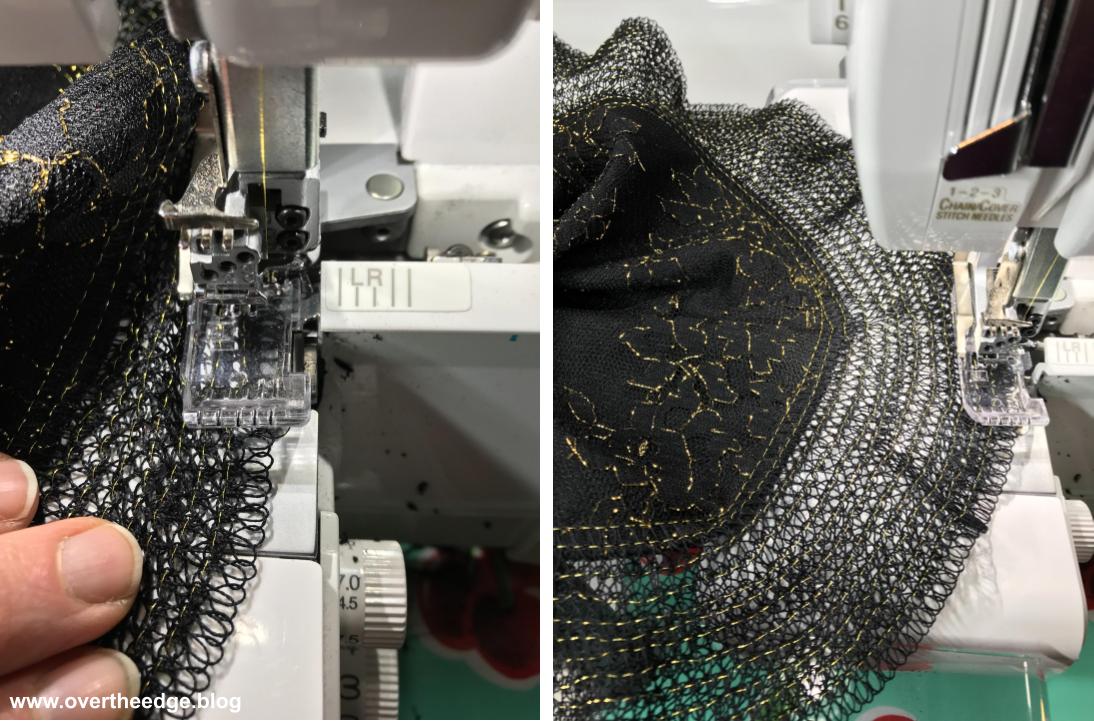
As the brim got wider and the stitch length smaller, the edge began to wave and ruffle and flounce even more. This required more maneuvering of the thread loops to keep them flat and feeding under the needle properly. I had to realign the edges of the loops frequently to keep them feeding properly up to the needle. This included lifting the presser foot to pivot and allow the thread fabric to relax.
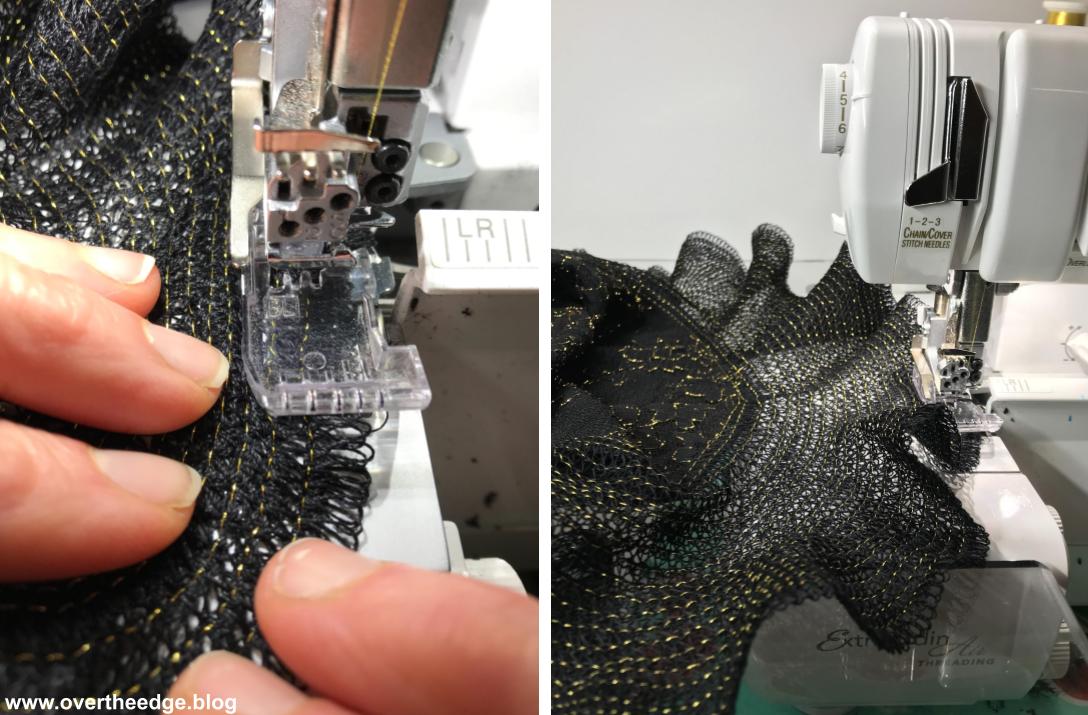
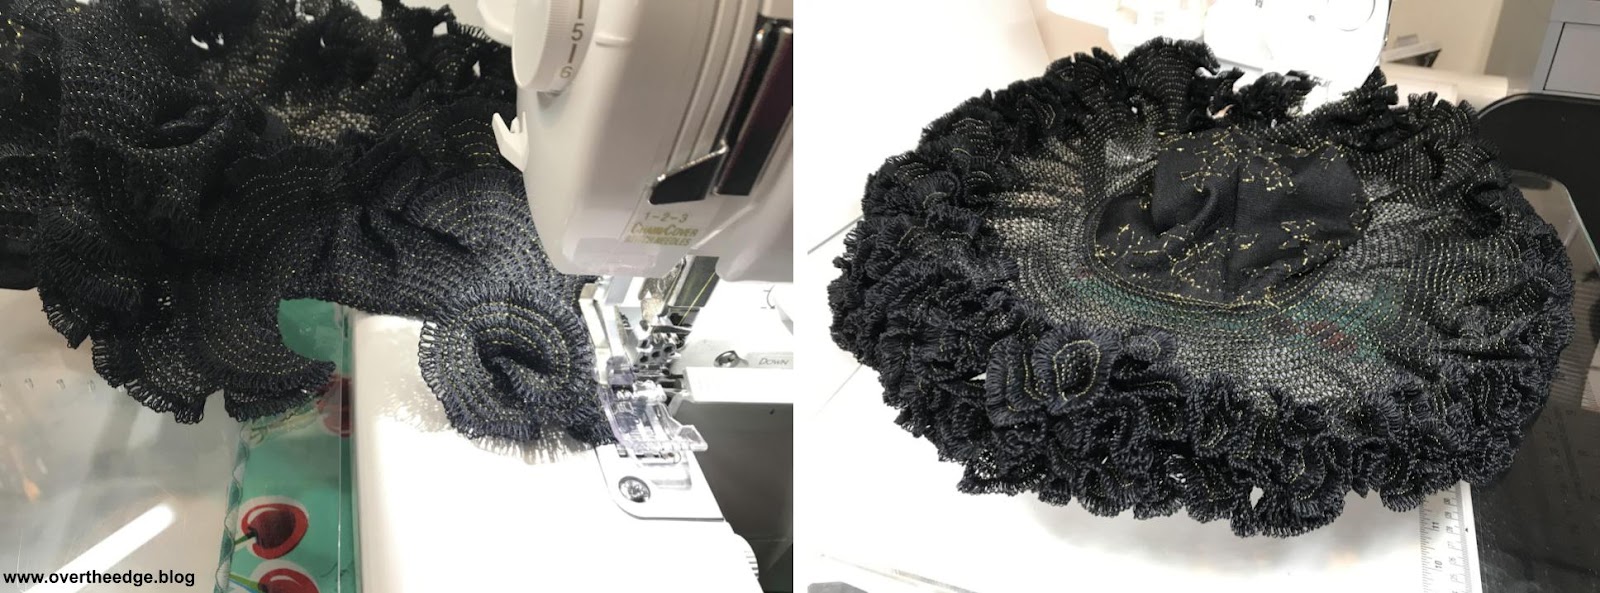
Outer Rows
The last few rows took the longest to complete because of the sharp curves. It was like serging on a bunch of small circles. I had to lift the presser foot very frequently to realign the edges of the loops before the needle. The clear presser foot allowed me to see exactly what was happening with the feeding of my loops, so I was sure to catch the loops with my needle. The last few rows at small stitch lengths were also the rows that created the greatest amount of volume of ruffle and flounce. You can see from the photo below, as the brim got wider, I had to serge on smaller and smaller curves to keep the previous rows flat as I serged.

Finishing the Witch Hat
When I got back to the beginning of the last row, I serged back toward the previous row’s needle stitching until I had a few stitches of overlap. At that point I lifted my presser foot, turned the project 90 degrees and serged off, leaving a chain. I smoothed out my thread chain and separated the needle thread from the looper threads. Then I tied the needle thread to the looper threads in a knot on the back side and trimmed off the extra thread.

Oops – What to do if you Make a mistake?
If you accidentally miss some loops and leave some holes in your serger crochet, most people find it easiest to go back and hand stitch the holes together after they are done serging.
Fortunately, I only had one oops where I went off the loops on this project. On my second to last row, my foot control got stuck on a drawer under my serger table. My serger kept serging even though I took my foot off the foot control. My hands couldn’t react fast enough. In that few seconds, I serged right off the edge of my brim! Fortunately, I was able to camouflage the oops. I trimmed my threads leaving a tail. I realigned my needle with the needle threads, a few stitches back from where I accidently serged off. Then I began serging again. Later, I pulled both thread tails to the back and tied them in a knot and trimmed them. With all the ruffles and flouncing, you’d have to inspect very carefully to find the oops!
I attribute my low number of oops to using a clear foot, serging slowly, pivoting a lot and taking breaks when my eyes got tired.
Tips on Serger Crochet
Beginning Rows of Serger Crochet
The first several rows of serger crochet are quick and relatively easy. For stitch lengths of 4, 3.5, and 3, I found it fairly easy to use the needle markings on the toe of the foot as my guide for the edge of the loops so I caught all the loops in my stitching. (I used the 1st line on the right as my guide, which is the position of my O2 needle (the right needle).
Middle Rows of Serger Crochet
As the stitch length gets smaller and you create more and more of a flounce you need to stop more often and reposition the loops. At about a stitch length of 2.5 and 2, I started lining the loops up with a point under the presser foot, closer to the needle than the toe of the presser foot. The point I used was the metal edge of my needle plate that was aligned with my right needle. Because of the curve/wave it was too difficult to force the fabric to to match up with the right most marking on the toe. I did this by watching the loops through the clear presser foot. I also needed to lift the toe of the presser foot every so often to realign the loops and make sure they were staying flat and not bunching up.
Last Rows of Serger Crochet
At a stitch length of 1.5 and 1, I had to stop very often and actually raise the presser foot to release the pressure on the thread fabric and keep loops flat and aligned (like every ¼”-½” ). Also I had to actually watch the needle catch the loops through the clear presser foot. Because of the wave/curve, it was pretty much impossible to keep the edge of the loops aligned with the marks on the presser foot. I lifted the foot and slightly moved the loops into position and then lowered the foot and kept going. I always made sure the needle was down in the loops before I lifted the presser foot.
How Long to Complete?
As you can see from the data below, as the stitch length got shorter, the time to complete the row became a lot longer. This is due to the flounce effect – more distance to cover and more time spent lifting and adjusting loops to keep them aligned and flat because of the sharper and sharper curves. The last few rows took a REALLY LONG time, but that is where most of the volume was created.
- 30 minutes – 8 rows at SL 4, 4 rows at SL 3.5 and 1 row at SL 3
- 20 minutes – 3 rows at SL 3, 4 rows at SL 2.5
- 35 minutes – 4 rows at SL 2
- 65 minutes – 2 rows at SL 1.5 (I documented 65 minutes but I think I read the clock incorrectly. Based on the next entry I think it should have taken more time)
- 100 minutes – 1 row at SL 1.5
- 230 minutes – 1 row at SL 1.0
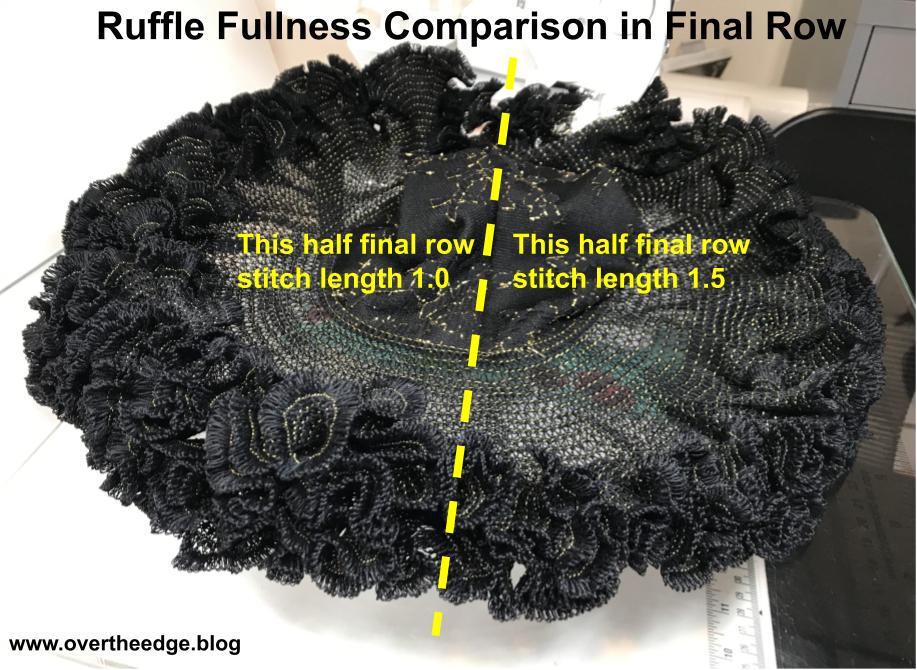
So it took me about 8 hours to complete the serger crochet on my witch hat. Almost 4 hours of that time was spent on row 28, the last row, at a stitch length of 1.
I could have stopped after row 27 and finished the brim in about half the time, and that hat would have still looked great. It would have been ruffly, but not nearly as ruffly as it was with 28 rows. I’m glad I took the extra time for that last row. I think it’s beautiful! But I will tell you that last row was a little monotonous. I could only serge about 30 minutes of time before I had to take a break.
How to Make a Witch Hat with Serger Crochet
Thanks for following along with my serger crochet witch hat project. Are you inspired to try serger crochet? I hope so!

Resources
Serger Crochet Witch Hat Project from Baby Lock, https://babylock.com/learn-and-create/projects/serger-crochet-witch-hat
General Serger Crochet Tips from Baby Lock, https://babylock.com/learn-and-create/projects/serger-crochet
Tutorial from Wonderfil Specialty Threads – Making Serger Lace Tutorial, https://www.wonderfil.ca/blog/making-serger-lace-tutorial/2/13/2017
How to Draw a Circle with String, https://www.instructables.com/How-to-draw-a-circle-with-string/
If you are interested in more projects, check out the book, Serger Crochet, by Joan Friedrich and Nancy Zieman. Unfortunately the book is out of print. But you may be able to find a used or new copy on the internet or your local shop.