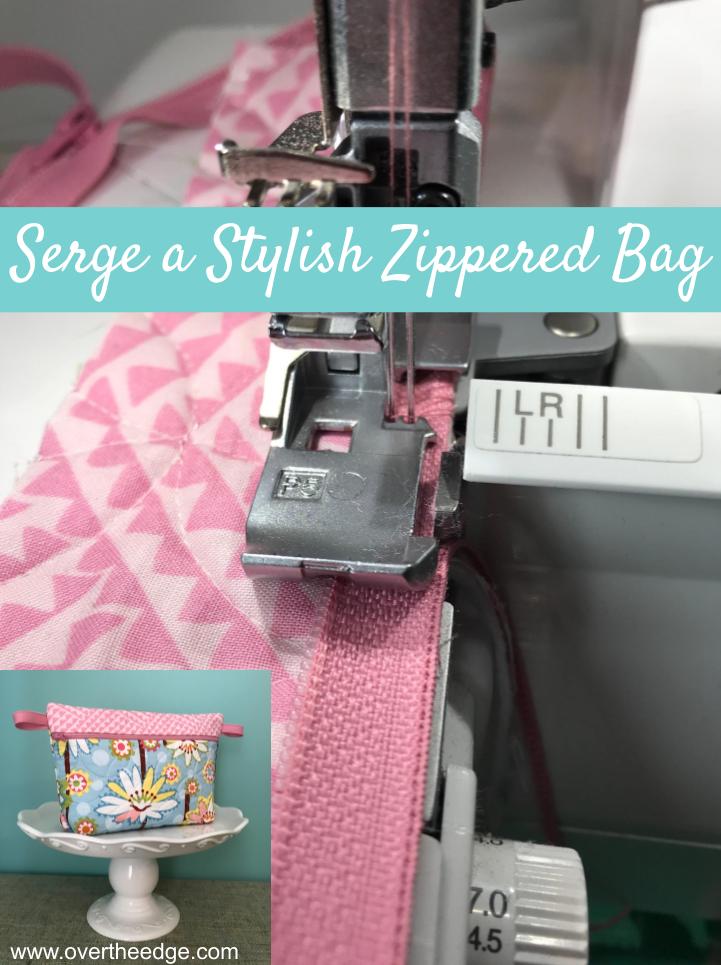

Zippered bags can be useful for storing or carrying all types of things. And they can be made in a wide variety of fabrics, sizes and styles. This simple design can transform from functional to fabulous with the addition of a few small details. Maybe you would like a flat bag or a bag with boxed corners? Maybe you prefer the zipper on the top, or somewhere in the middle? These bags are quick to make with a serger. Only 4 or 5 seams! Made completely on the serger, including the zipper! Follow along with my Serge a Stylish Zippered Bag tutorial and learn to use your serger to put in a zipper with a piping/cording foot. You won’t be able to stop with just one. These bags make great gifts!
Simple Serged Bag with a Zipper
If you’re new to installing a zipper with a serger (or would like a refresher) you should begin by making a simple serged bag. Watch my YouTube video, Simple Serged Bag with a Zipper and follow along with me as you make your first simple serged bag with a zipper.
Serge a Stylish Zippered Bag
The Serge a Stylish Zippered Bag I am featuring in this tutorial is a slightly dressed up version of the bag from my Youtube video – Simple Serged Bag with a Zipper. The stylish bag has a pleated bottom, side tabs and an accented top edge. I like to use double sided quilted fabric to give the bag a little structure. Use purchased double sided quilted fabric or make your own. The double sided quilted fabric makes your bag pretty on both the outside and the inside.
Supplies
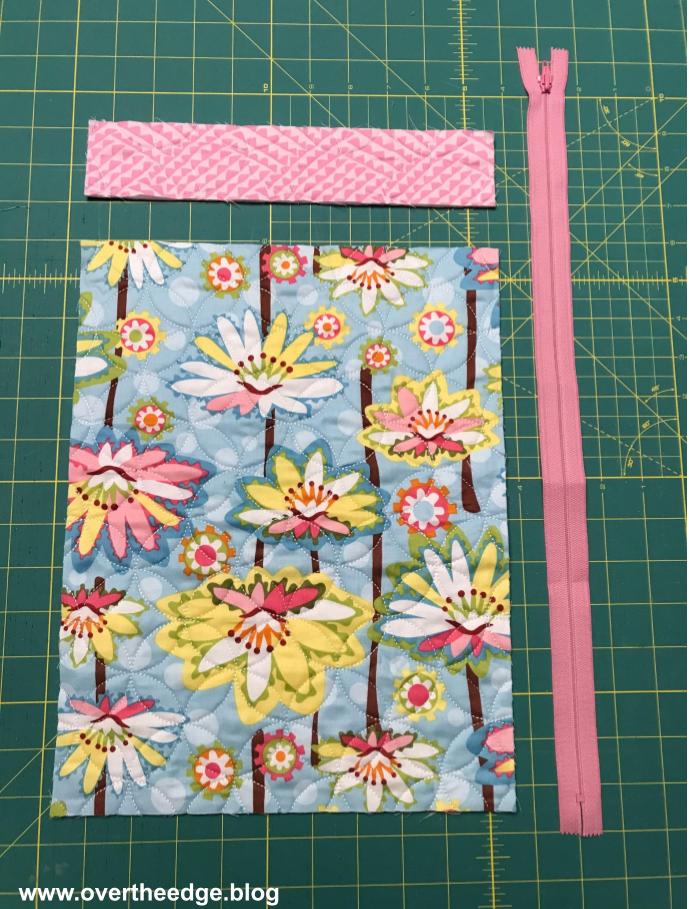
- 10”x15” piece of double sided quilted fabric (purchased or do it yourself)
Cut into 2 pieces 10”x2” and 10”x13”. I flipped the 10″x2″ piece over so the pink fabric on the back side became the right side.
- A plastic coil zipper at least 14” long or longer (at least 4” longer than the width of your bag fabric)
- 8” of grosgrain ribbon, or left over zipper tape (my zipper was 18” long, which gave me about 4” of extra zipper I could split in half and use as side tabs)
- Serger capable of 4 thread overlock stitch
- Four cones of serger thread to coordinate with fabric
- Piping/Cording Foot for your serger (5mm is best)
Serger Settings
- Install Piping/Cording foot on your serger
- Set up serger for 4 thread wide overlock stitch
- Stitch length = 3
Install First Half of Zipper
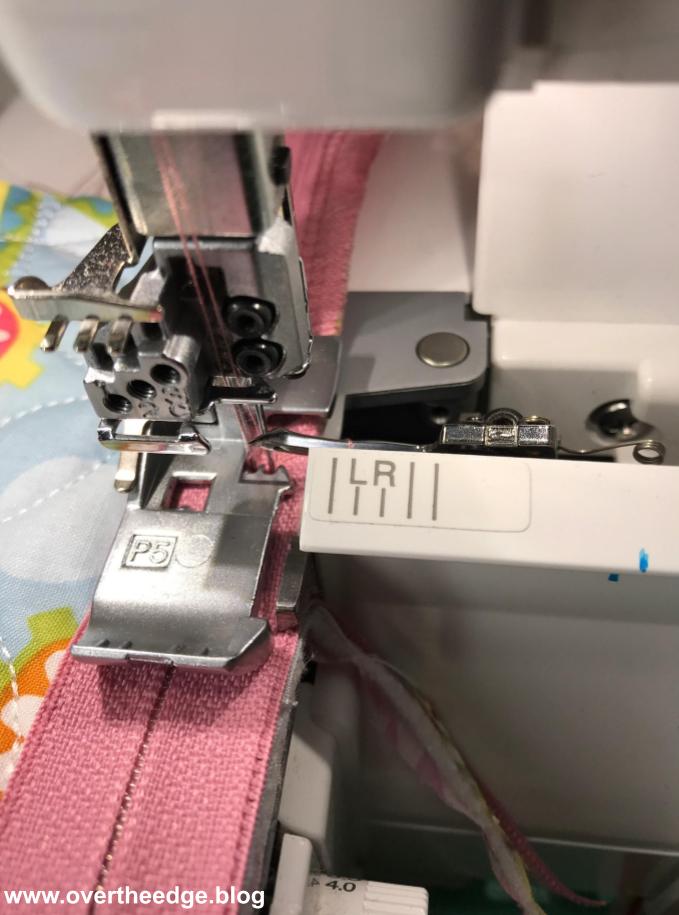
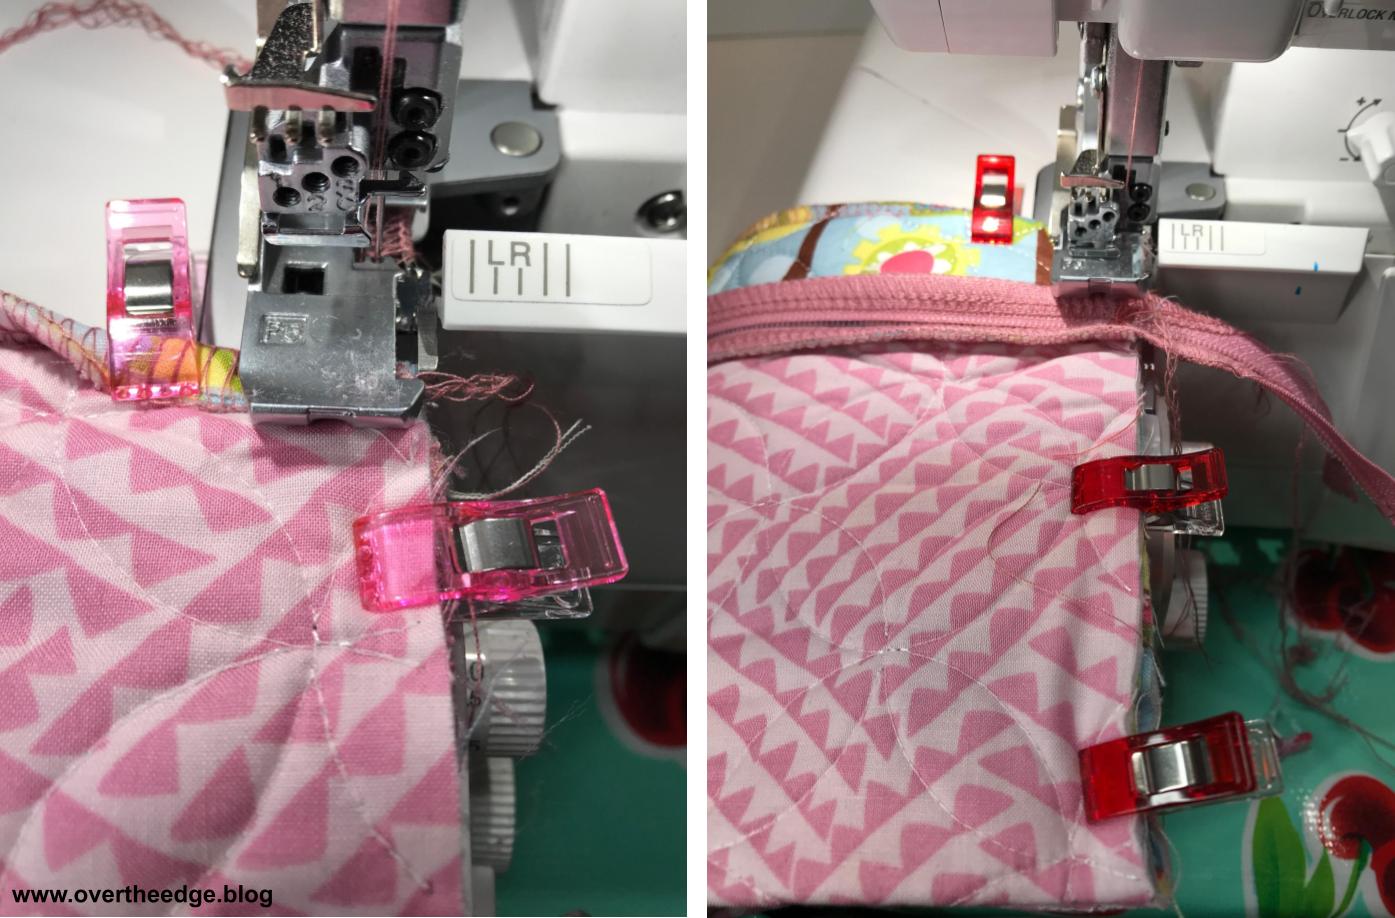
Lay your 10”x13” piece of fabric right side up with one of the 10” sides at the top. Position your zipper right side down centered along the top of the fabric, having one side of the zipper tape aligned with the raw edge of the fabric. Zipper should hang off the edges by about 2” on each side. This extra zipper length is needed to be able to maneuver the presser foot around the zipper pull and zipper stop. Clip in place with wonder clips.

Place zipper and fabric under the presser foot, with the zipper pull behind the presser foot. The coil of the zipper should be placed in the groove on the bottom of the piping/cording foot.
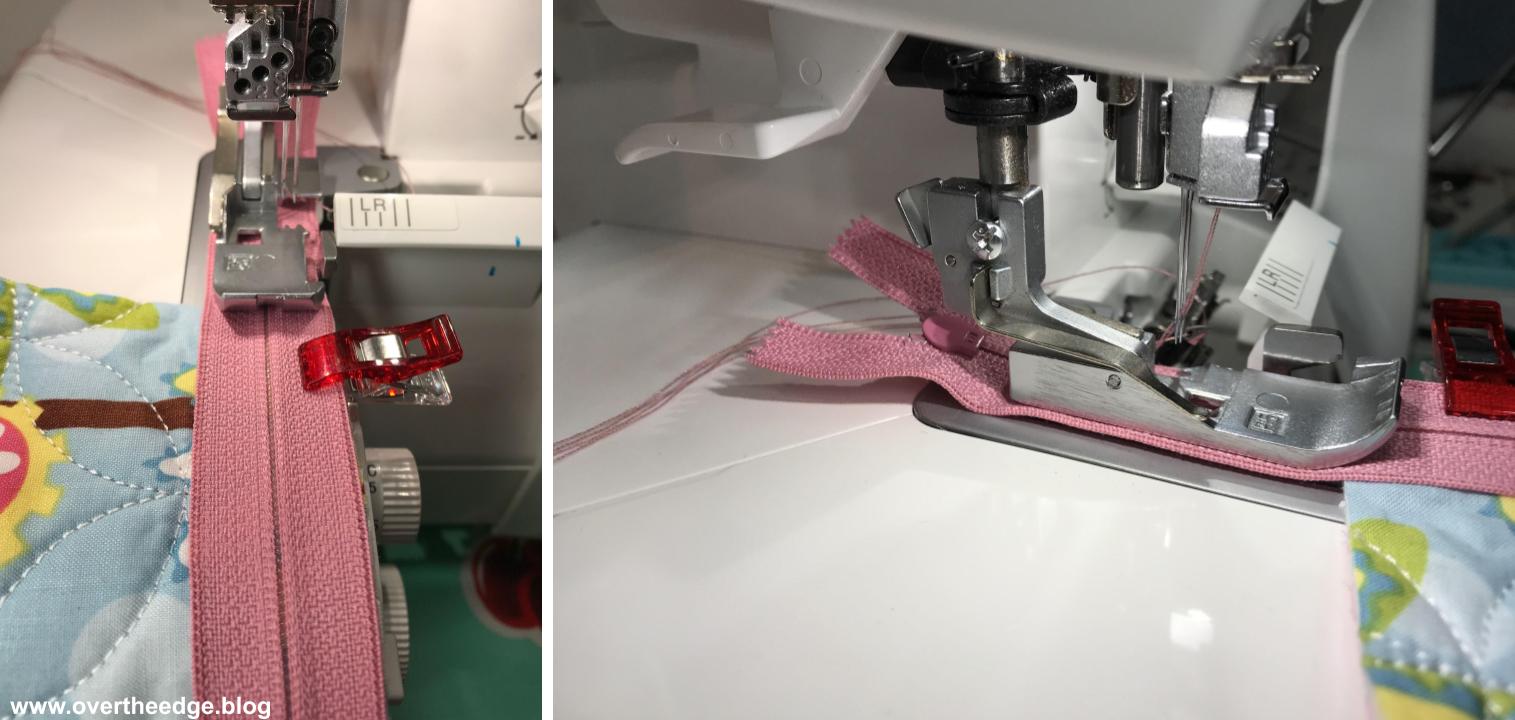
Serge. You will be trimming a little bit of zipper off as you serge. Keep serging until you are off the edge of the fabric. Then swing the project away from the blade and serge off the zipper tape.
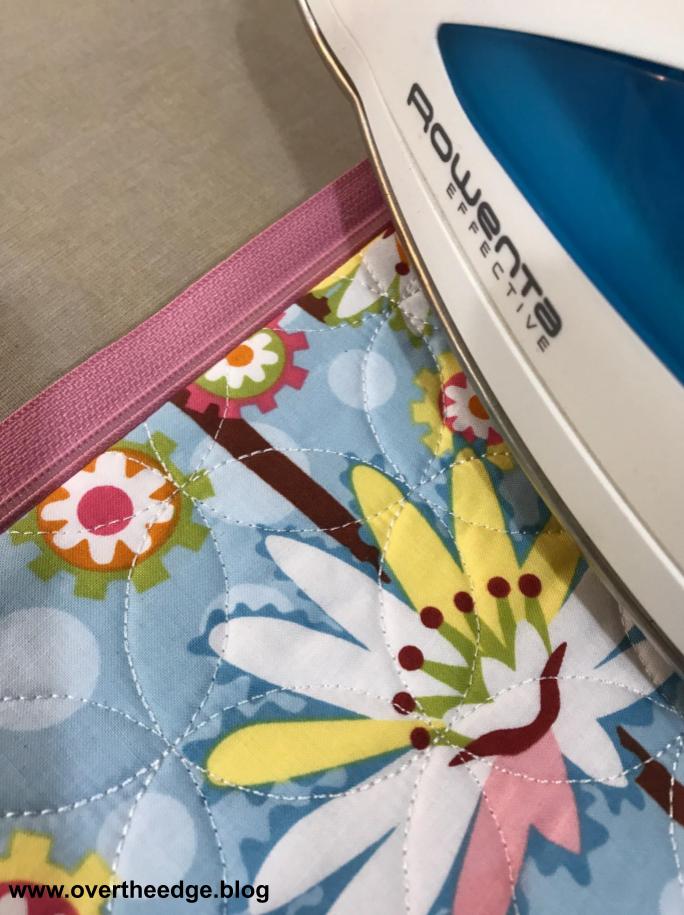
Carefully press the seam away from the zipper coils. I used a press cloth to protect the zipper (you can’t see the press cloth in the photo because I wasn’t actually pressing when I took this photo.)
Install Other Half of Zipper
Make marks on the second side of the zipper tape, aligned with the edges of the fabric.

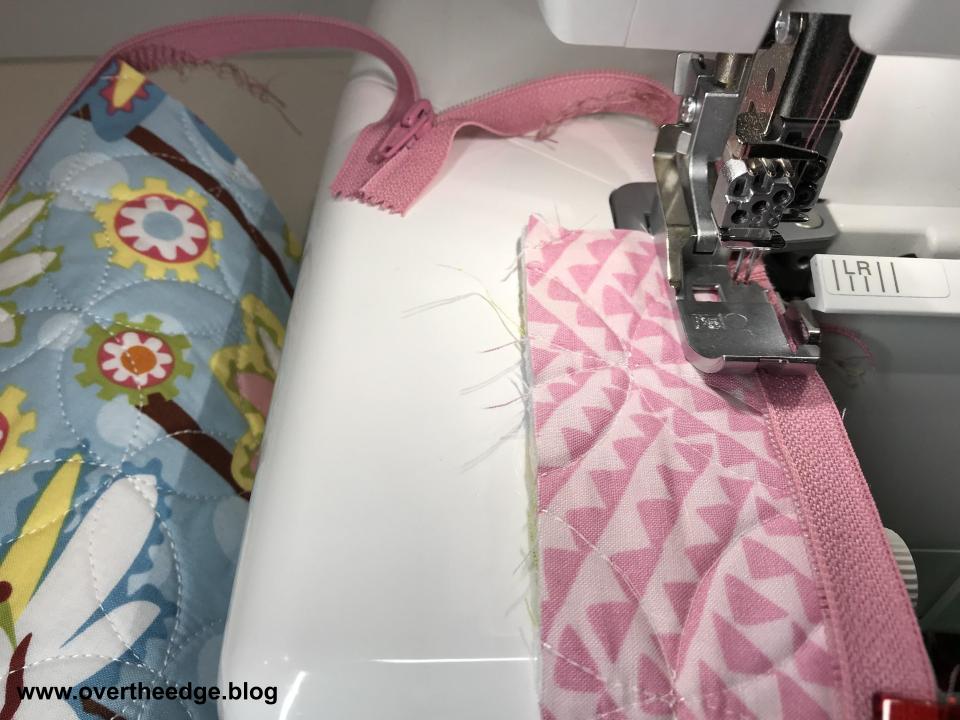
Now line up the second side of the zipper tape with the 10” side of the 10”x2” top accent fabric. Make sure the side edges of the the two pieces of fabric are aligned.

Place the zipper right side down on the right side of the accent fabric. Make sure the edges of the fabric line up with the marks on the zipper tape and clip together. Unzip the zipper.

Serge the other side of the zipper to the bag fabric in the same manner as the first. Make certain the coils stay in the groove as you serge.
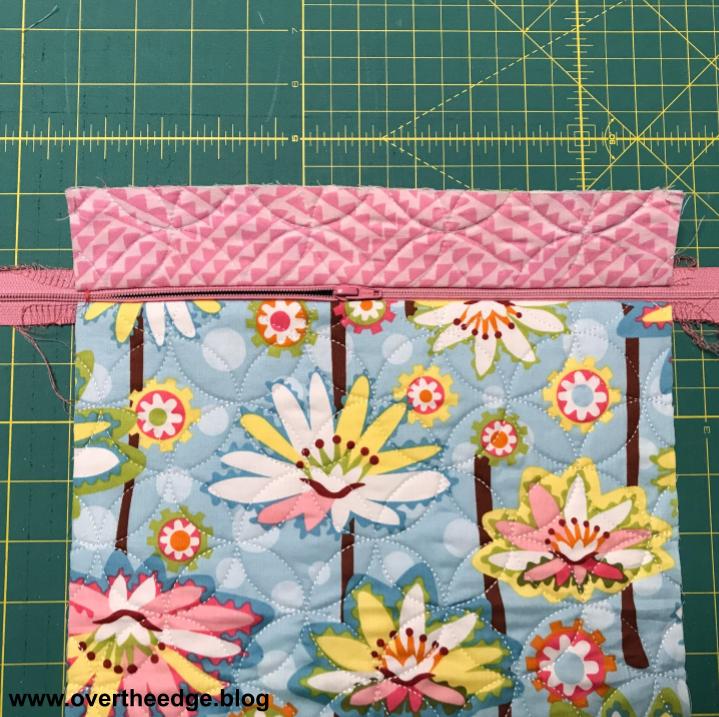
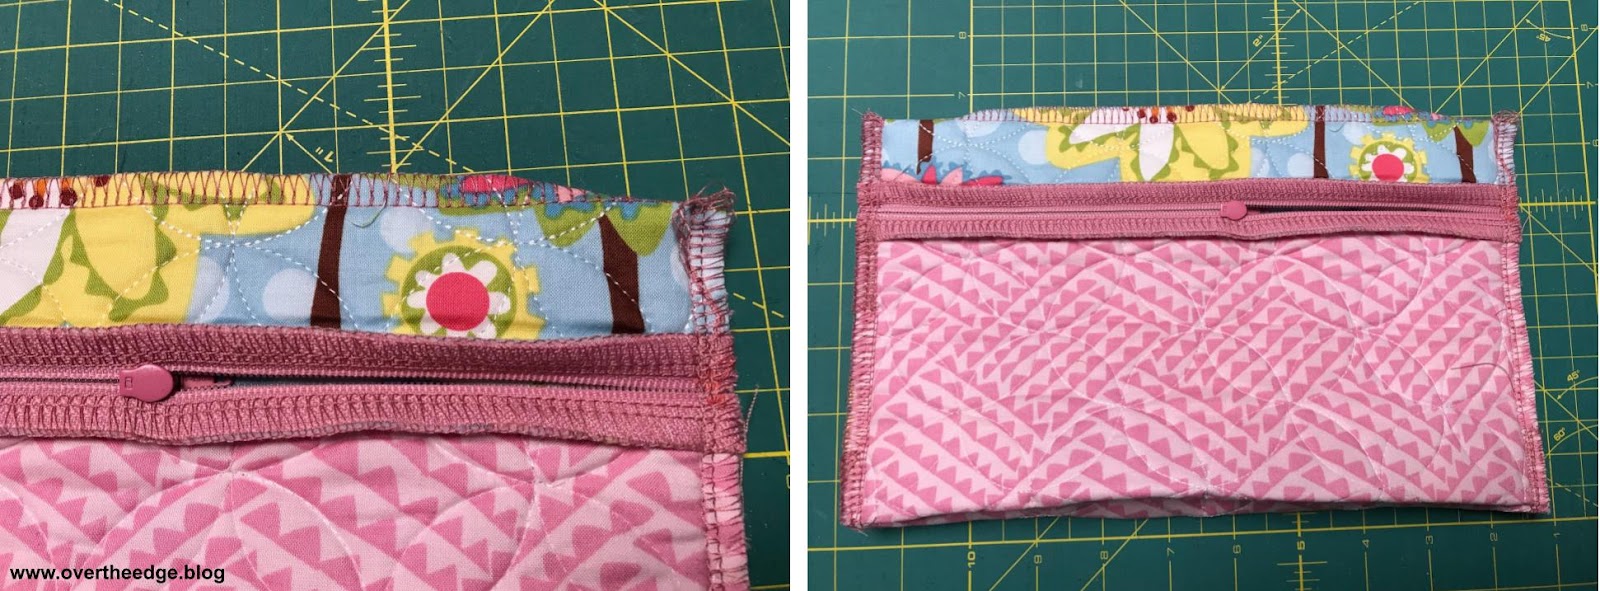
Using a press cloth press the zipper seam allowances away from the zipper.

Top Seam
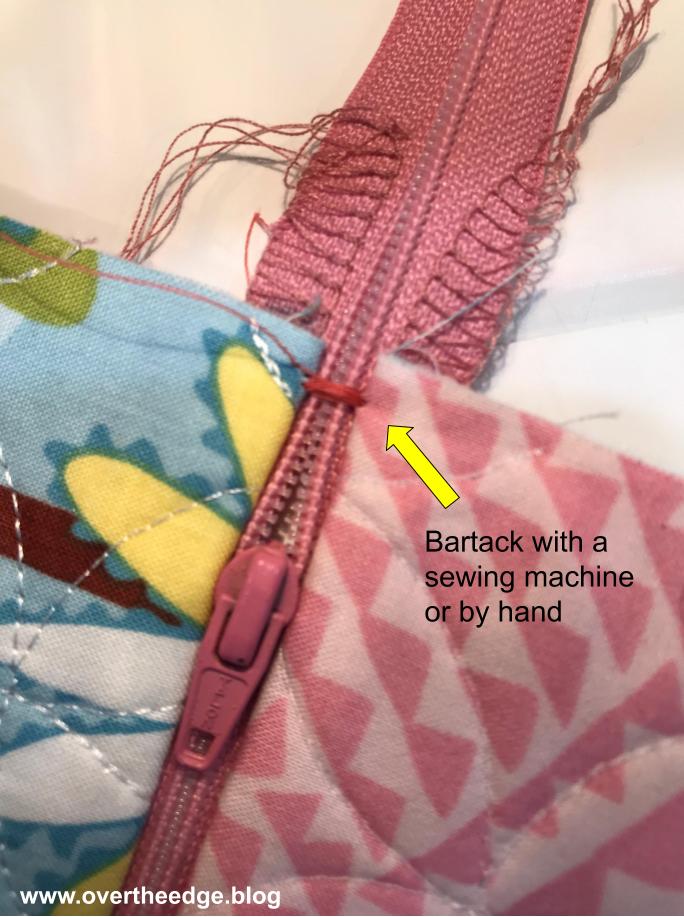
Make sure your zipper pull is within the bag and not hanging off the edge. You don’t want to cut off the zipper pull when you serge your side seams. Ideally you want it about in the middle, so you will be able to turn the bag right side out in a future step.
Bartack the two sides of the “open” end of the zipper together. This way the end of the zipper won’t shift as you serge the seam.
Fold bag in half right sides together, matching the top edges. Serge together along the top edge only. I used my piping/cording foot for this step. Depending on your serger you may need to change back to your standard presser foot serger. You will now have a tube.


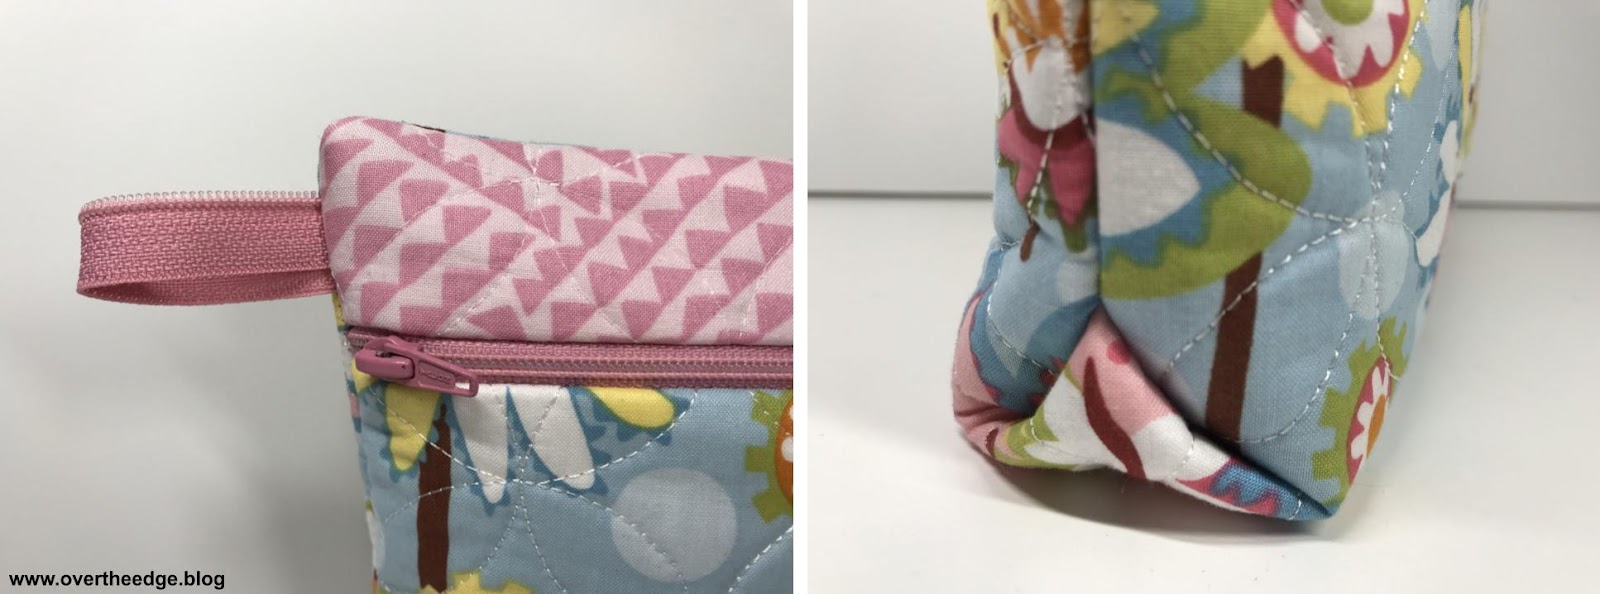
Add Side Tabs
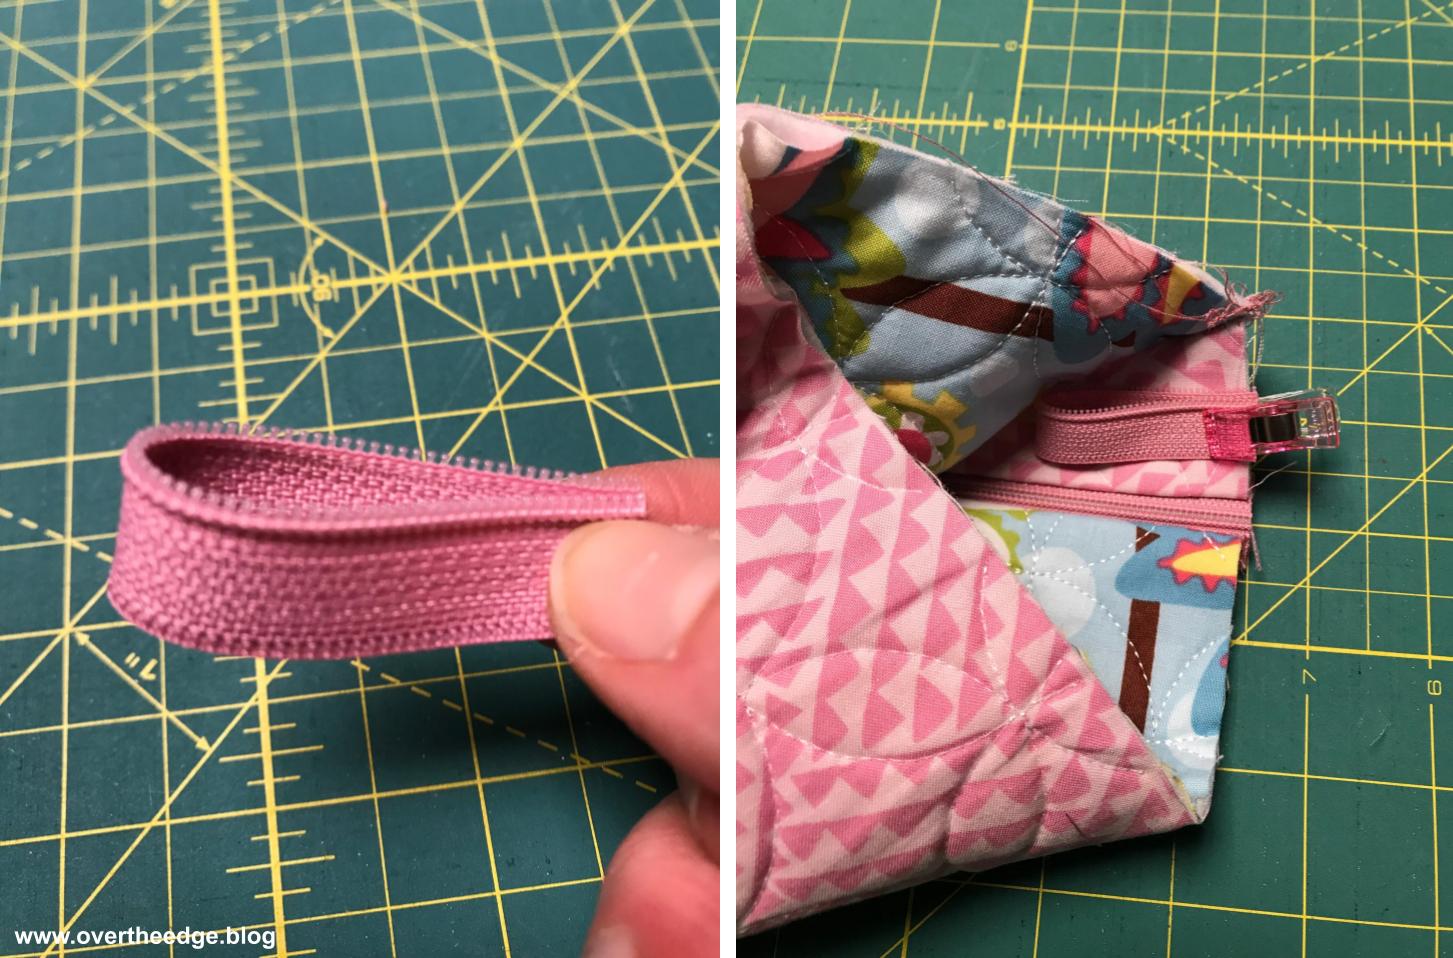
I used the 4” long leftover pieces of my zipper as side tabs. I used an 18” zipper (instead of a 14” zipper) so I had enough extra to make tabs. A piece of folded ribbon works well too. I offset the coils a little bit so there was less bulk when I serged the tabs into the side seams. I also placed them in the side seam above the zipper and below the top seam to keep extra bulk away from the zipper or top seam.

Bottom Pleats
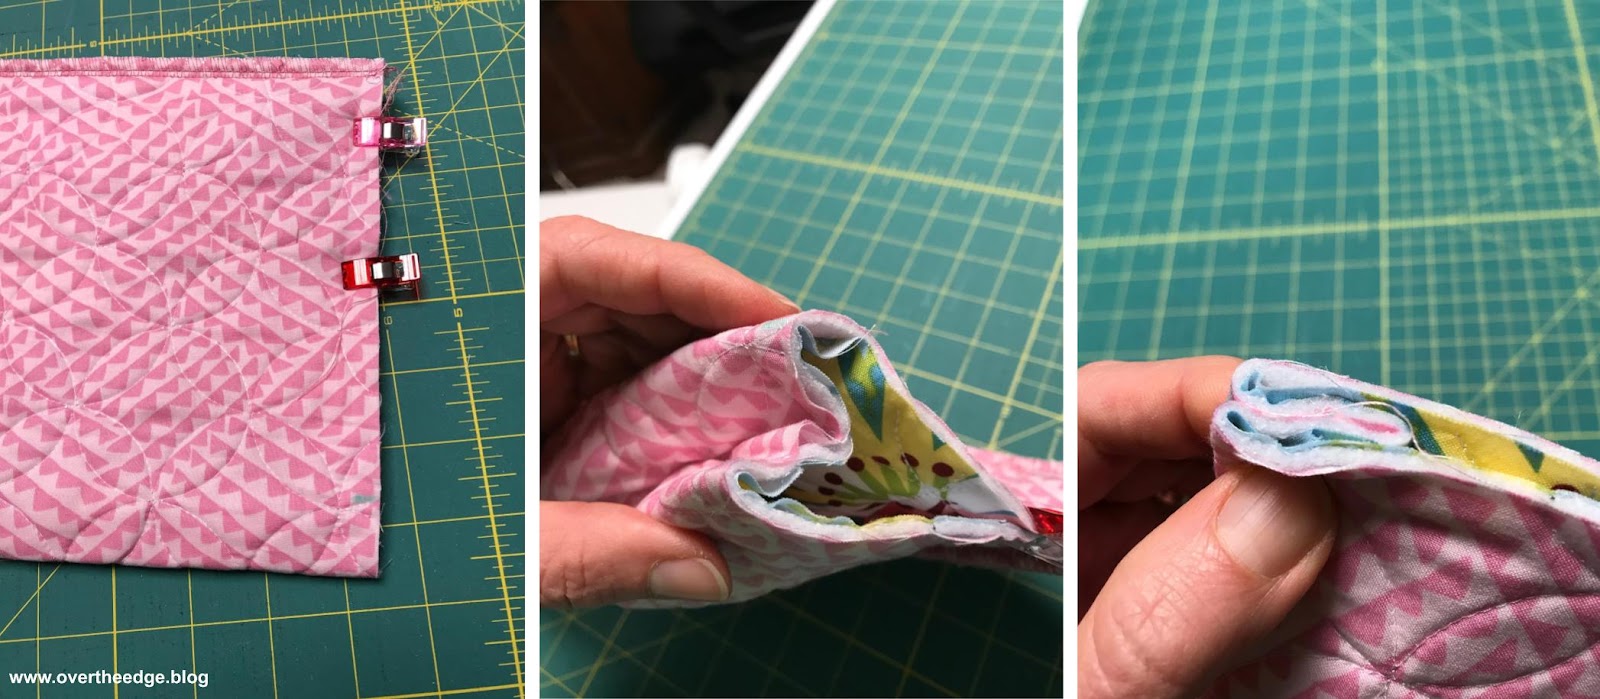
Fold your piece in half right sides together with the top seam at the top. At the bottom fold of the bag make a mark. Then make a mark 1” from each side of the bottom fold. Do this on both sides. Fold at these marks as in the photos below so you have a pleat. Repeat on the other bottom corner of the bag. Clip in place.
Side Seams
Line up your side seams and clip with wonder clips.

Wrap your corners at the top edge so you don’t have to clip the corners after serging. Check out my His and Hers Pillowcase tutorial with more information about wrapping corners with a serger. https://overtheedge.blog/tutorials/his-hers-serger-pillowcases-tutorial/
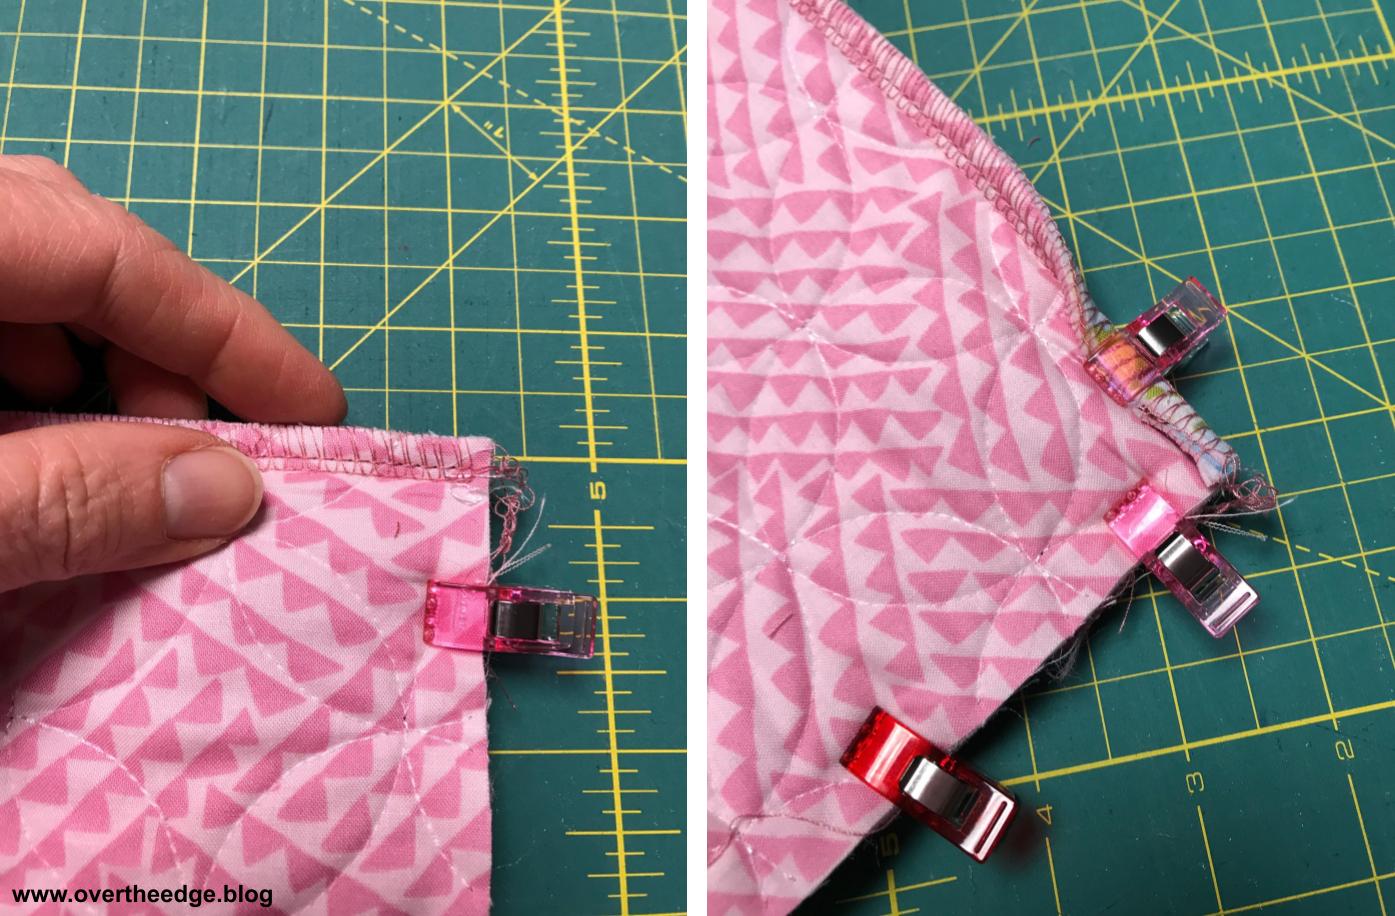
Serge both side seams having the zipper tape side up. Secure the ends of your seams using your favorite method.
Turn the bag right sides out. Poke out your corners. Press. You can add a ribbon to the zipper for a zipper pull if you like. Your bag is ready to use. Enjoy!
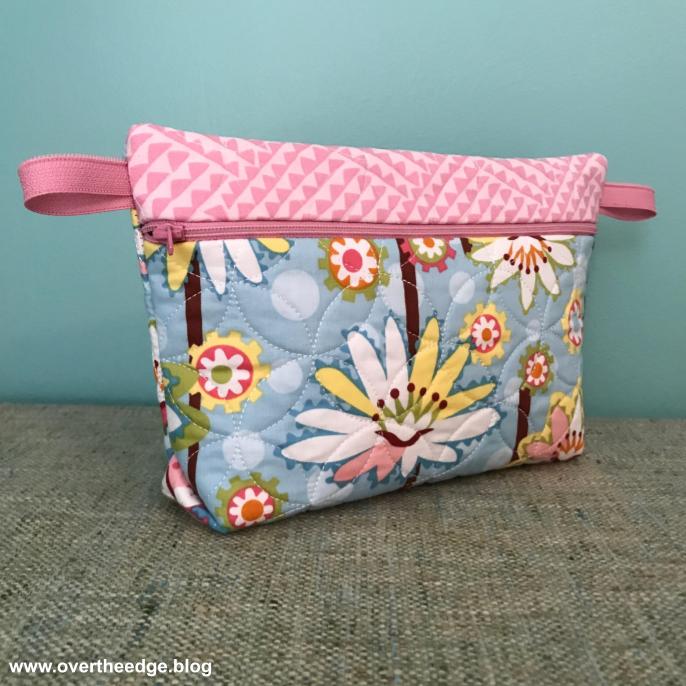
Serge a Stylish Zippered Bag
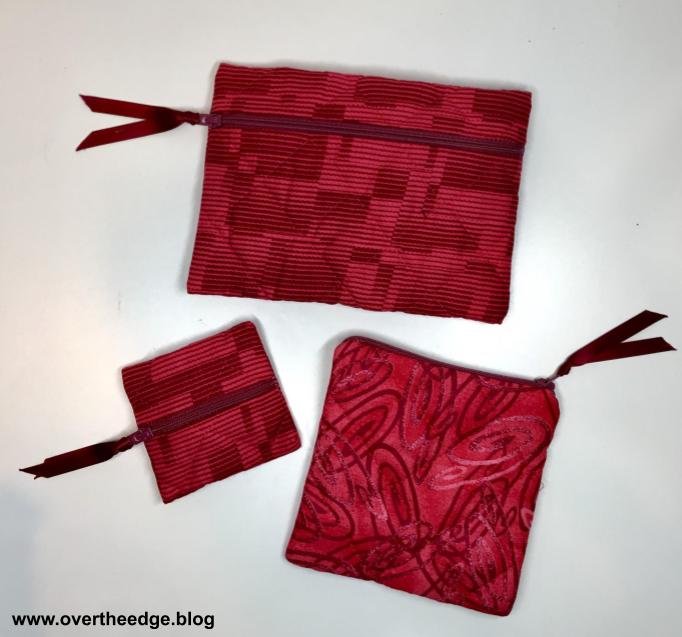
The great thing about this simple bag is that you can easily adjust the size to whatever you need. Just make sure the zipper is at least 4” longer than the side of the bag you are going to attach it to. If not you won’t be able to maneuver the zipper pull around the presser foot. Also with thick fabric like quilted fabric, it is normal to see a bit of your serged stitches in the seams of thick areas such as by the zipper or in the corners.
Learn More about the Serger Piping/Cording Foot
You can do more than just insert a zipper with a serger piping/cording foot. Check out my blog post below for more ideas.
https://overtheedge.blog/?p=1086

Resources
Jen’s Simple Serged Bag with a Zipper YouTube Video https://youtu.be/axVoafVxxLE
https://babylock.com/learn-and-create/projects/serged-zipper-pillow – project using cording foot.