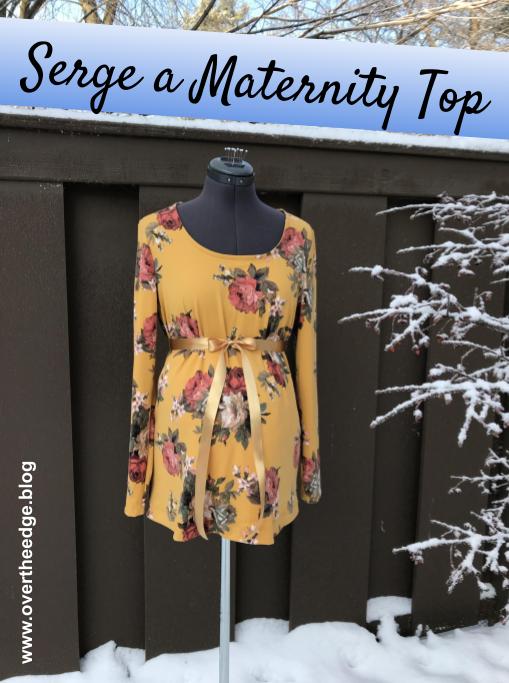
How to Serge a Maternity Top Using a Sewing Pattern

I have exciting news – I am going to be a grandma! My serger will be busy this year making maternity and baby things. And the first project I have to share with you is a maternity top for my daughter, the mommy to be. Follow along with me and learn about serger presser feet, attachments and techniques as I show you how to serge a maternity top.
The Pattern
For this top I used Burda pattern 6607, View A.

Serger Stitches, Techniques, Presser Feet and Attachments I Used to Serge a Maternity Top
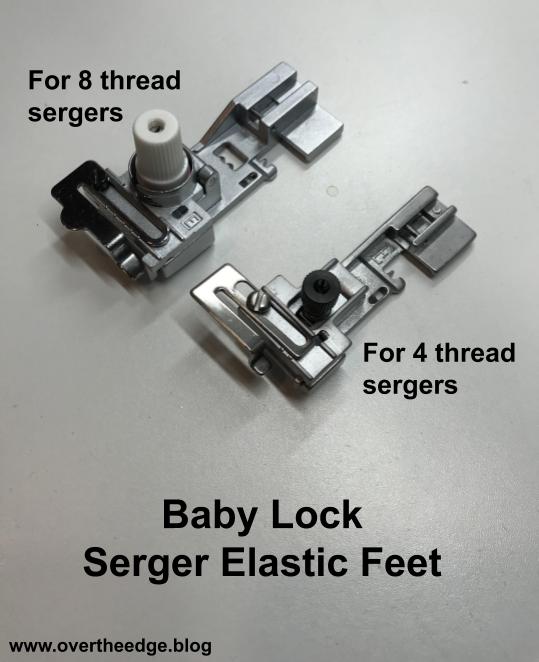
- 4 thread overlock with standard presser foot for seams
- 4 thread overlock with standard presser foot for stabilizing shoulder seams with clear elastic
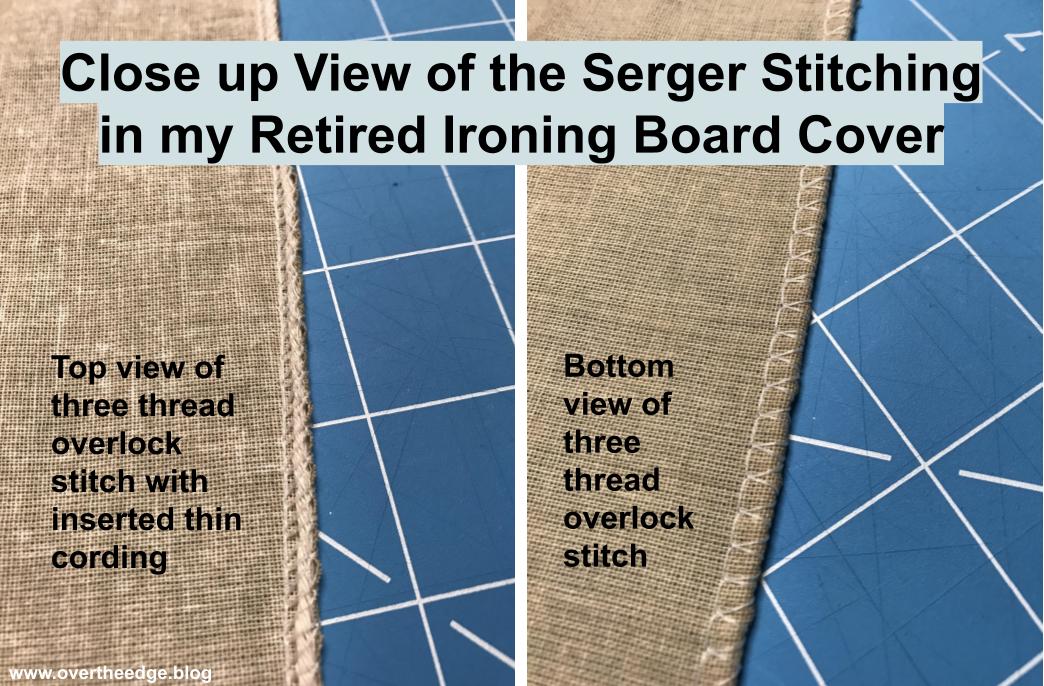
- 3 thread rolled hem with standard presser foot for thread chain belt loops
- 2 thread narrow cover stitch with cover stitch foot and fabric guide attachment for neckline hem, sleeve hems and bottom hem
I made this maternity top completely with my serger, but you could substitute a sewing machine twin needle for the hems if you don’t have a cover stitch capable machine.
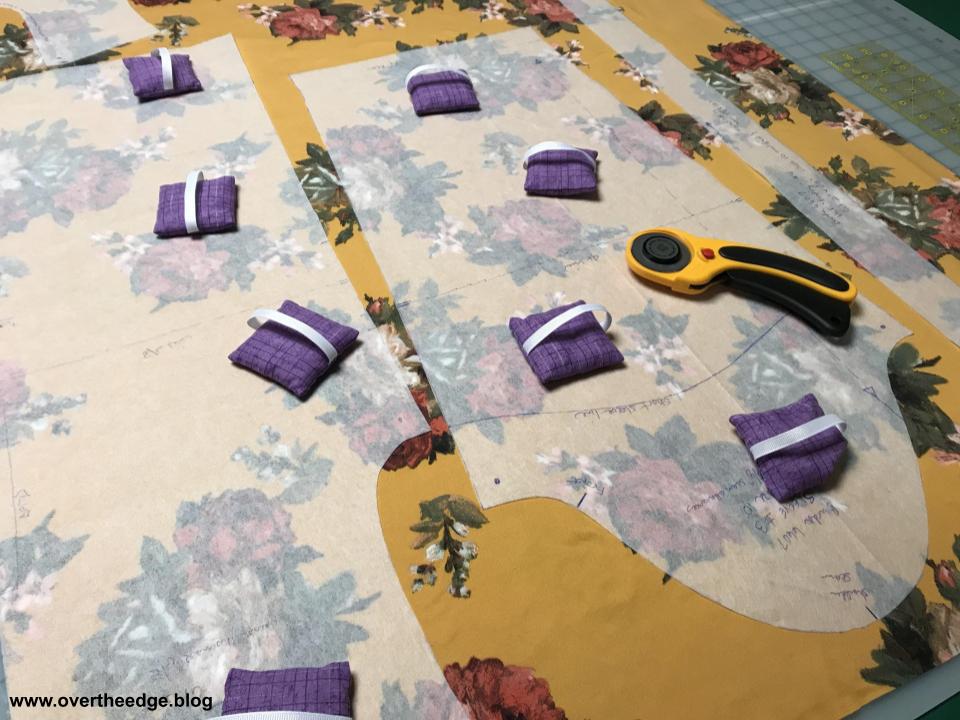
Prepare Pattern Pieces
I used a super soft, brushed polyester matte jersey for this top. Because it liked to stick to itself, It was a little finicky to layout smoothly for cutting. But my serger handled it well.
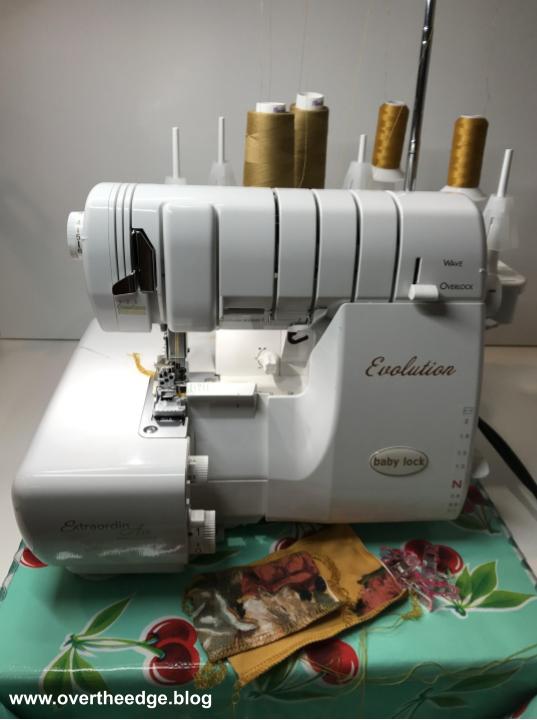
Set Up Serger and Test Stitches and Settings
Using the fabric scraps leftover after cutting out my pattern pieces, I tested my stitches and settings. I used Maxi Lock serger thread in the needles and Gutermann Bulky Nylon in the loopers. My stitch settings for the 4 thread overlock were as follows: stitch length 2.5, stitch width M (which is about 6) and differential 1.
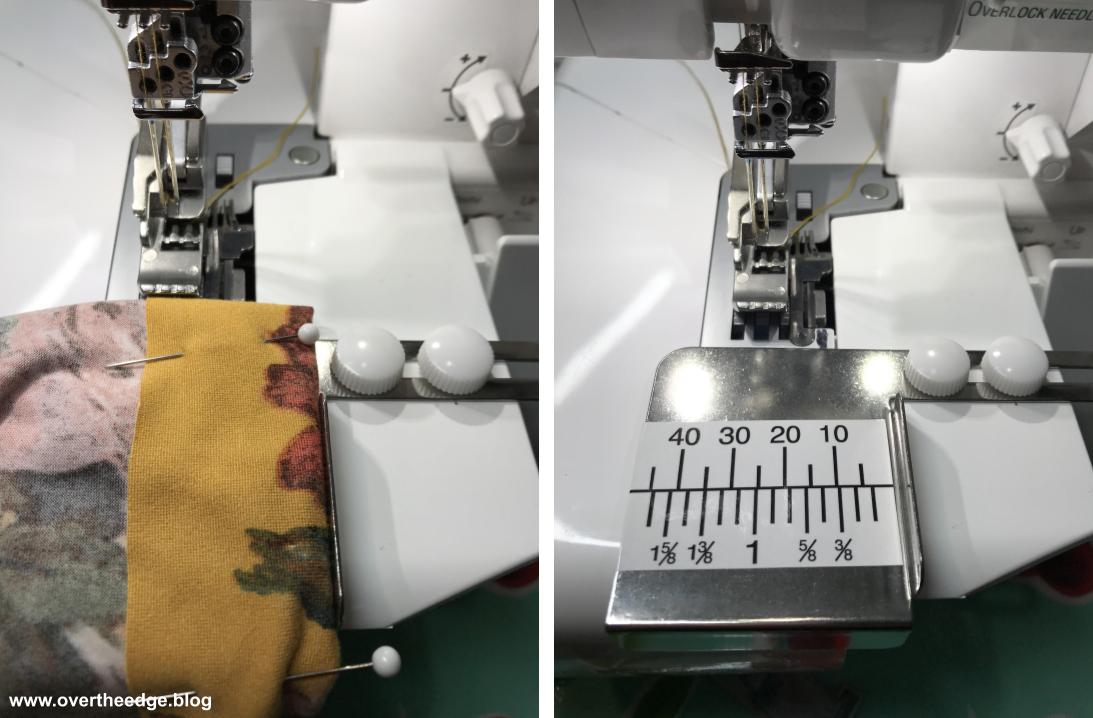
⅝” seam allowances
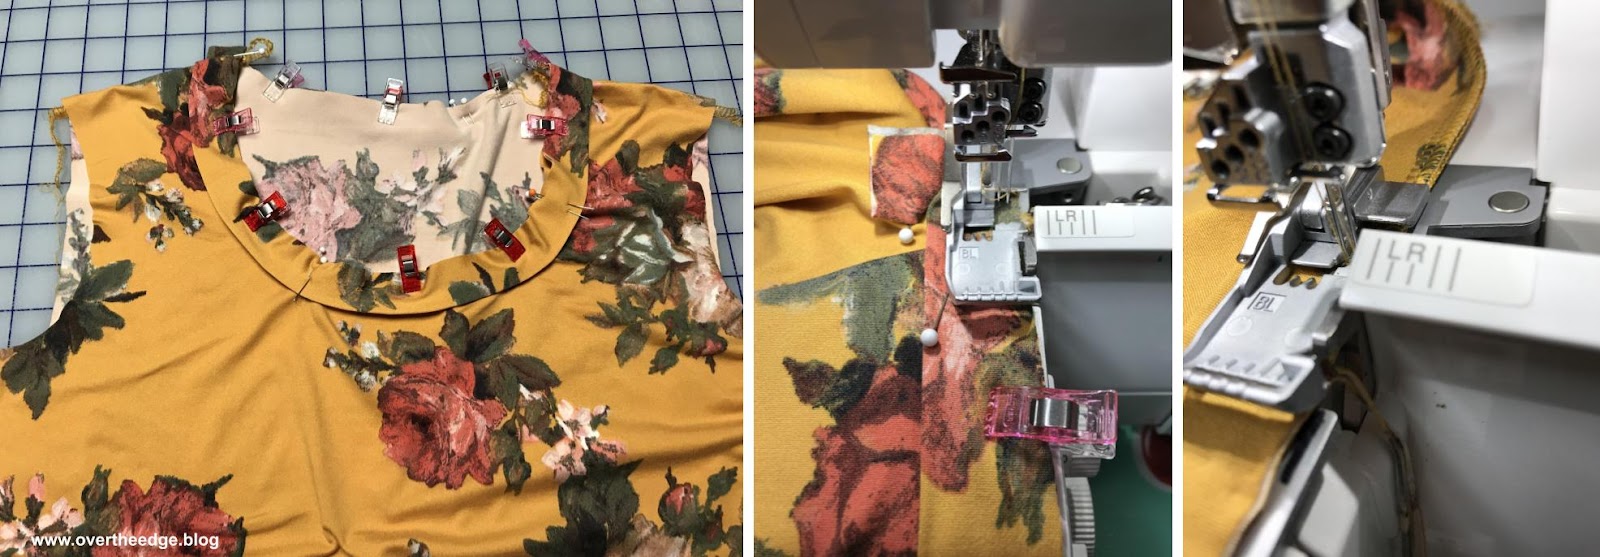
This pattern calls for mostly ⅝” seam allowances. But a typical four thread overlock seam allowance is closer to ¼”-⅜” wide. I just used the knives on my serger to cut off the extra seam allowance. If you notice in the photos below I am lining up the raw edges of fabric with the L marking on my knife cover. On my machine the L marking is ⅝” from the left needle position on a four thread overlock stitch using a stitch width of about 7.5. I serged with a stitch width on M or 6.0, so my seam allowances were a little shy of ⅝”, but that little bit of difference was just fine for this soft stretchy knit.
Order of Construction
The pattern instructions were not written specifically for a serger. So to save time and minimize changeovers between overlock stitches and cover stitches, I altered the order of the steps listed in the pattern. Here’s how I serged together this maternity top.
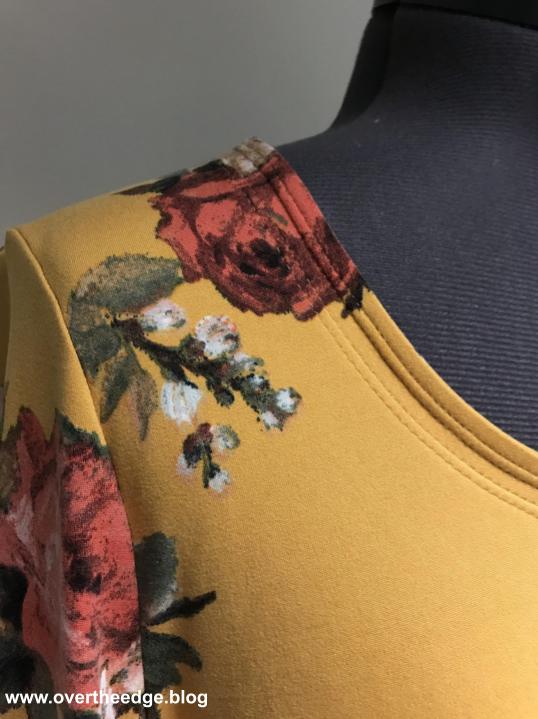
Serge and Stabilize Shoulder Seams
The first step was to serge the shoulder seams. I stabilized the shoulder seams with a piece of ¼” wide clear elastic. This elastic was originally part of a hanging loop in another garment that I no longer needed. I like to reuse whenever possible.

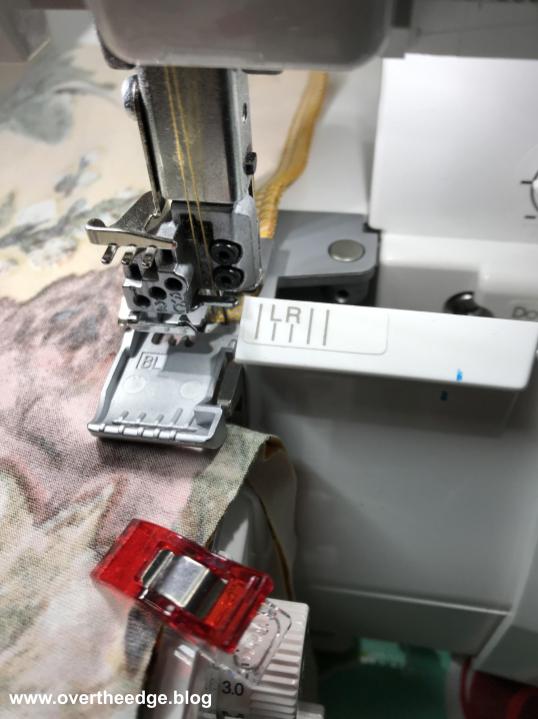
Stabilize Seams Using a Standard Presser Foot
There is a slot on the standard presser foot for my Baby Lock Evolution which can be used to guide elastic and insert it directly into the seam as I serge. If you don’t have a foot with a slot or guide, you could always baste your elastic in place by hand or with a sewing machine before you run it through your serger.
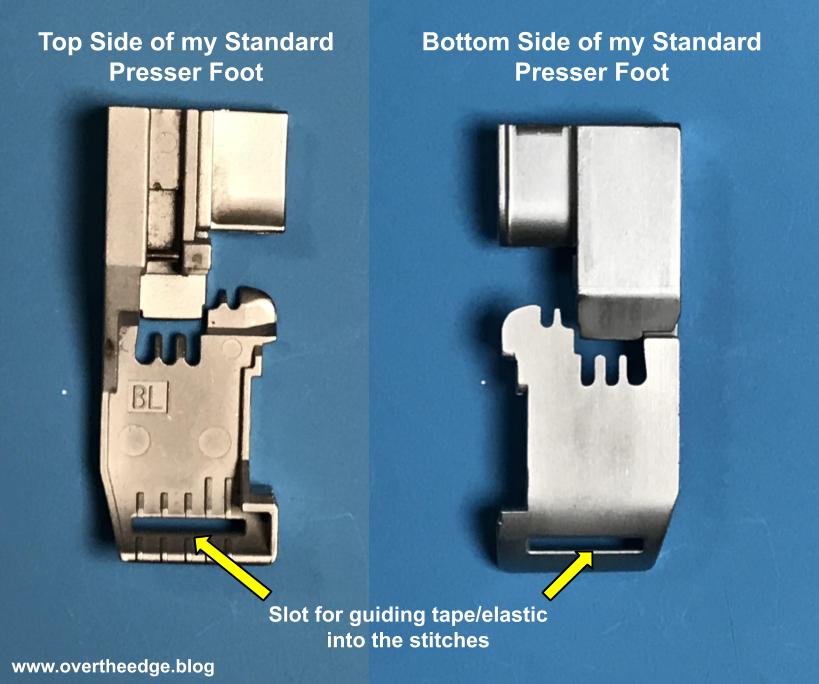
The elastic or twill tape is fed into the slot in the toe of the presser foot from the top. Then it is fed under the foot and out the back along the groove on the underside.
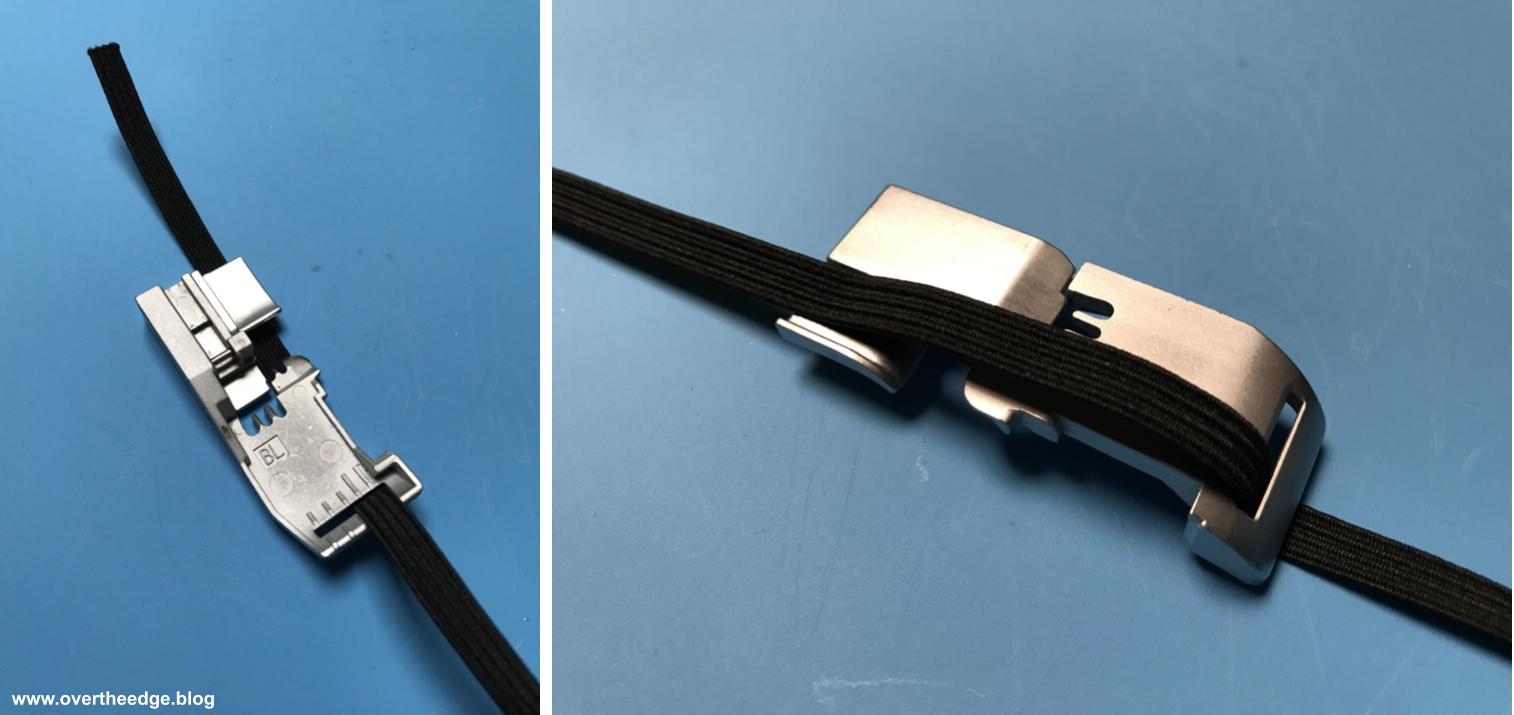
If you look closely at the photos below you will notice that I didn’t insert my elastic correctly when I stabilized the shoulder seams of the maternity top. Somehow I put the clear elastic through the slot from the bottom, over the front of the foot, under the needles and under the back of the foot. I don’t know what I was thinking that day, but at least it worked!

The serger applies the elastic or tape to the side of the seam that is up when you serge. I serged with the back side of the shirt up so the clear elastic would be on the back side of the seam. During later construction steps, I turned the shoulder seams to the back so the elastic ended up next to the wrong side of the fabric instead of my daughters skin. You’ll also notice that the elastic is completely encased in the serger stitches because it’s only ¼” wide. If you are using the standard ⅜” wide clear elastic, some of it will extend past the seam line.

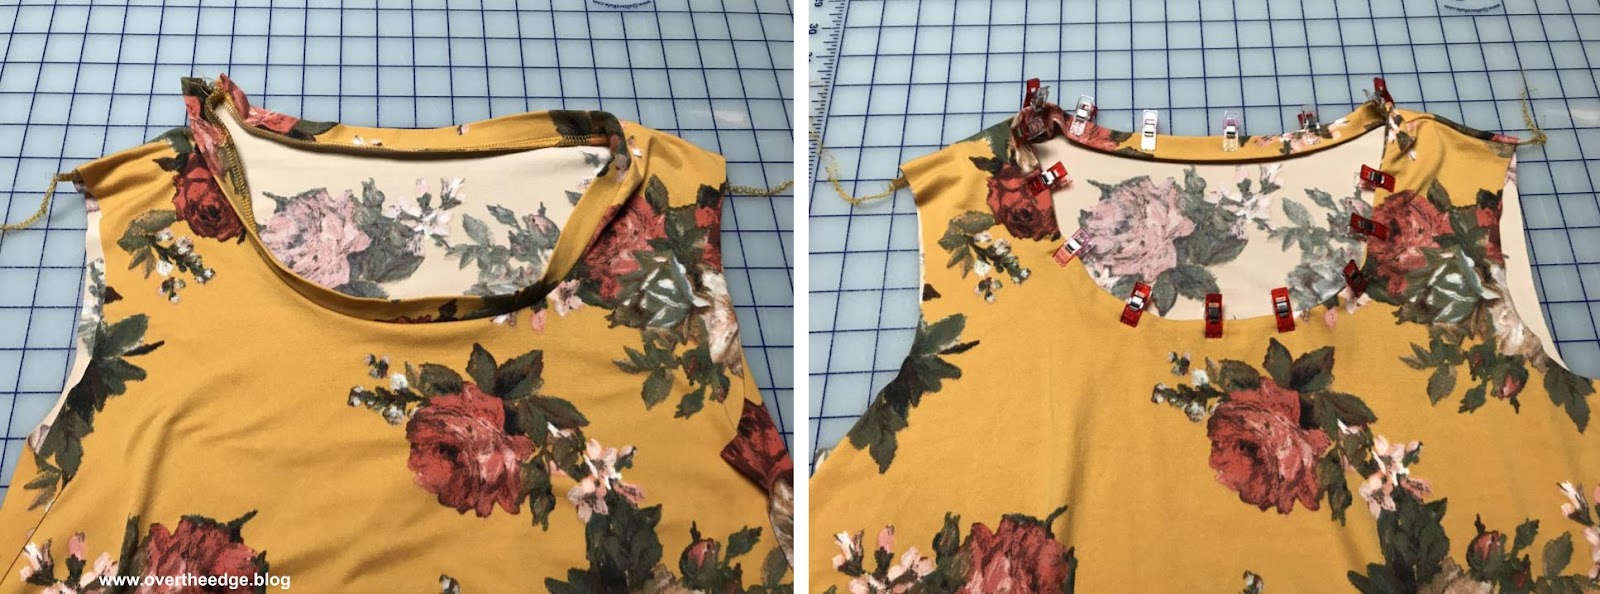
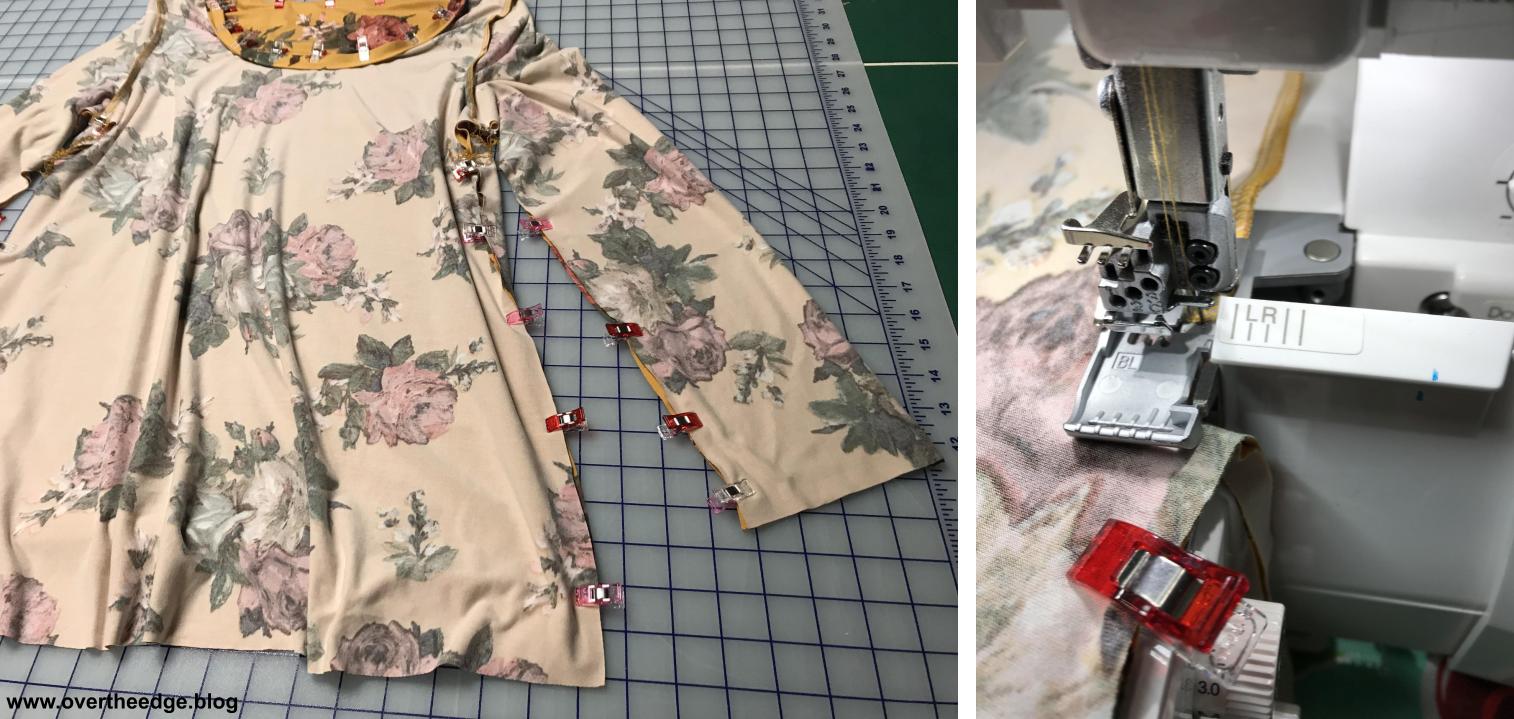
Attach Binding/Facing
I cut my binding/facing wider than the pattern instructed. I thought it would be easier to handle. It was easier to handle through the serger, but it created a little bit of a problem later, which I will explain in the hemming step. Notice here that I just skimmed the raw edges of the fabric to neaten them up. The seam allowances at the neckline were only ⅜” so I didn’t need to trim much off.
Attach Sleeves to Front and Back.
Next I pinned and serged both sleeves to the front and back of the top.

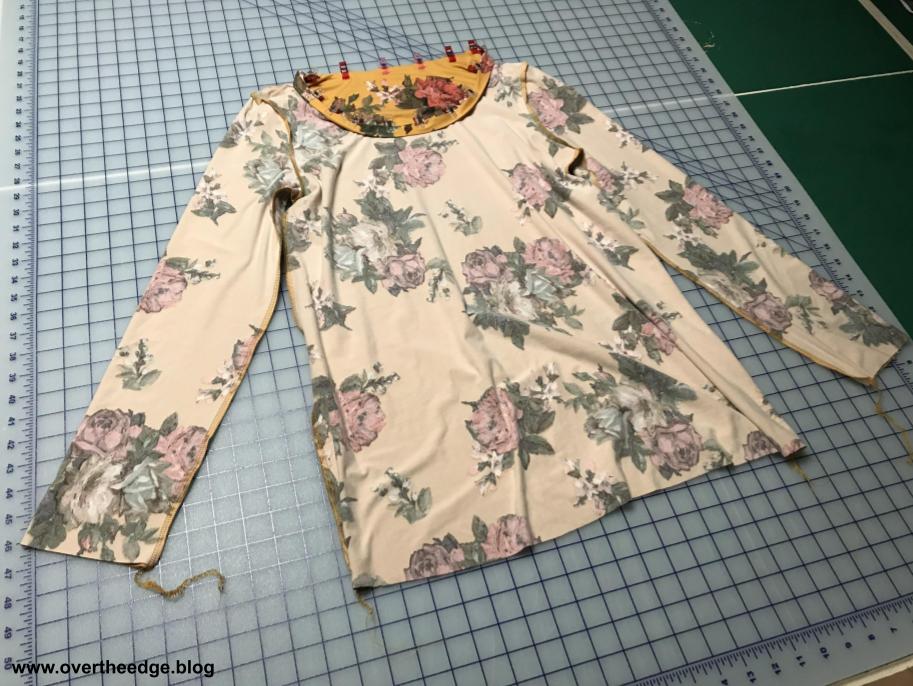
Side Seams from Bottom hem to Sleeve hem
Then I serged both side seams and sleeve seams from bottom hem to sleeve hem.
Belt Loop Chain – 3 Thread Rolled Hem
I serged the belt loops before doing the cover stitch hems, because switching from a 4 thread overlock to a 3 thread rolled hem is an easy changeover. The 3 thread rolled hem chain works as well for a delicate belt loop as the hand stitched thread loops as instructed in the pattern. However, I prefer to use my serger to make the belt loop chain. I serged about a yard of rolled hem chain, even though the belt loops only use a few inches each. I set this belt loop chain aside until the last step of this project.
To make a belt loop chain using the 3 thread rolled hem setting on your serger, set up for a standard rolled hem. You will be serging a rolled hem without any fabric. The presser foot should be in the down position or the stitch won’t form properly. Grab the chain behind the foot and gently pull straight back as you serge to keep slight tension on the thread chain. You will need to stop a few times to reposition your hand as you serge the yard of chain.

Hems
I serged all of my hems with a narrow cover stitch using my left and center needles at a stitch length of 4. Since all of my side seams and sleeve seams were completed prior to this step, I serged in the round. If you would like to learn how to finish a cover stitch in the round see my tutorial at https://overtheedge.blog/tutorials/finishing-off-a-cover-stitch-in-the-round/
I measured and pinned my hems to the desired depth. Most of the time when I serge I use clips instead of pins. But for 1¼” deep hems like this I like to use pins. Because the knives are disengaged while cover stitching I don’t have to worry about a stray pin causing damage to my knives

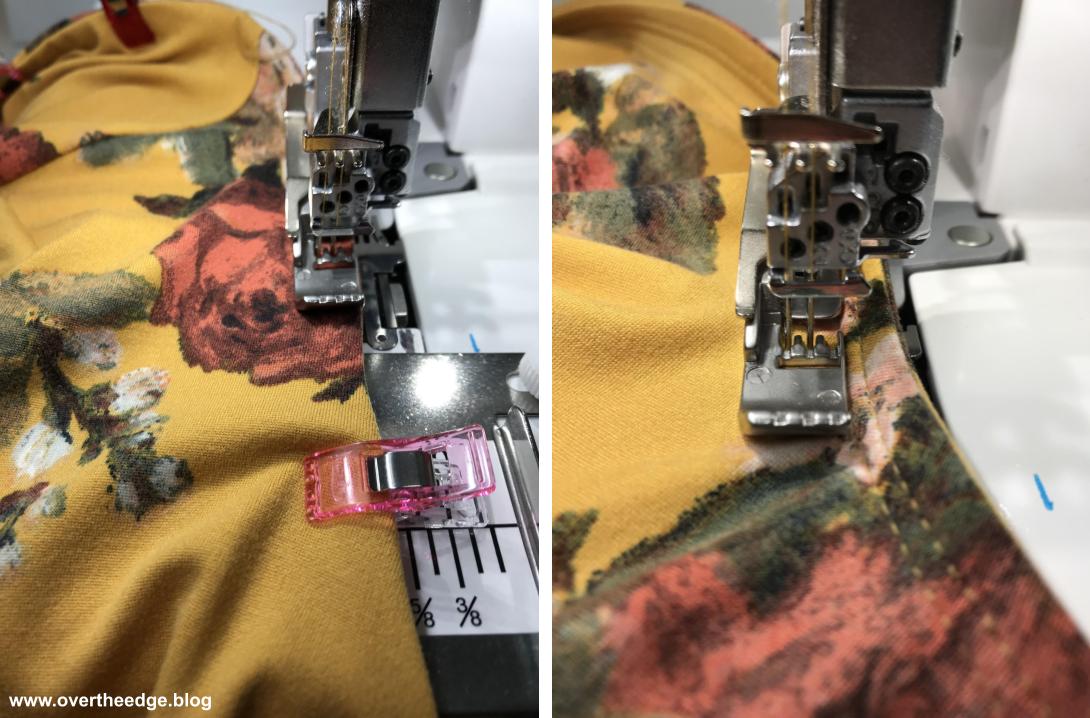
Presser Foot and Fabric Guide
When I hem with a cover stitch I like to use my cover stitch foot. You could use a standard presser foot, but the cover stitch foot has good visibility. I also like to use a fabric guide when I cover stitch hems. The guide helps me keep the depth of my hems even as I serge.
Setting up the Fabric Guide
I placed the fabric guide on the bed of the machine and loosely inserted both attachment screws. With the wrong side of the hem facing up, I placed the raw edge of my fabric a little to the left of the left needle and on top of the fabric guide. I positioned the fabric guide so that the raised lip rested against the fold of the fabric. Then I tightened the screws to lock the fabric guide into position.
Bottom Hem
Starting near a side seam, I positioned my bottom hem right side up under the presser foot with the fold up against the fabric guide. I serged all the way around the bottom hem.
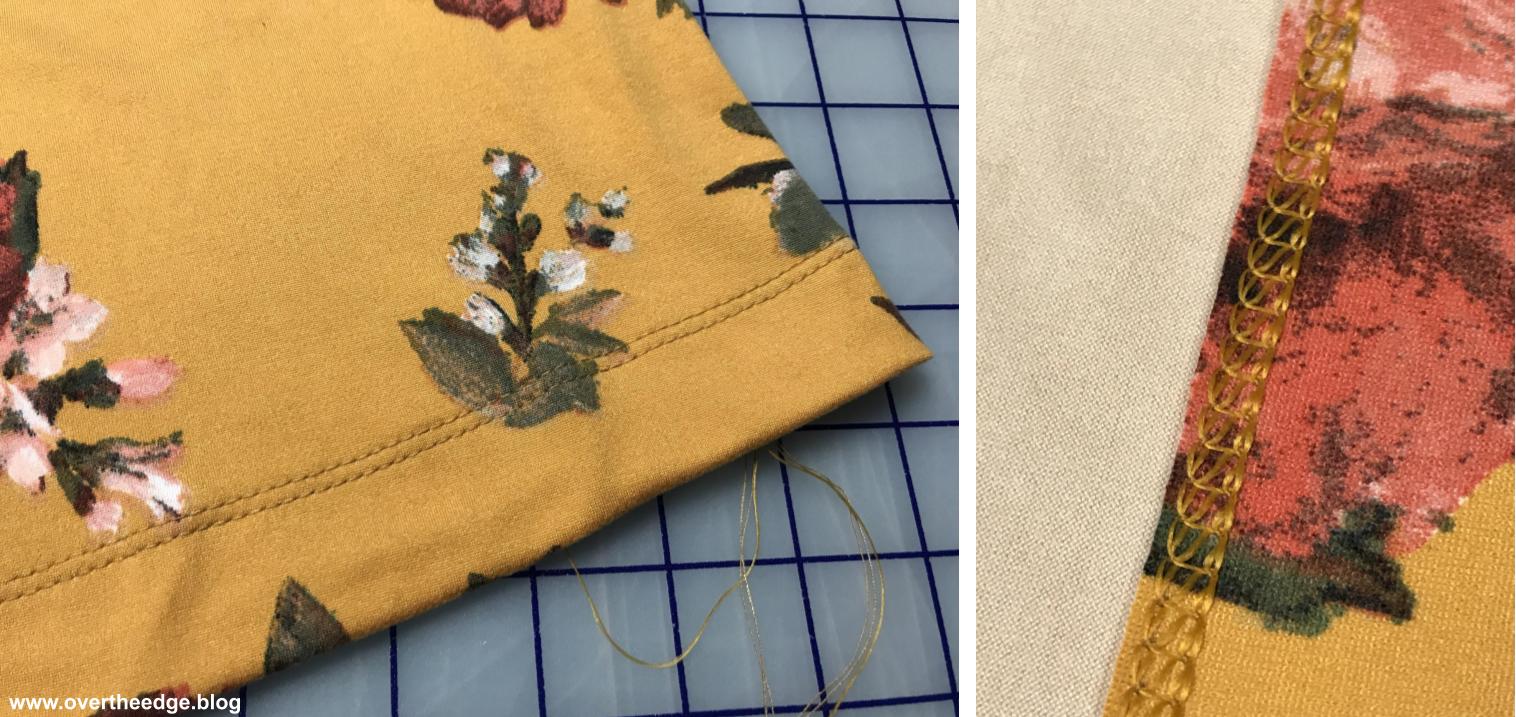
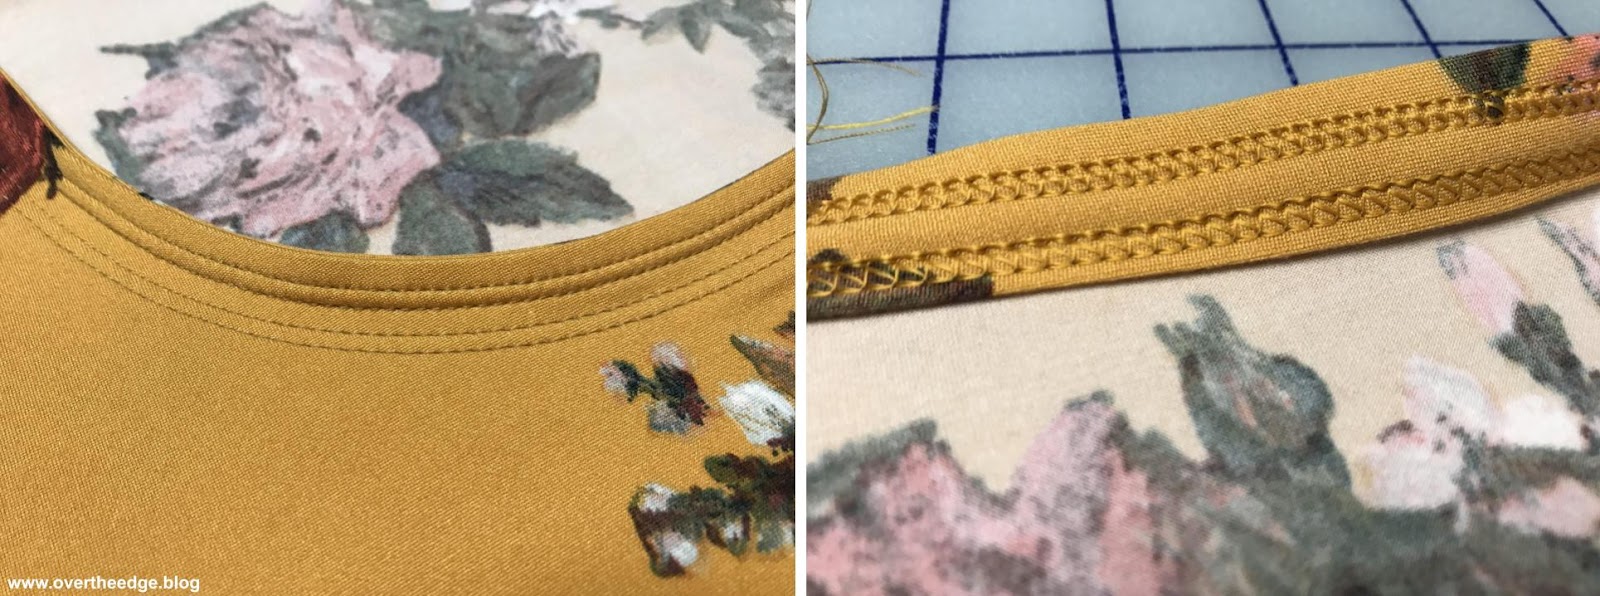
Here’s what the top side and underside of the narrow coverstitch hem looks like.
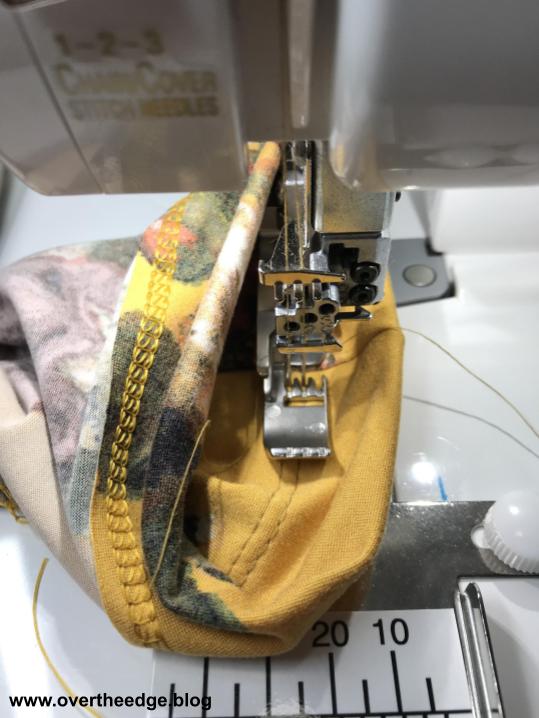
Sleeve Hem
The sleeve hem requires a little more maneuvering in the round because it is much smaller than the bottom hem. I turned my sleeve inside out and serged from the right side of the hem. I serged a little, then stopped to reposition the fabric, and then continued these steps until the hem was complete. You could cover stitch the hems flat before you serge up the side seams if you find this difficult. But then you have an additional changeover between overlock and cover stitch. I opted for less changeovers and completed my sleeve hem in the round.
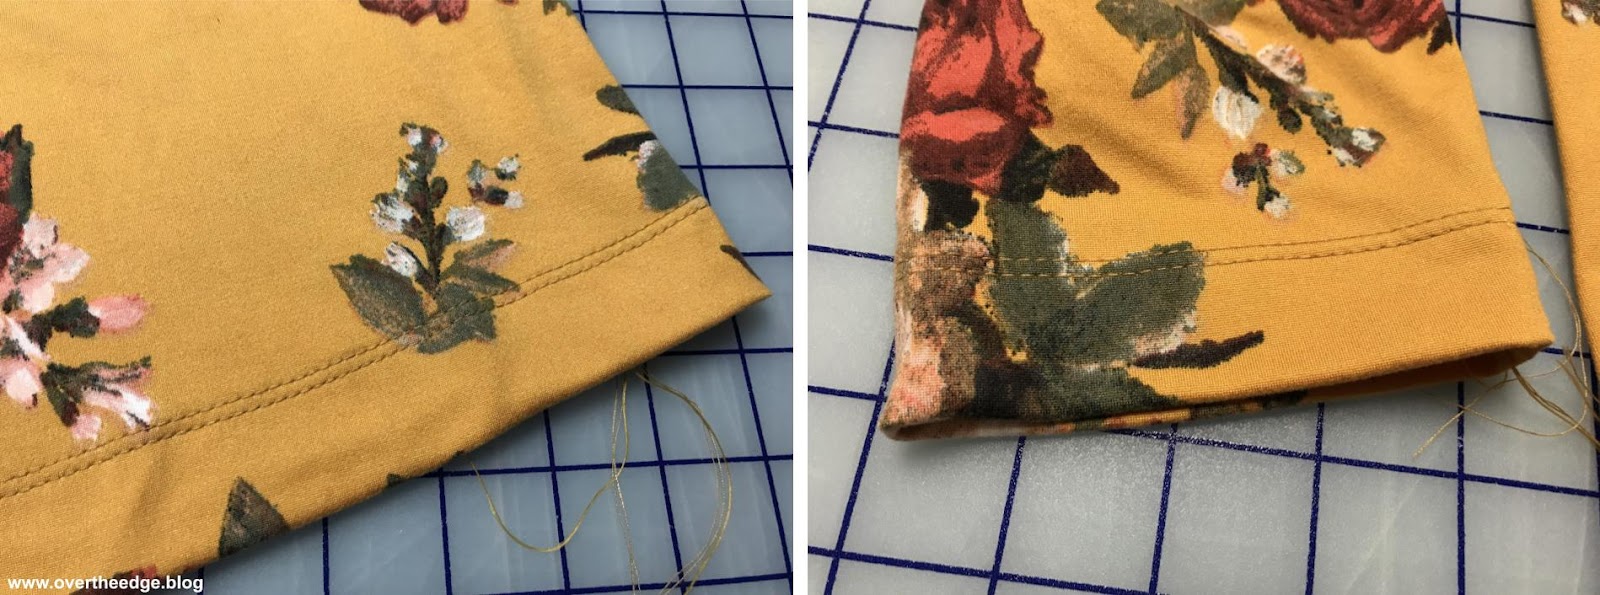
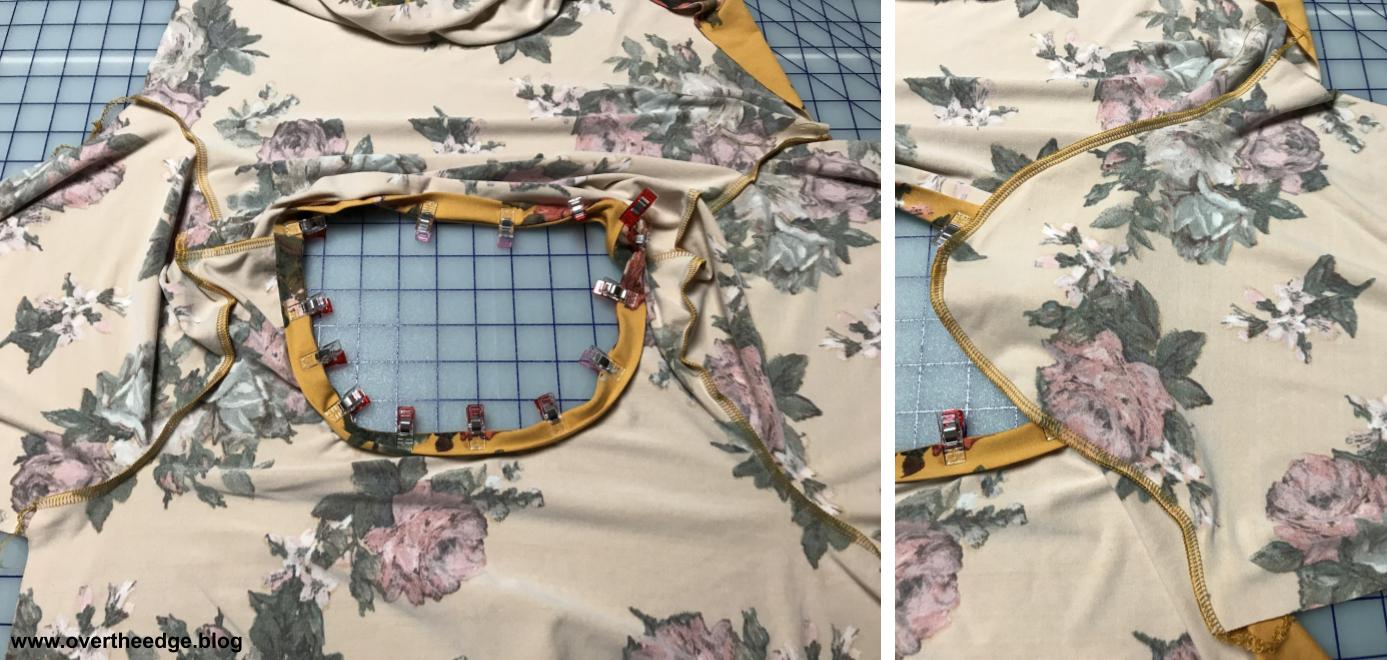
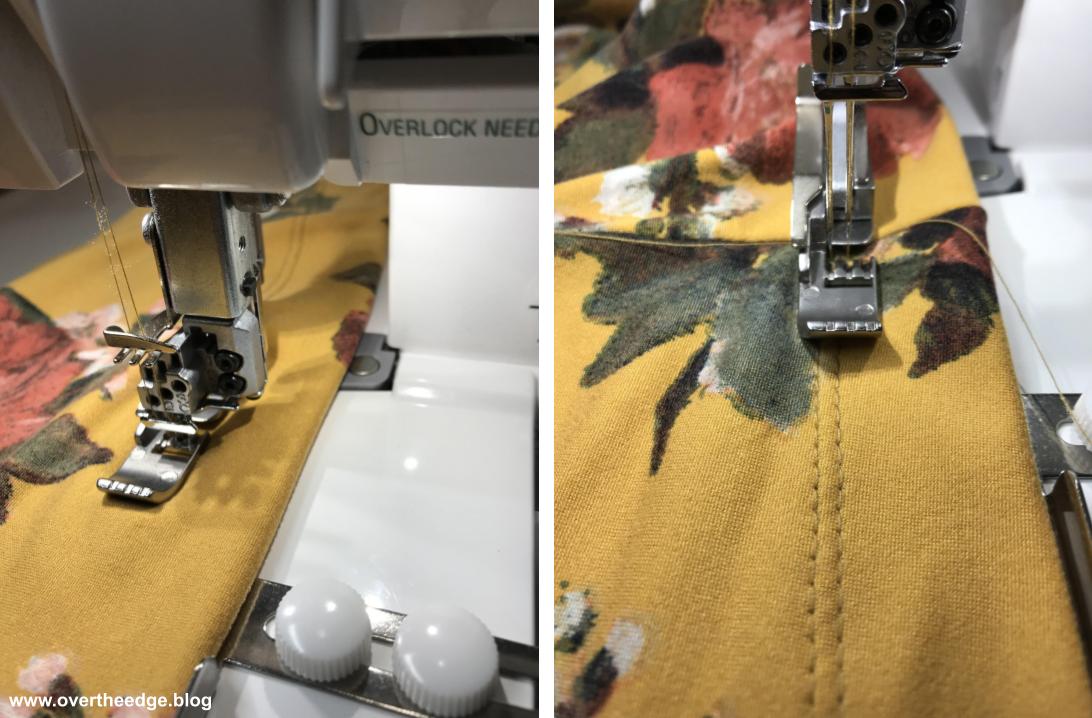
Neckline Hem
In an earlier step, I told you I made my neckline binding/facing wider than called for in the instructions. Well, when I completed the cover stitching near the folded edge of the neckline, I realized that the facing wanted to flip toward the neckline and stick out. My solution was to add an additional row of cover stitches near the bottom edge of the facing. I love how it turned out! The neckline is much more interesting this way! The first row of cover stitch was stitched with the edge of the neckline aligned with the right edge of the presser foot. I completed the second row of cover stitch with the right edge of the presser foot aligned with the left stitching of the first row of cover stitch.
Attach Belt Loops
The last step of this project was to attach the belt loops for the ribbon belt. Using a hand sewing needle I attached the belt loop chain to the side seams at the marks. My ribbon was wider than the ribbon stated for in the pattern, so I attached my belt loop chain on either side of the marks to accommodate the extra width. I put a knot in the end of my chain before threading my needle. Then I inserted the needle into the seam line from the inside near one marking, pulled the chain though to the right side, inserted the needle near the other marking from the right side and pulled the chain through to the wrong side making a loop. I put a knot in the end of the chain at my desired loop length and cut off the extra chain.

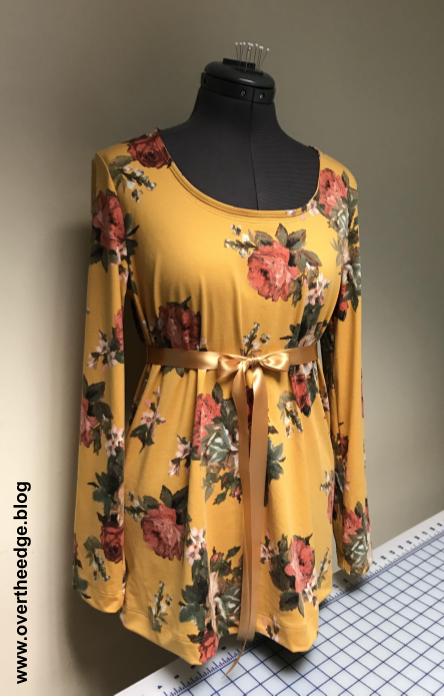
Serge a Maternity Top
Here is a photo of the finished top on my dress form.
Here are a few photos of the maternity top with a “batting baby bump.”

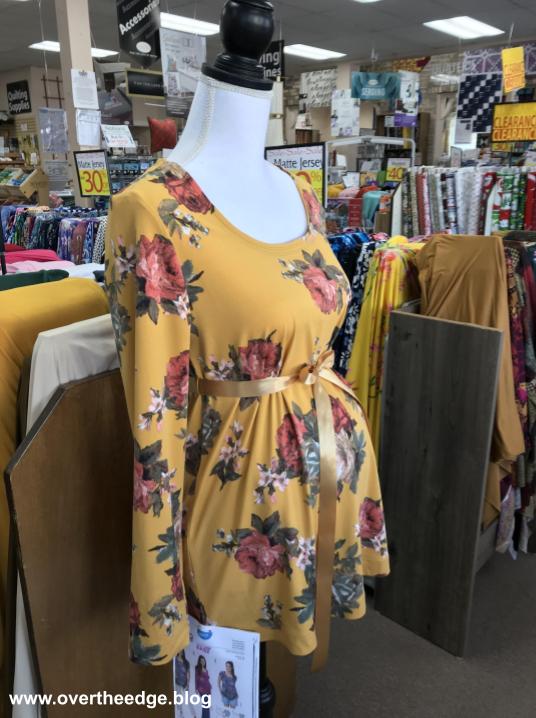
I made it as a store model, so it has to be on display for a month before I can give it to my daughter. I can’t wait to see her and her baby bump wearing it!

Resources
Baby Lock – Stabilize a Shoulder Seam with Serger
https://babylock.com/learn-and-create/inspiration/stabilizing-knits-on-a-serger