A serger pillowcase is a great beginner project for those new to serging or a quick project for those with more experience. In the classes I teach, I always encourage my beginning sergists to start with a simple project that they already know how to sew. This allows them to focus on learning the serger without also having to figure out the project. I usually recommend a serger pillowcase because it has only a few straight seams and a couple of pieces. And because almost every sewist I know has made a pillowcase with a sewing machine.
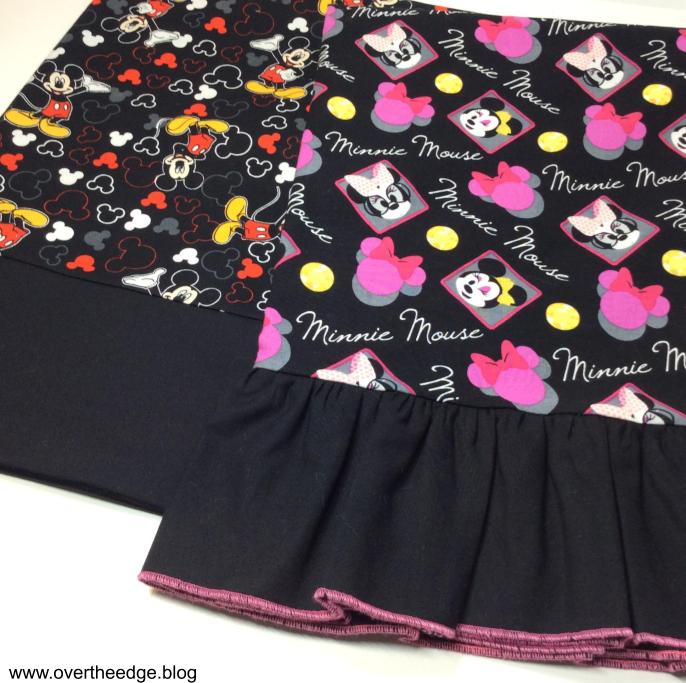
I developed these instructions for HIS & HERS Serger Pillowcases to be used in my beginning serger classes. Although there are many different ways to construct a pillowcase, I feel that this is the easiest way to make them on a serger. Both pillowcases fit standard size bed pillows and are made completely with a serger – no sewing machine required.
The HIS Pillowcase
The HIS Pillowcase is very simple and should be done before the HERS Pillowcase if you are new to serging. Only two pieces of fabric are used for this pillowcase – the main body and the cuff. After setting your serger up for a 4 thread overlock stitch, all you need to do is serge straight seams, wrap a corner, and secure your seams at the beginning and end. In my Serger SOS class these are the first skills we practice after getting our sergers threaded. (SOS stands for Serge On Successfully.) There is always a little more to learn when you switch from practicing on a small scrap of fabric to incorporating the skills into an actual project.
The HERS Pillowcase
The HERS Pillowcase is a slightly dressed up version of the HIS Pillowcase but still simple enough for a beginner. In addition to the techniques used to construct the HIS Pillowcase, you also add a 3 thread rolled hem to the edge of the cuff and gather the cuff with your serger. Only three pieces of fabric are used in this pillowcase – the main body of the pillowcase and two pieces for the ruffled cuff.
Supply List for One Pillowcase (either HIS or HERS)
- ¾ yard of 44/45” wide cotton fabric for body
- ¼ yard of 44/45” wide cotton fabric for cuff
- 4 cones serger thread to coordinate with fabric
- Also for HERS – 3 cones of thread for rolled hem on edge of ruffle
- Serger
- Instruction Manual and accessories for serger
- Machine needles for serger
- Sewing kit
- Iron and ironing board
- Optional: rotary cutter, mat and ruler
Cutting Instructions for HIS & HERS Serger Pillowcases
HIS – cut main body piece 27”x42” and cuff piece 9”x WOF (width of fabric)
HERS – cut main body piece 27”x42” and 2 cuff pieces each 4.5” x WOF (width of fabric)
HIS Pillowcase Serging Instructions

Prepare Cuff
Fold cuff fabric in half lengthwise with wrong sides together. Press the fold. You should have a folded piece that is 4.5” wide by 44/45” long.
Layout Cuff and Body
Line up the raw edges of the folded cuff piece even with one long raw edge of main body fabric having right sides together. The cuff may be a little longer than the body. That’s OK – we will trim it later. Pin the pieces together, placing the pins out of the path of the serger blades.
Set Up Serger
Set serger up for a standard 4 thread overlock using your manual as a guide. Use thread that coordinates with your fabric.
Serge Cuff to Body
Serge the cuff/main pieces together skimming stray threads as you serge. (You only need to cut enough off to even the raw edges of the seam.) Press the seam toward the main body fabric.
Serge Side Seam
Fold pillowcase right sides together matching up seams and raw edges. Pin together placing pins outside of the path of the serger blades. Beginning at the cuff end, serge down the long side, securing your stitches at the beginning. See your manual on how to secure your stitches at the beginning and end of your seams. Or search the internet for some great tips. At the end of this seam, just serge off the end.
Wrap Your Corner and Serge Bottom Seam
Now wrap your seam in the corner. On a sewing machine you would just pivot at the corner and continue sewing. And then you would get out your scissors and trim off the extra fabric at the corner. On a serged seam you can’t clip off the fabric in the corner to remove the bulk. If you do, your seam will fall apart. So instead you can do something called wrapped corners.
To wrap a corner you begin by serging off the end of your long side seam. At the corner, fold the seam that you just created toward you. Line up the raw edge of your next seam and begin by serging over the seam you just folded. (See photo). Secure your stitches at the beginning of the seam. Then finish serging your shorter bottom seam of your pillowcase. When you get to the end of this seam, secure your stitches.

Finish Pillowcase
From the wrong side, press your seams flat to set the stitches. Turn your pillowcase right side out. Poke out your corners. Press again. Your pillowcase is complete. ENJOY!
HERS Pillowcase Serging Instructions

Set Up Serger
Set up serger for a standard 4 thread overlock using your manual as a guide. Use thread that coordinates with your fabric.
Prepare Cuff
Take the two pieces of cuff fabric and place them right sides together, lining up the raw edges of the short ends. Serge the pieces together (no need to secure at beginning or end). You will now have one cuff strip that is 4.5” wide by about 88-90” long. Press seam to one side.
Convert Serger to 3 Thread Rolled Hem
Now set your serger up for a 3 thread rolled hem using your manual as a guide. Use the thread you have chosen for the finished edge of your ruffle.
Serge Edge of Cuff
Place your cuff fabric onto your serger with the right side up. Serge one long edge of your cuff with a 3 thread rolled hem, trimming slightly as you serge. A rolled hem looks best with a clean cut edge.
Convert Serger for Gathering
Now convert your serger back to a 4 thread overlock stitch with thread to coordinate with your fabric. Set your serger up for gathering using your manual as a guide. Gathering on most sergers is typically done by setting your stitch length to 4 (or your longest) and your differential feed to 2 (or your highest). For some sergers you may also need to increase the tension on your needles.
Gather Your Cuff
Place your cuff fabric right side up on your serger and the raw edge next to the blade. Begin to serge, skimming off just a little bit of fabric as your serge (trim those stray threads sticking out). Guide your fabric gently and don’t pull toward you. Let it feed freely through the serger. If you are holding it too tightly the serger will not be able to properly gather the fabric.
How to Adjust Gathering After Serging
If the fabric does not gather as much as you were hoping, you can separate the needle threads from the chain at either end of the seam and pull on them. Then slide the fabric along the threads just as if you had created two rows of basting stitches with your sewing machine. And the raw edge doesn’t fray because the looper threads have encased the edge of the fabric. Yay! (See photos below.)


To Gather with a Serger GATHERING/RUFFLING FOOT
If you have a gathering/ruffling foot for your serger this section applies to you. If not, Please skip ahead to the next section.
Some sergers have a foot that allows you to simultaneously gather a ruffle and sew it to another piece of fabric. If you have this foot for your serger and want to use it, I recommend practicing with some scrap fabric before you use it for your pillowcase. It’s a great foot and it saves you time, but you do have to get used to guiding two separate pieces of fabric through the foot. You cannot adjust the amount of gathering with this method, as the ruffle is serged in place as you go. If you have any extra ruffle fabric leftover you would simply trim it off. Refer to the instructions that came with your foot.
Set Serger Settings to Standard 4 Thread Overlock Stitch
Return your settings from gathering to standard for the 4 thread overlock stitch.
Serge Cuff to Body
Pin your cuff to your main body of pillowcase right sides together and adjust the ruffle to fit if necessary (see Gather your Cuff section for how to adjust a ruffle). Serge ruffle cuff to pillowcase, just skimming edges to even out the raw edge. There is no need to secure the stitches at the beginning or end of the seam. In the next step you will be serging over them with another seam.
Serge Side Seam
Right sides together, align the pillowcase raw edges and seams and pin, placing pins outside of the path of the serger blades. Beginning at the cuff end, serge down the long seam, securing your stitches at the beginning. When you get to the corner, serge off the end of the seam. Wrap your corner and finish serging your bottom seam. (see Wrap Your Corner and Bottom Seam section of HIS Serger Pillowcase Instructions.) Secure your stitching at the end of the seam.
Finish Pillowcase
From the wrong side, press your seams flat to set the stitches. Turn your pillowcase right side out. Poke out your corners. Press again. Your pillowcase is complete. ENJOY!

