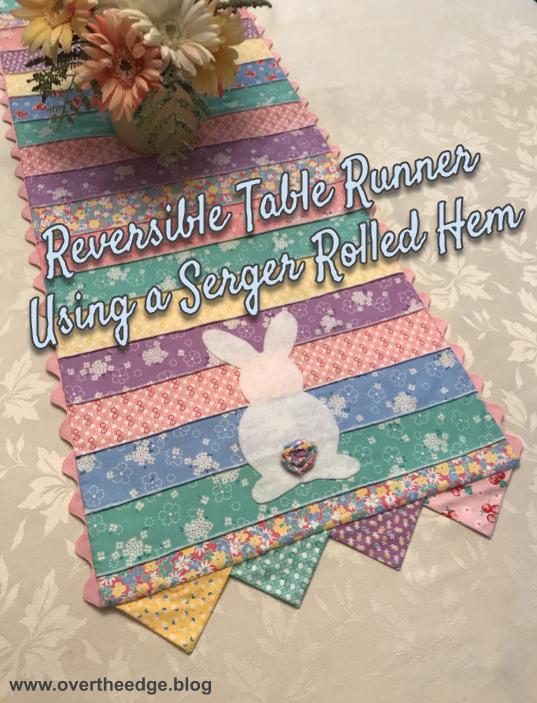
Spring is in the air! The sun is shining and the snow has melted. It’s once again time to dress the table with my colorful and reversible serger table runner. It’s full of texture with exposed seams, prairie points, bunny tails and fabric flowers.
Reversible Serger Table Runner Inspiration
I designed this table runner a few years ago using a bunch of leftover jelly roll strips from another project. And of course I challenged myself to use my serger to make it. My vision began with a “stripey” table runner with texture, and evolved as I serged.
Creation of Table Runner
I pieced the strips together with the 3 thread rolled hem stitch. I serged the strips wrong sides together so the rolled hem would show on the right side of the table runner. Then I cut the strip sets into two sections and serged the sections together to end up with a rectangle about 16” wide by 48” long.
A Second Runner
I still had a few more jelly roll strips left so I decided to make a second but different runner. I serged these strips together with a three thread rolled hem stitch, adding in a wider strip of white fabric. Then I cut the strips into squares, alternated the layout and added sashing strips in between the squares.
The Reversible Serger Table Runner
Instead of two separate table runners, I decided to make one reversible table runner. I added a wide ric rac trim to the long sides and prairie points to the short sides.
I then layered the two table runner tops right sides together, along with a layer of batting and serged around the outside edges, using a 4 thread overlock stitch.
Here is a closeup of the wrapped corners technique I used at the corners so I didn’t need to trim away any fabric at the corners. For more information about how to wrap a corner with a serger visit my pillowcase tutorial at: https://overtheedge.blog/tutorials/his-hers-serger-pillowcases-tutorial/
I left an opening on one side for turning and closed it up using a fusible web and an iron.
Serger Rolled Hem Prairie Points
My prairie points started as rectangles that were 5” long and 2.5” wide. I serged one long edge of the rectangle and then folded two corners to the middle to make the prairie point. The rolled hem edge ends up in the center of the prairie point.
Finishing Touches
The reversible runner turned out nicely, but I thought it needed a little something extra to make it compete. So I added bunnies on one side and flowers on the other. Adorable!
My Felt Bunnies
I cut out two bunny shapes from some white felt and glued the bunnies to the ends of the table runner. The bunny tails were made from fabric trimmings that were cut off to even up the edges of the table runner. I took the strips and twisted them and then rolled them into a circle to form the tails.
My Fabric Flowers
I had a few more leftover jelly roll strips that I transformed into fabric flowers. To make a flower, I serged one edge of a fabric strip using a 3 thread rolled hem. Then I set up my serger to gather and serged the other long edge to gather the fabric. Pulling on the needle threads, I gathered the fabric a bit more before shaping it into a flower. And I added a fabric covered button to create the flower center.
So they could be easily removed when I wanted to display the bunny side, I pinned the flowers to the table runner.
Reversible Serger Table Runner
I hope you enjoyed learning about how I made my bunnies and flowers reversible serger table runner! And in case you didn’t know, April is National Serger Month. Now would be a good time to serge something fun for spring!

Resources
Setting up for a rolled hem on a Baby Lock Vibrant: https://youtu.be/KBOZjD57JUU


