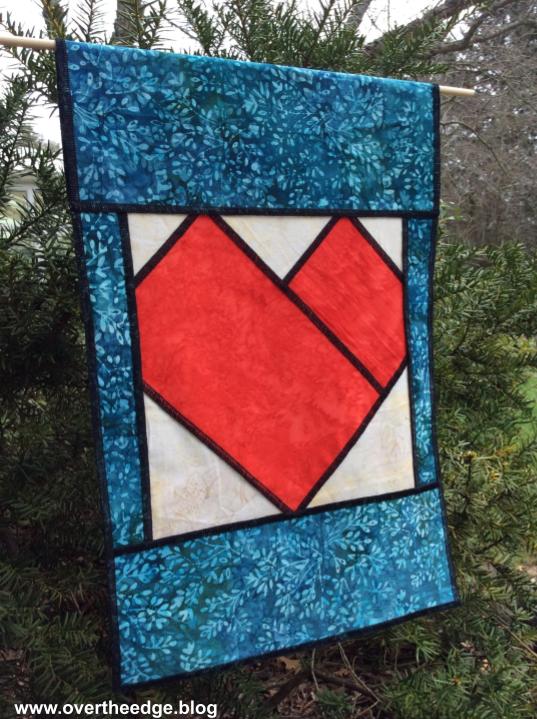
It’s April now, and in a typical year I would be celebrating National Serger Month. In the last few weeks I have been sewing face masks almost non-stop, and I miss using my serger creatively. So I took a short break from mask production to create a serger project to share with you. I’ve seen on the news that in some places people are clapping and cheering for healthcare workers from their balconies. Others are making signs to show support. Well, I’m going to show you how to serge a flag with a flatlock stitch. Hang it outside or hang it in your window to show your support!
The flag is garden size, about 12” x 18”. I thought about making it larger but I didn’t have any pieces of batik large enough to make a bigger flag. Normally, I would just run out to the store to buy what I needed, but that is a little difficult right now.
The flag is reversible and since both sides of the fabric show in this flag, batiks work well. Solids would work too, but batiks are so much richer. Using black thread gives the effect of stained glass. Who knew you could make stained glass with your serger!
Supplies Used for this Flag
- Red batik remnant at least 6” x 13”
- Light colored batik remnant at least 7” x 16”
- Blue batik remnant at least 10” x 26”
- Black thread – 1 spool of sulky solids 12 wt (or other thick thread) and 2 cones of Maxilock serger thread
- Serger, capable of 3 thread flatlock stitch
- Rotary cutter, mat and ruler
- Hanging rod
- Tool for securing thread tails (large eyed needle or other tool)
Serger Set Up and Testing

I set my serger up for a 3 thread narrow flatlock stitch with the widest width. I used a spool of black Sulky Solids 12 weight cotton in my upper looper and black cones of Maxilock serger thread in my needle and lower looper. The Sulky Solid would have been good to try in the needle too. It would have made the ladder side of my flatlock stitches stand out more. But since I only had one spool, I went with the Maxilock thread instead.
Using scraps of fabric, I tested my stitch settings. After trying a few different stitch lengths, I decided on a stitch length of 1.5 to create my stained glass effect. I serged my samples with the wrong sides together, so the more dense loop side would be on the right side.

Flatlock Piecing on your Serger Video
Watch my short video on flatlock piecing if you would like to see the technique in action.
Serger Flatlocked Heart Flag – Link to Tutorial
Click on this link to view my full tutorial for serging this stained glass heart flag using the flatlock stitch. https://overtheedge.blog/tutorials/serger-flatlocked-heart-flag/
Flag Front Side and Back Side
This photo shows the front side and the back side of the reversible flag. The stained glass look is more pronounced on the front side with the loops and the heavier thread.

Close Up View of Stitching

Flatlock Loops on Front 
Flatlock Ladder on Back
Serge a Flag with a Flatlock Stitch
I hope you enjoyed this post and are inspired to serge a flag with a flatlock stitch. Hang it proudly and show your support of all the workers on the front line of this pandemic!


Thanks for this tutorial. I like that you are using the Evolution. This is the machine that I have, and I really want to learn to love it. But as with embroidery machines, the sergers get updated as well, and so many of the serger tutorials and projects reflect the newer machines with all of their newer bells and whistles. I know that they all say “this can be done with any serger”, but I like to see my model in use. And I already have my fabric picked out for my own flag!
Thanks again.
You’re welcome. I hope you have fun and learn a lot making your flag. I’d love to see it when you are finished!