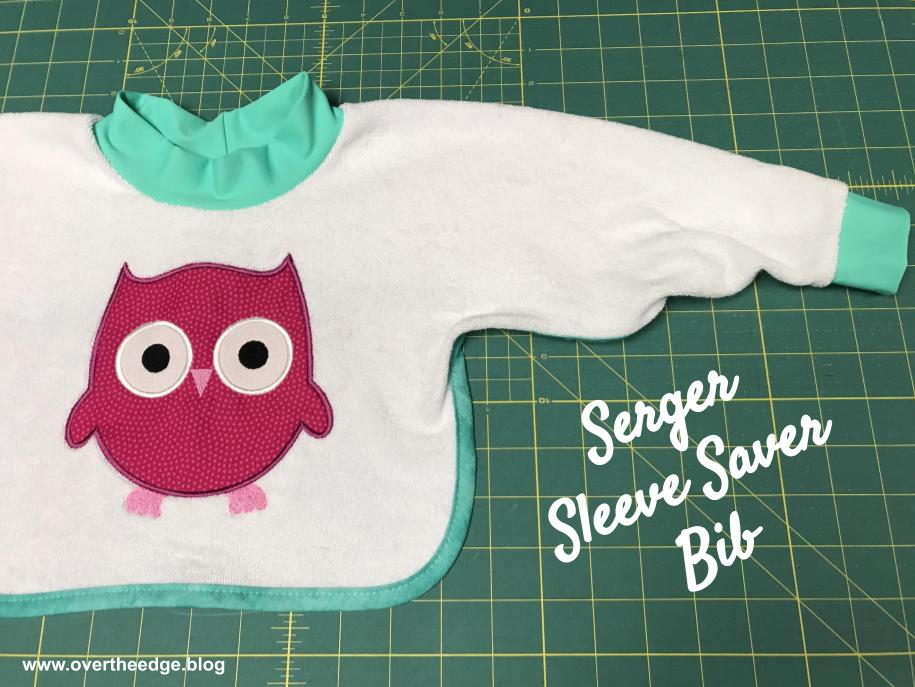
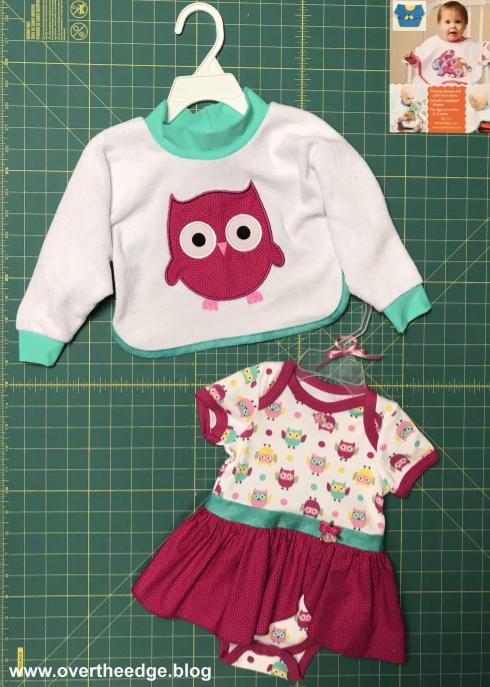
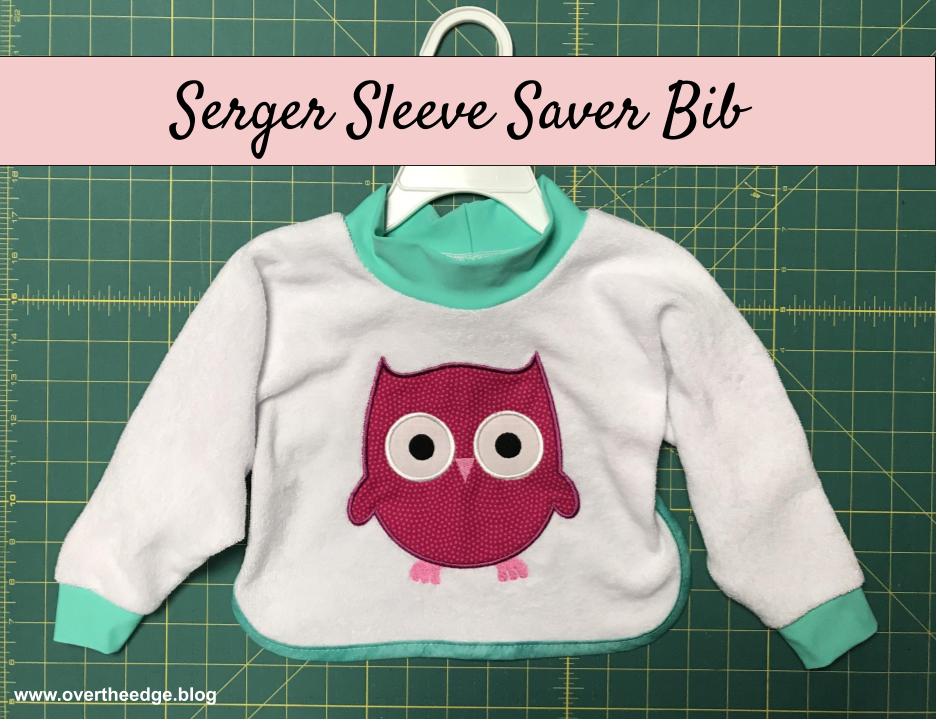
Last week I blogged about the Serger Funsie Onesie that I made for my niece’s baby. This week I made another gift for her baby – a Serger Sleeve Saver Bib. This great bib has sleeves to protect the sleeves of your child’s outfit. The bib is made from stretch terry cloth with ribbing at the cuffs and neckline and bias binding on the edges. The serger is the perfect tool for construction of this bib and to apply the bias binding.
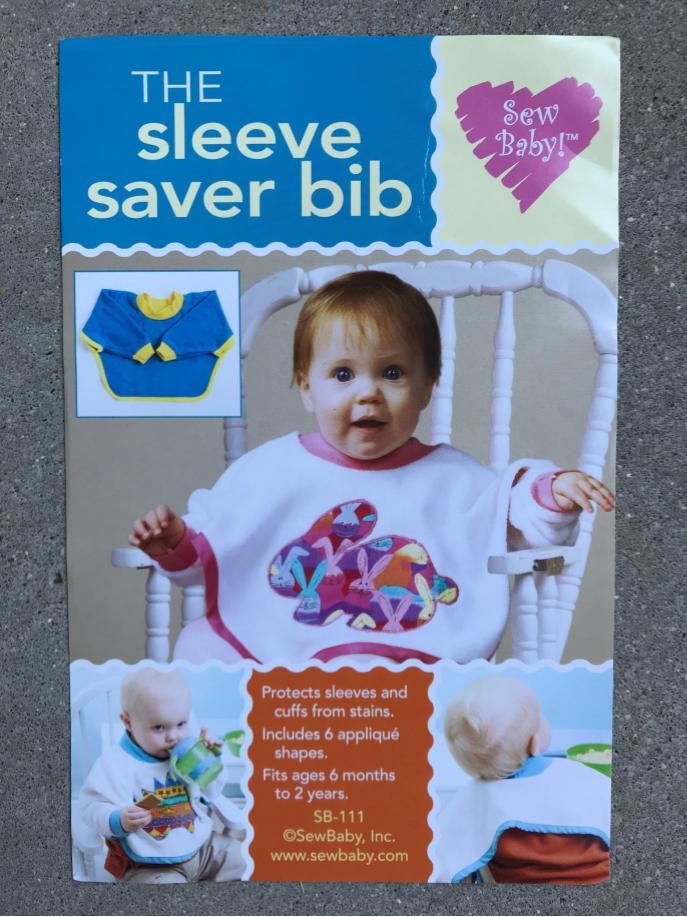
The Pattern
The pattern instructions for applying the ribbing and constructing the seams are written for a standard four thread overlock stitch on a serger. A sewing machine can also be used. The pattern applies the binding using a sewing machine, but I applied the bias binding with a serger chain stitch using a double fold bias binder. If you don’t have a chain stitch capable serger you could apply the binding with your sewing machine following the instructions in the pattern. You will find a link to the Sleeve Saver Bib pattern in the Resources section at the bottom of this post.
Applique
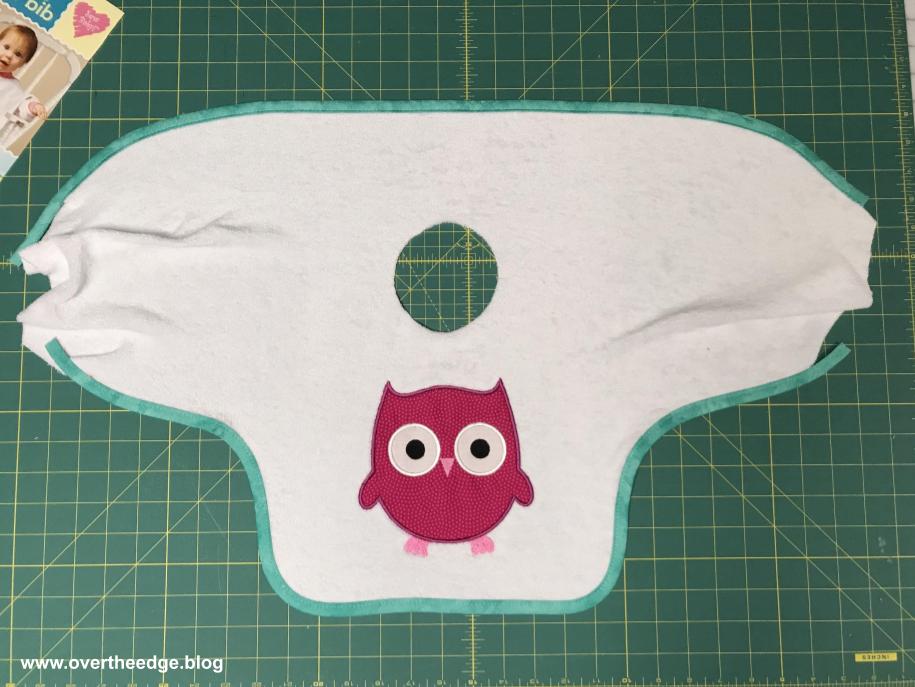
I used my embroidery machine to applique a cute owl on the front of the bib. If you don’t have an embroidery machine you can apply an applique with your sewing machine. The pattern comes with several shapes for appliques. I purchased the owl applique on Etsy. You will find a link to the design in the resources section at the bottom of this post.
Here is my terry cloth pattern piece with my owl applique already applied.

Apply Bias Tape
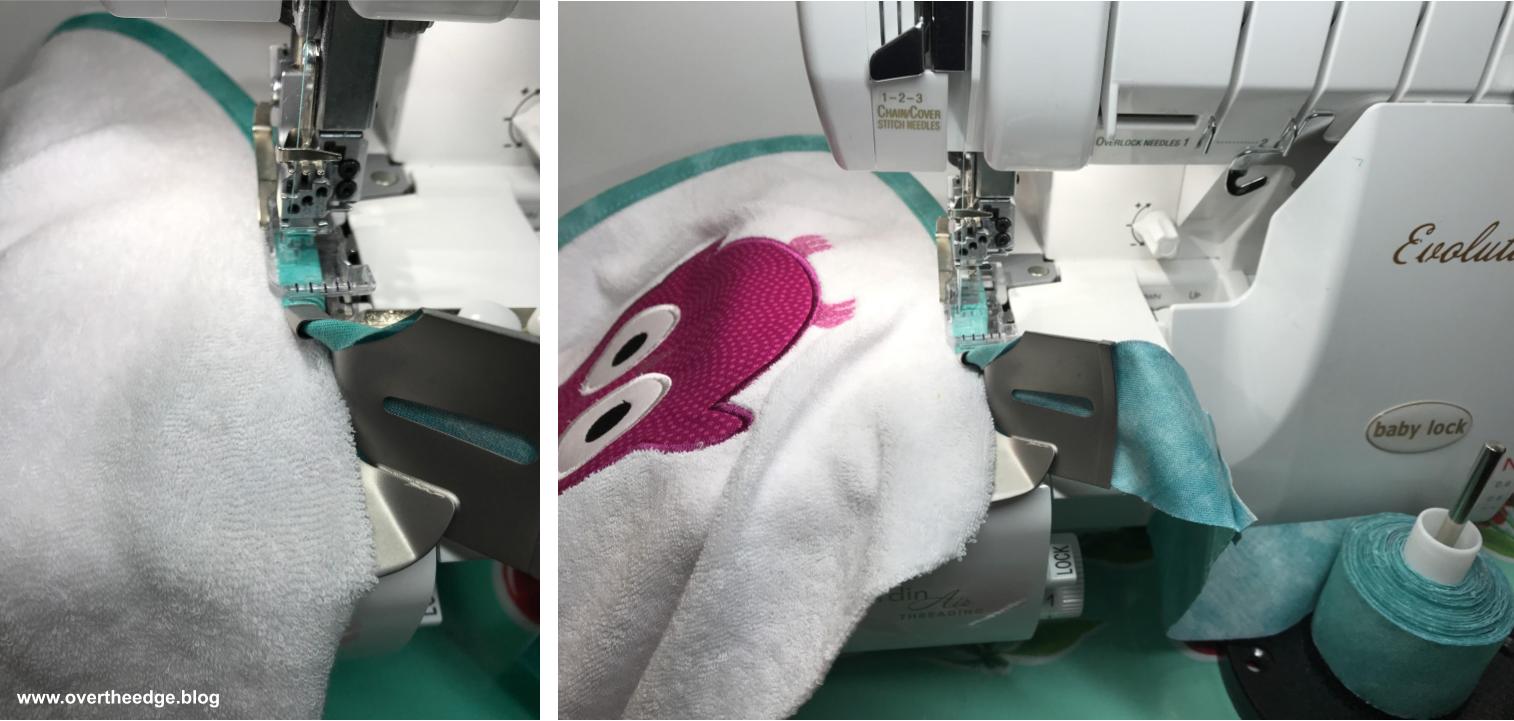
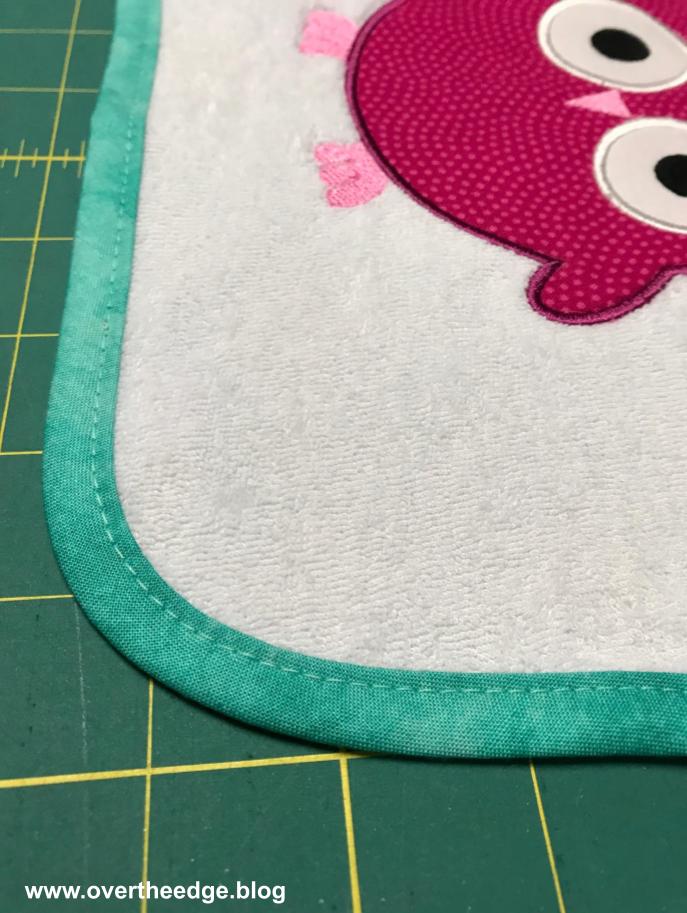
The bias binding I used for the bib, was the same bias binding I created for the funsie onesie. I set up my serger for a C1 chain stitch and attached my 36mm double fold bias binder.
I’ll be honest with you. I was trying to finish this project quickly and so I just jumped right in without practicing. Not a good idea with stretch terry. The first time I bound the back edge it was a little wavy, so I took it out and tried again with my differential feed set to 1.3. This time the back edge looked good. The straight back edge was fairly easy, but it took me three tries to get the binding right on the sharp curves on the front. Good thing that the chain stitch pulls out easily and I made lots of extra bias strips!
The trick on sharp curves on stretch terry is to go slow. Take a few stitches. Stop with the needle down. Lift the presser foot to release the pressure on the stretch terry. Continue this process until you are through the curve.


How to Use a Serger Double Fold Bias Binder Tutorial and Video
For more information on how to use double fold bias binder with a serger check out my tutorial and video:
Adapting ⅝” Seam Allowance for Serger
Seam allowances on the Sleeve Saver Bib pattern are ⅝”. If you are using a sewing machine, the pattern has you trim the seams down to ¼” after they are sewn.
Since I used my serger for all the seams, I just trimmed the allowances down to ¼” as I serged. My serger has markings to the right of the blade that show you where to line up your raw edges of seams with ⅝” seam allowances. If you are unsure of how to trim down a ⅝” seam to ¼” using your serger, you could always trim off the extra seam allowance with your scissors before you serge. Then when you serge you only need to align the raw edges next to the blades. Or you could use a marking pencil to draw the seam allowance on the fabric and align the marks with your needles.
Apply Ribbing
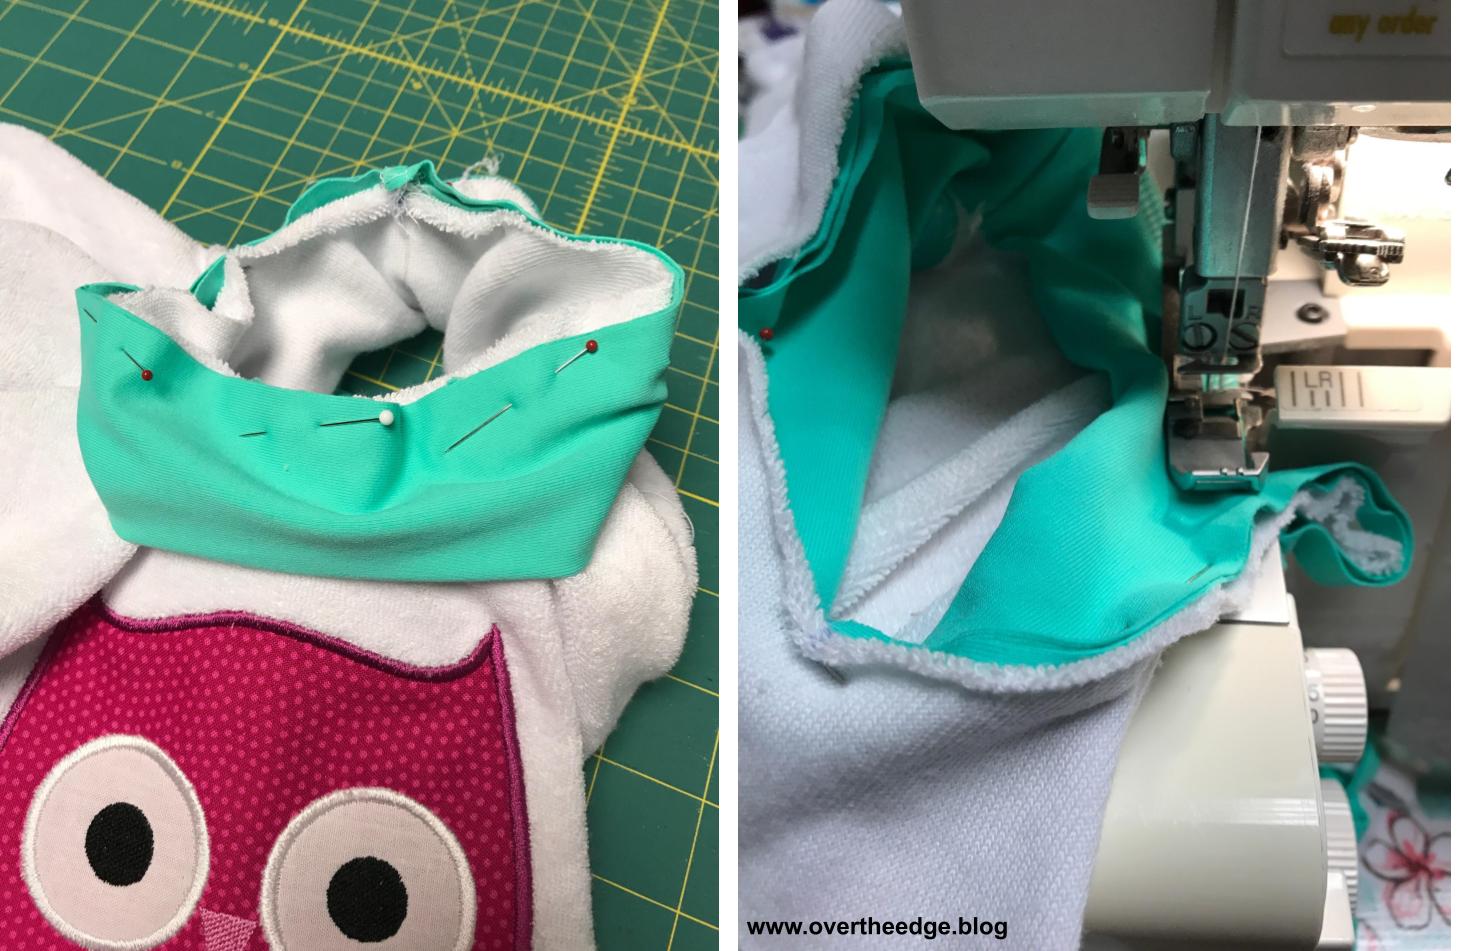
I used a piece of spandex material in place of the ribbing called for in the pattern.
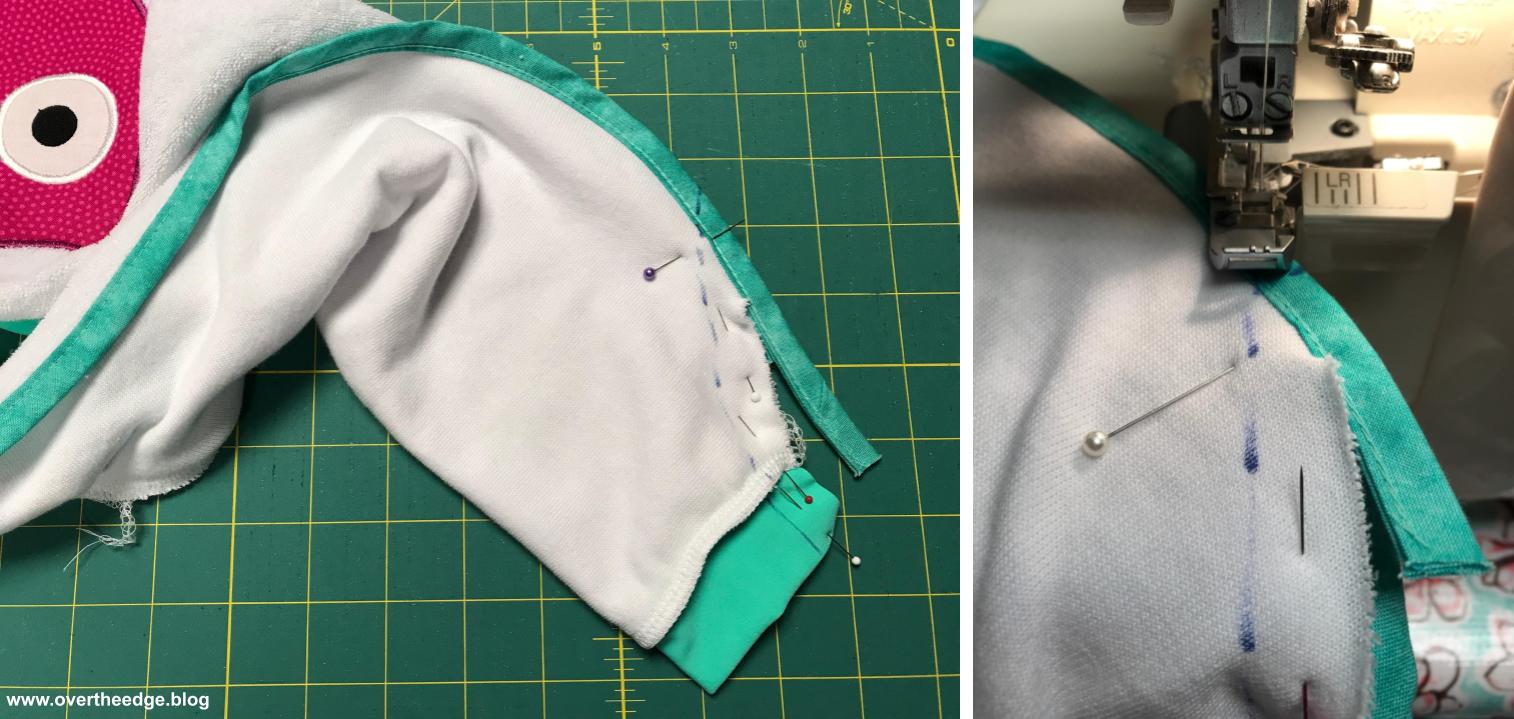
The cuff pieces were applied first. I cut the pieces 2” longer than stated in the pattern so I had a one inch “grab tab” on each end. It’s not required, but I find it easier to have the extra fabric to hold onto when stretching the ribbing to fit.


If you find it difficult to keep all three layers from shifting as you serge, you can always baste the raw edges of the folded ribbing together before pinning the ribbing to the project. That way you only have to control two layers of fabric instead of three. Basting first with my sewing machine gives me much better results on ribbing. And I spend a lot less time resewing because one layer of fabric slipped away from the seam.
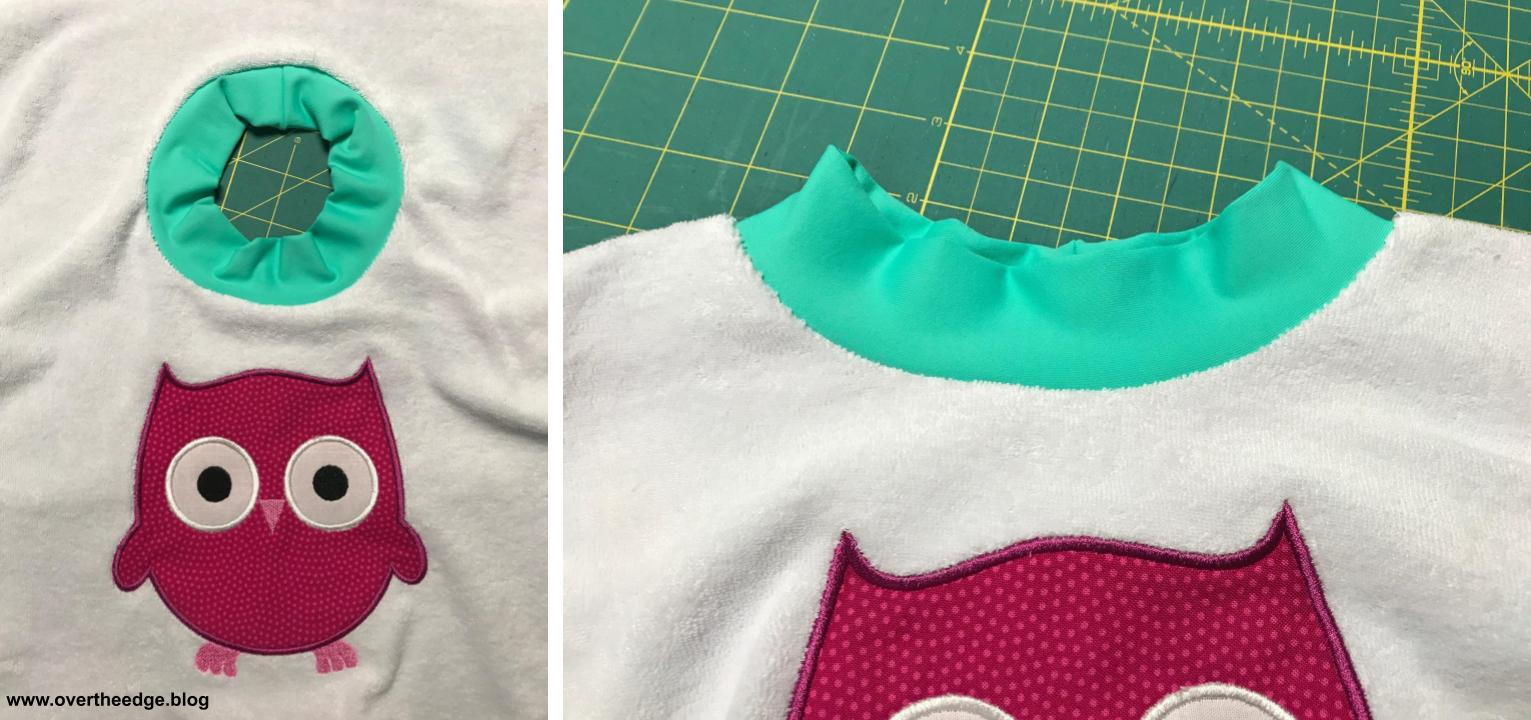
Next I applied the neck band. I serged the short ends together to make a circle. Then I folded it in half lengthwise, wrong sides together and pinned the neck band to the bib. I matched the seam of neck band to center back of neck of the bib. You will need to evenly stretch the ribbing to fit.
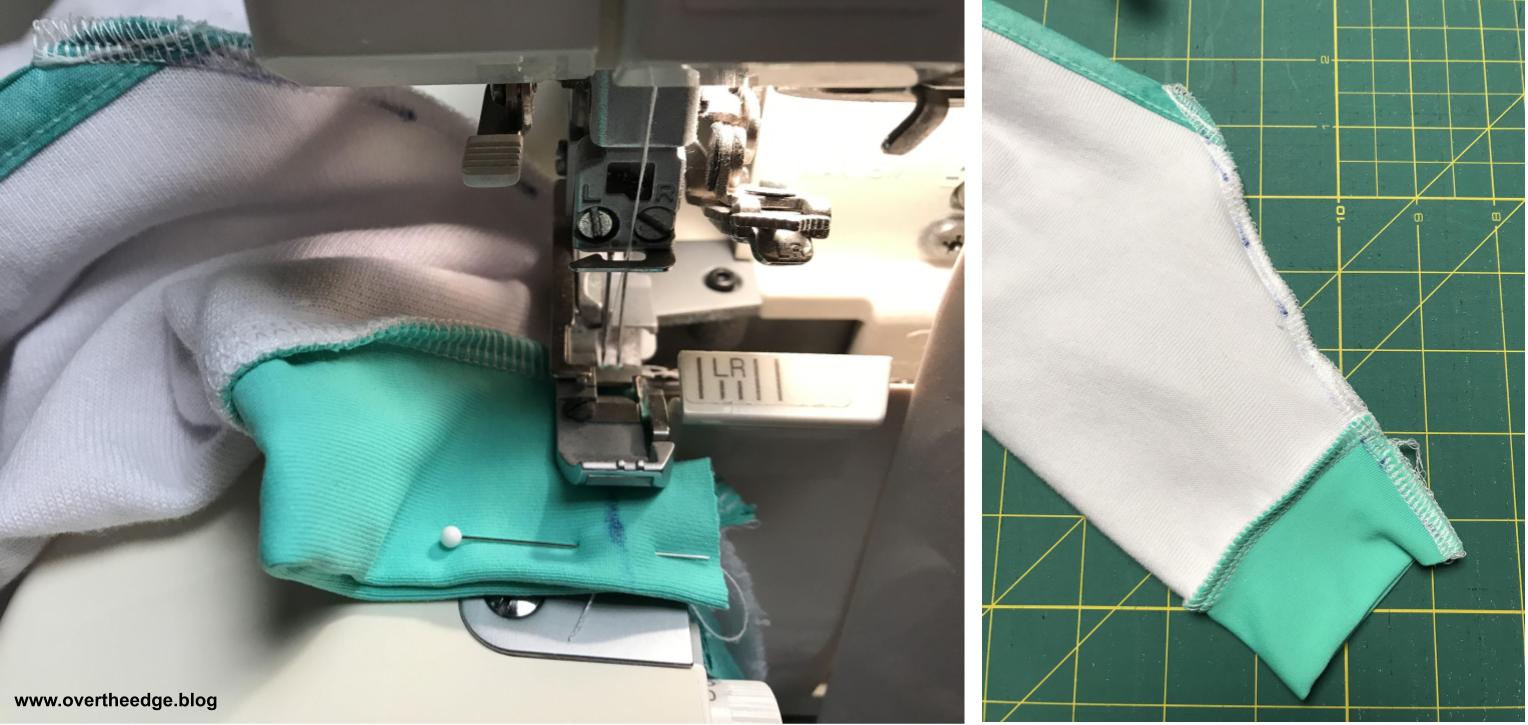
Sleeve Seams
The last step was to serge the sleeve seams. I finished the ends of my seams by locking the ends with my serger.
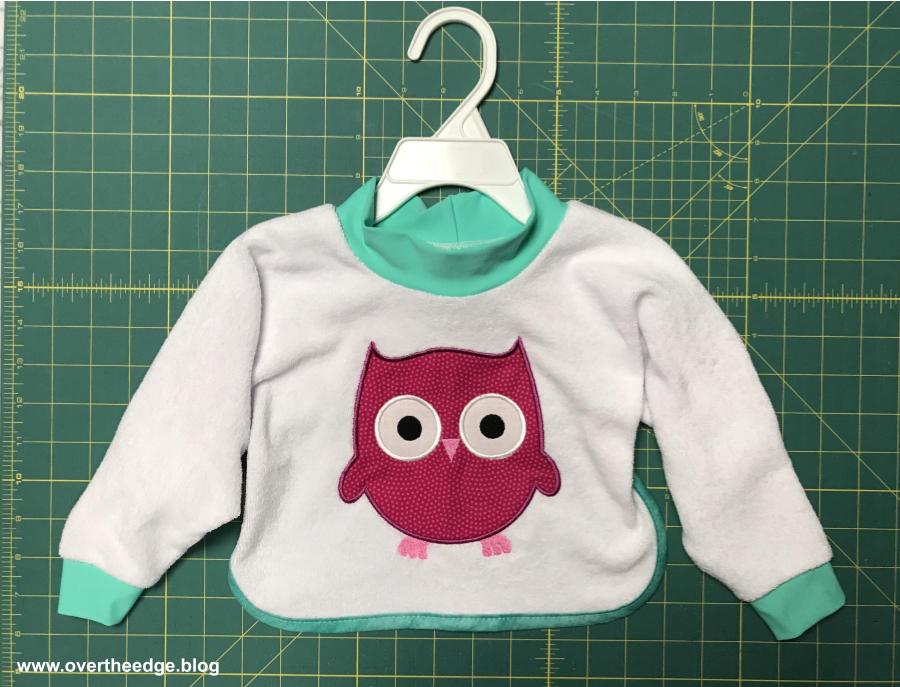
Serger Sleeve Saver Bib
Here is a front view and a back view of my finished Serger Sleeve Saver Bib.
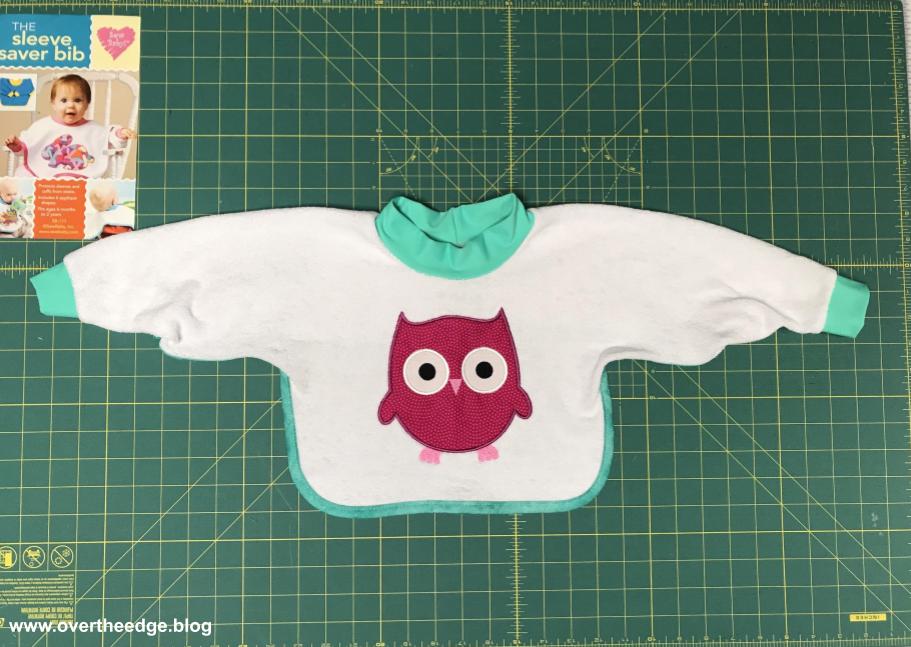
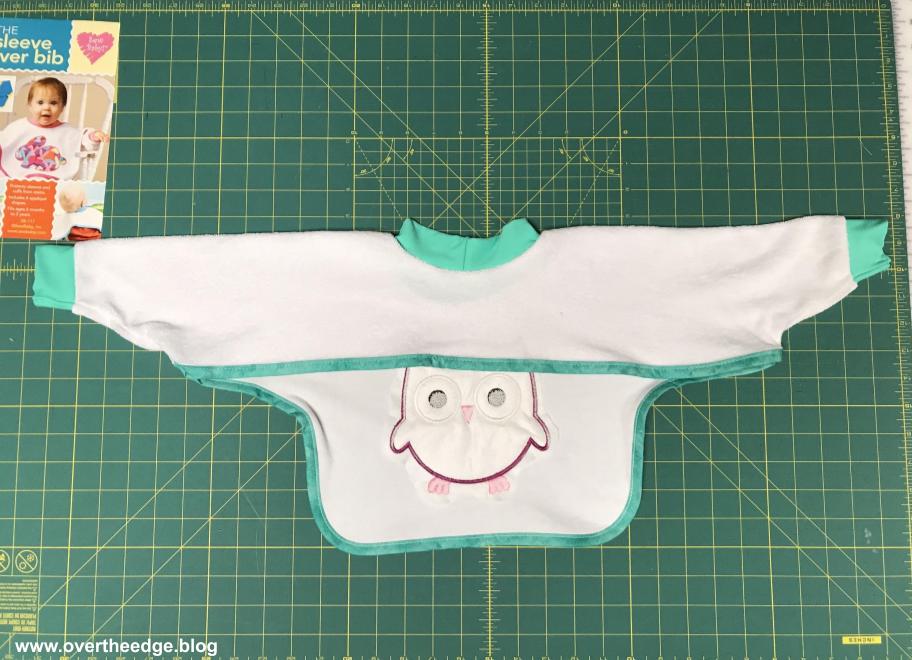
This bib is both cute and practical and the perfect accessory for my serger funsie onesie from last week’s blog post. I can’t wait to see it on my niece’s baby girl! I hope this post inspires you to use your serger more…..

Resources
Sleeve Saver Bib Pattern: https://www.sewbaby.com/shopbaby/product_info.php?products_id=3123
Owl applique for machine embroidery from Etsy shop Stitchtopia: https://www.etsy.com/listing/545350124/forest-animals-owl-applique-design-6?ga_search_query=owl&ref=shop_items_search_4&pro=1