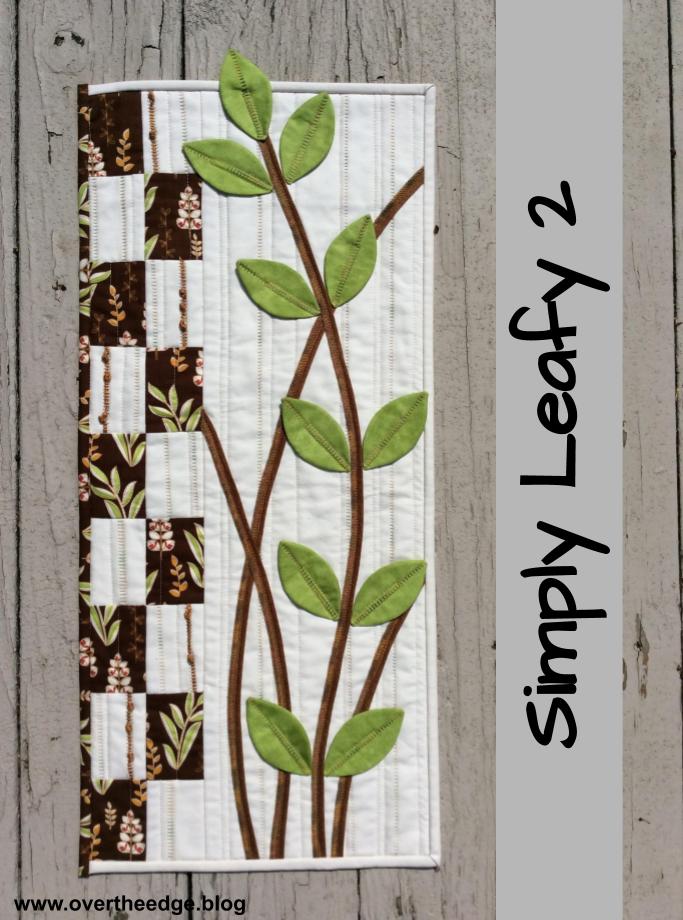
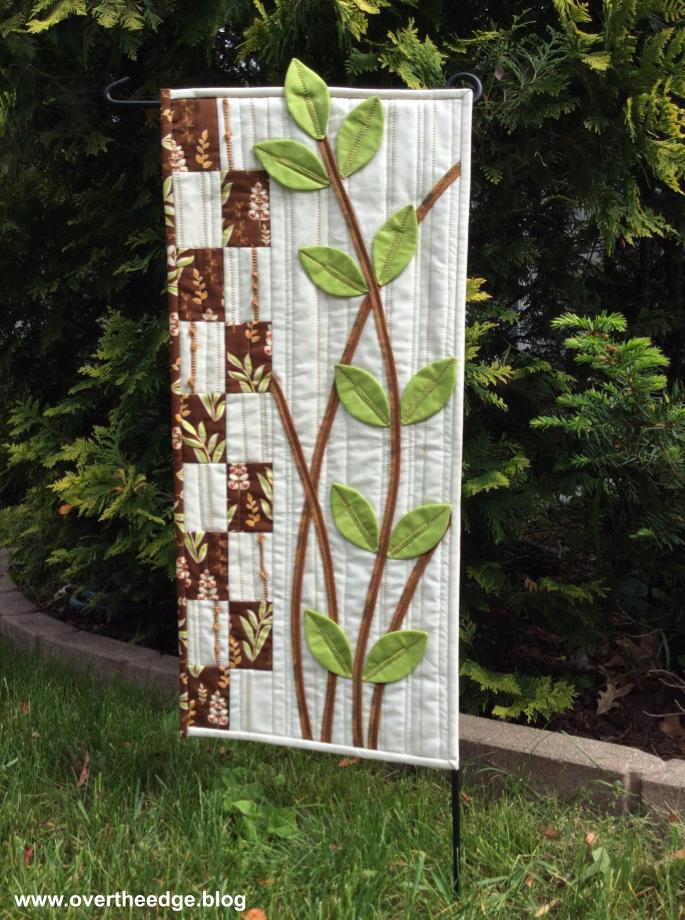
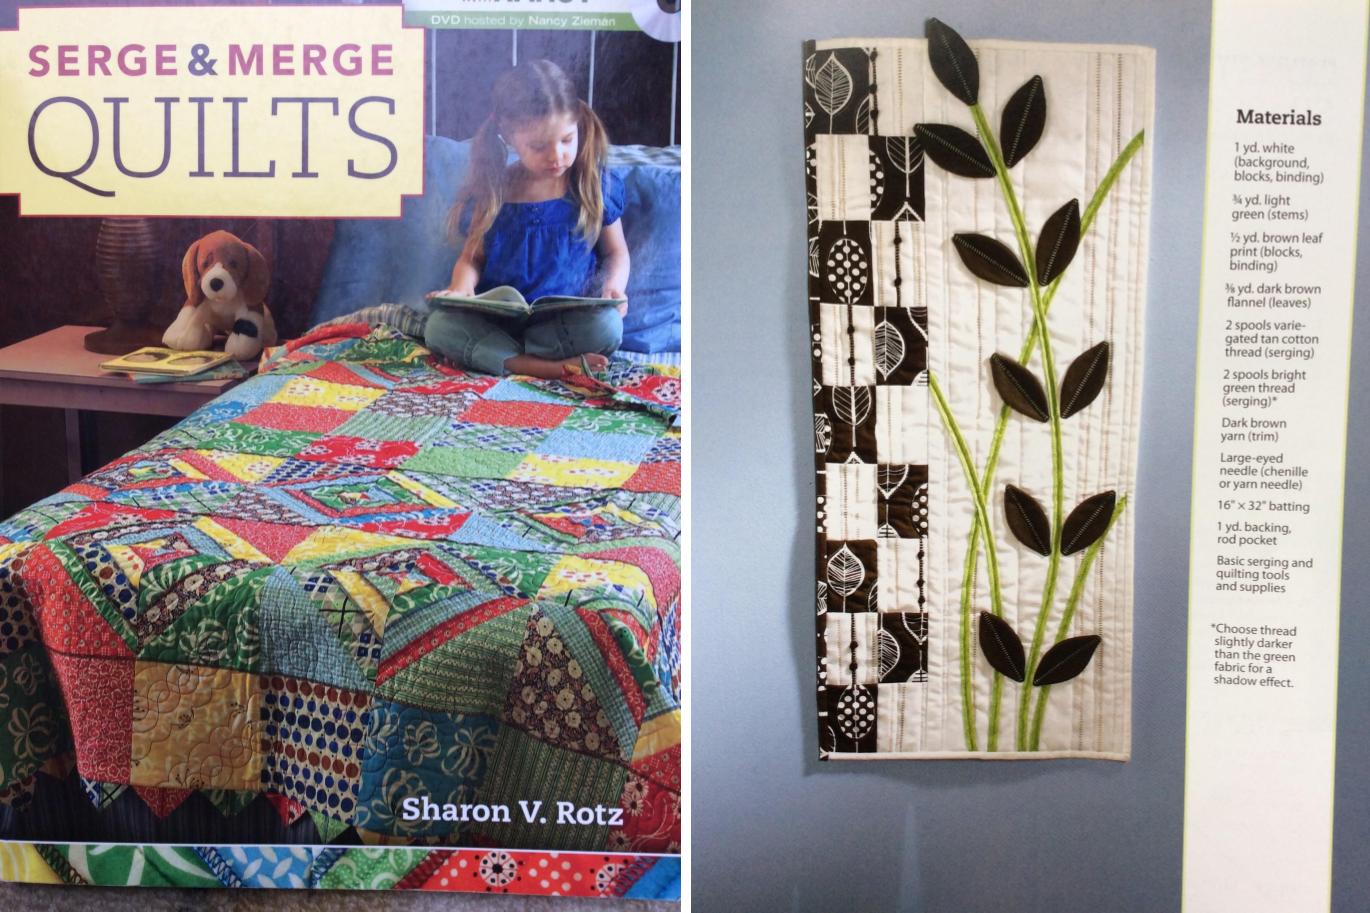
I had so much fun making my Simply Leafy 2 quilt that I thought I would share it with you. Simply Leafy 2 is a project from the book, Serge & Merge Quilts. It’s a small wall hanging and is the perfect size to experiment with creative serging. The serger creates the texture in the background and enhances the dimensional stems and leaves. The project showcases serger flatlock stitching, but uses a sewing machine to complete the quilting and binding. If you enjoy creative quilting and you have a serger, you should give this project a try!
Fabric and Thread Choices
I used quilting weight cotton for all the fabric in my Simply Leafy 2 quilt. I selected a brown leafy floral as my focus fabric and off white for the background. Based off the leafy floral fabric, I chose green fabric for the leaves and brown for the stems. The instructions said to use yarn for embellishing the flatlock stitches so I chose a brown perle cotton. I decided on a variegated Sulky Blendables 30 weight thread for the background flatlocking and a variegated YLI quilting cotton thread 40 weight for flatlocking the leaves and stems. I used Maxilock serger thread in the positions that were not visible in the stitches.

Flatlock Background and Create Rectangle Blocks
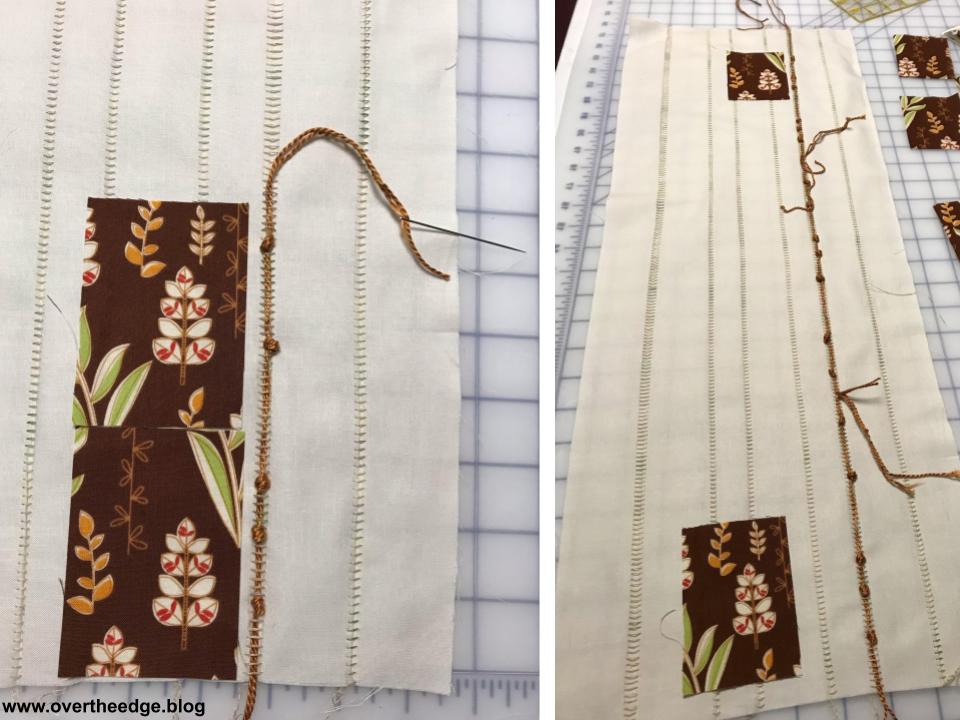
I randomly pressed lines in my background fabric to mark my folds for flatlocking. Then I created ladder stitching on the folds of fabric using both a narrow and wide two thread flatlock.
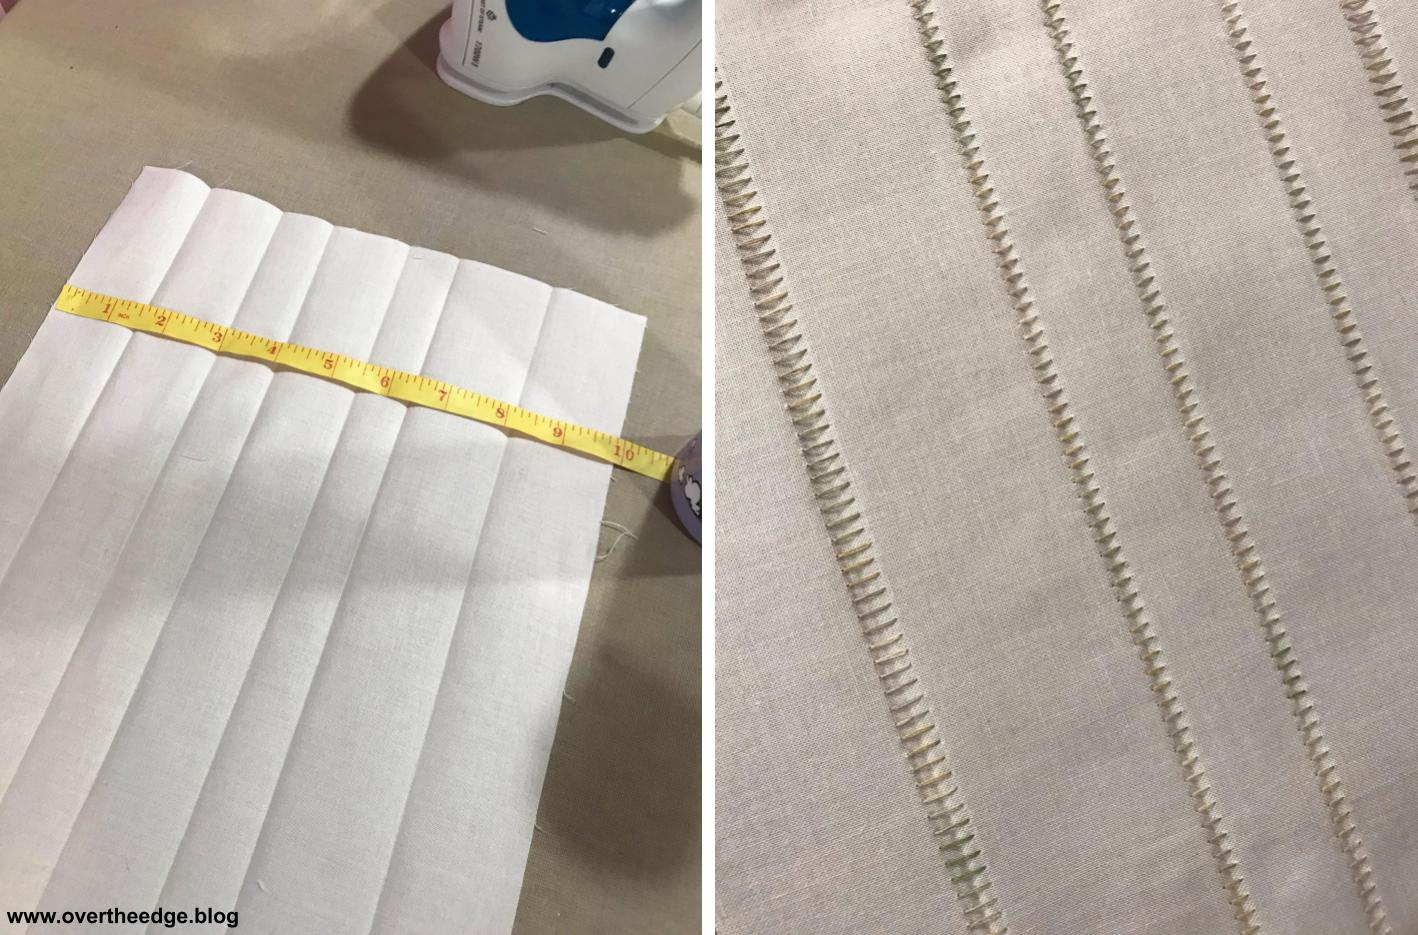
I serged each fold, then pulled it open. I pressed all of the flatlock stitching at once after I was finished serging the lines. After flatlocking I used two strands of perle cotton to create extra texture, making knots as suggested. The only change I made here was to add my yarn knots before I cut out the rectangle blocks. Unsecured flatlock stitching unravels easily near the edges, so I thought this change would create less stress on those stitches. When I ran out of yarn, I just cut 2 new pieces and continued where I left off. I fussy cut around the thread tails as I cut out my rectangles, so each rectangle was unique.


Create Leaves and Stems
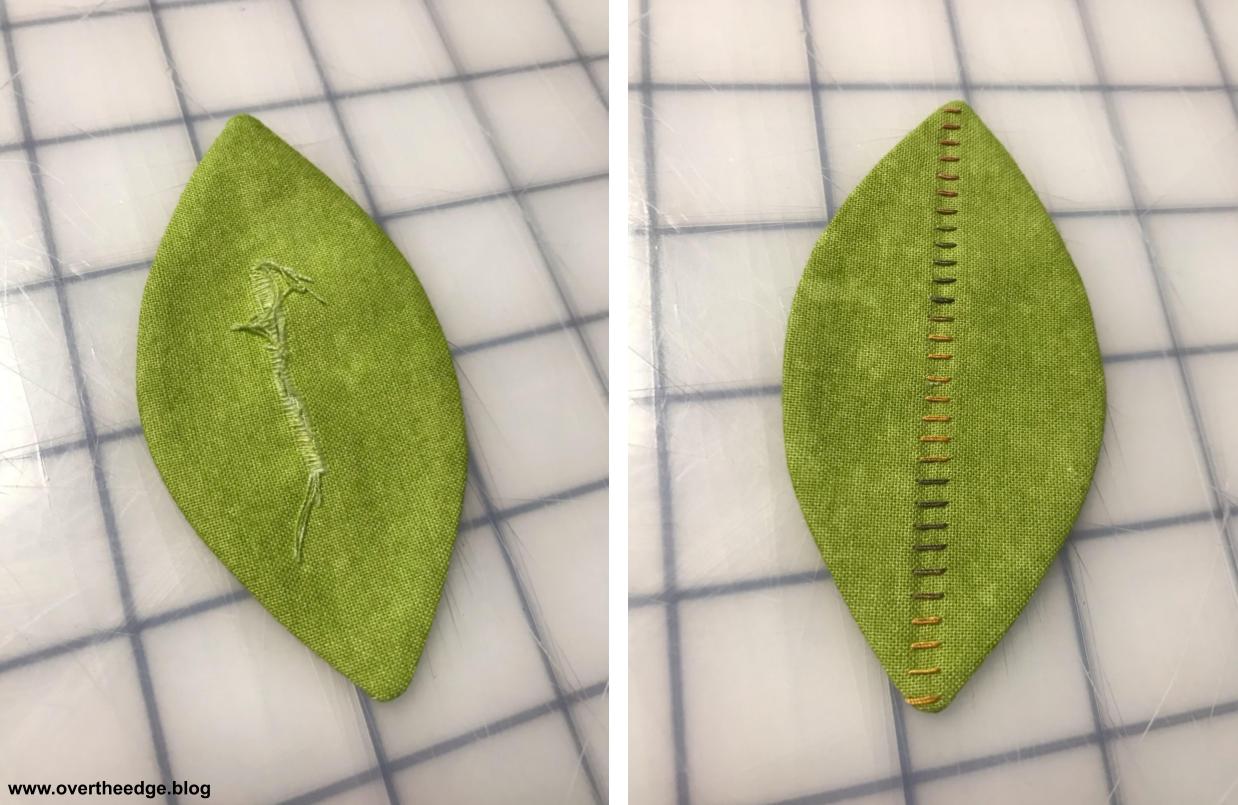
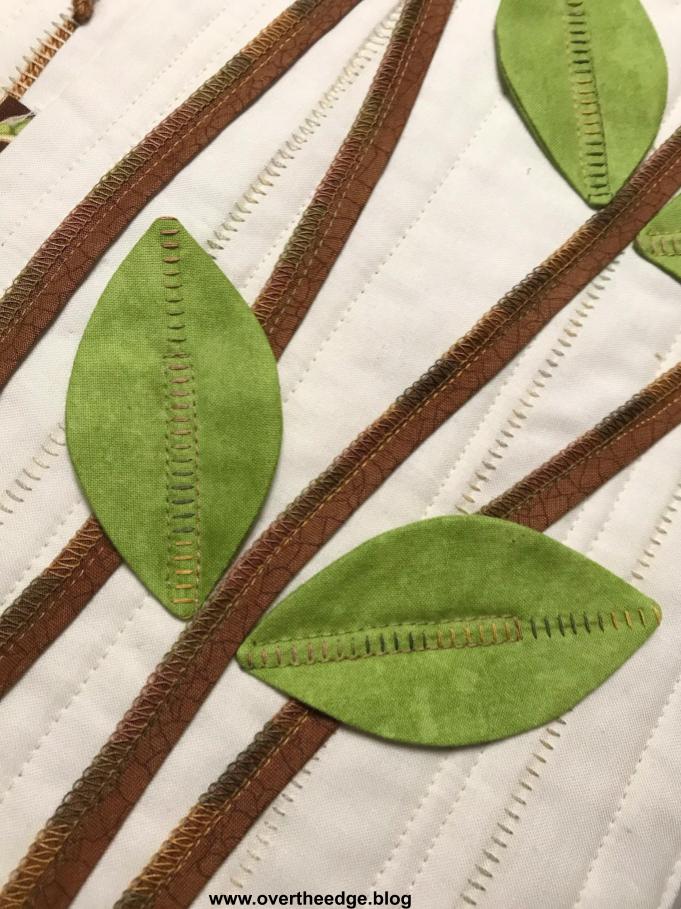
For flatlocking my leaves, I put the variegated thread in my needle. I wanted the variegated thread to show on my leaves. After flatlocking the leaf strip on my serger, I traced the leaf pattern onto the fabric. I then completed making the leaves on my sewing machine.

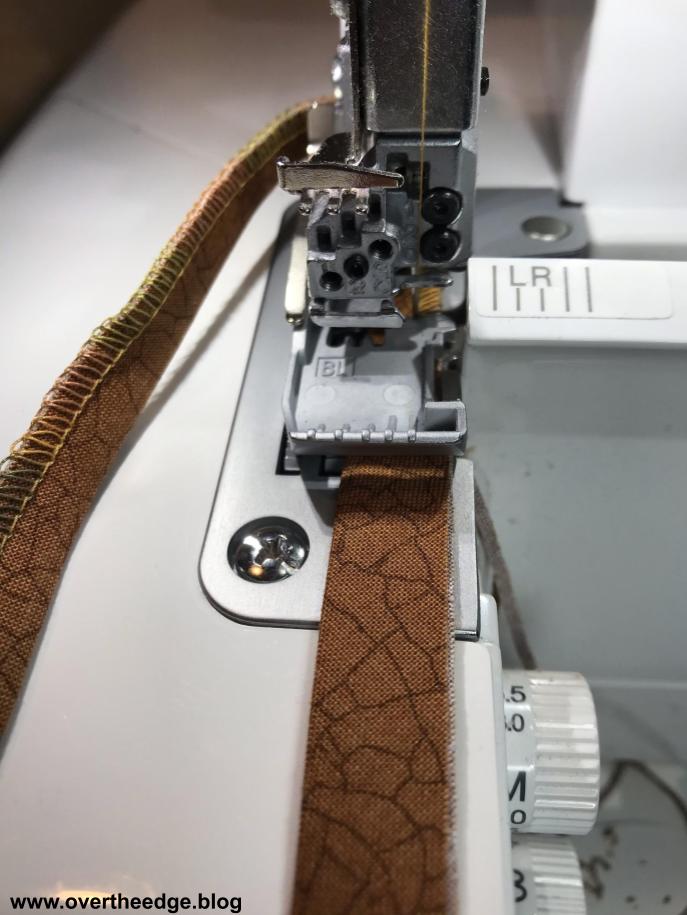
For finishing the stems, I set the serger up for a two thread overlock. The two thread overlock is basically the same stitch as the two thread flatlock, but you don’t open the seam. I put variegated thread in the lower looper because the loops ended up on the right side of my stems.
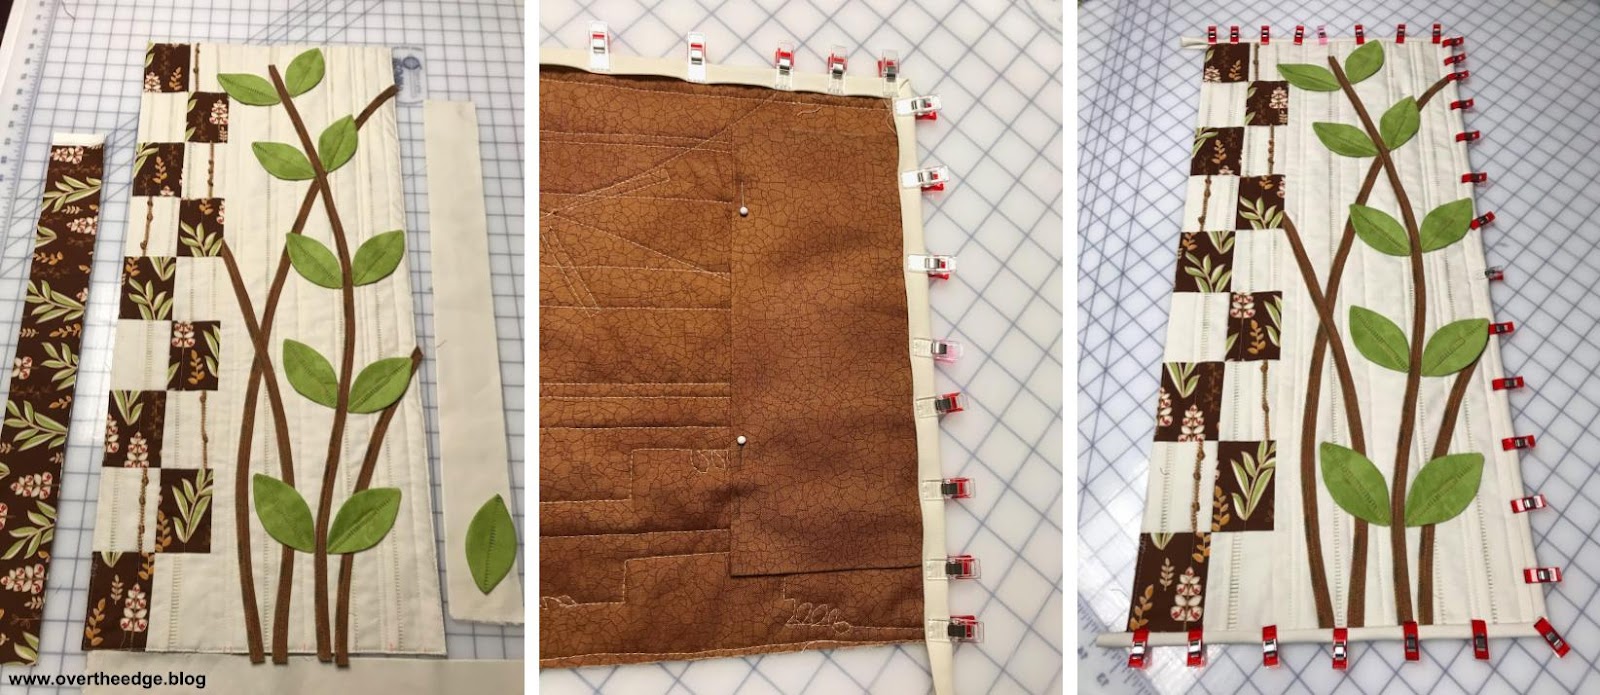
Piece Together Background
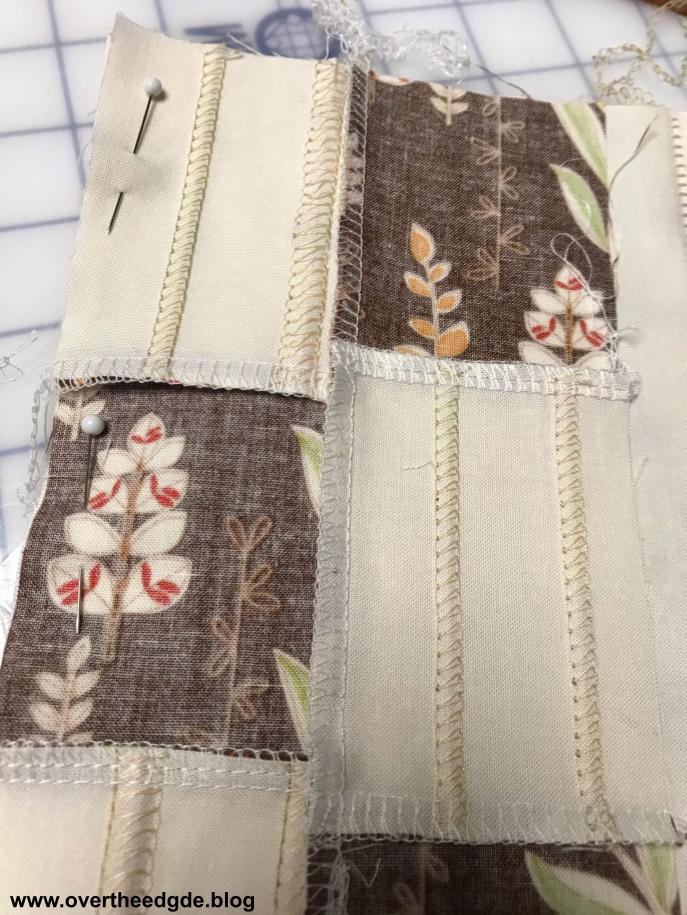
After serging the leaves and background, I converted my serger to a four thread overlock stitch. I used the four thread overlock stitch to serge the background rectangles together. I handled the rectangles carefully to keep the cut flatlock stitches from unraveling before piecing them together.

Quilt with Sewing Machine
I layered my backing, batting and top of my quilt sandwich and quilted the background using a sewing machine. My quilting was simple. I stitched lines between my lines of flatlocking and outlined some of the leaves in the brown rectangles.

Add Stems and Leaves
After the background was quilted, it was time to add the stems and leaves. I auditioned my stems and leaves on the background until I was happy with the layout. Then I stitched them all down with my sewing machine. Since the top leaf hangs off the edge, it was easier to stitch it on after the binding was applied. One of the things I really like about this project are the three dimensional stems and leaves!

Add Binding and Finish
The instructions have you use two different colors of binding. I bound the top, bottom and right side of my quilt with off-white and the left side with brown. I attached my binding to the front of quilt, and then flipped it to the back. To secure the binding, I stitched in the ditch on the front side with my sewing machine. I also added a hanging sleeve on the back
Flatlocking on the Fold
You typically see serger stitching on seam lines and fabric edges. But flatlocking is not limited to seams or fabric edges. You can flatlock on a fold and create decorative stitching within the body of your garment or project.
Flatlocking is a technique you can do with your standard presser foot. However, a foot with a guide, such as a blind hem foot, will make flatlocking easier.
The flatlock stitch is reversible. Which means you can use either side of this stitch in your projects. I like both the “loop” side and the “ladder” side of the flatlock stitch. To see the loops on the right side of your fabric you fold it with the wrong sides together. To see the ladders on the right side of your fabric you fold it with the right sides together.
When you flatlock on the fold, you serge with the loops hanging off of the fabric. You must guide your fabric so that the fold is about halfway between the needle and the blade. (See photo below.) Without the extra thread in those loops, you won’t be able to pull open the stitch to make it flat. If you have too much fabric in the stitch you won’t be able to fully open it. The stitch will look lumpy on one side and like a tunnel on the other. If you get too little fabric in the stitch you will have loose and floppy stitching.
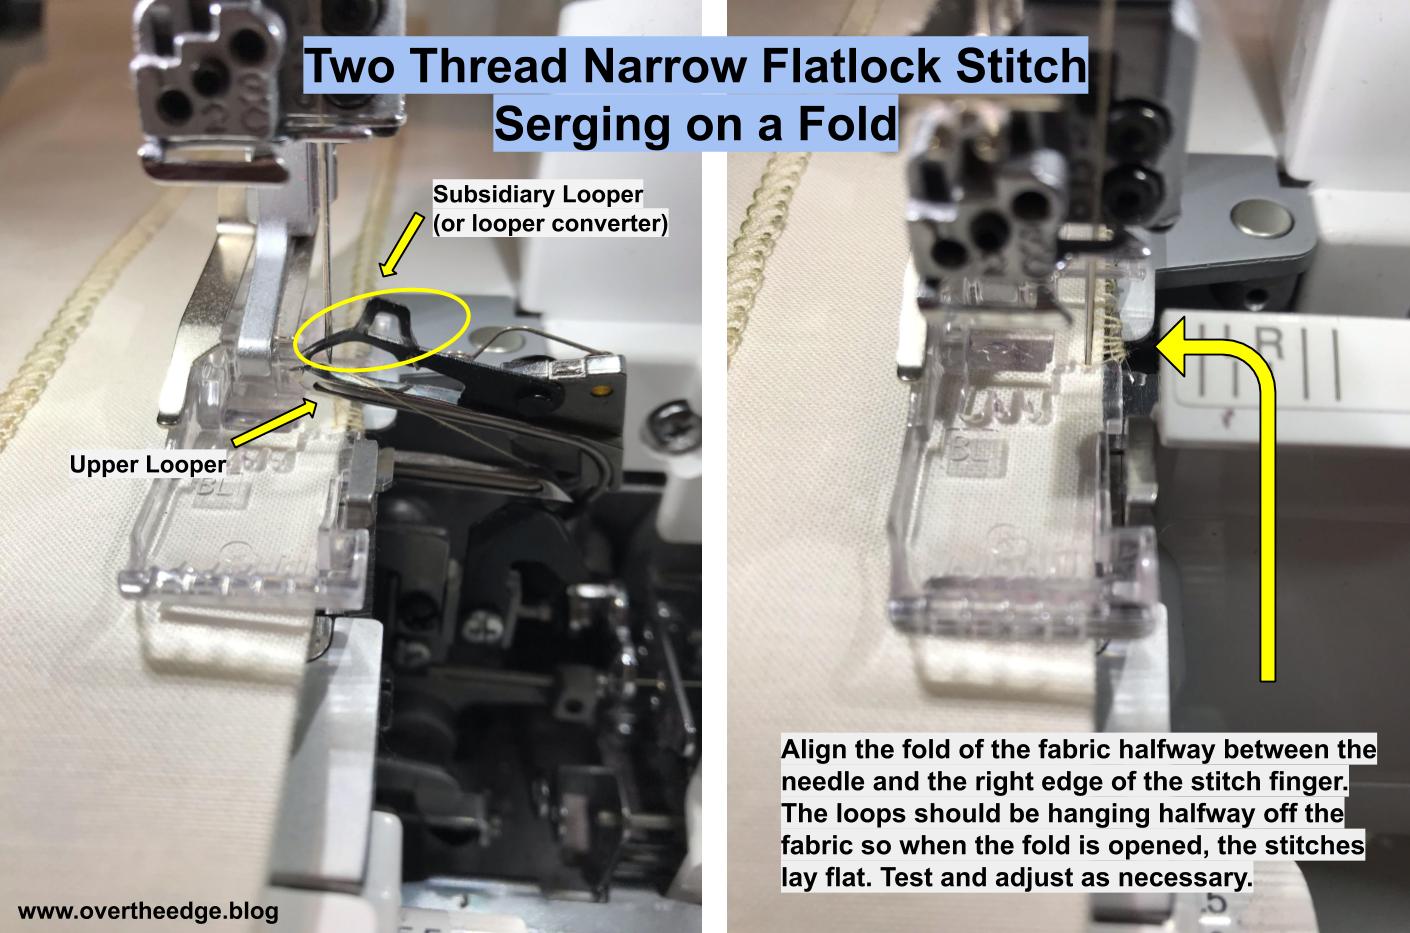
I recommend you practice flatlocking on the fold before you begin this part of your project. Sharon provides some information about flatlocking on page 16 of her book. Your serger manual will instruct you how to set up and perform a flatlock stitch with your machine.

Simply Leafy 2
I hope you enjoyed my post about the creation of my Simply Leafy 2 wall hanging quilt.
Check out another fun project called Down the Pathway that I made from the book, Serge & Merge Quilts. https://overtheedge.blog/serge-and-merge-quilts-down-the-pathway/


Resources
Serge & Merge Quilts by Sharon Rotz. This book was published in 2009. If you can’t find it in your local shop, try the internet. https://www.amazon.com/Serge-Merge-Quilts-Create-Nancy/dp/0896898105
Super duper neato! I love the creativity and uniqueness. Loved seeing the step by step process… makes me think it is
“do-able”.
I’m glad you liked it! I have a lot of fun with serger flatlocking and love to share my creations.