Since March is National Quilting Month, I thought it fitting to share the latest serger quilting technique that I have been experimenting with – one seam flying geese with a serger.
While I was surfing the internet I came across an interesting YouTube video of Jenny Doan from Missouri Star Quilt Company. She was showing how to create a one seam flying geese block using a sewing machine. I immediately decided that the serger would be a great tool to use for this technique. I couldn’t find any internet resources about using a serger to make a one seam flying geese block. So maybe I am the first person to try it with a serger? Probably not, but it appears I am the first person to blog about it…..
One Seam Flying Geese with a Serger
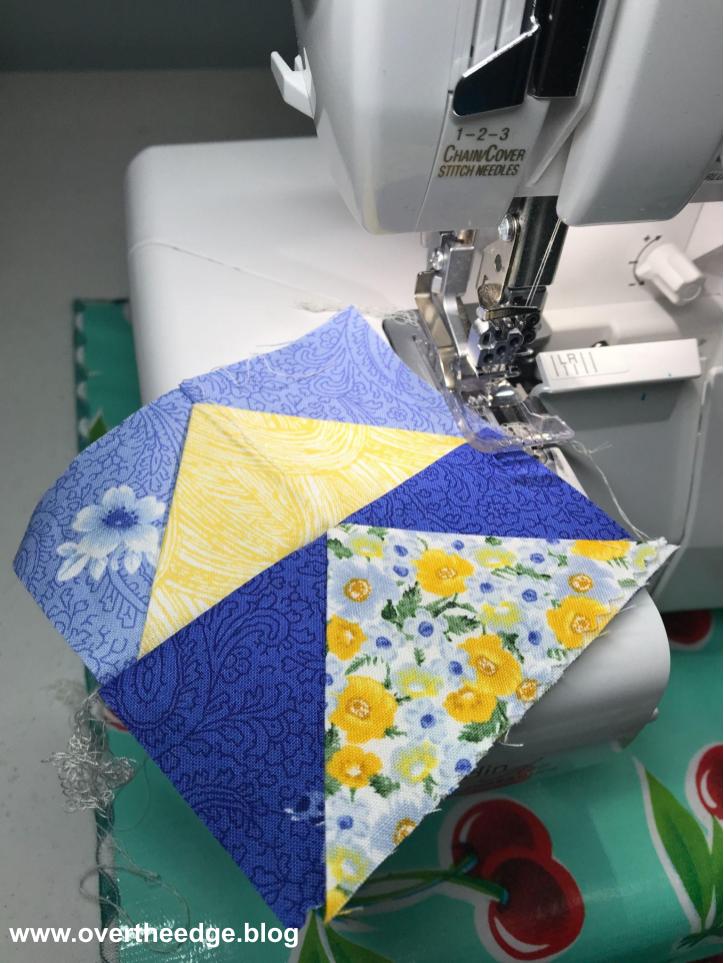
The one seam flying geese block is a three dimensional block. The block is made from a rectangle and two squares and has just one seam. Each geese block/unit is twice as wide as it is tall. The angled sides (or wings) of the geese are folds in the fabric. This method has no lines to mark, no subcutting, and makes perfect points. How easy is that?!
Pros and Cons of the One Seam Flying Geese Block
Pros
Accurate
Fast
No markings or paper to remove
No bias edges
3D adds texture
Very little waste
Cons
May need or want to stitch down the wings of the three dimensional geese
Some seams are a little thicker due to the folded fabric
Jen’s Experiment with Serged Flying Geese
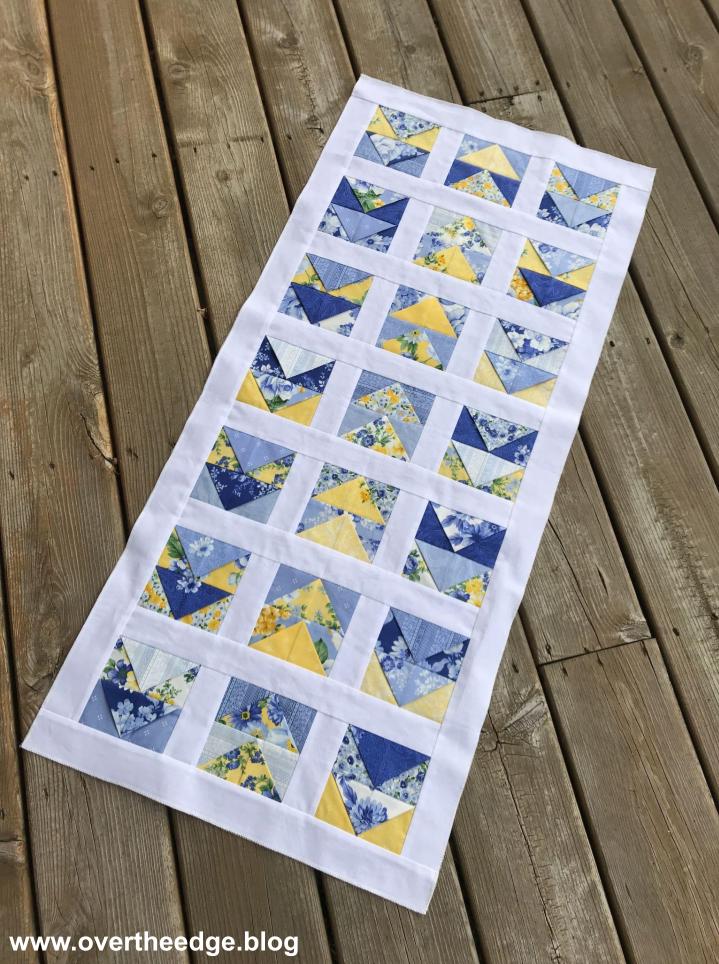
I pulled a charm pack from my stash. The charm pack was from Boundless Fabrics and called Dutch Garden III. The blues and yellows were so fresh and cheerful compared to our dreary February weather! With a few simple cuts and a little serging, I quickly transformed the 42 squares in my charm pack into 42 flying geese units. Chain piecing the blocks on my serger was quick and easy. I found making them kind of addictive – I just wanted to keep making them!
With a little fabric manipulation, pressing and trimming, I transformed all of the blocks into one seam flying geese.
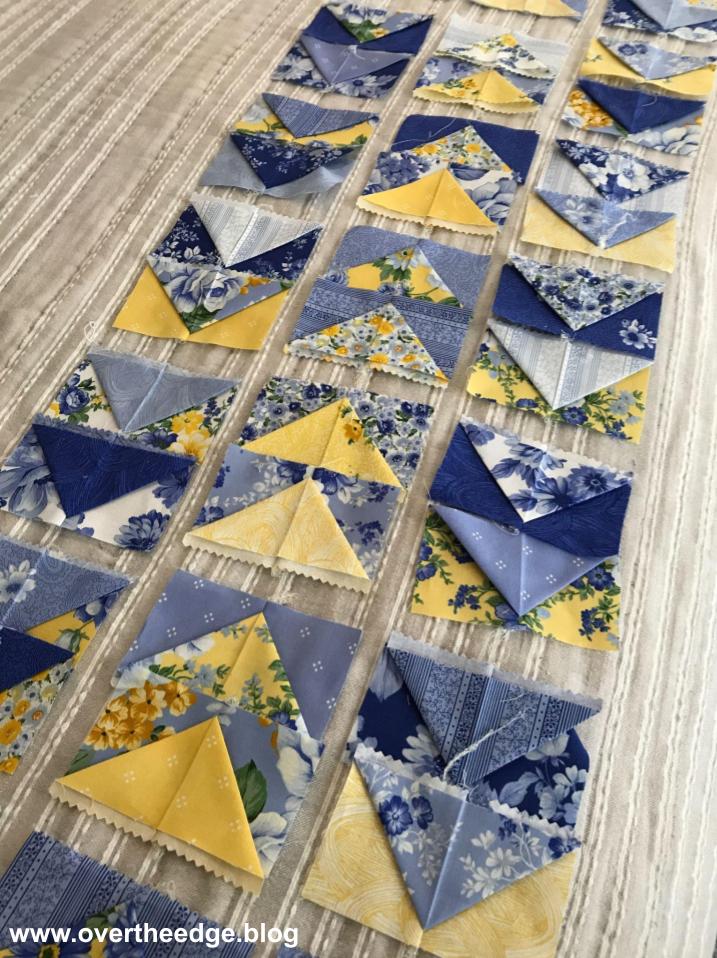
I Have a Bunch of Flying Geese – Now What?
Most people begin with a pattern when they create a quilt. Sometimes I do too. But not this time. I serged all these geese without a plan for what to do with them. I simply laid out all the blocks and moved them around until I liked the arrangement. These geese decided to become a table runner.
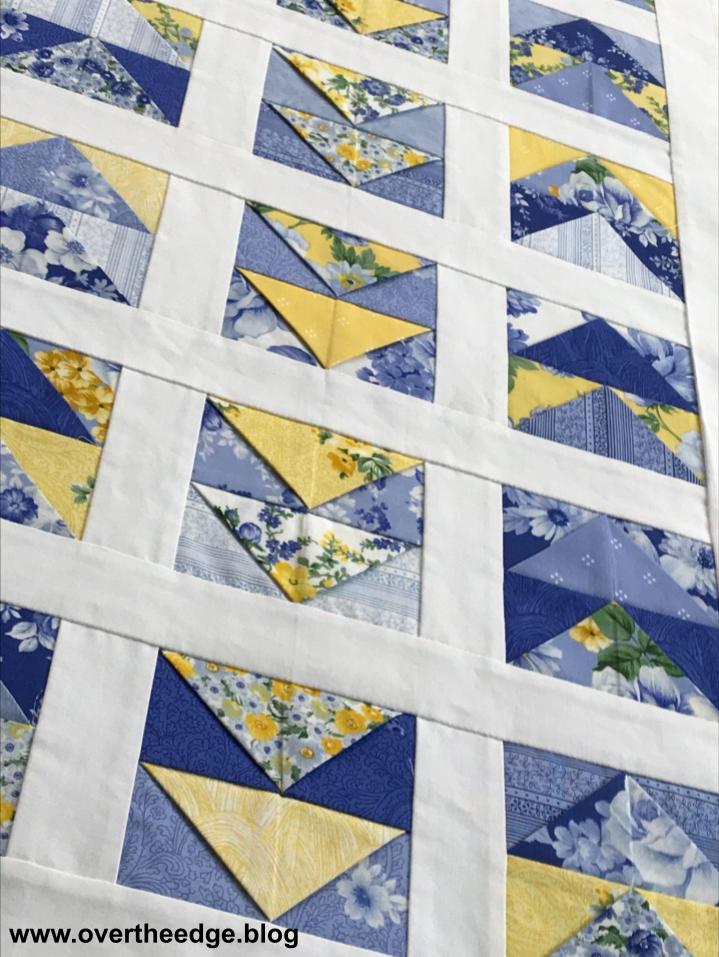
Sashing and Borders
I serged the geese blocks together in groups of two and added sashings and borders.
The Results of my Experiment
From the front side you might think the table runner was sewn with a sewing machine. But from the back side you can see all the neat and tidy serged seams.
My one seam flying geese blocks became my cheerful Spring Migration Table Runner!
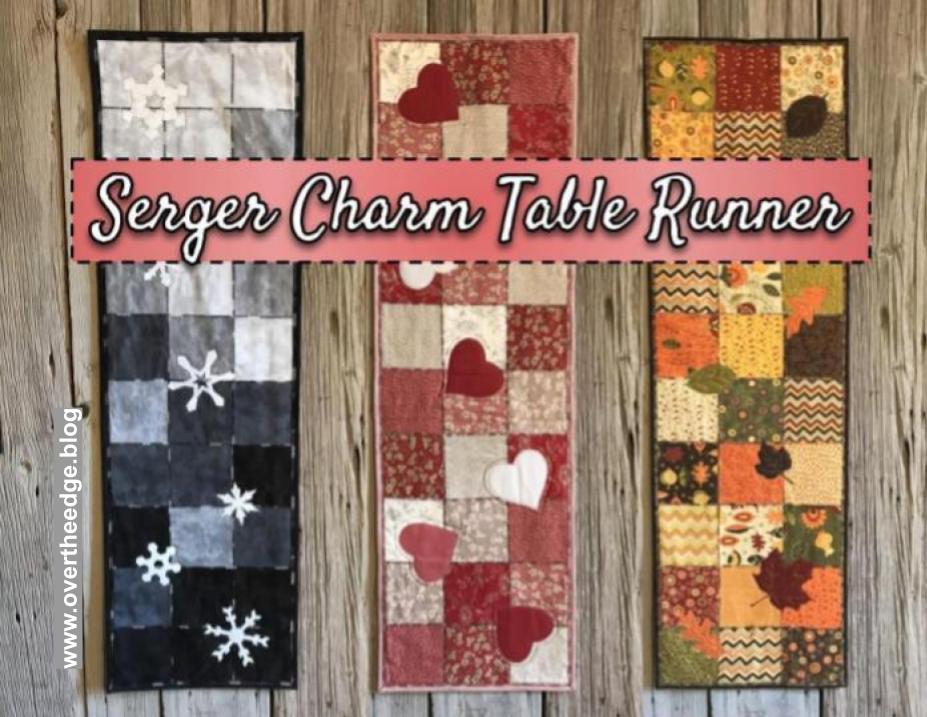
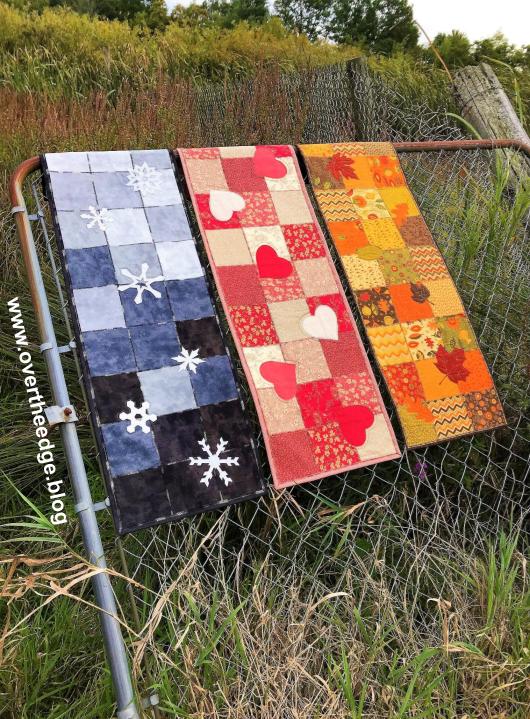
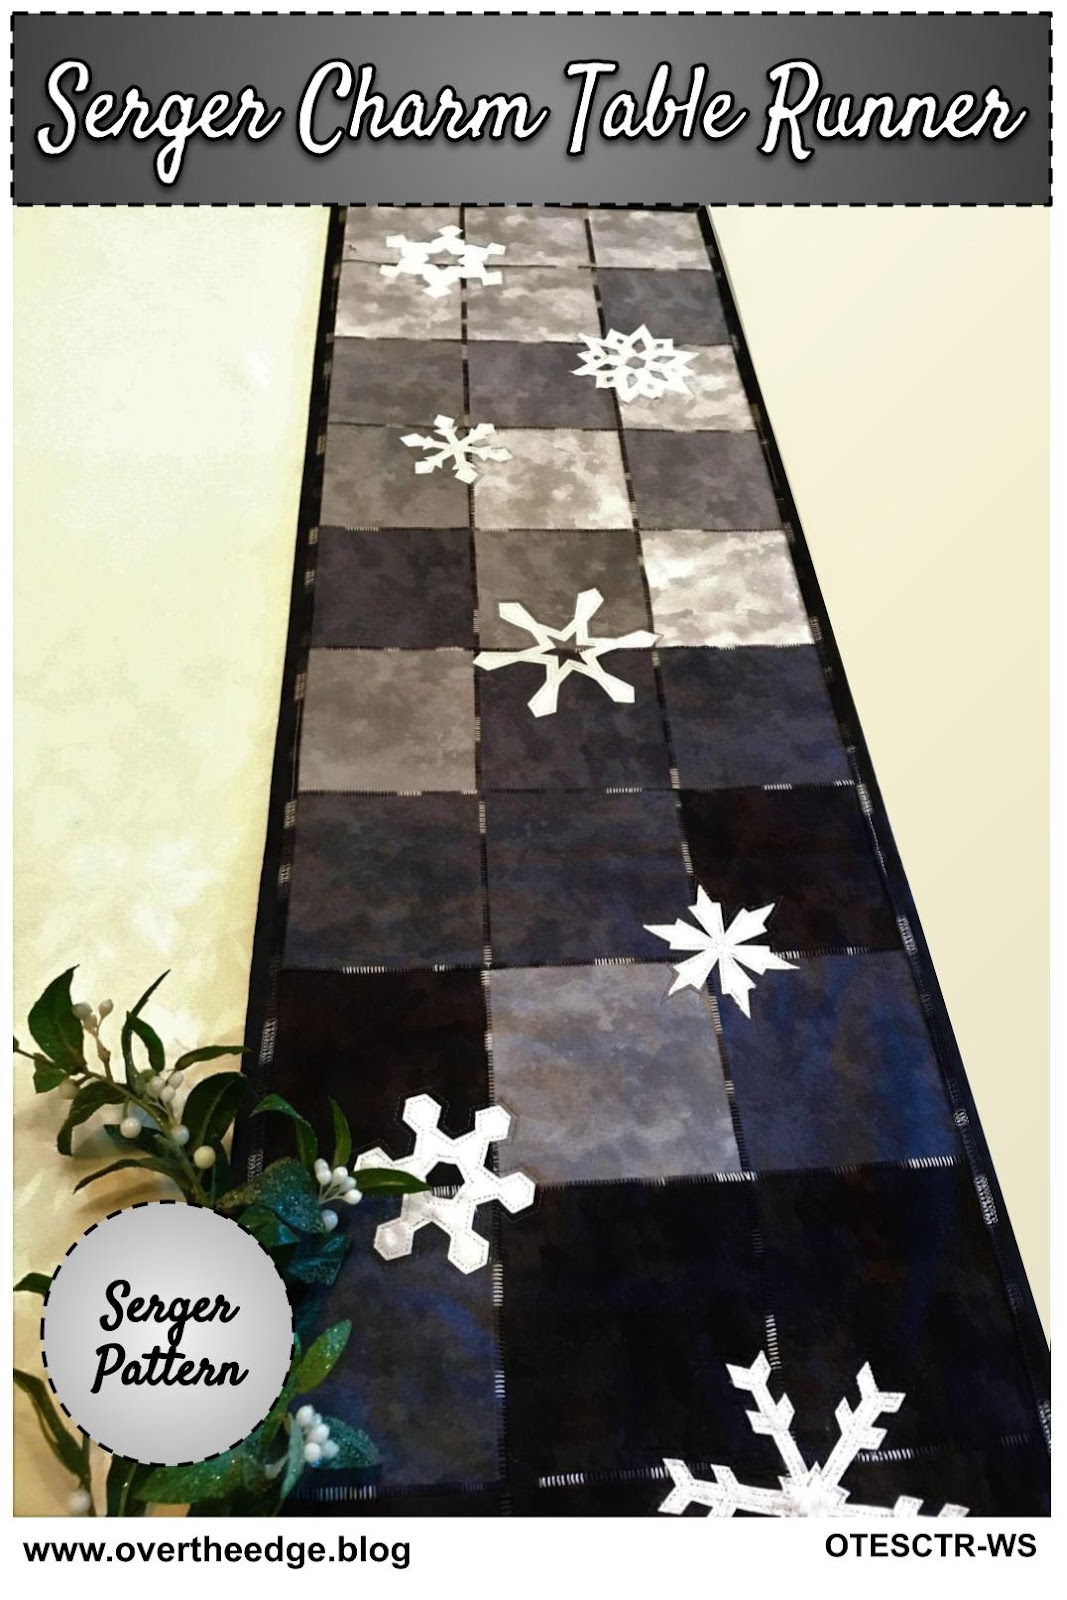
I finally completed the official pattern for my Serger Charm Table Runner design. It’s hard to believe that six years have passed since I first taught this design in a serger class. It’s time to get charmed by a serger!
My serger charm table runner quilt is made from charm squares that are pieced together with a serger flatlock stitch. It even has overlock embellished binding. I included all three layouts and applique shapes in the pattern: Winter Skies, Hearts a Flutter and Falling Leaves. And of course, the step by step instructions have lots of diagrams and photographs. Keep reading to learn all about the table runners I made as samples for my pattern.
The Flatlock Stitch and Piecing a Quilt
There are many different ways to use a flatlock stitch. Most involve serging with part of the loops hanging off the edge of the fabric. You need a steady hand (or a special presser foot) and a little practice to get it just right. But with flatlock piecing you don’t need a special foot. Your standard presser foot will work just fine. You guide the raw edges of your fabric next to your blade, and just trim off the stray threads. So the entire stitch lays on the fabric with no overhanging loops.
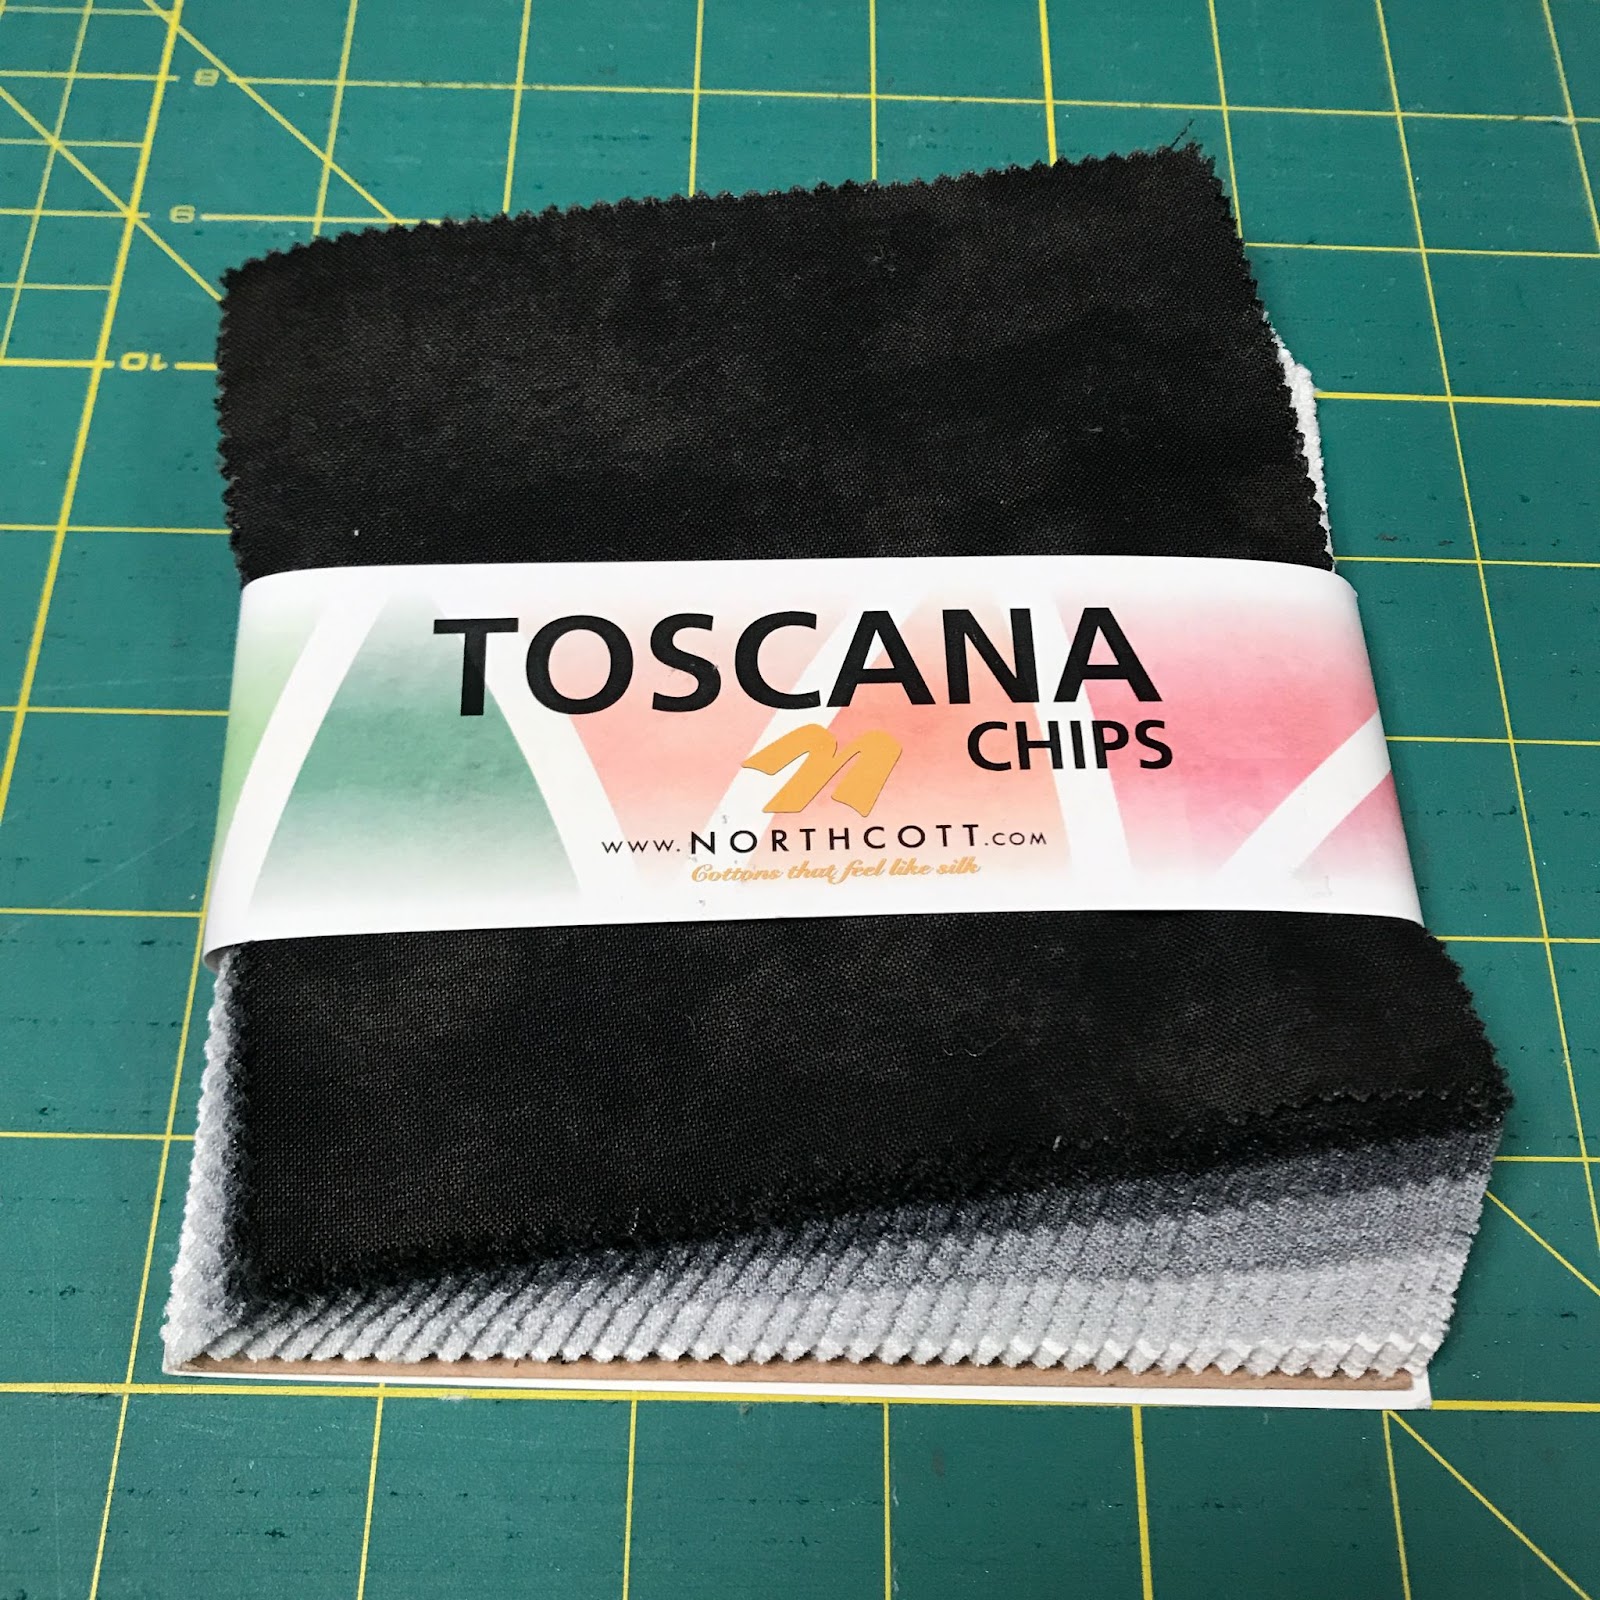
Charm squares are 5” squares that are cut from a collection of cotton quilting fabric and sold in packages. There are typically 40-42 squares per pack, but the number can vary. I used one package of charm squares for each of my table runners.
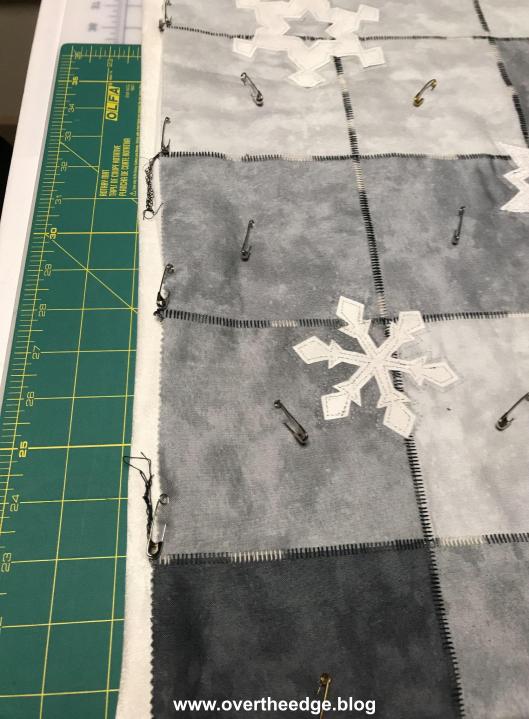
Winter Skies – I used a Northcott Toscana Evening Shadow Chip Pack
Hearts a Flutter – I used a Moda French General Favorites Charm Pack
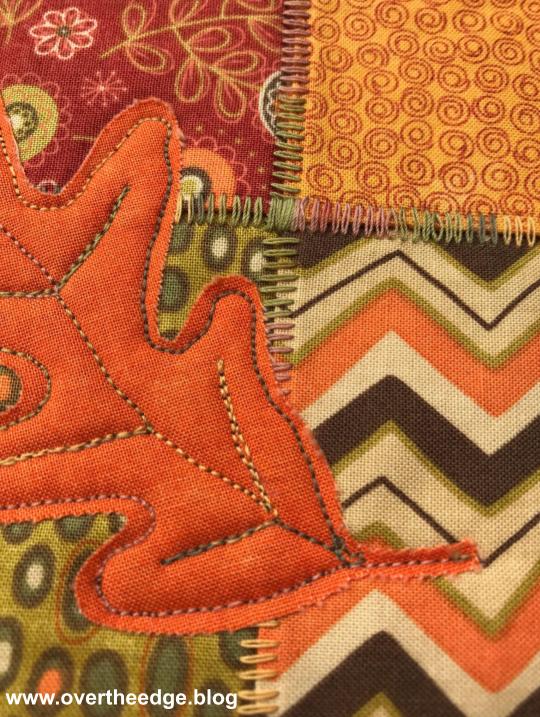
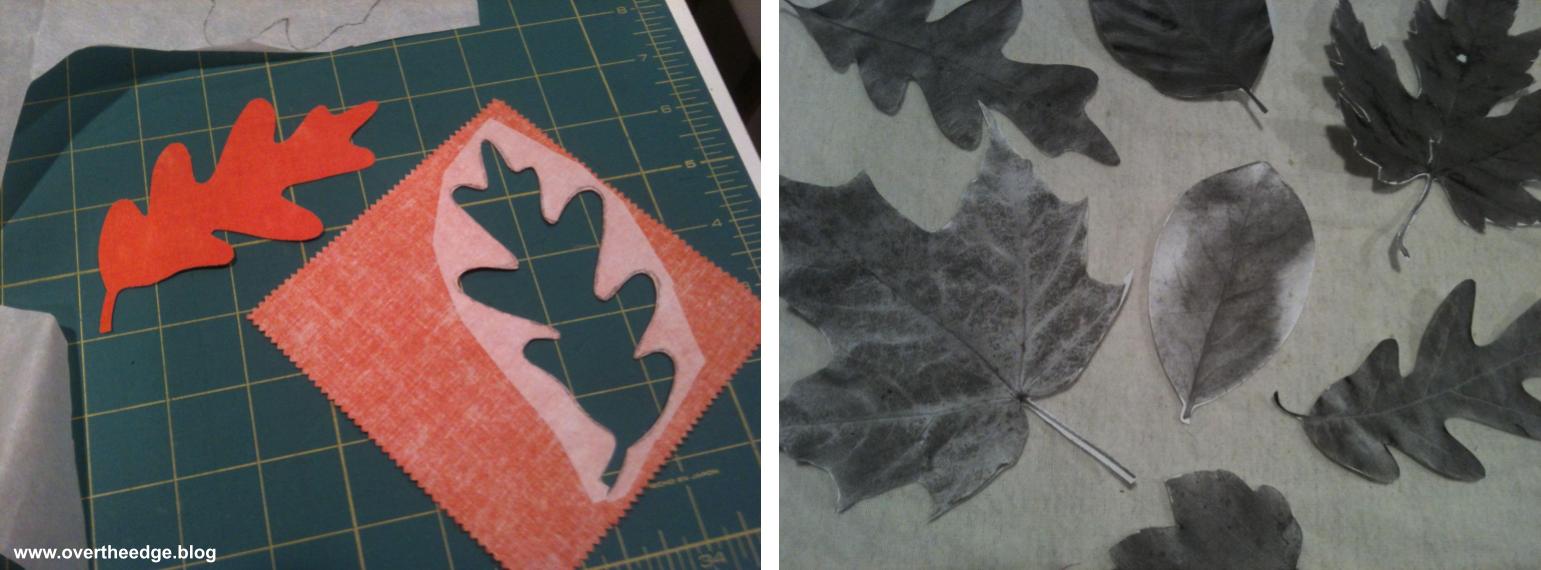
Falling Leaves – I used a Moda Hello Fall by Sandy Gervais Charm Pack
Both the background squares and the applique squares in my table runners came from the charm packs. The Northcott Toscana charm pack had 5 colors in it with multiples of each fabric. The Moda Hello Fall charm pack had very few repeats. The Moda French General Favorites charm pack had some repeats. You can always add in some applique fabric from your stash if the charm pack doesn’t have the solids or blenders you need for the appliques. I was lucky because the charm packs I chose had just the right amount of blenders for appliques. Or you could always cut your own collection of 5” squares for this table runner.
Quilt Top
The table runners were pieced together using flatlock stitch. I love the look of the flatlock stitches in decorative quilts where the thread can be a focal point. And I love the way it looks with variegated thread. It really adds interest to a quilt. I’ve used both 30 wt and 40 wt variegated cotton threads by Sulky and YLI. The squares with the flatlocked seams look great as a background for applique.
Applique
I had fun designing the applique shapes for this pattern. Real tree leaves were the inspiration for my Falling Leaves table runner. It’s amazing what you can do with real leaves and a copy machine! I learned how to make my own six sided paper snowflakes and picked my favorites to add to my Winter Skies table runner. For the Hearts a Flutter table runner I cut out several different paper hearts from folded paper and tested them on the runner before choosing my favorite.
I used the raw edge applique technique to apply my shapes using a sewing machine. But other forms of applique would also work. If you have a serger with a large throat space you could applique with the chain stitch. You could even machine embroider some of your favorite applique designs on your table runner.
Batting
Choose your favorite. I’ve made mine with thin fusible fleece, cotton quilt batting, and flannel. I like them all, but each is a little different. Flannel is the thinnest. Fusible fleece was a little more “stiff” and cotton quilt batting was the fluffiest. I think the fusible fleece fused to the back side of the quilt top fabric helps to hold the fabric and flatlock stitches in place, but I’ve had good success with all of these battings.
Quilting
You can quilt this table runner with as little or as much quilting as you like, based on your selected batting. Some battings require quilting stitches every 3-4” or some like flannel can be quilted 8-10” apart. My table runners are decorations and are spot cleaned as needed (rarely), so quilting distances are not that important. I did minimal quilting on my table runners so that my variegated thread and flatlock stitches would stand out and be a focal point of the quilts. I quilted my table runners using both a sewing machine and a hand sewing needle.
Binding
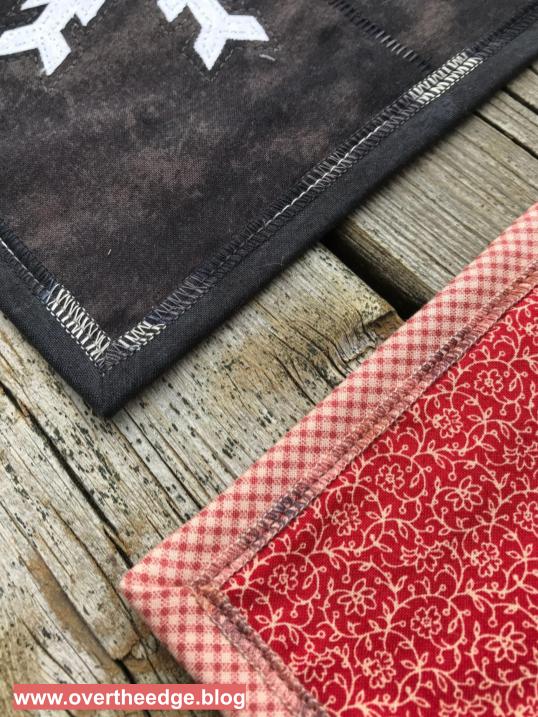
Although any method of binding would work for this table runner, I chose to embellish my binding with a three thread overlock stitch. The serger stitches on the binding really help tie together the quilt with the flatlock stitching around the squares. I attached and top stitched the binding to these table runners using a sewing machine, but a serger using a 4 thread overlock and/or a chain stitch would work as well.
Other Ways to Use a Serger for this Project
You can serge a table runner just like mine using the instructions in the pattern. A standard serger capable of a three thread flatlock stitch and a sewing machine are all you need.
Would you like to get more creative with your serger? Here are a few additional ways to use your serger that are not included in the pattern:
Use a rolled hem on the binding instead of an overlock
Attach the binding with a four thread overlock stitch or a chain stitch
If you’d like to try making the Serger Charm Table Runner be sure to visit my etsy shop and get your own copy of my pattern. Use the coupon code SERGERCHARMNOV2021, which will give you a 20% discount on this pattern through November 30, 2021. Click on this link to take you directly to the pattern section of my shop. https://www.etsy.com/shop/studiojsewing?coupon=SERGERCHARMNOV2021
I hope you enjoyed learning about the making of my serger charm table runners.
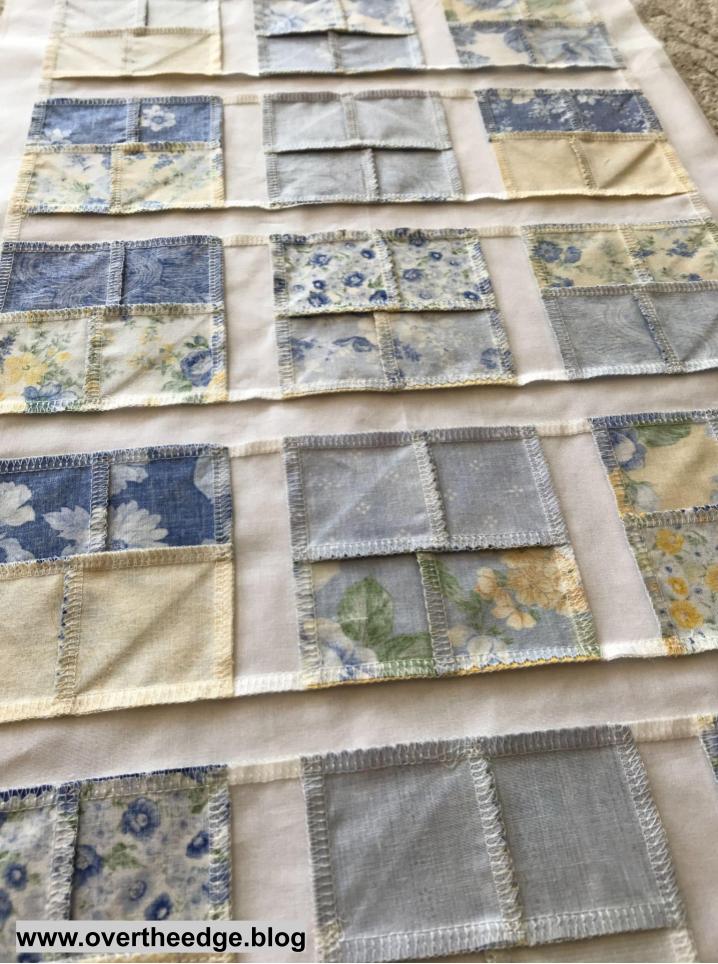
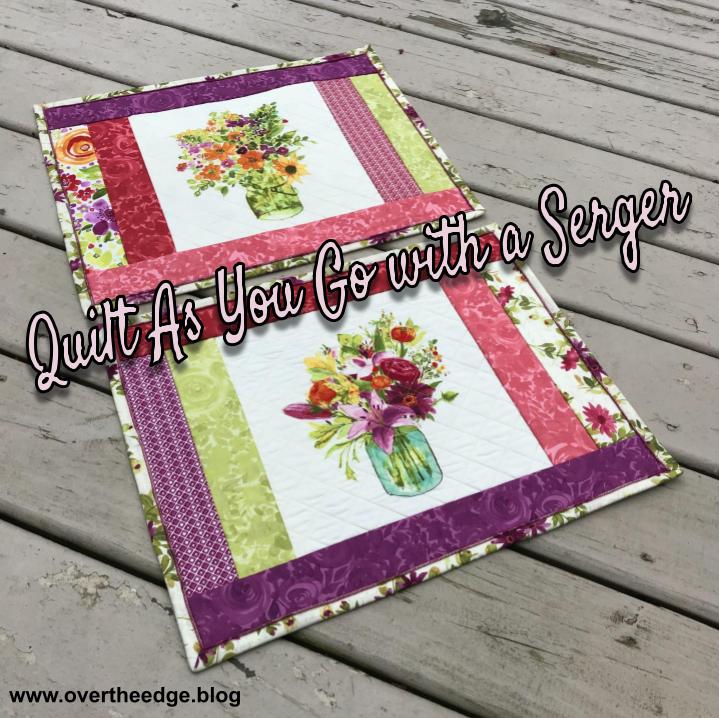
Quilt as you Go (QAYG) is a term used to describe the process of piecing and quilting each block in a quilt as you assemble it. In QAYG when the quilt top is done, so is the quilting!
QAYG with a serger is similar to QAYG with a sewing machine, but the way the pieces are layered and assembled is different. The end result is a reversible project where all the layers are connected at the seam lines. And it’s fast because you save a step. The “stitch in the ditch” machine quilting is done at the same time the layers are serged together.
Typically, you assemble your quilt in strips or log cabin style, working from the middle outwards, or side to side or top to bottom. This technique is not just limited to quilts. I’ve made placemats, lap quilts, picnic quilts, table toppers, table runners and tote bags using quilt as you go with a serger.
Why would you want to try Quilt As You Go with a Serger?
It’s fast. Some people refer to this method of quilting projects as “fun and done”.
A four thread overlock seam is approximately ¼” wide, which is a typical seam width in a quilt. The serger compresses the seam so the multiple layers aren’t too bulky. And it’s secure due to the 4 threads in the seam.
It’s great for projects with simple quilt designs without complicated seams.
Project Inspiration
I’ve done a variety of different projects with QAYG on a serger. Below I’ve included photos and information about several of my own serger QAYG projects. And you can find many tutorials and YouTube videos on the internet for inspiration.
If you would like to try a strip placemat without the center panel see the brothersews tutorial. You will find a link in the resources section at the bottom of the post.
Is it a Table Runner or are they Placemats?
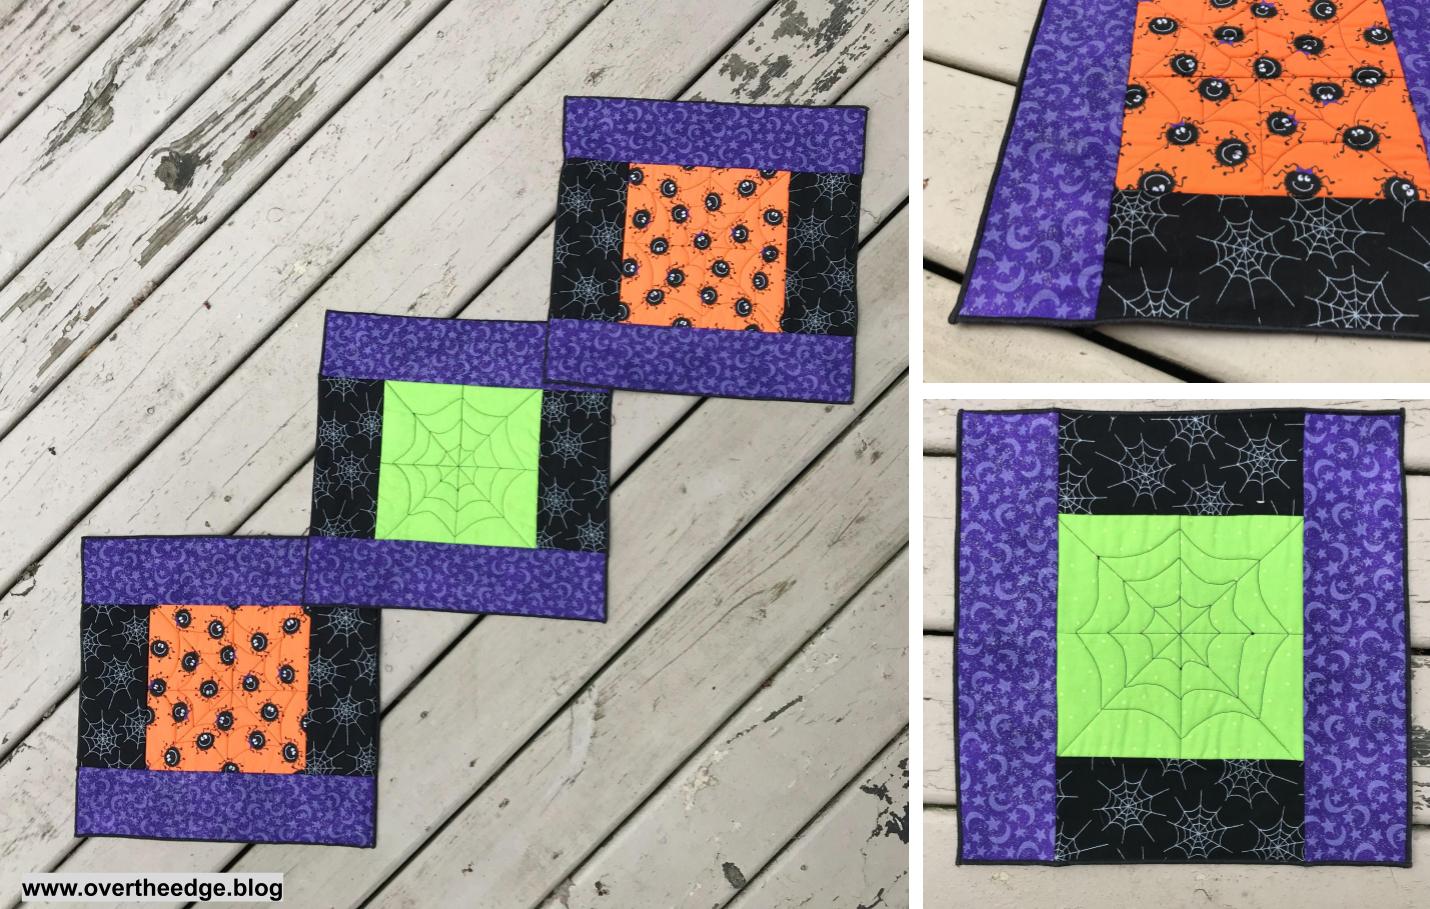
These three reversible Halloween placemats I designed can be used individually as placemats or overlapped and laid out as a table runner. One side is orange and one side is green. I quilted the center panels on my sewing machine with a spiderweb design. Then added the borders using the serger quilt as you go technique. Instead of traditional binding, I serged the edges with a decorative thread.
Lap or Baby Quilt
Serge this reversible lap or baby quilt together quickly and easily. It’s also a great quilt project to donate to charities. And you could serge the edge with a decorative thread like I chose to do, instead of binding it the traditional way. The width of the strips is only limited by the batting and it’s maximum quilting distance. I used a polyester batting that could be quilted up to 6” apart. So I cut my strips 6.5” wide x WOF. This project used 9 strips of fabric on the front, 9 strips of fabric on the back and 9 strips of batting. The finished size of my ladybug quilt is approximately 42” x 52”.
Heirloom Creations and Sara Gallegos of the Decorative Stitch have some helpful youtube videos on making lap or baby quilts with this method. For more of a log cabin style quilt check out Kay Wood’s video on youtube. See my resources section for links.
Picnic Quilt
I decided to scale up the serger quilt as you go technique to make a bigger picnic quilt. At first glance the quilt below looks like a traditional quilt. It is actually assembled in strips just like my lady bug lap quilt. This project was a bit more involved, but worthy of trying. I used cotton batiks for the top, a super thin batting, and a water resistance nylon for the back and binding. It was a gift for my daughter who uses it frequently for the beach and just hanging out in the yard. When I have some extra time, I plan on writing up a pattern for this design.
Table Topper
I made this patriotic reversible table topper using the serger QAYG method. The pattern came from the book, Simple Serger Sewing. I applied the binding to the front with a sewing machine and then turned it to the back and hand stitched it in place. This method begins in the middle with a pre-quilted center square and then works its way outward using triangles and border strips. See resources section for more information.
Tote Bag
I designed this tote bag by experimenting with an extra panel from my serger QAYG placemats and a bunch of extra jelly roll strips. It was a fun experiment! Some day when I have time I may write up a pattern for this serger QAYG tote.
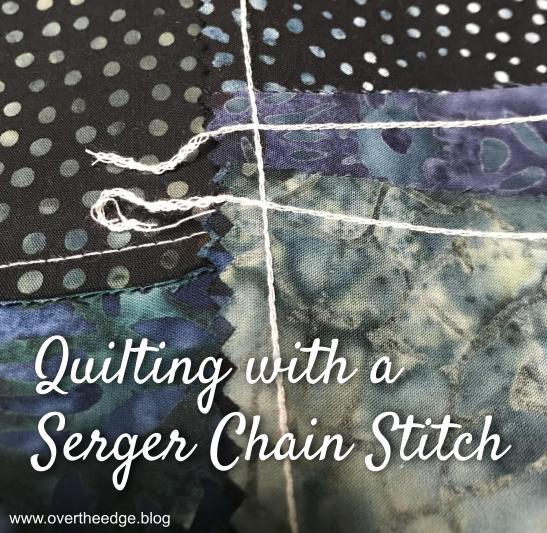
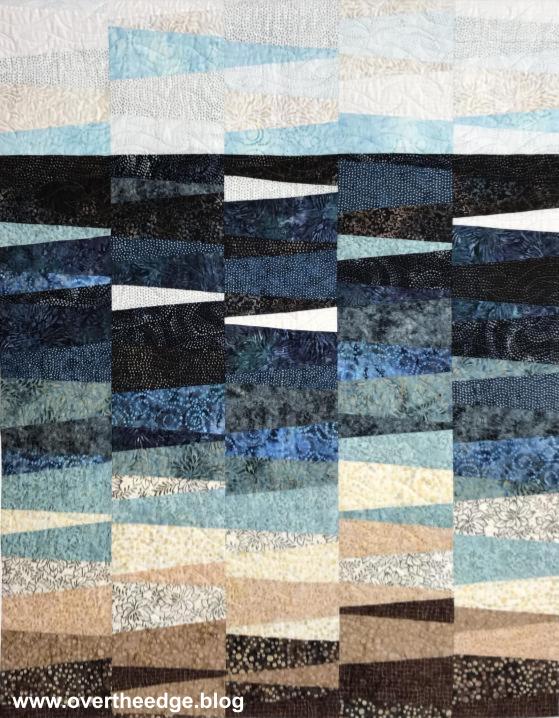
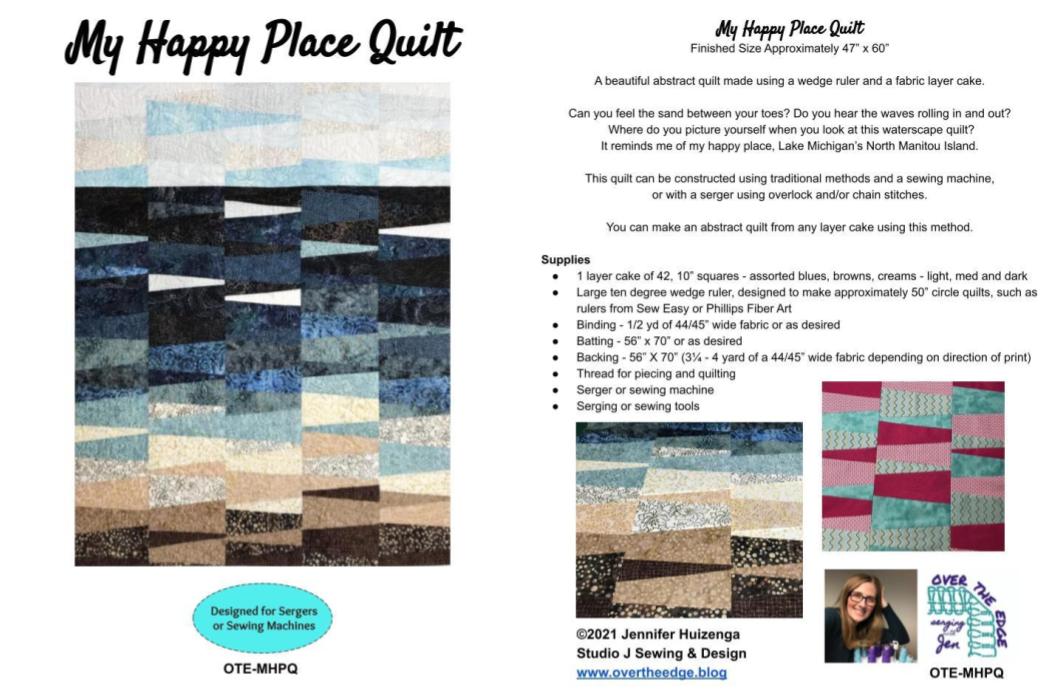
Did you know that you can serge a quilt with a chain stitch? I tried it, and I am so excited to share with you my latest quilt by serger. My Happy Place Quilt is an abstract waterscape quilt designed with a layer cake and a ten degree wedge ruler. I’ve made serger quilts using many types of serger stitches and techniques. But this is the first quilt I have pieced and bound exclusively using a serger chain stitch.
I was so happy with the results that I decided to create an official pattern for the quilt. The pattern is full of step by step photographs and diagrams. And the quilt can be made using a serger and/or a sewing machine. If you’d like to make your own My Happy Place Quilt, you can find the pattern for sale in the Shop section of my blog: https://overtheedge.blog/shop/
Story Behind the Quilt
I created the quilt as a personal design challenge for National Quilting Month this year. And of course, I chose to use my serger to make it. So I guess it counts for National Serger Month too!
I wanted to use my ten degree wedge ruler for another project.
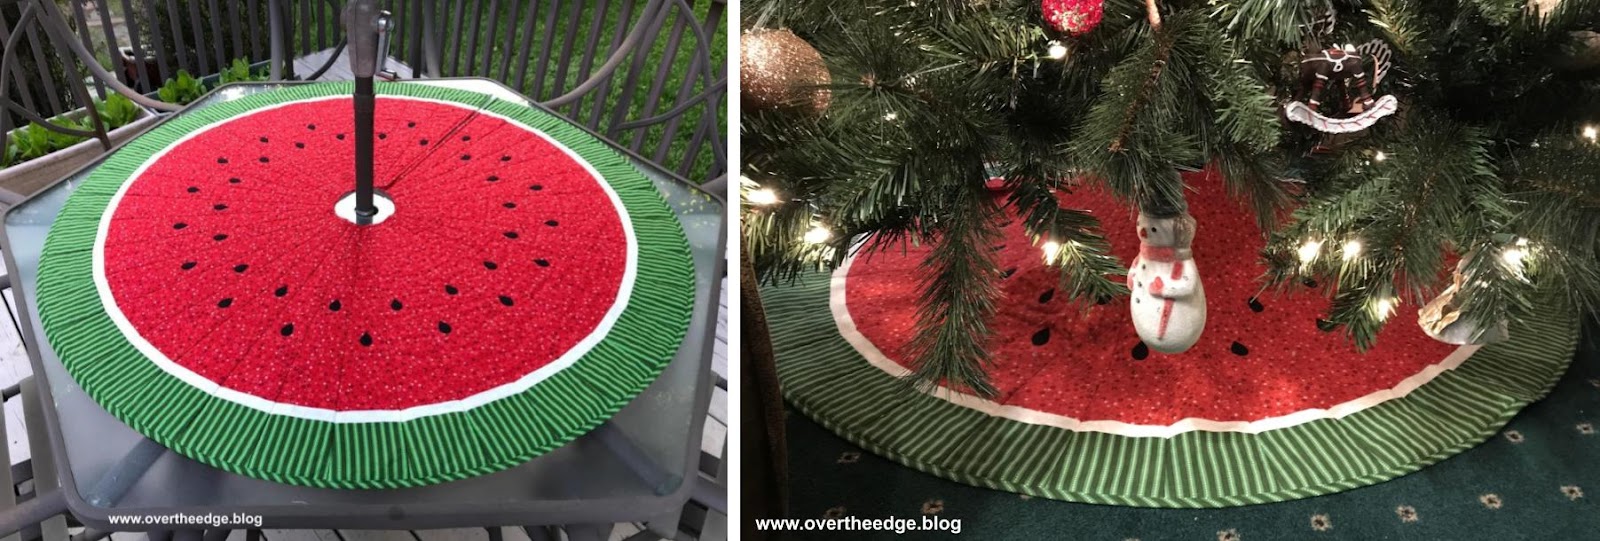
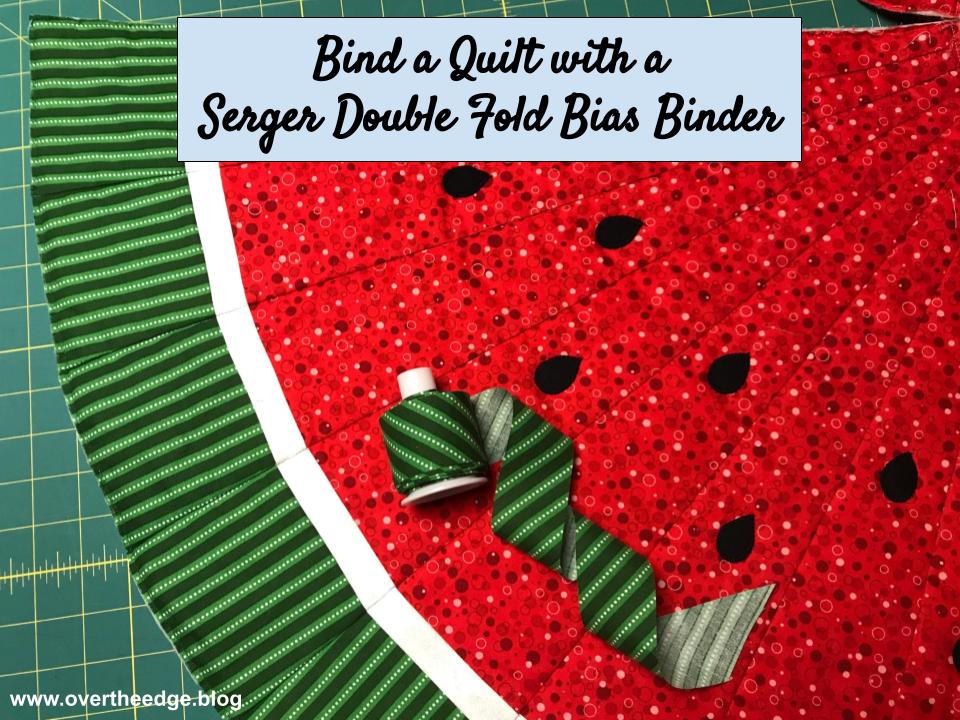
You may remember that last year I used my serger and ten degree wedge ruler to create a watermelon quilt. I’ve used the quilt as both a patio table topper and a tree skirt.
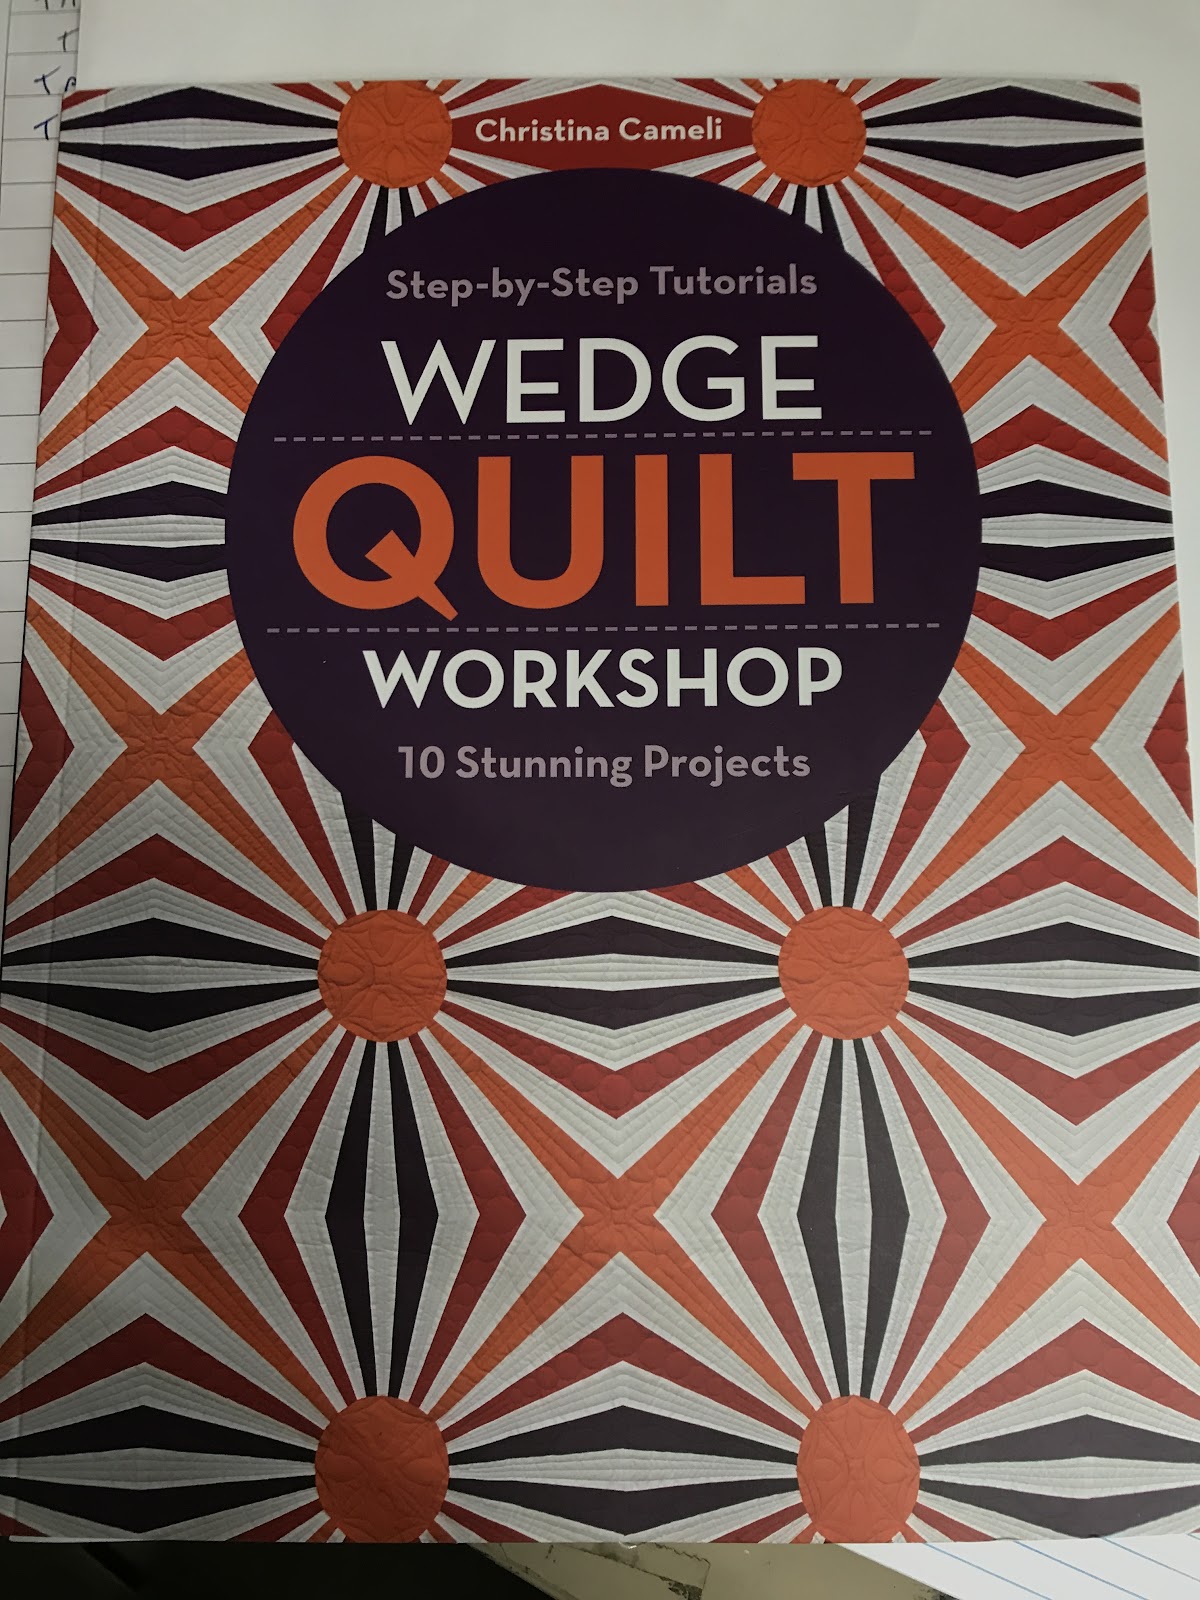
I found a few wedge style quilts online that seemed interesting. But when I saw the “It Takes All Sorts” quilt from Christina Cameli’s book, Wedge Quilt Workshop, I was instantly inspired.
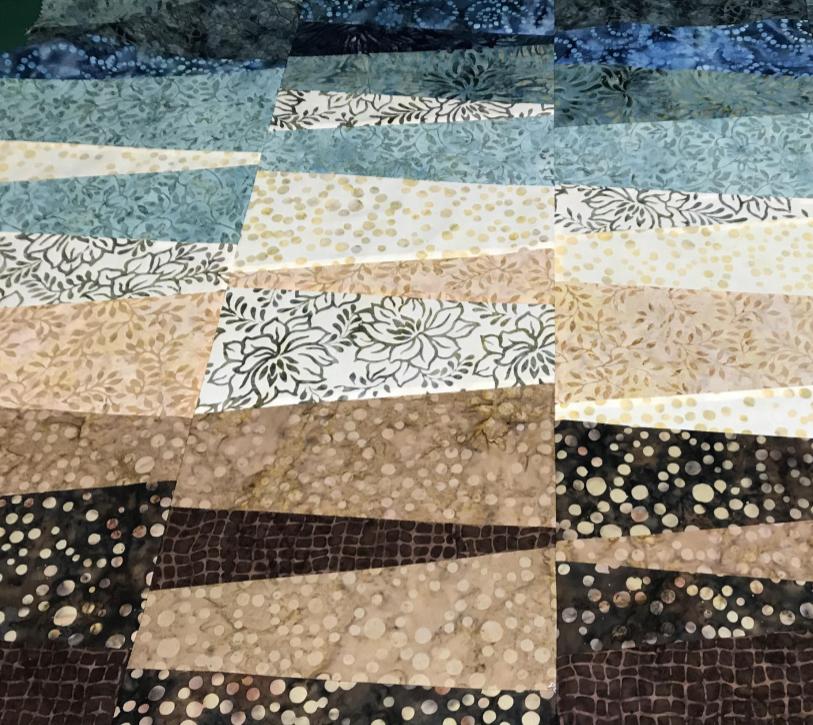
I had the idea, but now I needed the perfect fabric. I found it in the sale rack where I work. It was the Ocean Stone batik layer cake from Boundless Fabrics by Craftsy. The blues and browns reminded me of Lake Michigan. And I love layer cakes because they are complete collections of coordinated fabric. The less time I spend choosing fabric is more time I can spend serging! At first I thought I would do something completely abstract, but as I experimented with my wedge layout, the abstract waterscape began to materialize.
How to Serge a Quilt with a Chain Stitch
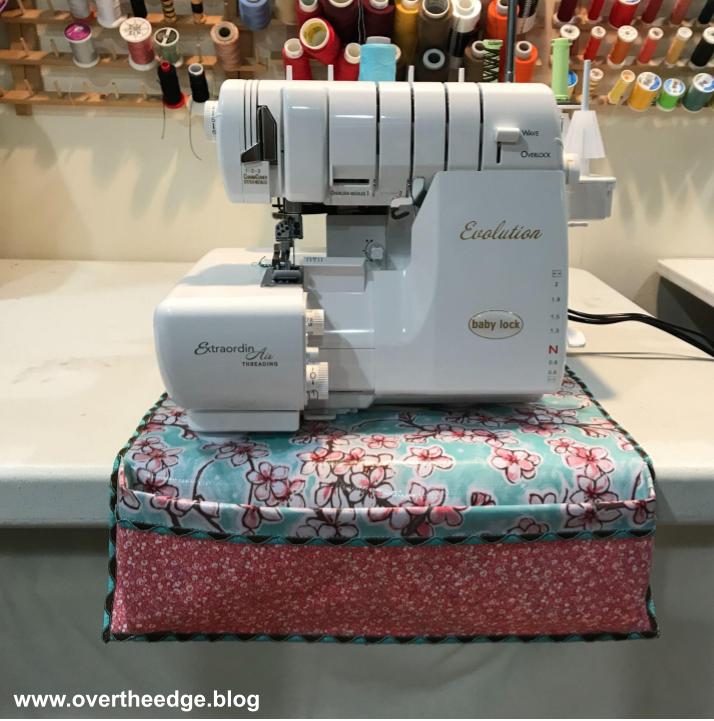
Not all sergers are capable of making a chain stitch. But if your serger does, you can use a chain stitch to serge a quilt. I have a Baby Lock Evolution serger, which is both an overlock and a cover stitch machine.
Here are some useful tidbits about serging and quilting with a chain stitch.
Seams can be pressed to the side or pressed open
Uses two threads, similar to a sewing machine
Can be quickly and easily removed if you make a mistake
Blades are disengaged so no accidentally cutting into your seams
Stitch length is usually a little longer than when sewing, about 2.75-3
Don’t have to worry about running out of bobbin thread
Can be used for piecing, binding and quilting
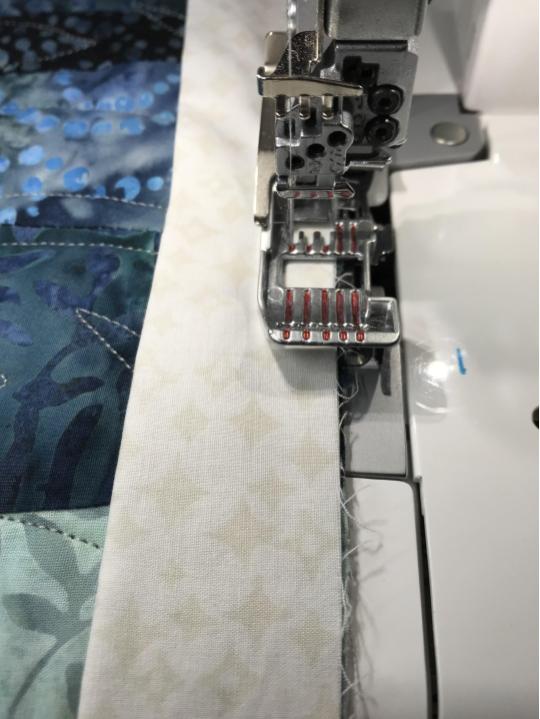
Piecing with a Serger Chain Stitch
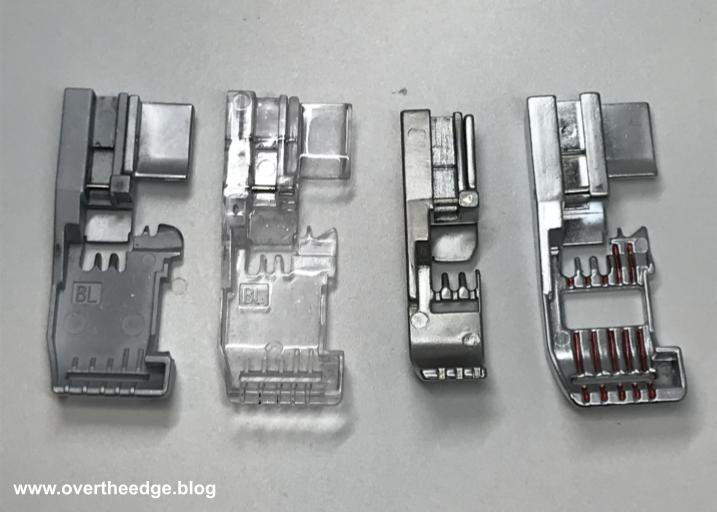
I pieced together all of My Happy Place Quilt using a chain stitch and the cover stitch presser foot. Several different feet can be used – standard foot, clear foot, open toe foot, cover stitch foot, etc. Check your manual for the best settings and presser foot to use for your serger. Any foot that has good visibility makes it easier to get accurate ¼” seams. For chain stitch quilting I prefer the cover stitch foot or the open toe foot.
Pictured below are a few presser feet I use to quilt with my Baby Lock Evolution serger. From left to right: standard foot, clear standard foot, cover stitch foot, open toe foot.
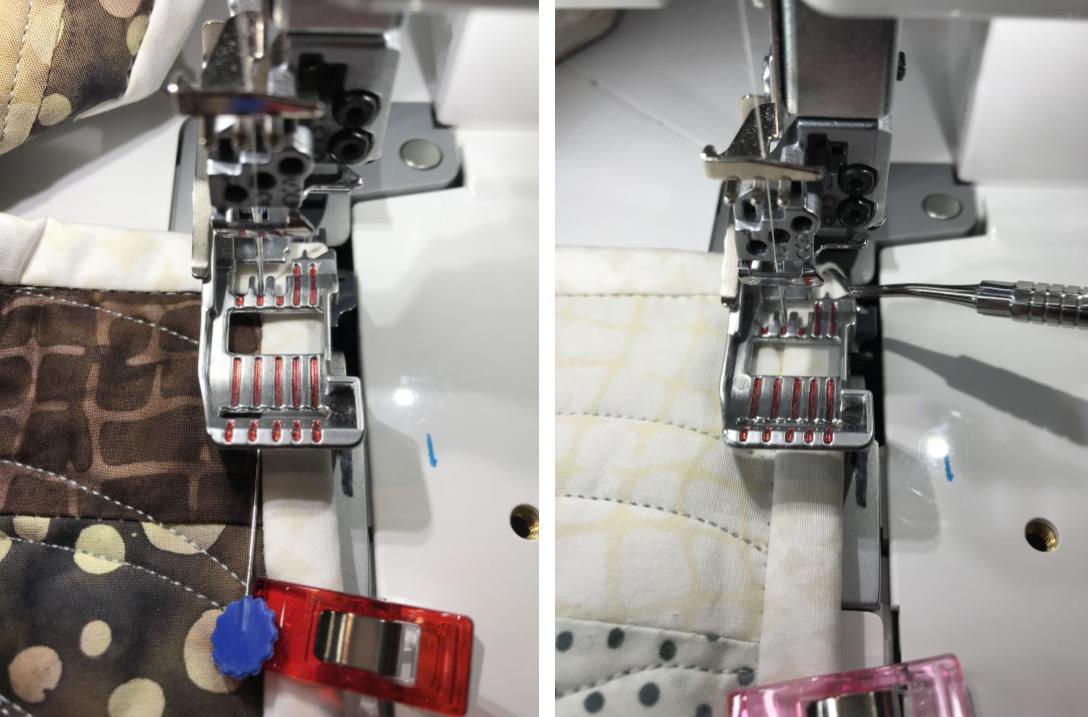
I used my left needle and guided the fabric along the right needle marking on the toe of my presser foot. Guiding the fabric this way gave me accurate ¼” seams. I used standard serger cone thread in my needle and chain looper.
Attach Binding with a Chain Stitch
Applying binding with a serger chain stitch is just like applying binding with a sewing machine. You stitch the binding onto the front or back of the quilt and then wrap it around the edges and stitch it down by hand or machine.
I used this binding method for my quilt because I wanted two layers of fabric in the binding at the raw edges of the quilt. I used a very light color binding and did not want the dark fabrics in the quilt to show through. After testing the seam allowances I decided that a scant ⅜” seam allowance was best. The binding on the back would be perfectly secured by the “stitch in the ditch” stitches from the front. A scant ⅜” seam allowance from my left chain needle is between the third and 4th red marking from the left on the toe of my open toe presser foot as seen in the photo below.
I even chain pieced my binding strip seams with the chain stitch on my serger.
When I approached the corners, I simply turned the quilt clockwise and serged off the corner on a diagonal. Then I folded the binding at the corner and serged back on to the next side of the quilt, just like I would on a sewing machine.
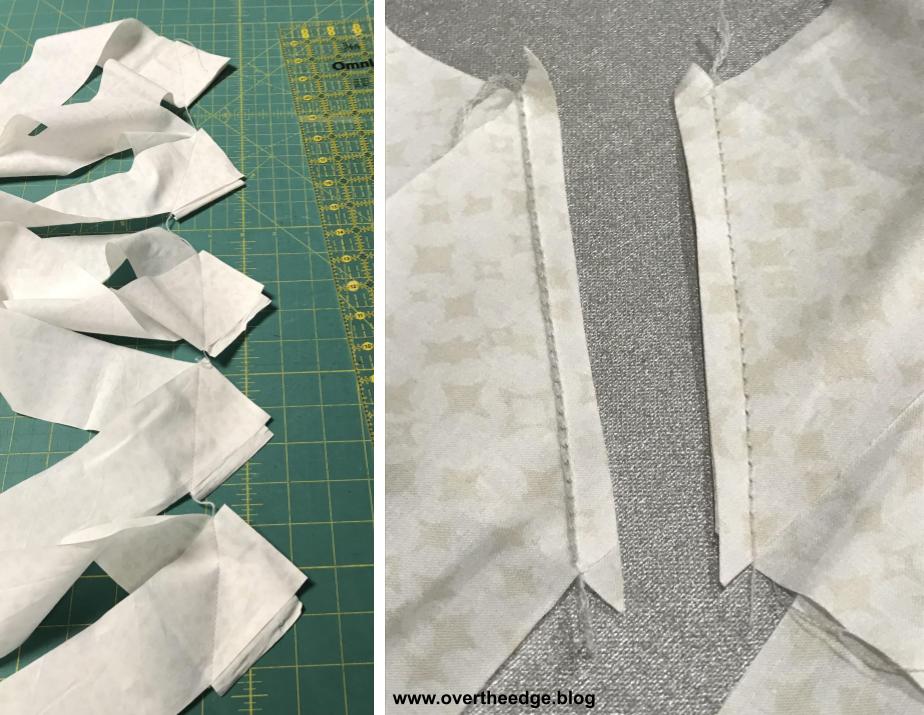
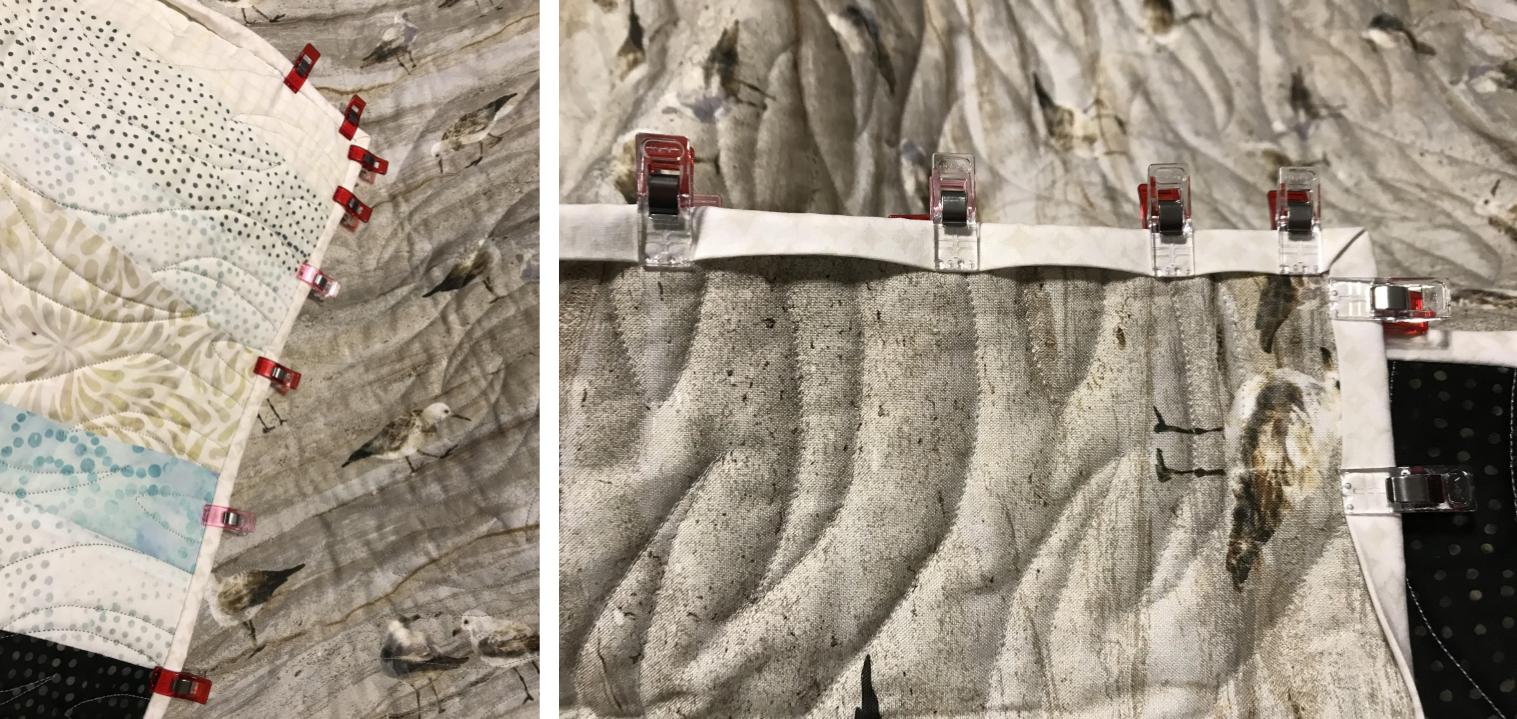
After the binding was attached to the front of the quilt, I turned the folded edge to the back and clipped in place.
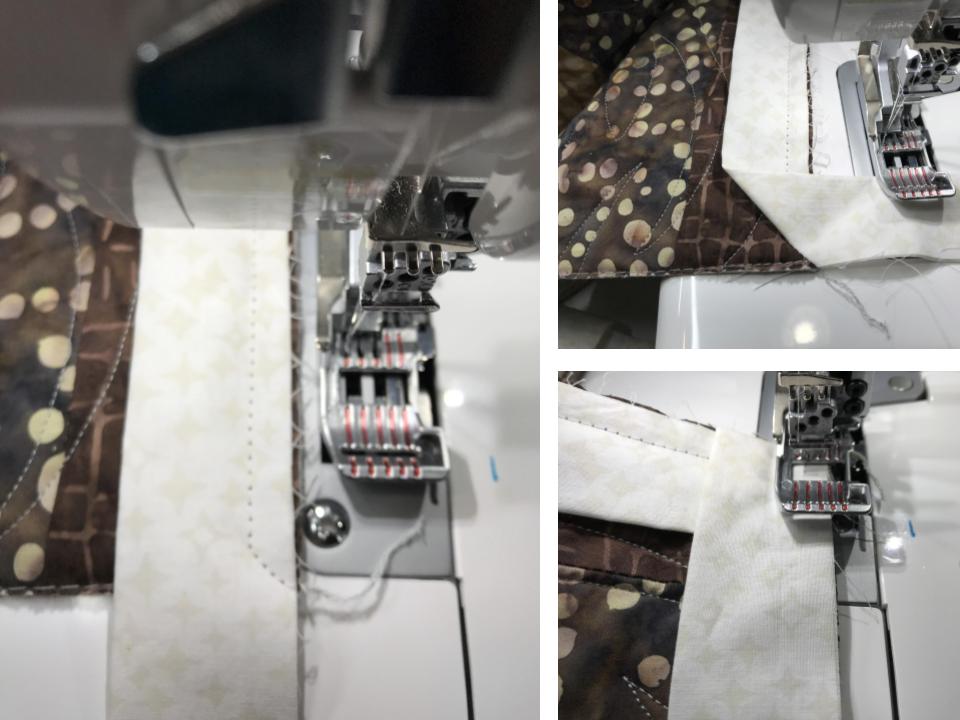
Finish Binding – Stitch in the Ditch Method
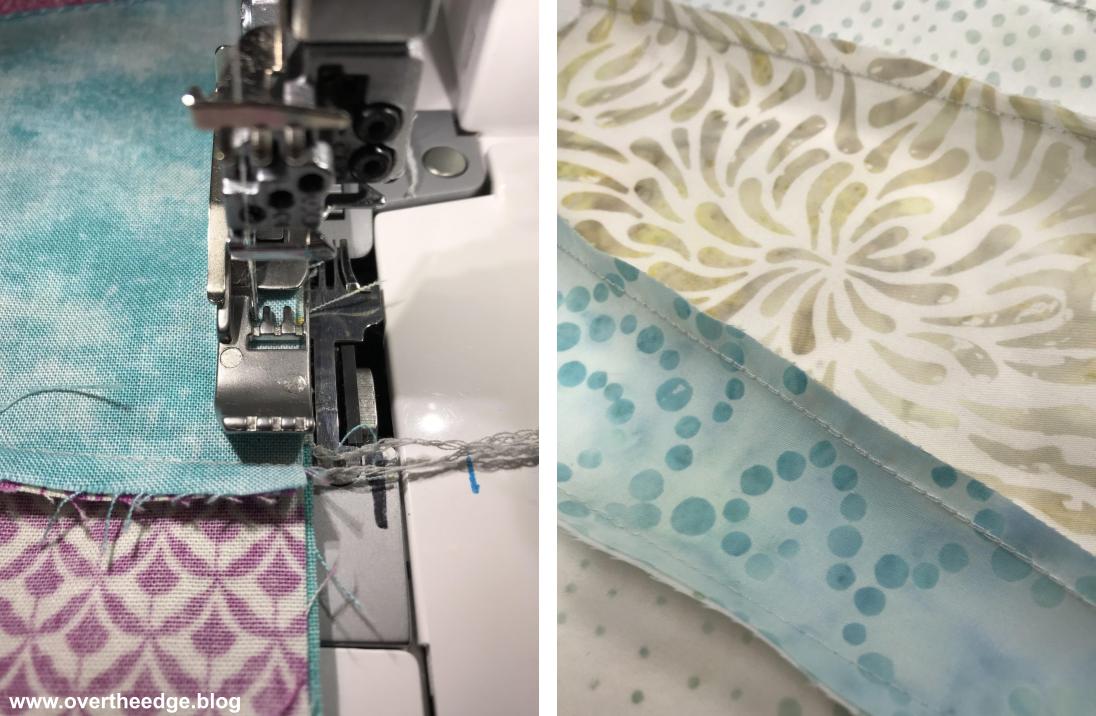
The last step of binding a quilt is stitching down the folded edge of the binding on the front or back of the quilt. It can be stitched by hand or by machine. I completed this last step of my quilt binding by serger, using a chain stitch and the “stitch in the ditch” method from the front side of My Happy Place Quilt. For the best visibility of the “ditch” between the binding and the quilt, I used my open toe foot and the center chain needle position.
You do have to turn your corners just a little bit differently with a chain stitch. When you get to the corner, stop with your needle down in the fabric. Then turn the hand wheel until the eye of the needle just peeks out above the fabric.
Next lift the presser foot and carefully rotate your fabric counter clockwise. Once positioned, start serging again. You may need to use a stiletto or other tool to gently pull or push on the fabric to keep the bulky corner from getting stuck after the turn. I used a pin to hold the binding in place near the corner and removed it after I took a few stitches, since wonder clips are too bulky to use close to the corner.
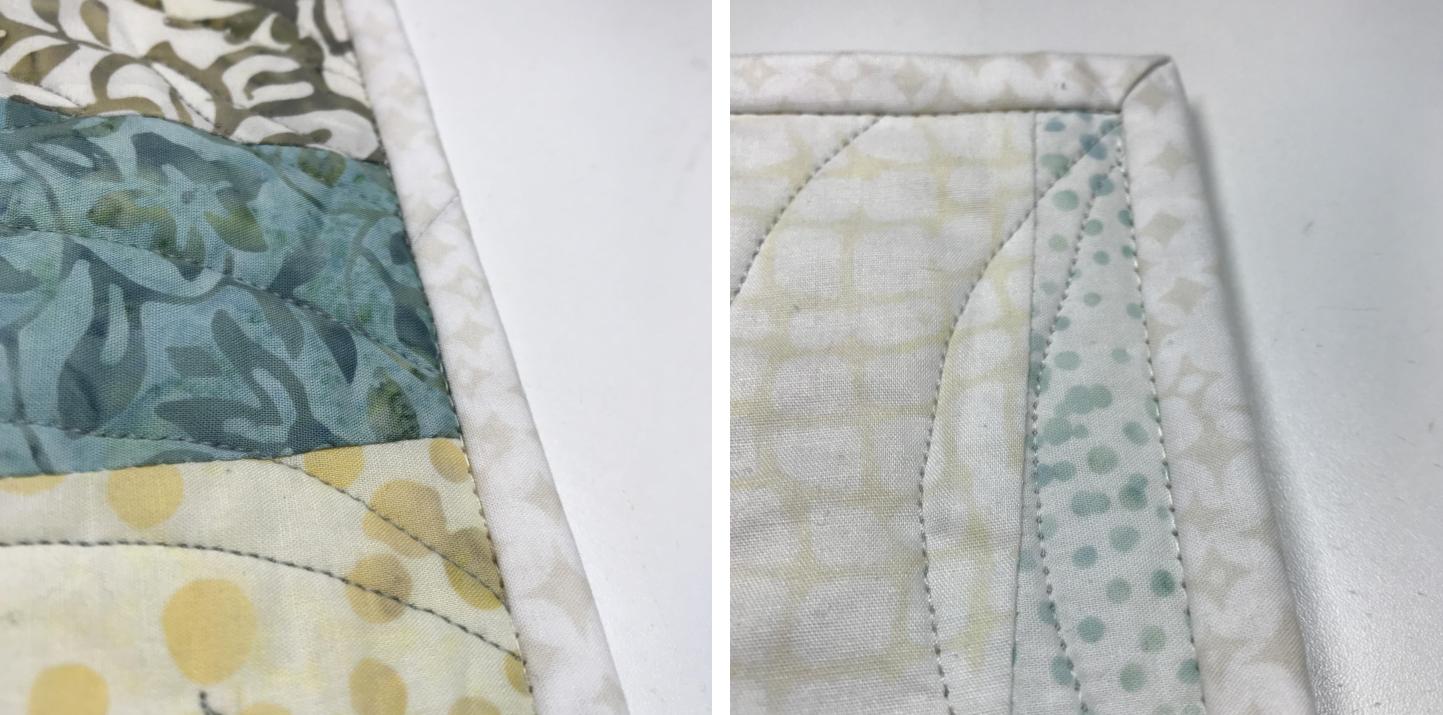
Here’s a view of the chain stitch in the ditch from the right side of the quilt.
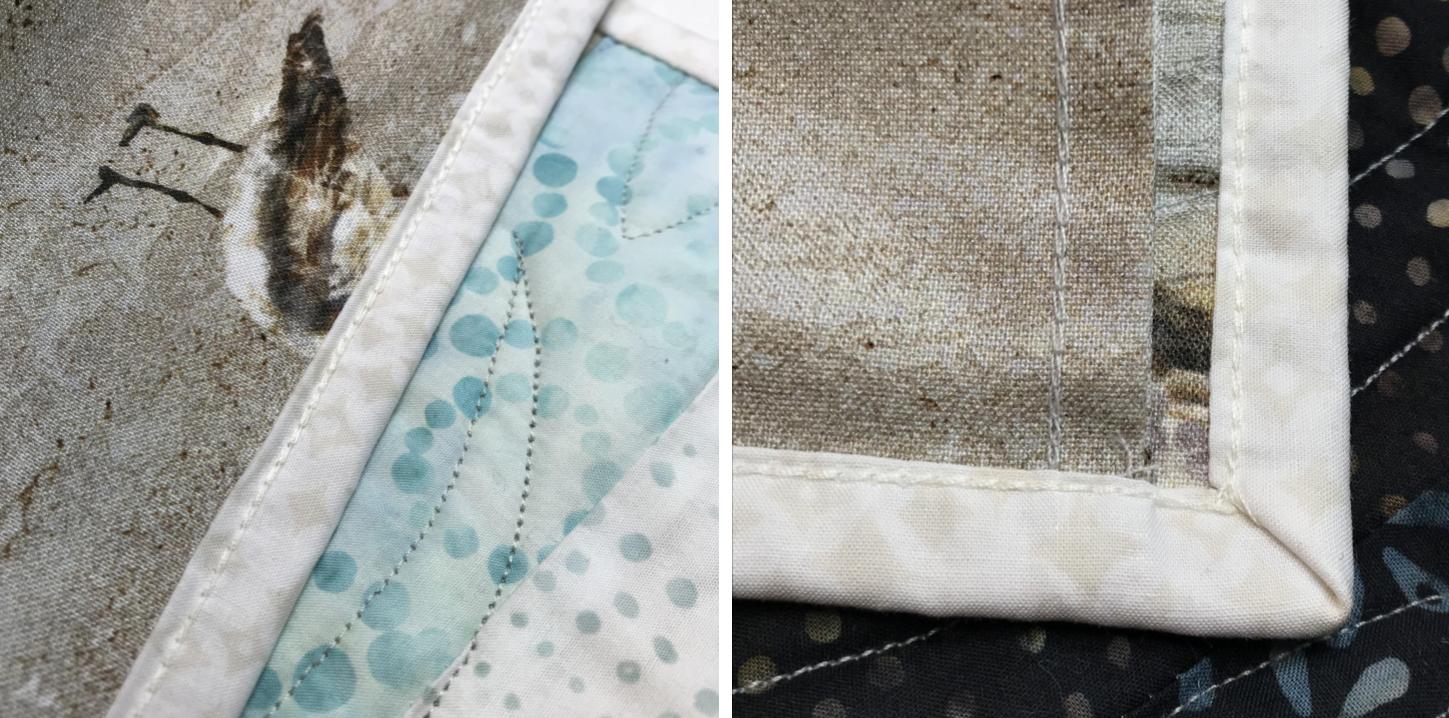
Here’s a close up of the chain stitch on the binding on the back side of the quilt.
Tips for Serging with a Chain Stitch
When piecing my quilts with a chain stitch, I like to trim the thread chain tails to about an inch past the edge of the fabric. The extra inch of thread gives me a little wiggle room, just in case the chain starts to unravel as it is handled.
If you need some assistance with the mechanics of serging with a chain stitch, check out my tutorial: Tips for Serging with a Chain Stitch athttps://overtheedge.blog/tutorials/tips-for-serging-with-a-chain-stitch/. In the tutorial I share tips on how to start and end a seam, how to secure the ends of the seam, and how to easily remove a chain stitched seam.
How to Serge a Quilt with a Chain Stitch
I hope you enjoyed learning about My Happy Place Quilt and how to serge a quilt with a serger chain stitch.
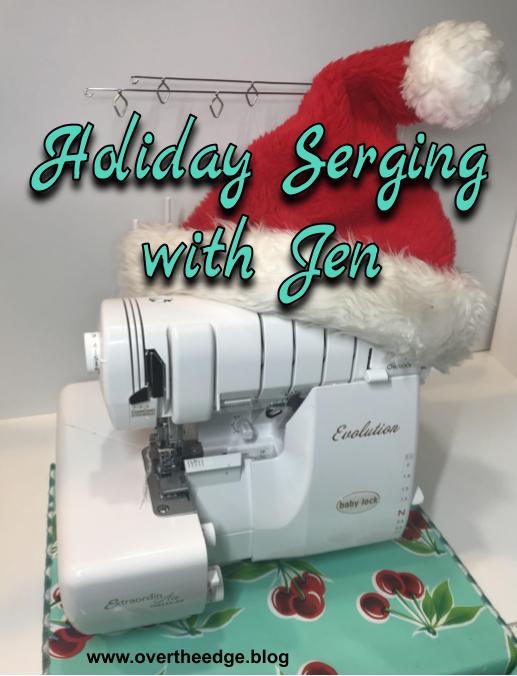
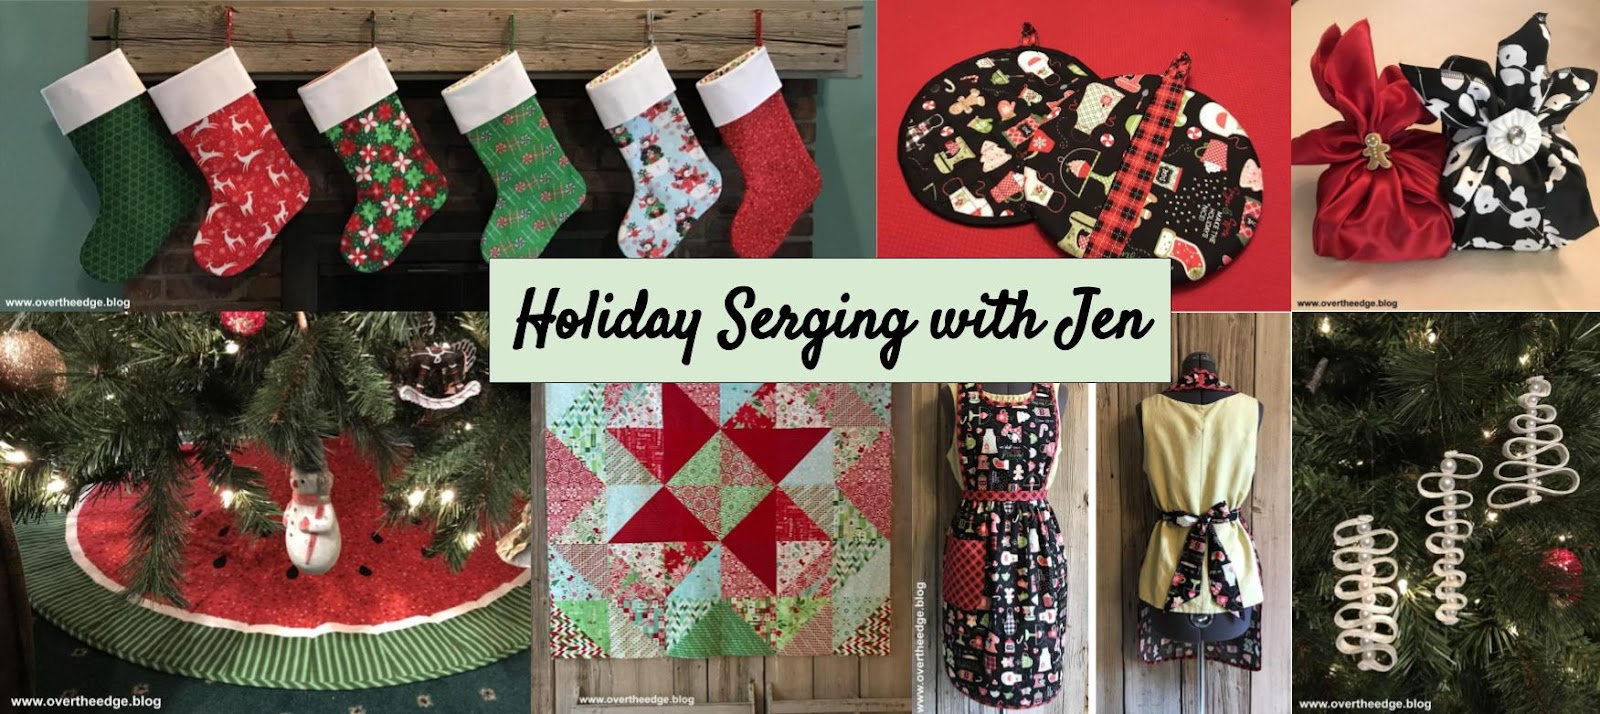
As I started pulling together ideas for this blog post, I realized I did quite a few holiday serging projects this year. I thought it would be fun to share my projects with you. Hopefully, Holiday Serging with Jen, will inspire you to try some future holiday serging of your own.
If you’ve been following my blog you’ve probably noticed that I always find ways to incorporate the use of my serger into my projects. For the holidays this year I made stockings, a tree skirt, gift wrap, an apron, some potholders, ornaments and a quilt, all using my serger. Some of these projects were made with only a serger, while others utilized a serger and maybe a sewing machine or some hand sewing.
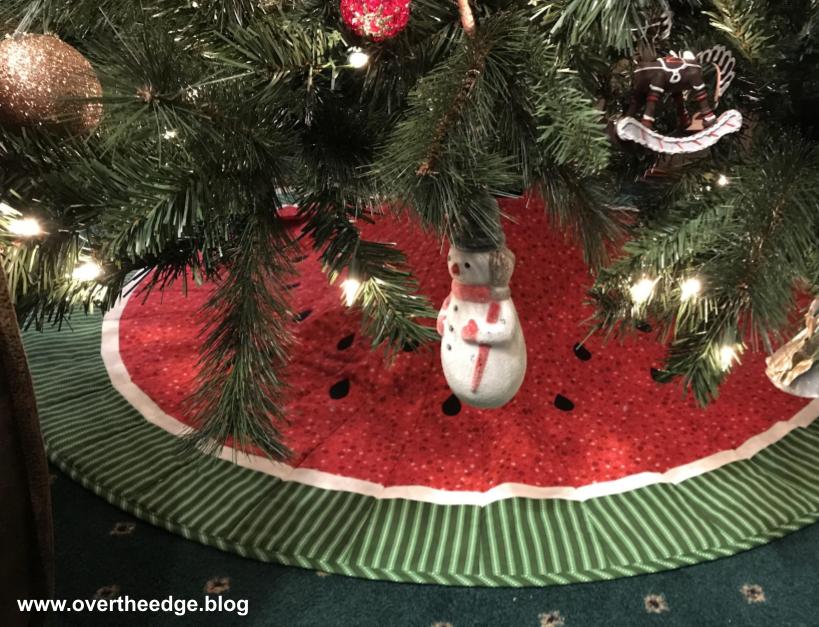
Christmas Tree Skirt
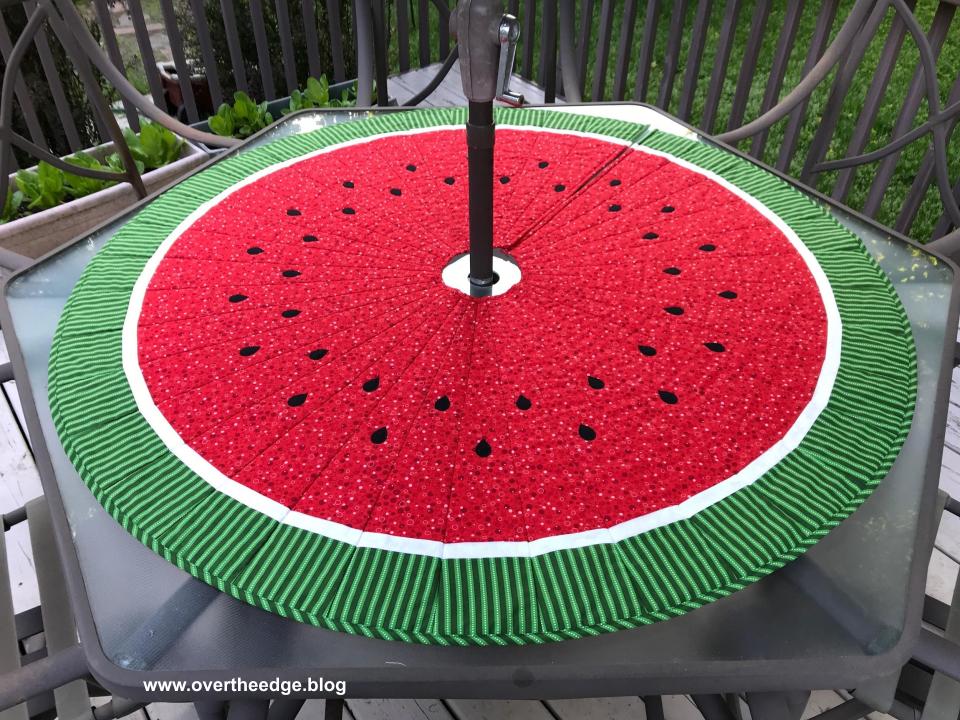
Does this tree skirt look familiar to you? In case you didn’t recognize it, it’s also my watermelon patio table topper I made with my serger that I blogged about this past summer. It fits around the umbrella post on my patio table.
We purchased an artificial Christmas tree this year, and I didn’t have a tree skirt to fit it. Since my table topper is basically a tree skirt in disguise, why not use it as my Christmas tree skirt too? It was actually my husband’s idea. It’s the perfect size for my new tree and the red and green fabrics I used in the tree skirt are from a Patrick Lose’s Christmas collection.
The watermelon design was my own, but I followed the basic tree skirt assembly instructions from the free pattern that came with my wedge ruler. I have a Ten Degree Wedge Ruler from Phillips Fiber Arts. This company has several patterns available that utilize the wedge rulers. See the resources section at bottom of this post for a link to the website.
I used a serger four thread overlock stitch to piece together the topper and I used a serger double fold bias binder to bind the circular edges. Here is a link to my tutorial if you would like more information on how to bind the edge of a quilt with a serger double fold bias binder.
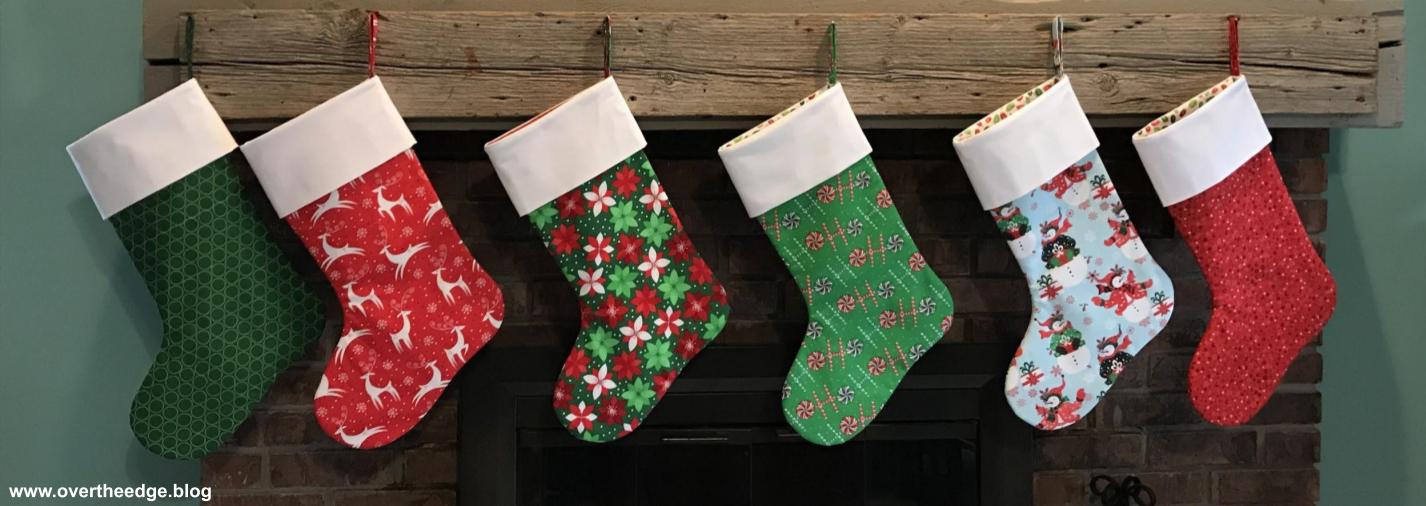
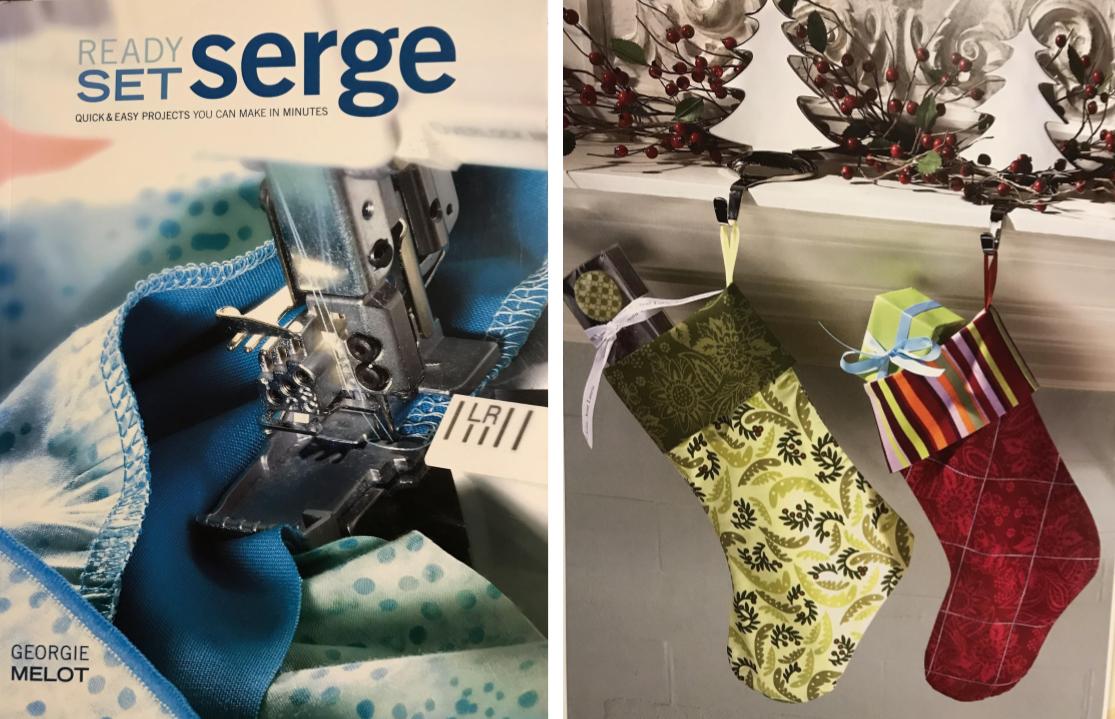
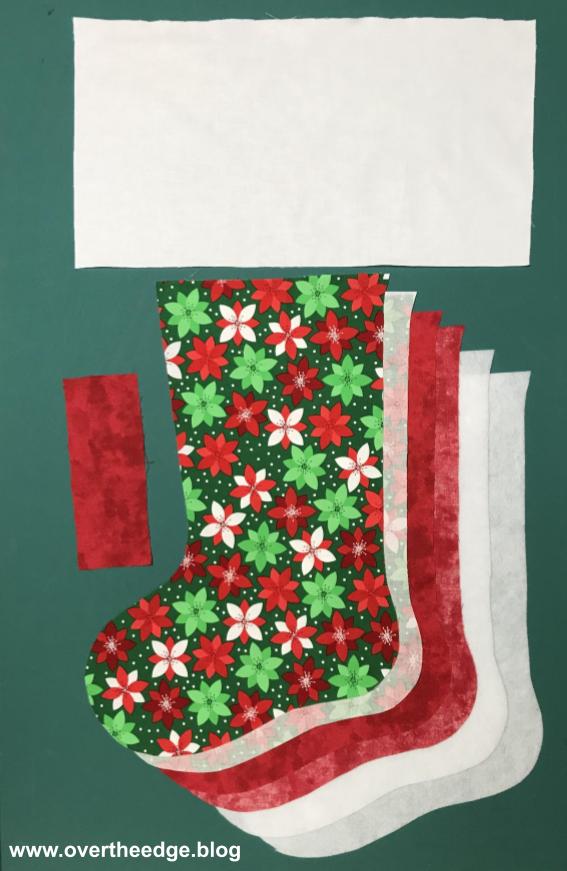
When I pulled my old stockings out of storage, I realized how tattered they looked. It was time to retire them. For the new stockings I chose mostly bright red and green fabrics that coordinate with my watermelon tree skirt. The serger technique I used to make my stockings came from the book, Ready Set Serge, by Georgie Melot. I didn’t use Georgie’s pattern for the stocking shape because I already had a favorite stocking shape. I used the stocking shape from the pattern, Stocking Sweet Stocking, by Bean Counter Quilts.
Many years ago a customer brought in some beautiful quilted stockings to the store where I work. I loved the shape of her stockings, so I asked her what pattern she used. It was the Stocking Sweet Stocking pattern. I’ve never made the quilted twister stocking, but I’ve made many serger stockings using that pattern for the shape.
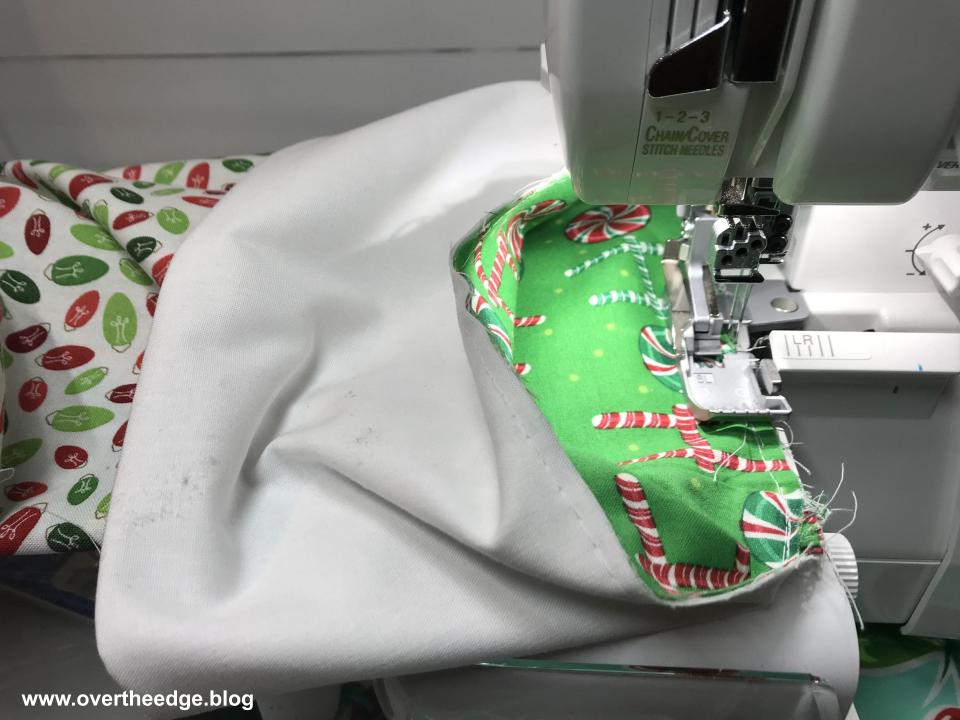
I used a four thread overlock to construct most of the stocking. Using a sewing machine, I top stitched the hanging loop and basted the layers together before serging around the stocking. Georgie Melot doesn’t use batting or tell you to baste the layers before serging, but I found the fabrics shifted less as I serged if I first basted the layers. If layers shift when you baste, no big deal. You simply take out the stitches and try again. If they shift while you are serging (and cutting) it’s much harder to fix. Plus, I like how the serging compresses the layers to make the seams flatter in the stocking.
Batting or no Batting?
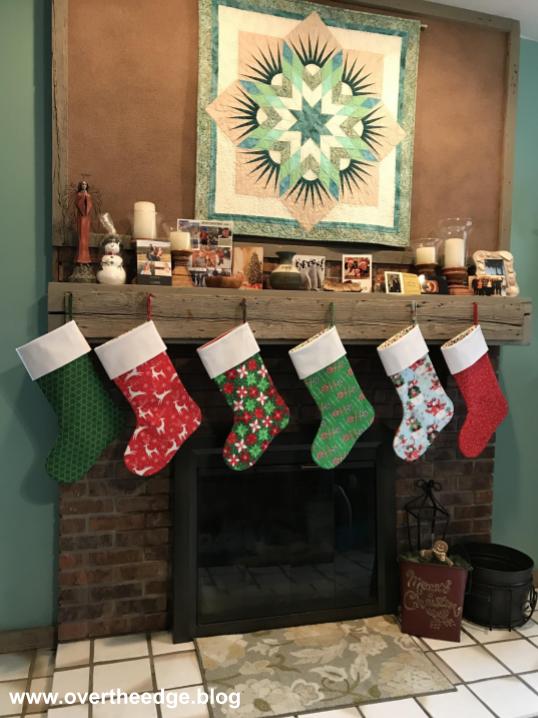
I made one stocking with batting and one without batting so I could compare both methods. Both stockings turned out well. But I prefer the stability of the stockings with the batting. I used a thin sew in fleece batting by Pellon, but many other battings would work too. You can see in the photo below that the stocking without batting is a little floppy. The stocking with batting holds its shape.
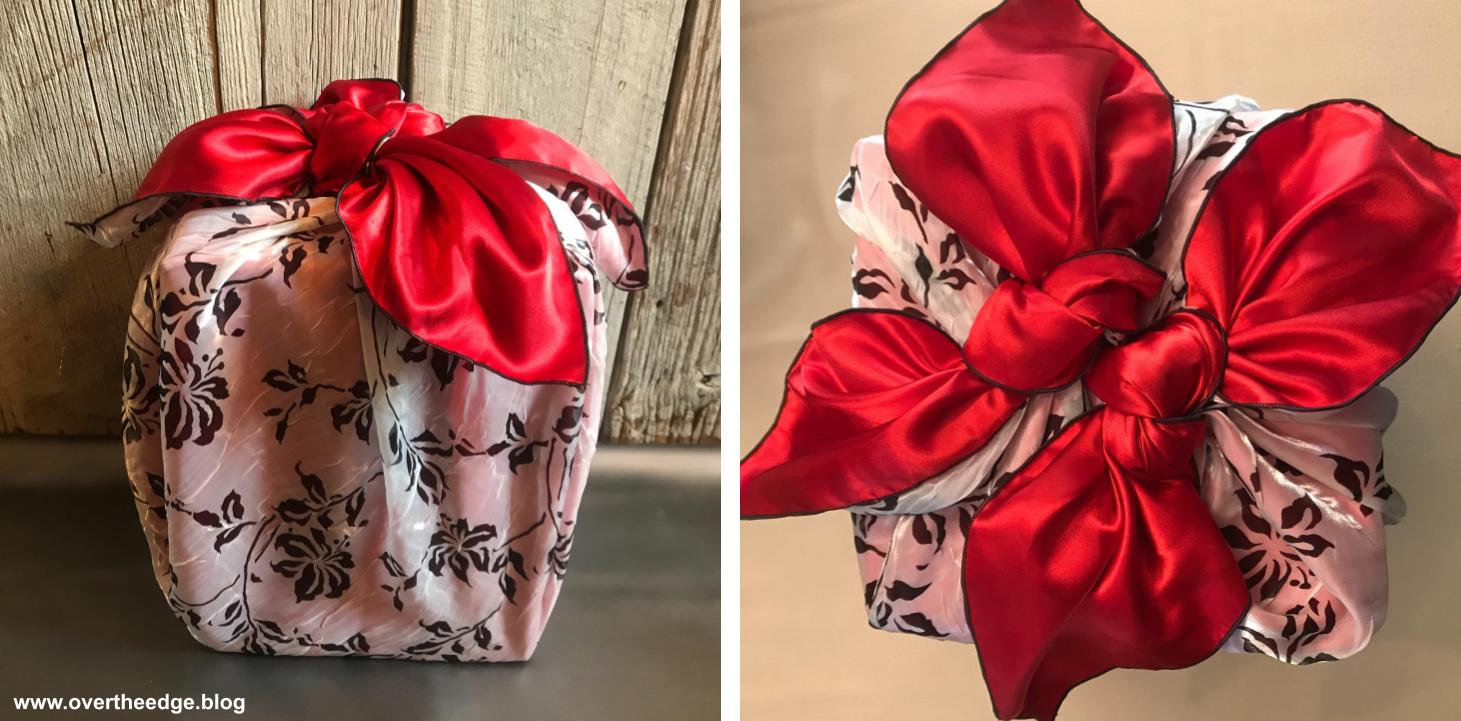
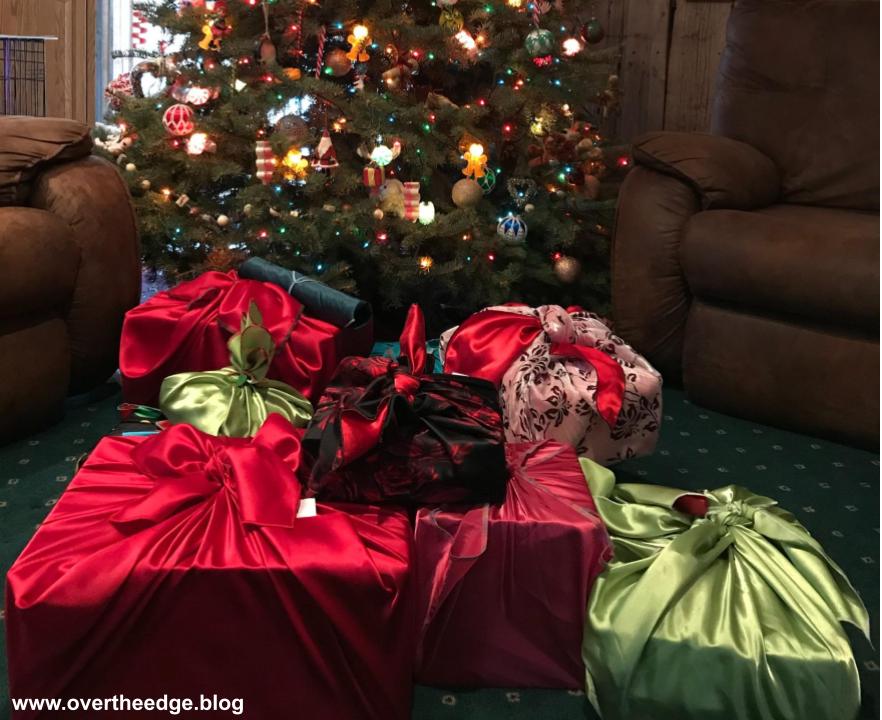
Fabric Gift Wrap
Fabric gift wrap is beautiful and can be used over and over again. I’ve been using fabric gift wrap for many years. The serger is a perfect tool for finishing the raw edges of your fabri gift wrap edges quickly and neatly. You can simply serge the edges of a piece of fabric just like you would with a cloth napkin and use it like wrapping paper. Or you can create a variety of gift bags with your serger. Check out my blog post and tutorial on serger made fabric gift wrap.
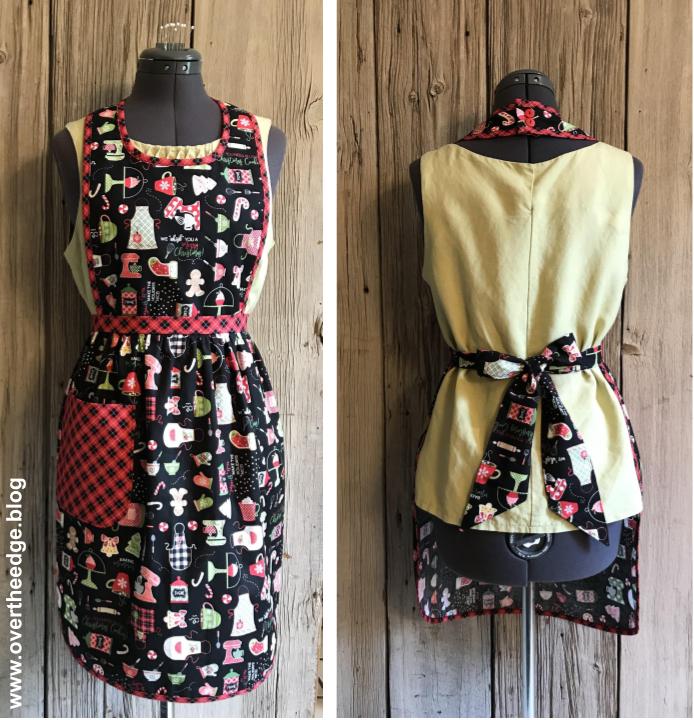
Every year at our store we make holiday aprons to display. This was my apron for 2020 and it was based on Kwik Sew pattern 4284.
I applied all of the binding on the apron using my 36mm double fold bias binder and a serger chain stitch. I used the same set up to apply the binding to my apron as I did for my watermelon tree skirt. Here are the links in case you would like to learn more.
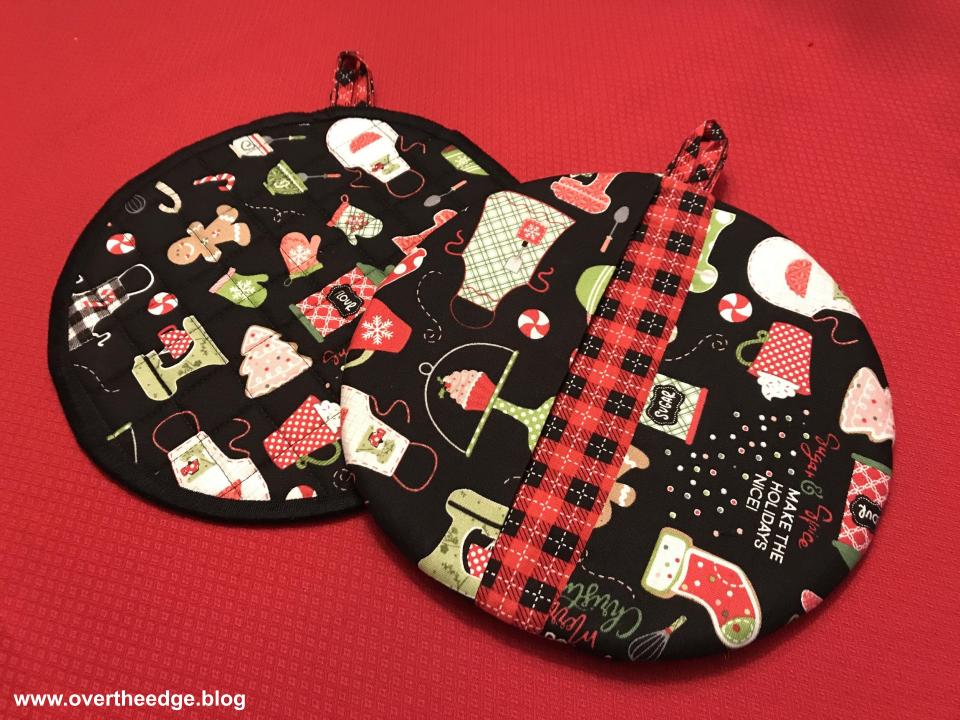
These potholders were a bonus project made with the leftover fabric from my apron. For the one on the left I made my own quilted fabric with my sewing machine. Then I used cotton thread with a three thread overlock wide and a small stitch length (can’t remember how small) and serged the edge. The one on the right was made by layering the fabrics and serging around the circle with a four thread overlock. Then I flipped the finger pockets over to conceal the serger stitches. The hanging loops were made from leftover bias fabric strips from the apron and the serger 36mm double fold bias binder.
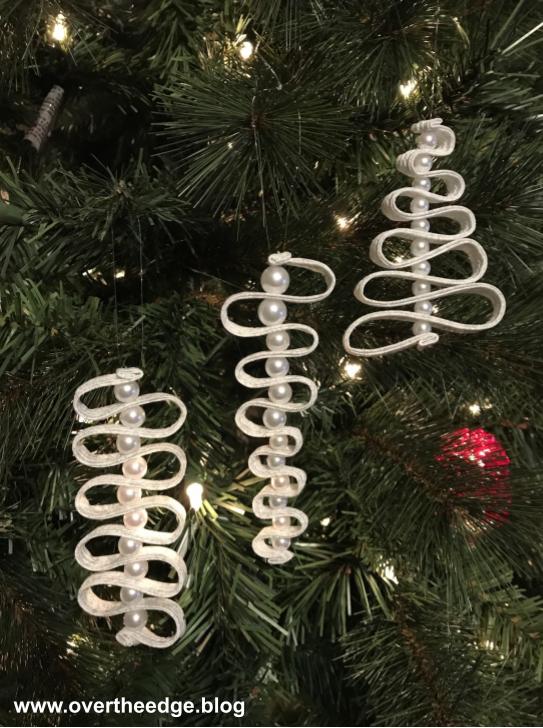
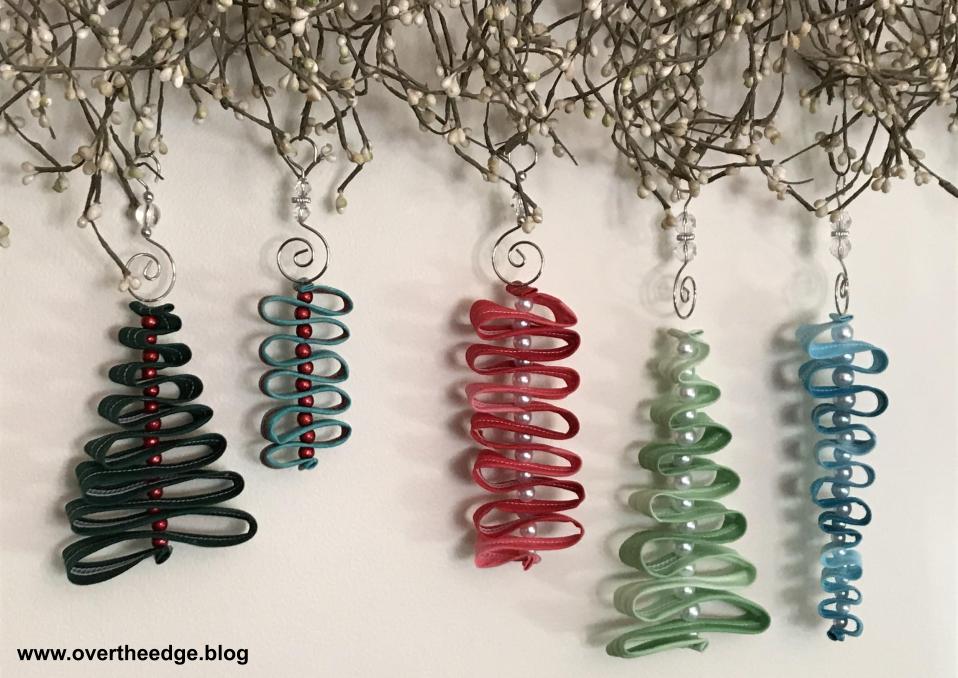
Ornaments
These ornaments all began with a folded piece of fabric, which I quickly and easily made with the cover stitch on my Baby Lock Evolution and the belt loop binder or double fold bias binder. Then I grabbed my hand sewing needle and combined the fabric “ribbons” with beads to make the ornaments. Your choice of fabric will determine whether your ornaments are fun and whimsical or lovely and elegant.
Check out my blog post about experimenting with your serger to make the best fabric ribbons for ornaments:
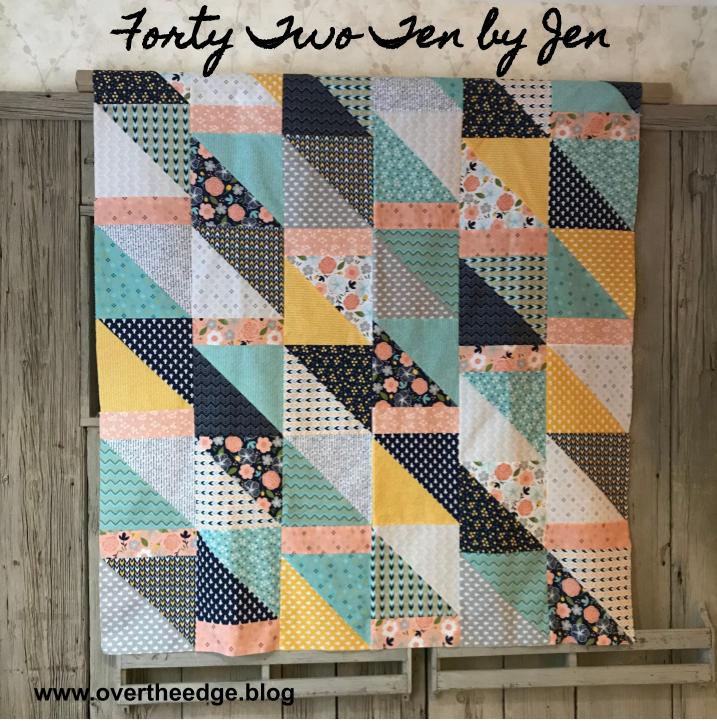
At the store this past spring most of the clerks participated in a fun activity for National Quilting Month. We created our own quilt patterns using only a layer cake for the fabric. Then we taught a class based on our designs. I called my quilt design, Forty Two Ten by Jen. Of course I had to use my serger to make my half square triangles (but you could also make it on a sewing machine.)
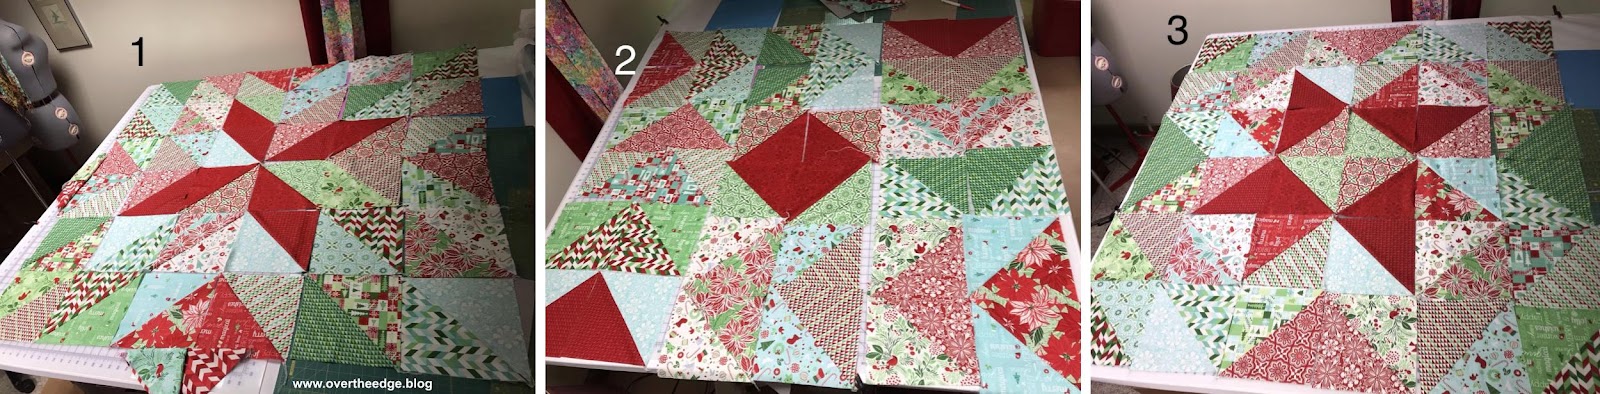
I also had a christmas layer cake, Jingle by Deb Strain of Moda, that I wanted to use. So I made a bunch of half square triangles with my serger and pieced them together to make this throw quilt for the holidays.
I considered three different layouts for the half square triangles in my holiday quilt. The winning layout was the friendship star in figure 3. But the giant flying geese in figure 2 was a close second. I finished piecing the quilt top earlier this year, but the layering and quilting will need to wait until next year…
Here is the link to my quilt tutorial for Forty Two Ten by Jen and my serger half square triangle video if you would like to give it a try:
Would you like to learn how to bind a quilt using a serger double fold bias binder? If yes, then keep reading! Although I’ve found several videos and articles about the double fold bias binder and its potential as a tool, the internet seems to be lacking in resources about actual projects made using this attachment. So I thought I would try to fill the gaps by sharing my experiences using the attachment on some of my projects.
The project featured in this post is my recently designed and completed Watermelon Patio Table Topper Quilt. It’s basically a christmas tree skirt with a summer twist! The opening in the quilt fits around my patio table umbrella. The topper adds a little fun to my outdoor summer dining. In the future I hope to create an actual pattern for my design, but for now I will share with you how I used the serger double fold bias binder attachment to finish the curved edges of the quilt
Traditional Double Fold Bias Tape
I love the look of traditional bias bound edges, but I am not always excited about applying folded bias tape using traditional methods. If you use pre-folded bias tape and just slide it over the edge of your project and stitch it down, you risk not catching it on the back side. Or you do catch the back side, but your stitches waver because you didn’t catch the bias tape evenly. And pre-made folded bias tape isn’t available in many colors or prints, so often it is hard to find one that matches your project. Sometimes I do make my own double fold bias tape to coordinate with a project, but I don’t enjoy spending all that time at my ironing board pressing the folds into my bias fabric strips.
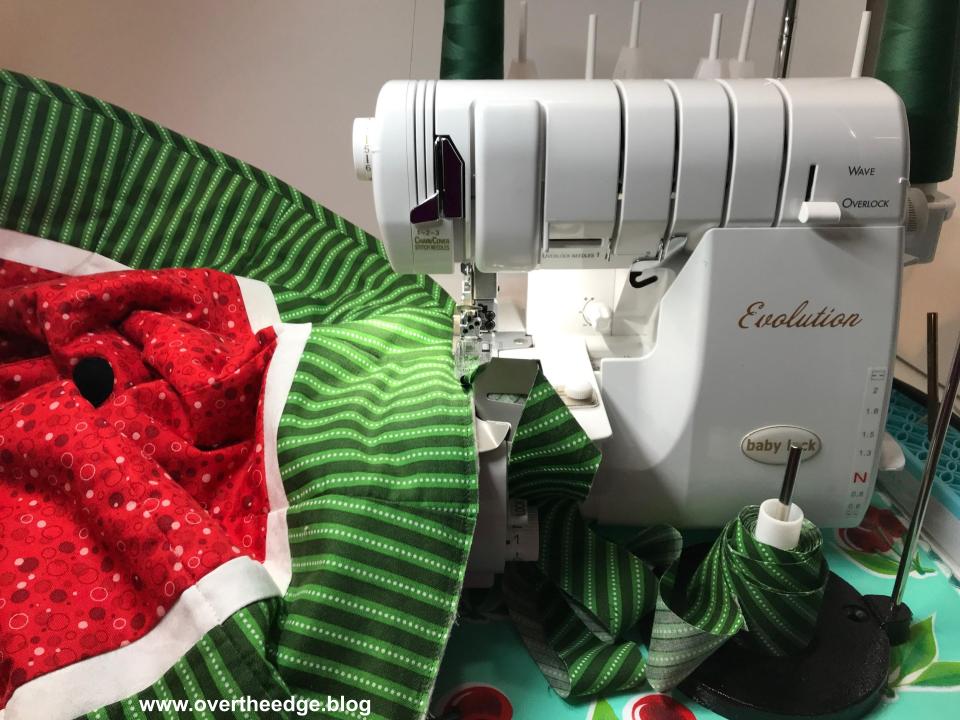
Serger Applied Double Fold Bias Binding
Now that I’ve experienced using the double fold bias binder for my serger, I’m in love! The serger double fold bias binder attachment folds your bias fabric and attaches it all in one step, saving you time and giving you professional results. To use this attachment you need to make your own bias fabric strips. This does take a little time, but opens up so many creative possibilities because you are not limited to what is available commercially.
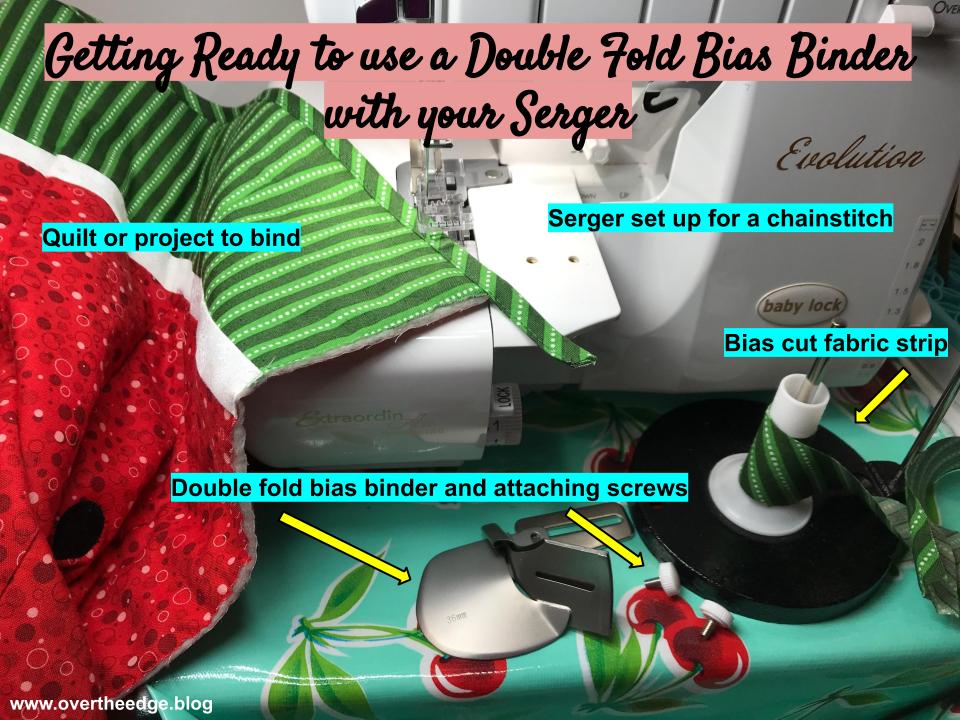
Getting Ready to Bind a Quilt with a Serger Double Fold Bias Binder
Things you need to get started:
Serger, capable of chain stitch or cover stitch
Double fold bias binder attachment and attaching screws
Bias cut fabric strip
Quilt or project to bind
Things I’ve Learned About the Serger Double Fold Bias Binder
Practice. You will be guiding the project with your left hand and the bias fabric strip with your right. Grab some scraps and begin with straight edges. Once you’ve mastered the straight edge, experiment with some curves.
Test your binder alignment and settings before jumping into the project. It’s no fun if you have to readjust after you start applying binding to your actual project.
Make sure you keep your project raw edge positioned against the folder. If it migrates away, you may not catch it in the binding.
Don’t be afraid to modify the width of your bias fabric strips slightly to achieve better results. I found that I had better results with 1½” bias strips on my project instead of the recommended 1⅜”.
You may need to change your needle positions for better results with the chain stitch. I found that using the left needle C1 worked much better for me than the right needle C3.
Tweezers are very useful at getting the bias fabric strip into the attachment and under the presser foot.
Make more bias fabric strips than you think you will need. That way you are ready if you have to do a lot of testing or make a mistake. If you have extra left over, you can always use it on another project or for more testing.
The fewer seams in your bias fabric strip, the better. The extra bulk in the seams can sometimes cause little fluctuations in your stitching.
You can’t miter corners with this method of applying binding. You must serge on at the beginning and serge off the end of each edge.
Full Tutorial and Video on How to use the Serger Double Fold Bias Binder
If you want all the details on how to use the serger double fold bias binder to bind a quilt or other project click on the link to read my full tutorial at:
I also created a video on how to use a serger double fold bias binder in case you prefer to watch the tool in action. Click on the link below to watch my bias binder video.
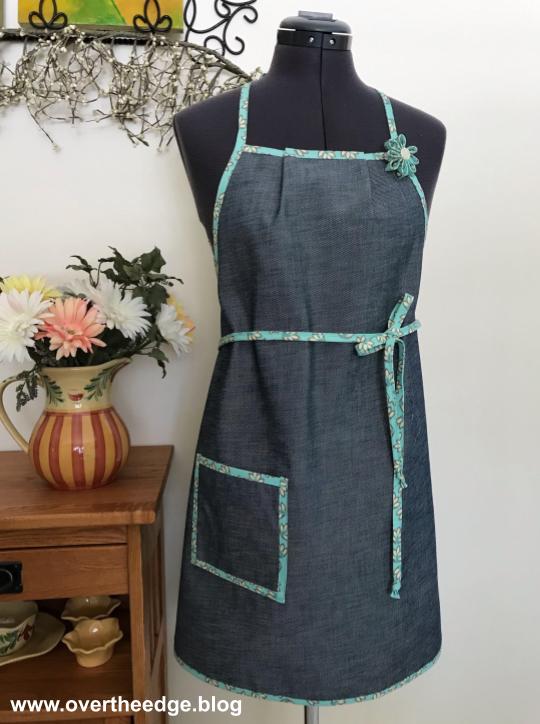
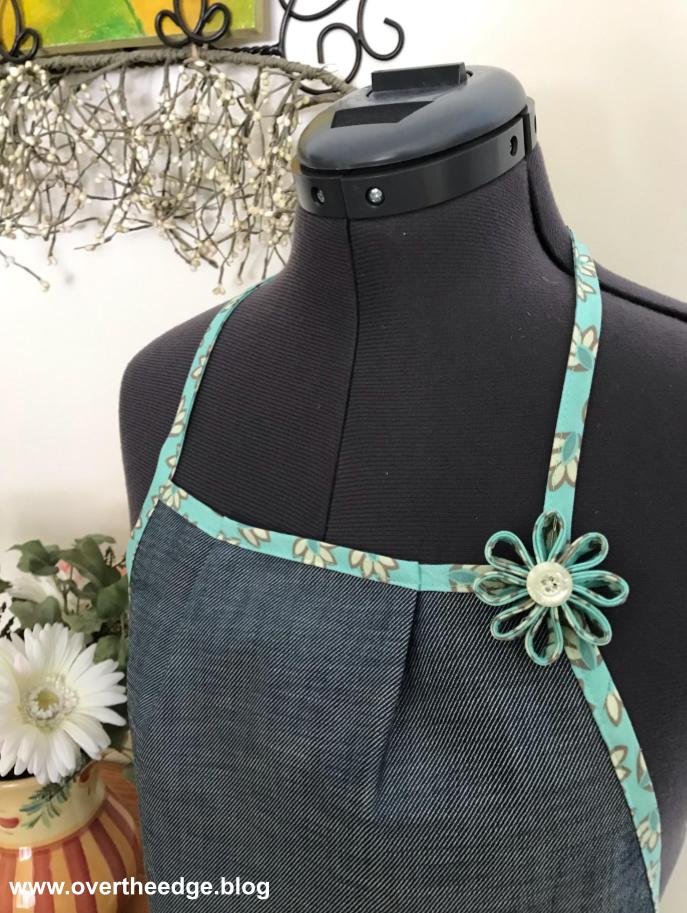
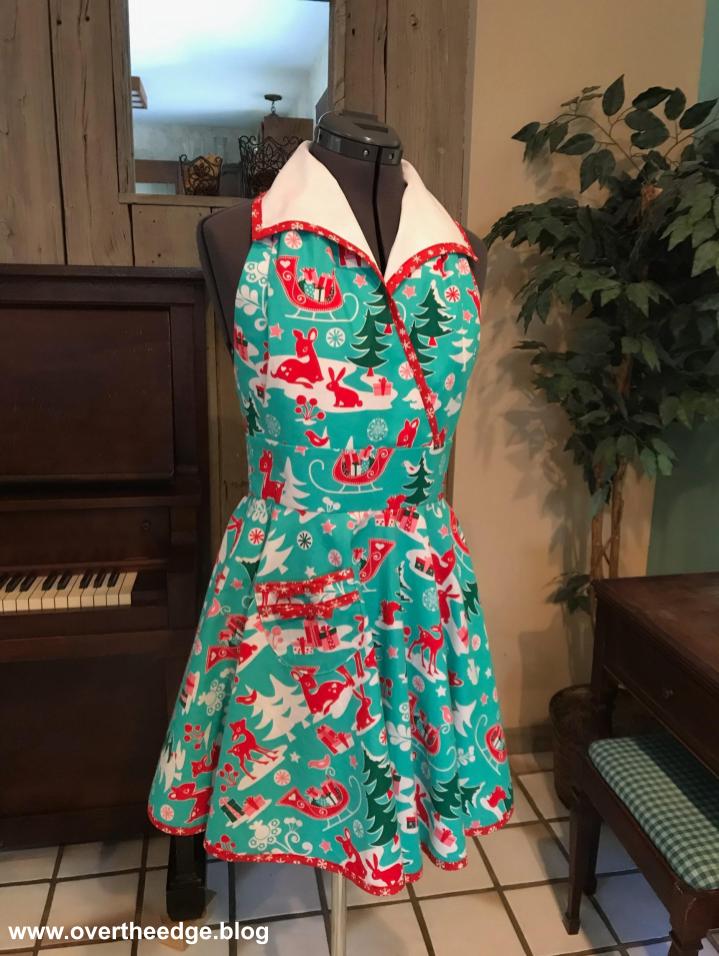
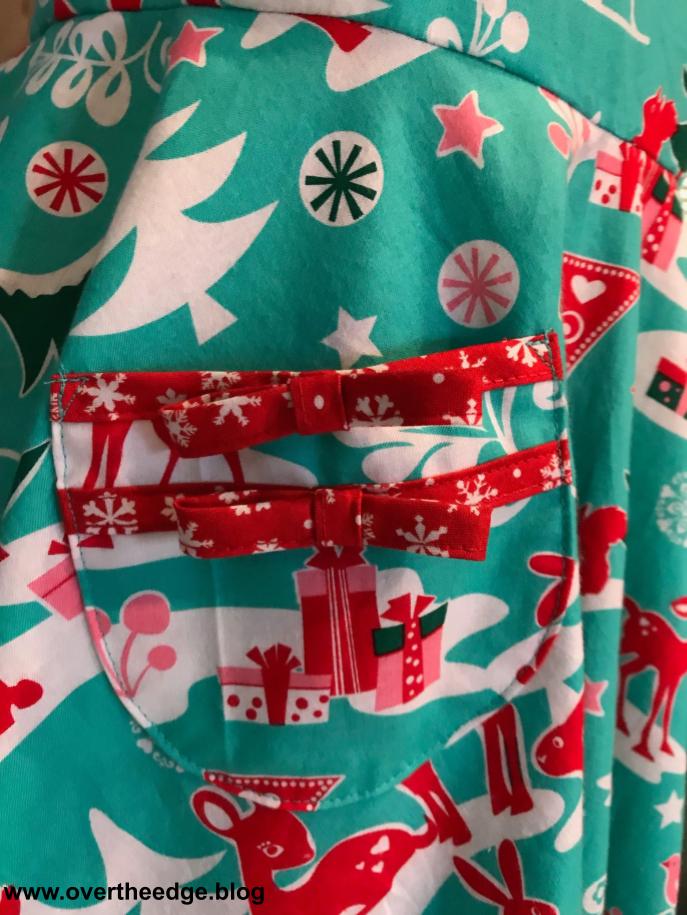
The serger double fold bias binder attachment is not just for binding quilts. I’ve used it on other projects such as aprons. The aprons below were bound using my serger and the double fold bias binder.
Jen’s Basic Serger Bound Apron – Isn’t this apron cute?! The binding, the ties and the flower on this apron were all done with this tool. Learn how to make this apron in a future project post on my blog.
Festive Holiday Apron – This apron was made from Simplicity pattern 8857. I adapted the instructions slightly so I could use my serger double fold bias binder attachment. All of the red binding on this apron was done with this tool. I was really happy with the results!
Until the Next Project…
I hope you enjoyed this post about how to bind a quilt using serger double fold bias binder. Hope to see you back at my blog soon!
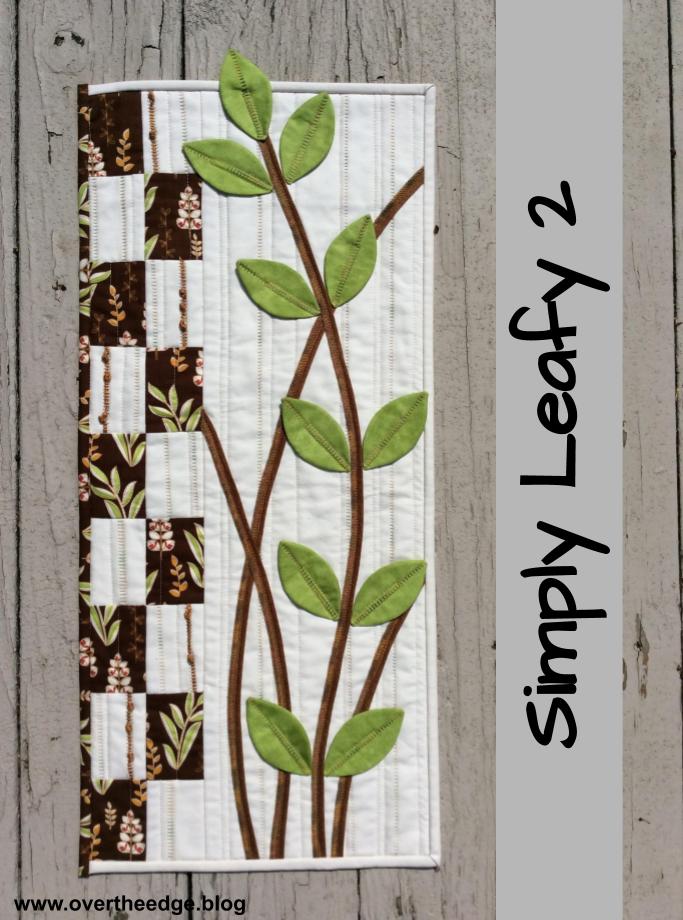
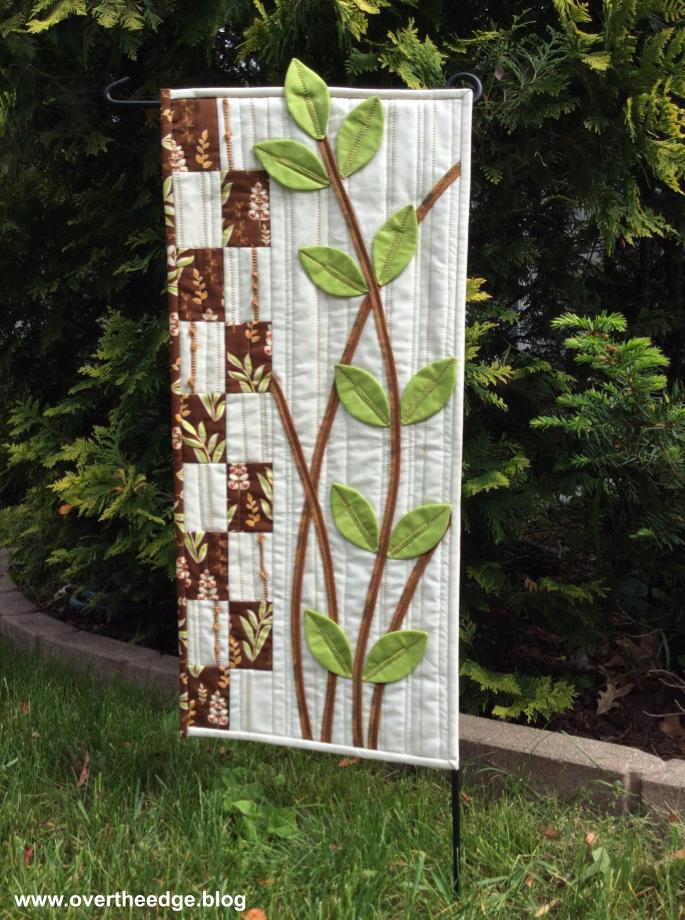
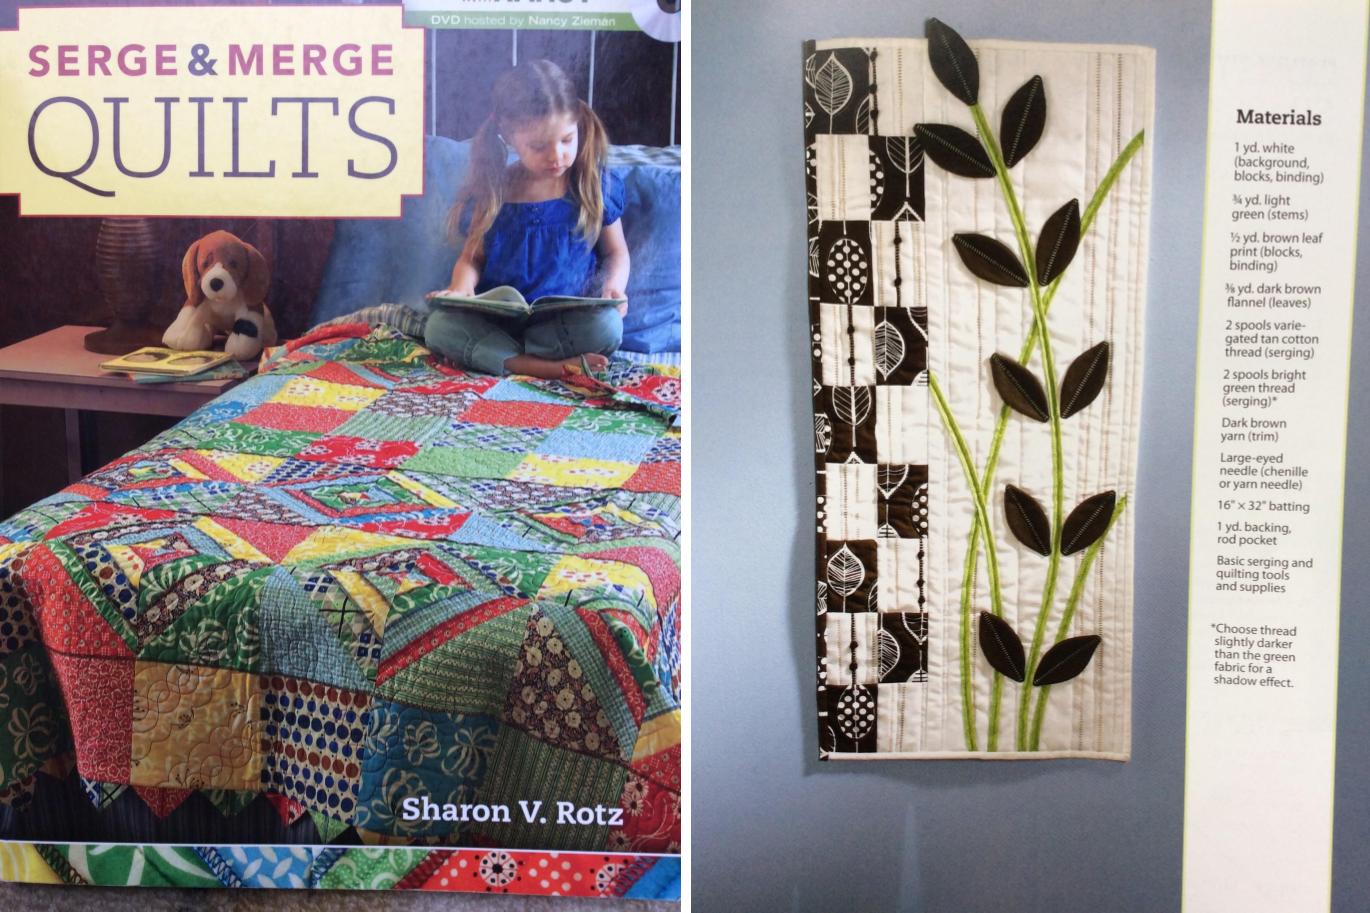
I had so much fun making my Simply Leafy 2 quilt that I thought I would share it with you. Simply Leafy 2 is a project from the book, Serge & Merge Quilts. It’s a small wall hanging and is the perfect size to experiment with creative serging. The serger creates the texture in the background and enhances the dimensional stems and leaves. The project showcases serger flatlock stitching, but uses a sewing machine to complete the quilting and binding. If you enjoy creative quilting and you have a serger, you should give this project a try!
Fabric and Thread Choices
I used quilting weight cotton for all the fabric in my Simply Leafy 2 quilt. I selected a brown leafy floral as my focus fabric and off white for the background. Based off the leafy floral fabric, I chose green fabric for the leaves and brown for the stems. The instructions said to use yarn for embellishing the flatlock stitches so I chose a brown perle cotton. I decided on a variegated Sulky Blendables 30 weight thread for the background flatlocking and a variegated YLI quilting cotton thread 40 weight for flatlocking the leaves and stems. I used Maxilock serger thread in the positions that were not visible in the stitches.
Flatlock Background and Create Rectangle Blocks
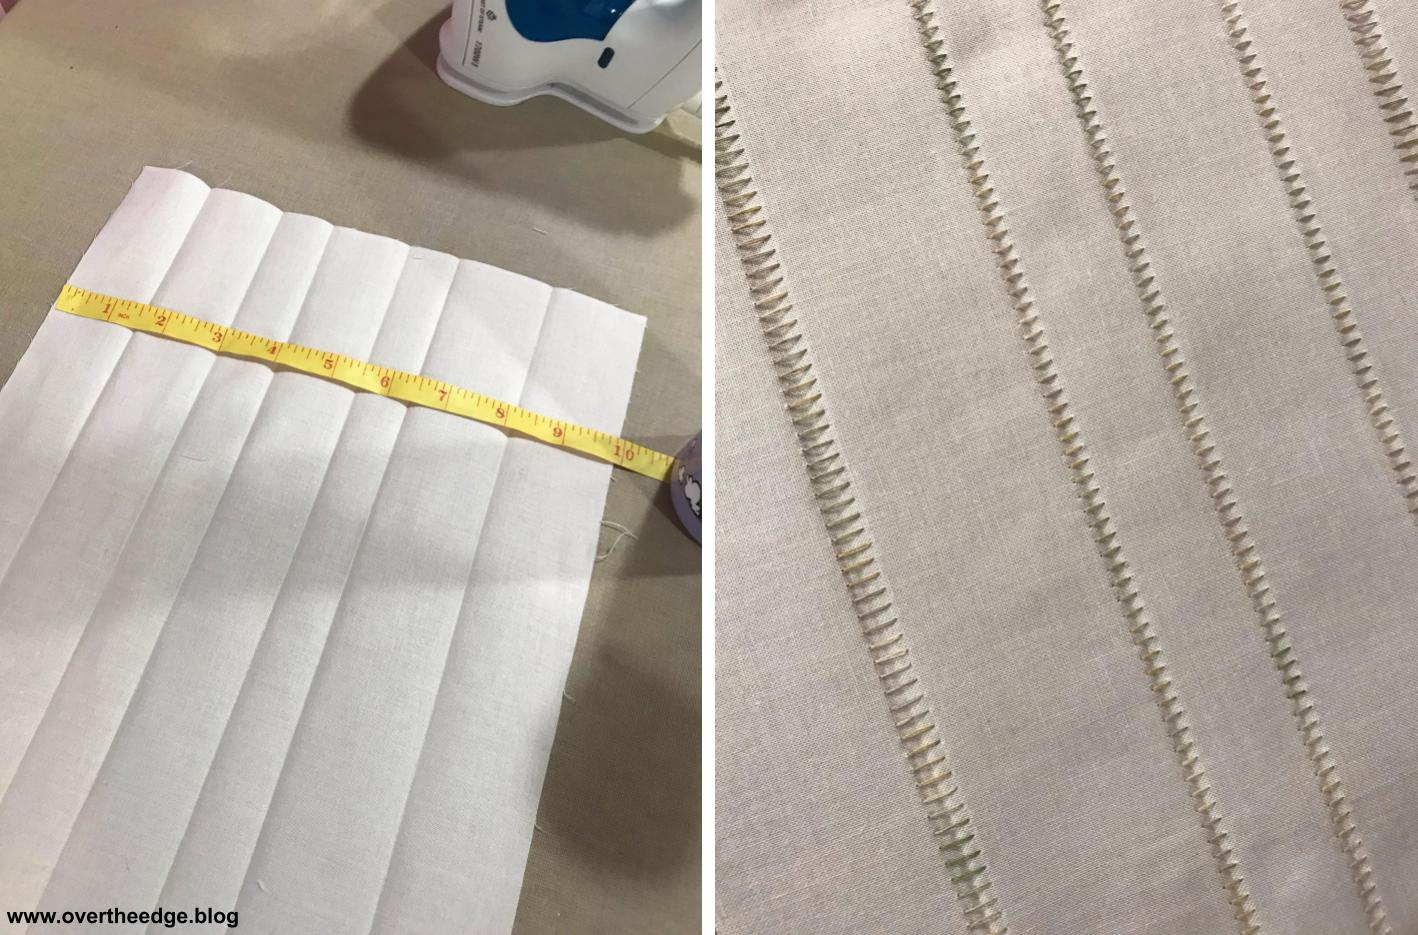
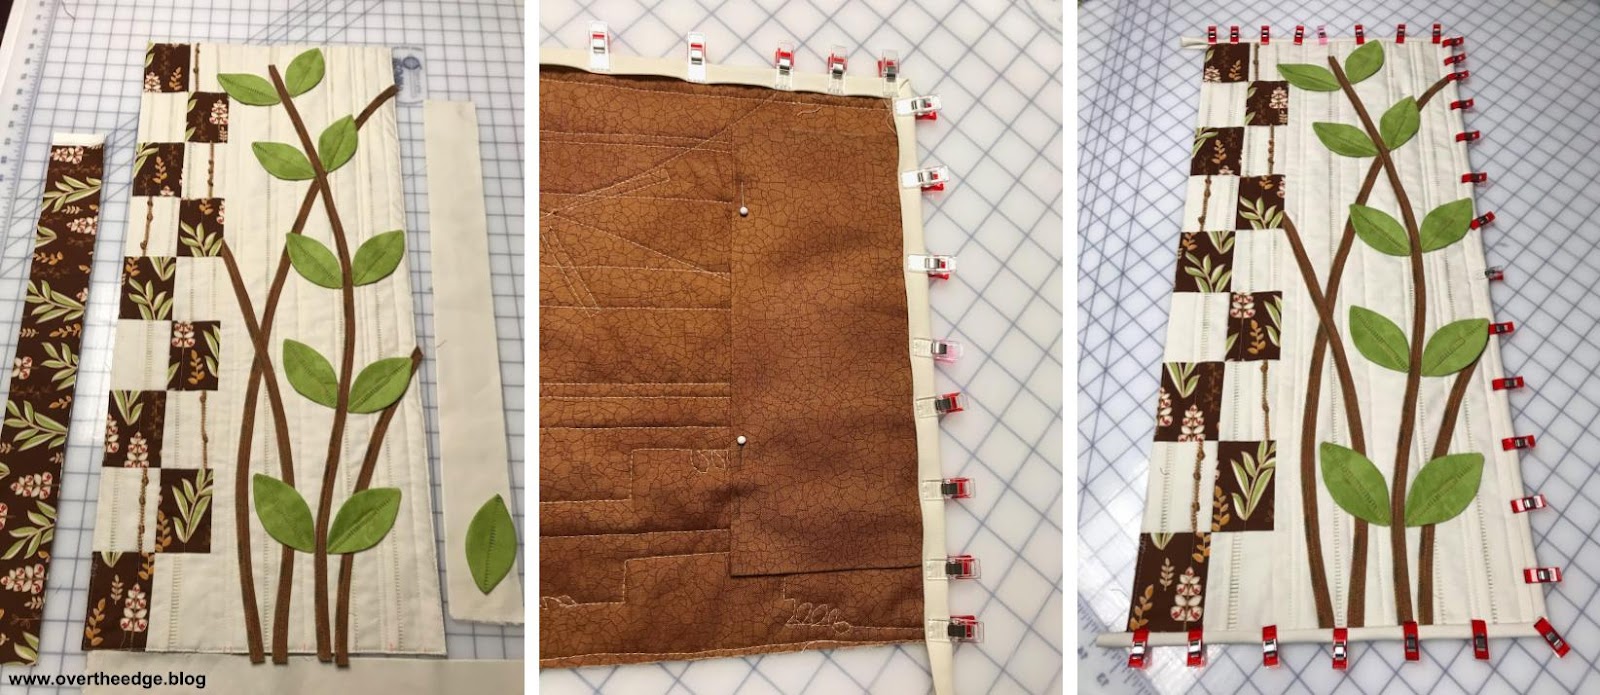
I randomly pressed lines in my background fabric to mark my folds for flatlocking. Then I created ladder stitching on the folds of fabric using both a narrow and wide two thread flatlock.
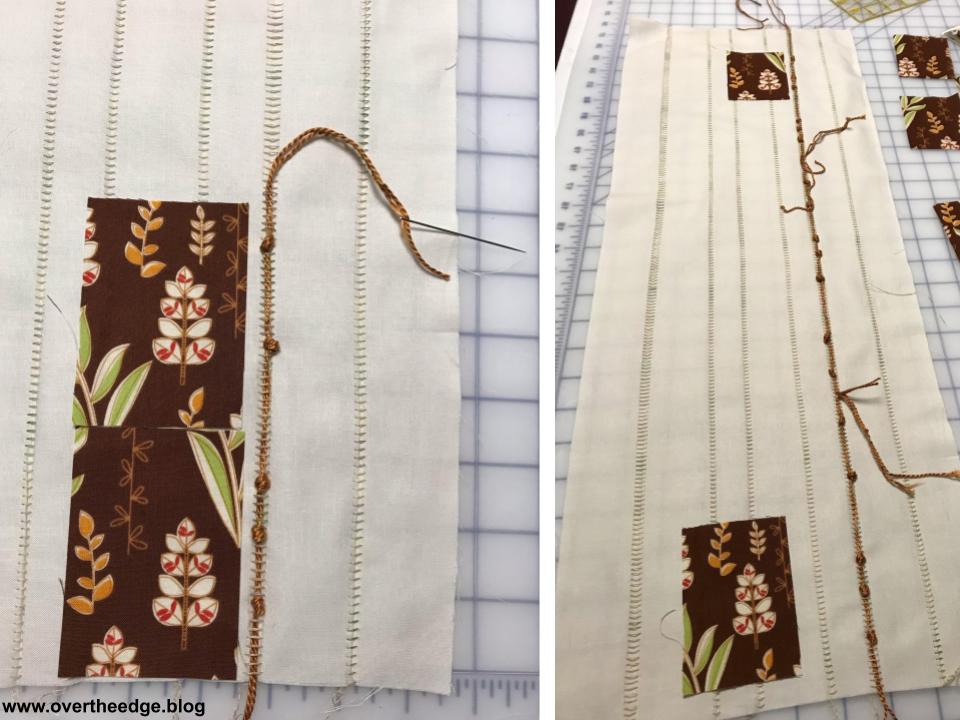
I serged each fold, then pulled it open. I pressed all of the flatlock stitching at once after I was finished serging the lines. After flatlocking I used two strands of perle cotton to create extra texture, making knots as suggested. The only change I made here was to add my yarn knots before I cut out the rectangle blocks. Unsecured flatlock stitching unravels easily near the edges, so I thought this change would create less stress on those stitches. When I ran out of yarn, I just cut 2 new pieces and continued where I left off. I fussy cut around the thread tails as I cut out my rectangles, so each rectangle was unique.
Create Leaves and Stems
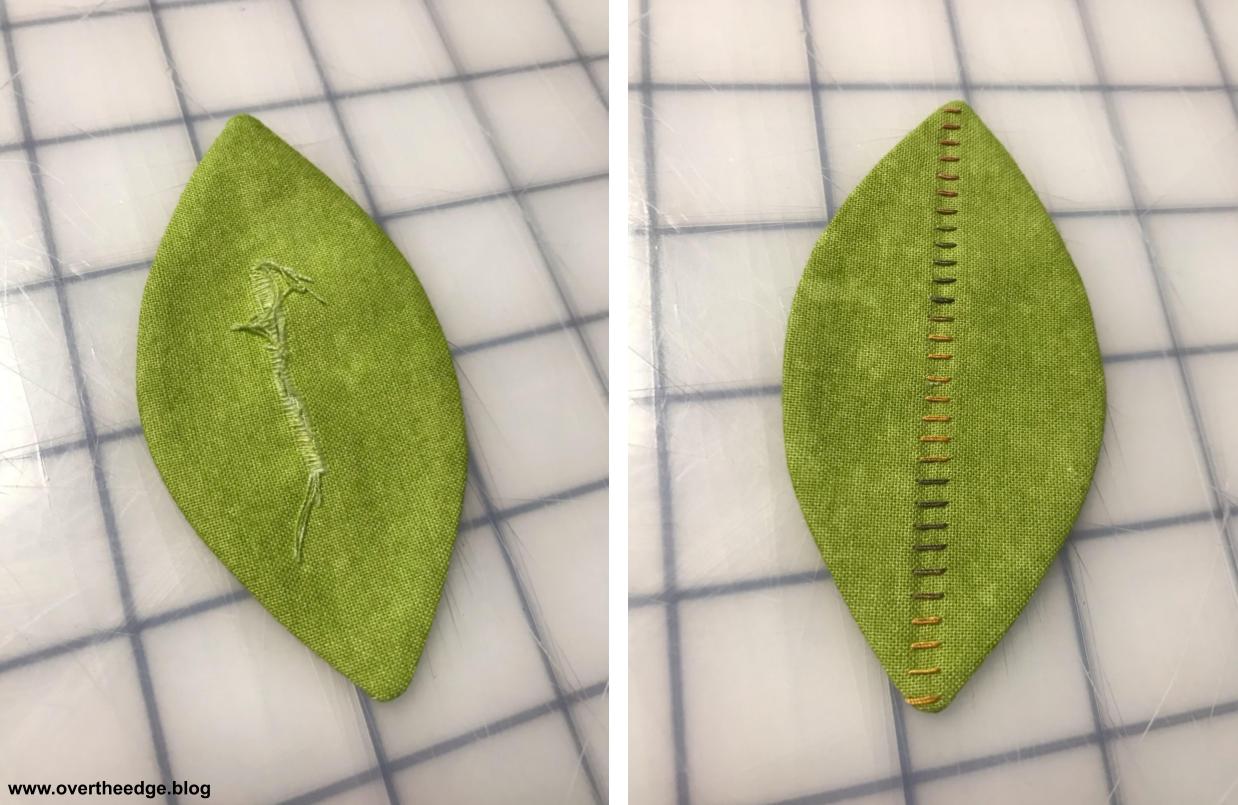
For flatlocking my leaves, I put the variegated thread in my needle. I wanted the variegated thread to show on my leaves. After flatlocking the leaf strip on my serger, I traced the leaf pattern onto the fabric. I then completed making the leaves on my sewing machine.
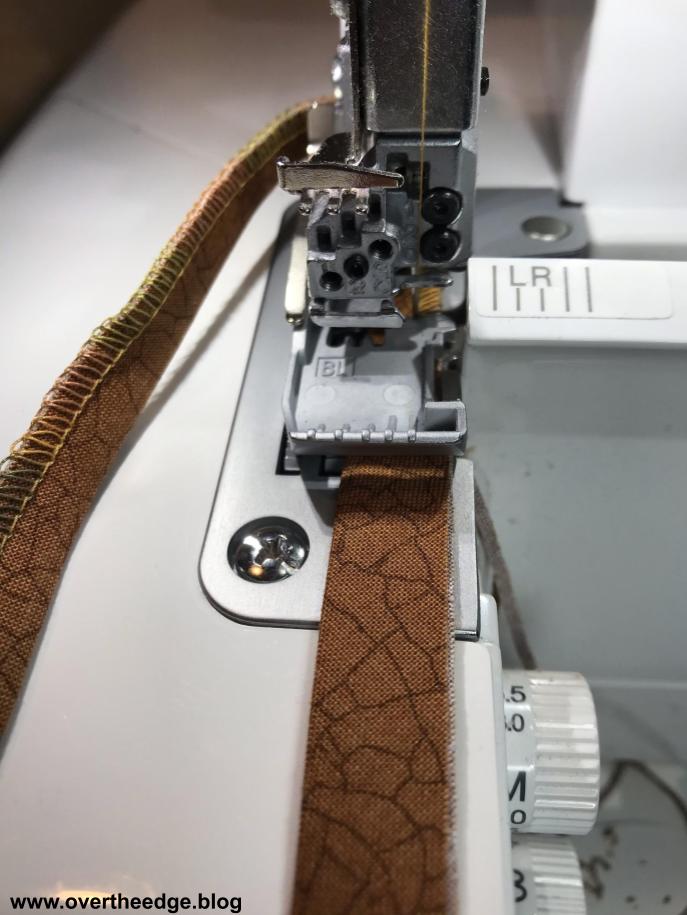
For finishing the stems, I set the serger up for a two thread overlock. The two thread overlock is basically the same stitch as the two thread flatlock, but you don’t open the seam. I put variegated thread in the lower looper because the loops ended up on the right side of my stems.
Piece Together Background
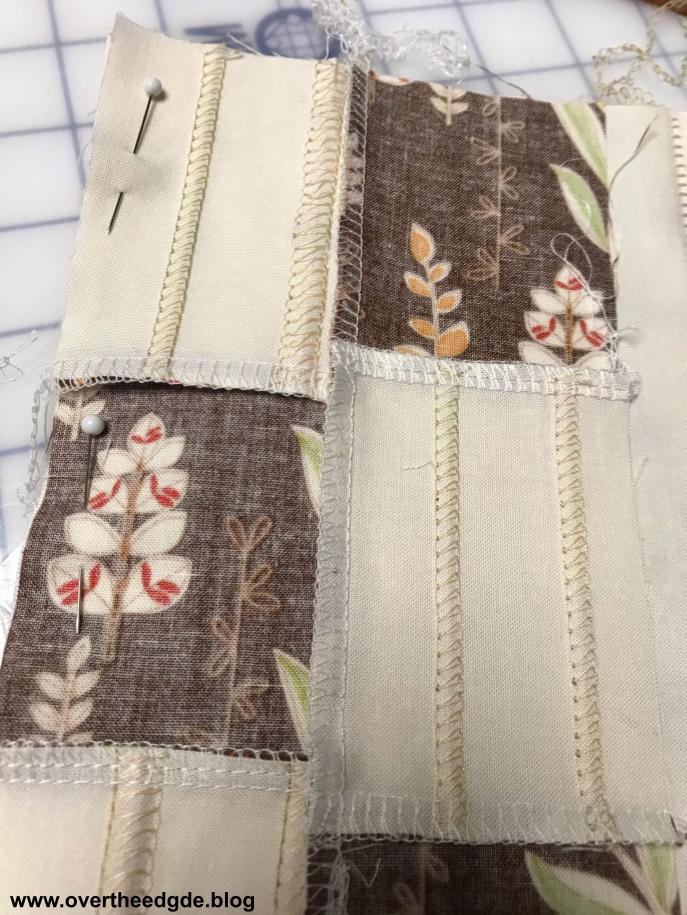
After serging the leaves and background, I converted my serger to a four thread overlock stitch. I used the four thread overlock stitch to serge the background rectangles together. I handled the rectangles carefully to keep the cut flatlock stitches from unraveling before piecing them together.
Quilt with Sewing Machine
I layered my backing, batting and top of my quilt sandwich and quilted the background using a sewing machine. My quilting was simple. I stitched lines between my lines of flatlocking and outlined some of the leaves in the brown rectangles.
Add Stems and Leaves
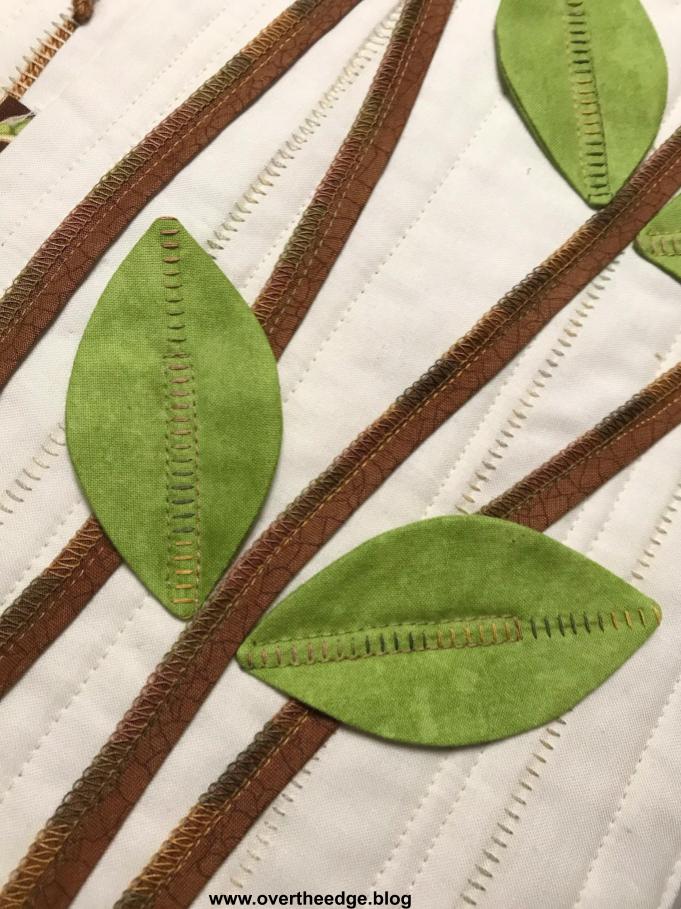
After the background was quilted, it was time to add the stems and leaves. I auditioned my stems and leaves on the background until I was happy with the layout. Then I stitched them all down with my sewing machine. Since the top leaf hangs off the edge, it was easier to stitch it on after the binding was applied. One of the things I really like about this project are the three dimensional stems and leaves!
Add Binding and Finish
The instructions have you use two different colors of binding. I bound the top, bottom and right side of my quilt with off-white and the left side with brown. I attached my binding to the front of quilt, and then flipped it to the back. To secure the binding, I stitched in the ditch on the front side with my sewing machine. I also added a hanging sleeve on the back
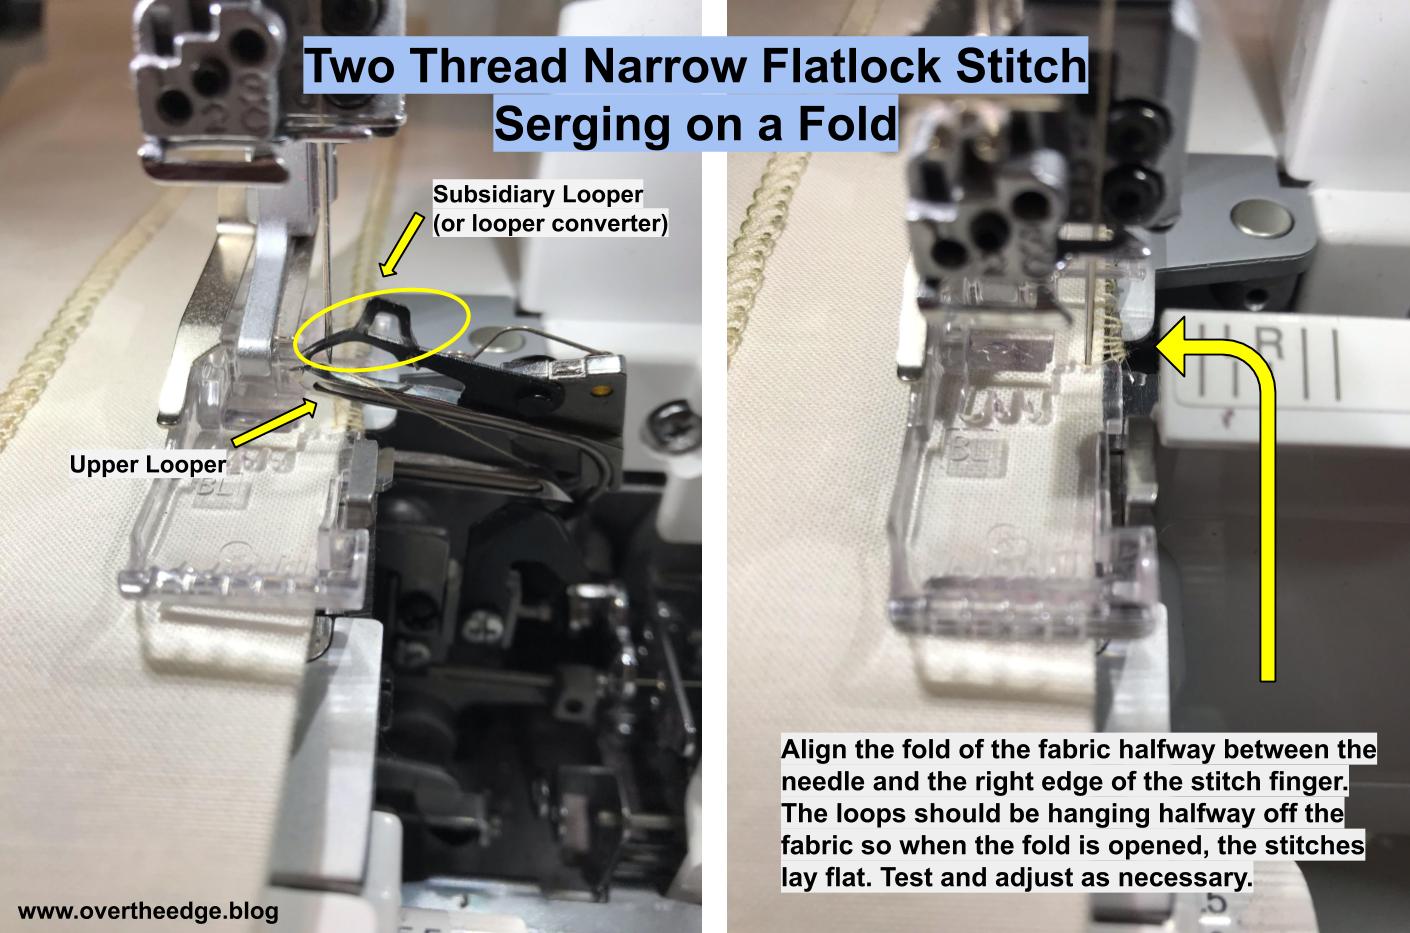
Flatlocking on the Fold
You typically see serger stitching on seam lines and fabric edges. But flatlocking is not limited to seams or fabric edges. You can flatlock on a fold and create decorative stitching within the body of your garment or project.
Flatlocking is a technique you can do with your standard presser foot. However, a foot with a guide, such as a blind hem foot, will make flatlocking easier.
The flatlock stitch is reversible. Which means you can use either side of this stitch in your projects. I like both the “loop” side and the “ladder” side of the flatlock stitch. To see the loops on the right side of your fabric you fold it with the wrong sides together. To see the ladders on the right side of your fabric you fold it with the right sides together.
When you flatlock on the fold, you serge with the loops hanging off of the fabric. You must guide your fabric so that the fold is about halfway between the needle and the blade. (See photo below.) Without the extra thread in those loops, you won’t be able to pull open the stitch to make it flat. If you have too much fabric in the stitch you won’t be able to fully open it. The stitch will look lumpy on one side and like a tunnel on the other. If you get too little fabric in the stitch you will have loose and floppy stitching.
I recommend you practice flatlocking on the fold before you begin this part of your project. Sharon provides some information about flatlocking on page 16 of her book. Your serger manual will instruct you how to set up and perform a flatlock stitch with your machine.
Simply Leafy 2
I hope you enjoyed my post about the creation of my Simply Leafy 2 wall hanging quilt.
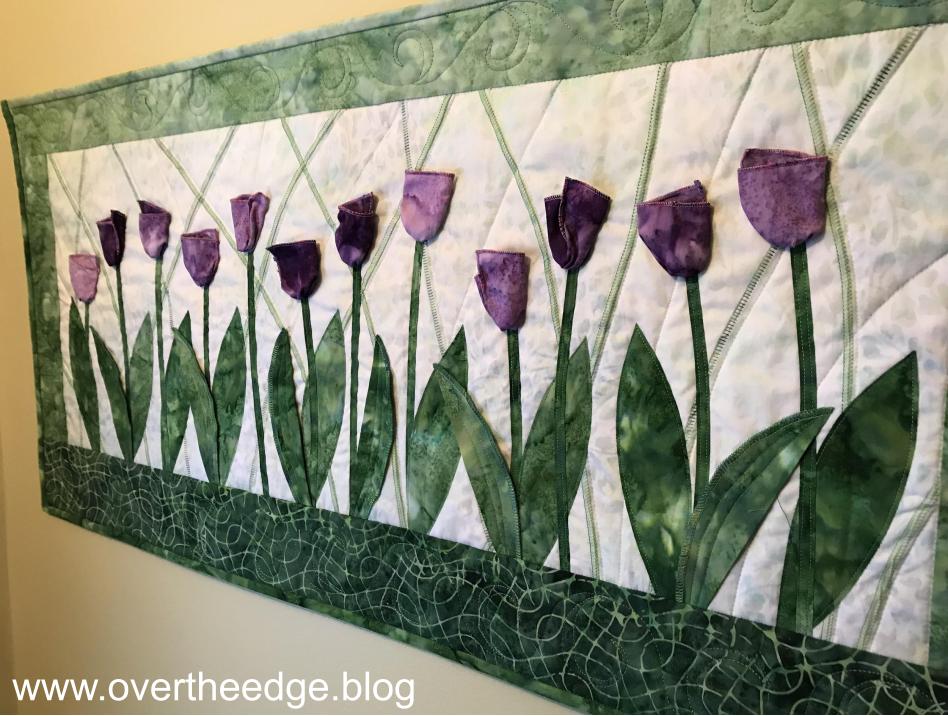
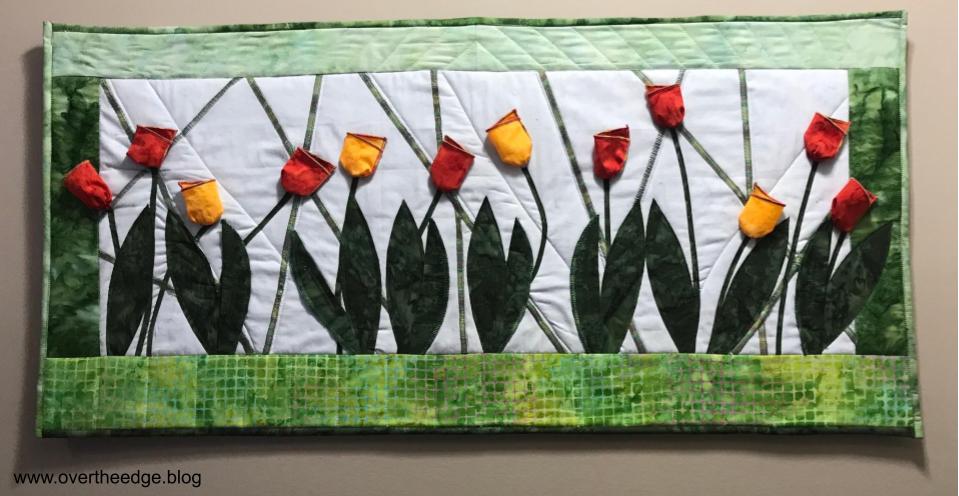
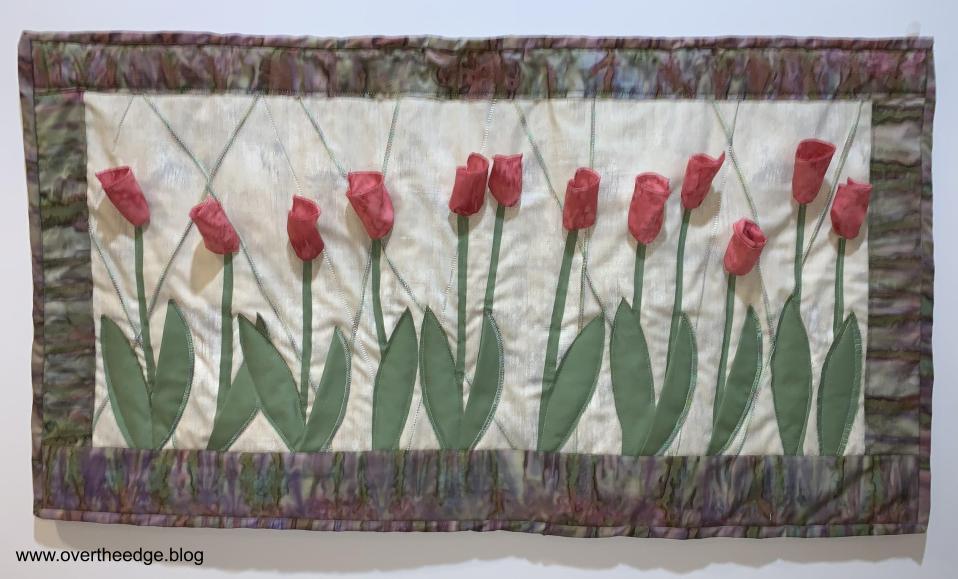
Down the Pathway is a project from the book, Serge and Merge Quilts, by Sharon V. Rotz. As she says in her intro to the project “Have fun displaying your serging talents as you construct a tulip garden with dimensional flowers and leaves.” And I sure did! This quilt was fun to make!
I love my Down the Pathway quilt. It makes me happy! Every time I look at my quilt I think of a beautiful spring day. I serged it with a combination of flatlock, rolled hem and overlock stitches and merged it with traditional quilting on a sewing machine.
Fabric Prep
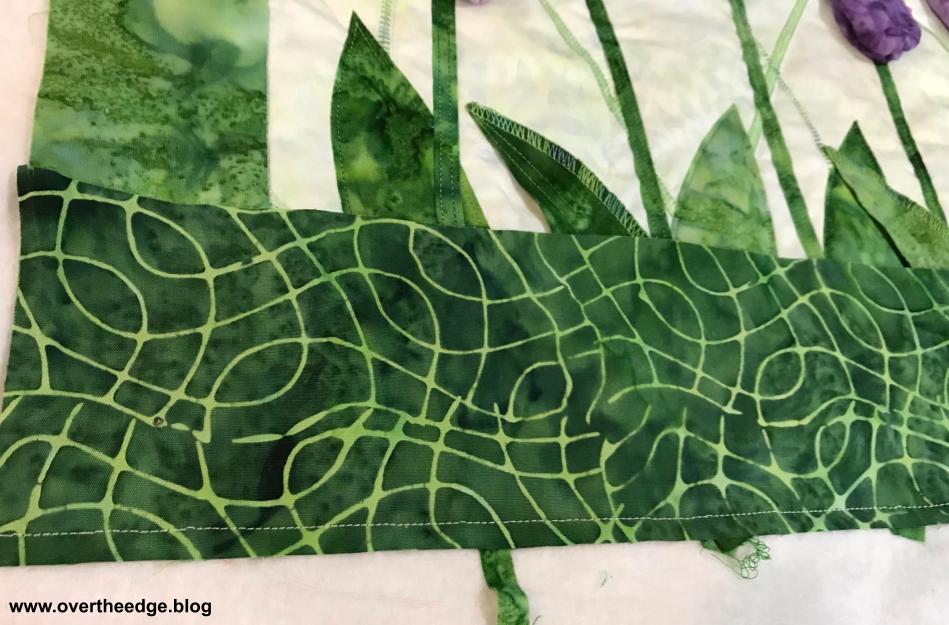
I chose an ombre purple batik fabric for my tulips and an ombre green batik for my stems, leaves and borders. The ombre fabrics gave me the perfect variety of colors for my tulips, greenery, borders and binding. The bottom border (or ground) was a coordinating green batik. I used a light green batik as the background (sky). The photo shows how I fussy cut my leaves, stems, borders and binding from the green ombre batik.
Create Background
The first step I took in creating the background of this quilt was to serge my “stems” using a flatlock stitch on the fold of the fabric. I serged some stems with the ladder side up and some with the loop side up. I used a variegated Madeira Polyneon thread for my flatlock stitches.
Flatlocking on the fold is a little different than flatlock piecing. By folding the fabric you can place the flatlock stitch in the center of the fabric rather than only on the edge. When you flatlock on the fold, you serge with the loops hanging half off of the fabric, which allows your fabric to lay flat when the stitch is pulled open. I recommend you practice flatlocking on the fold before you begin this part of your project. It takes a little more skill to get a nice even stitch than does flatlock piecing. Flatlock piecing is used to join two pieces of fabric and it is placed on the edge of the fabric. Sharon provides some information about flatlocking on page 16 of her book.
After finishing the flatlock “stems” I added the top and side borders. I did not miter my borders as is instructed in the book. Using a sewing machine, I quilted this piece to the batting/backing along each of the flatlock stems.
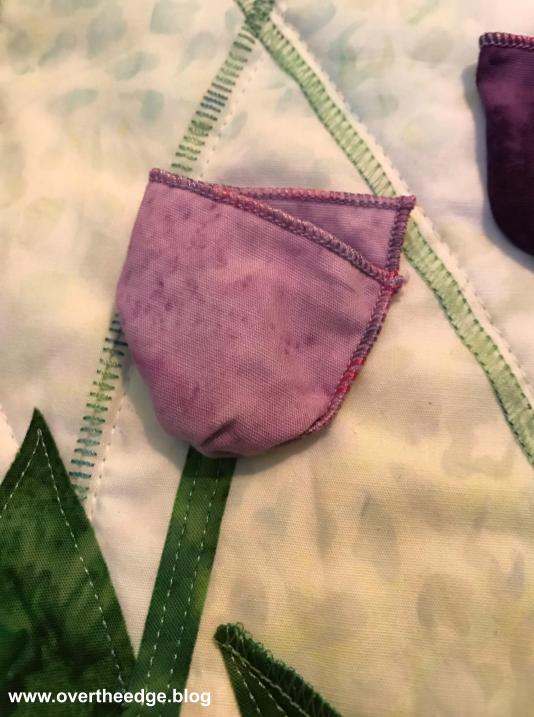
Create Tulips
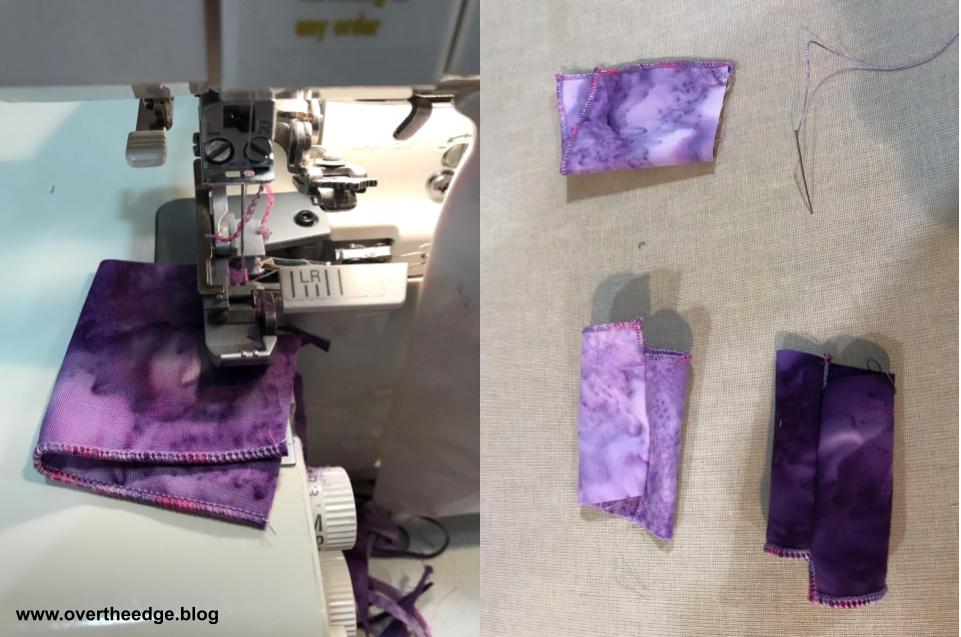
I serged the edges of the tulips using a 3 thread rolled hem stitch with Madeira Polyneon embroidery thread in the upper looper. To create the three dimensional tulips, I gathered the bottoms by hand with a running stitch and a strong thread .
Layout, Fuse and Quilt Greenery and Attach Tulips
After laying out my stems and leaves in a pleasing arrangement, I fused them down with an iron and pressing sheet. The pressing sheet both protected my iron from the fusible web and my thread from the heat of the iron. After fusing, I stitched down the raw edges of the stems and leaves using a sewing machine. I left some leaves 3 dimensional, as it says in book. After finishing the leaves and stems, I hand stitched a tulip at the top of each stem.
Add Bottom Border
I added the bottom border after the tulips and greenery were attached to the batting and backing.
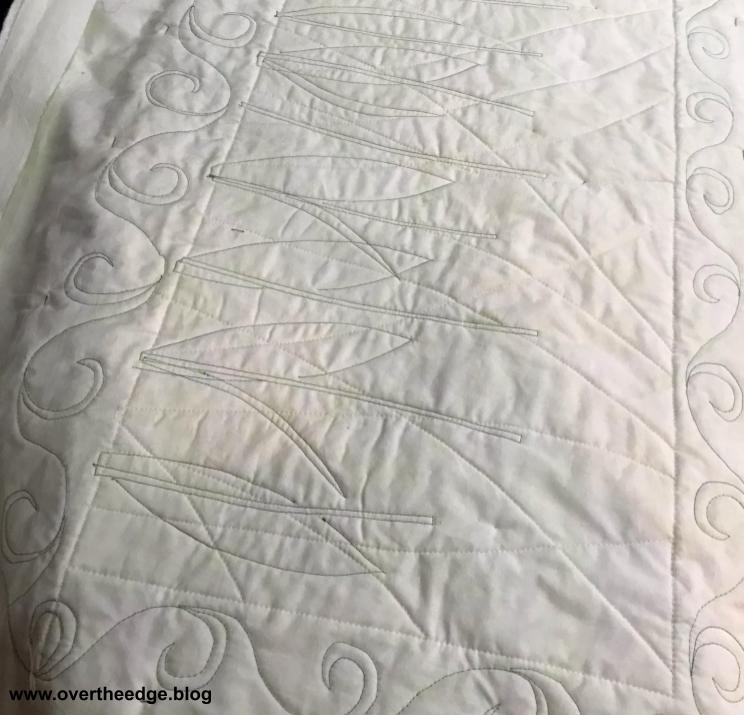
Machine Quilt Borders
I used a swirly leaf pattern for the free motion machine quilting of my borders, as you can see from the back side of my quilt in the photo below.
Add Binding and Finish
I used my rotary cutter and a ruler to trim and square my quilt sandwich before adding binding.
I chose to use two different parts of the green ombre batik fabric for my binding. The light colored green was the perfect choice for the top and right edge binding. And I used the darker green for left and bottom binding.
To finish the quilt, I added a hanging sleeve, which you can see pinned on the right side of the photo.
All done!
Down the Pathway Details
I included a few close up photos of the tulips, leaves and background flatlock stitching so you can better see the details.
Down the Pathway Class
I taught this as a class at my local fabric store. The class covered only the serger portion of the project (flatlocking, overlocking and rolled hem). Students did the rest on their own at home. A few of the students allowed me to share photos of their Down the Pathway quilts. Aren’t they beautiful. Spring is in the air!
A Few Final Words
It’s never too late to change something. After I finished the quilt, I stepped back to admire it from a distance. Everything looked great except one area of the background. My eyes kept being drawn to an area of the background that was a too dense with flatlock stems. I ended up removing one stem of flatlock stitches, and now I think it’s perfect! Can you spot the change?
Serge and Merge Quilts – Down the Pathway
The book, Serge & Merge Quilts was published back in 2009. After eleven years, it may be unavailable from your local store. If you can’t find a copy at the store, try the internet.
The Down the Pathway quilt is just one of several projects I have completed from Sharon’s book, which I will share with you in the future. I hope you enjoyed this post!
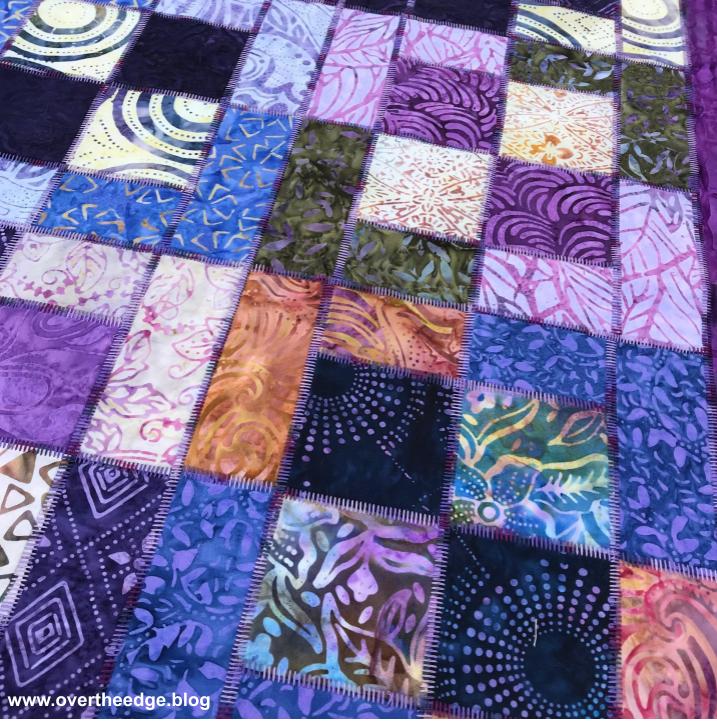
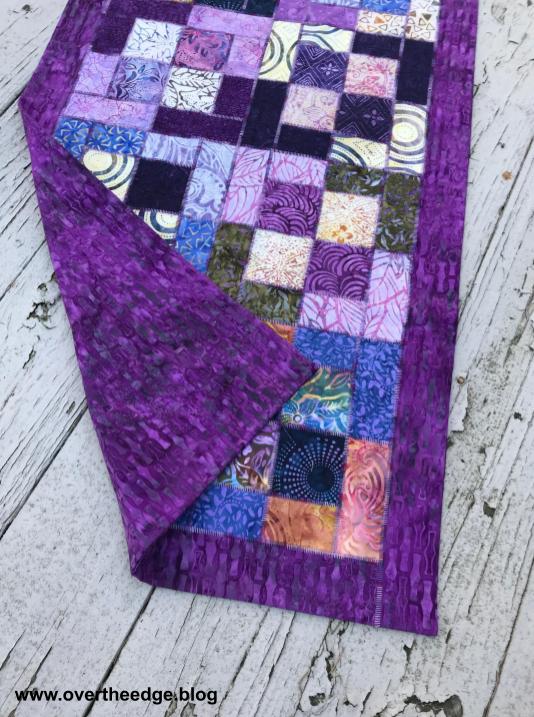
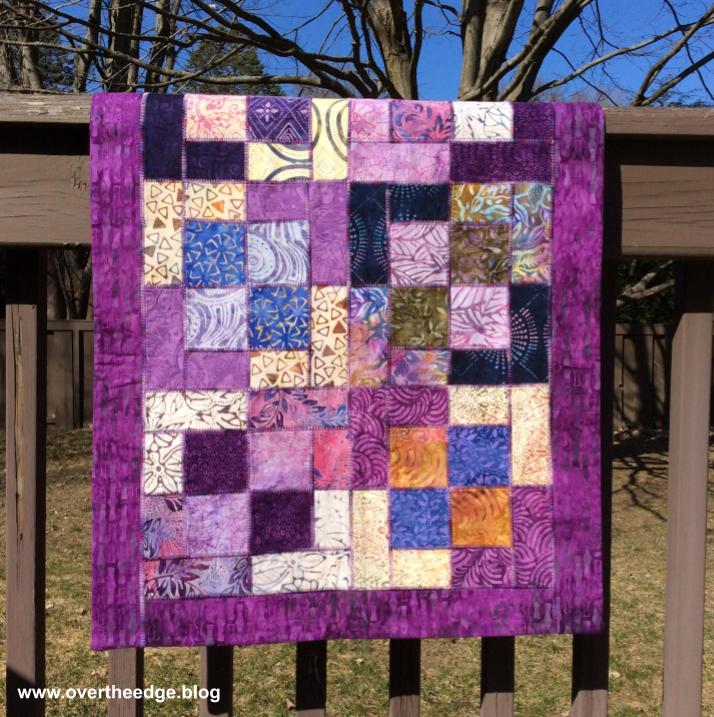
It’s still March and National Quilting Month, so here I am highlighting another way to use a serger to quilt. Flatlock piecing with a serger is a great way to add an artistic flair to your quilts. With a serger flatlock stitch, you are embellishing your quilt with decorative thread as you piece it together. The photos in this post are of my Four Square Table Runner that I made in 2014. This table runner is one of my favorite serger quilts I have made!
My Four Square Table Runner
My table runner is a great example of how easy it is to modify a traditional quilt pattern for serger construction.
Fabric, Pattern and Thread
I used a package of forty 5” squares called Tonga Treats by Timeless Treasures. The “Four Square Table Runner” pattern came free in the package. I don’t know if this fabric is still available, but you can do this technique with any fabric or quilt pattern.
I used a variegated purple YLI machine quilting thread in the needle and Maxilock serger thread in the loopers.
Serging
I followed most of the pattern instructions to make the quilt top, except for using a sewing machine. Instead, I pieced the quilt together with my serger using a three thread flatlock stitch with a length of 2. I serged the pieces right sides together, so the “ladder” side showed after pulling the flatlock stitches open.
I added a border, which I also attached with the flatlock stitch. Instead of a traditional quilt sandwich, I used a flannel fabric as batting. and attached the backing using the pillowcase or “birthing” method (without binding). I serged the layers together leaving an opening for turning right sides out. After turning and pressing, I hand stitched the opening closed and hand tacked the layers together invisibly at the corners of the blocks. I wanted the decorative thread and the flatlock stitching to be the center of attention.
What is a Serger Flatlock Stitch?
A flatlock stitch can be used to seam two fabrics together and to add detail to a seam line. It has unbalanced tensions that allow you to pull open the seam so it lays flat. Typically the needle thread tension is very loose and the lower looper tension is tight. The flatlock stitch is also reversible. It forms a “loop” stitch on one side of the fabric and a “ladder” stitch on the other side of the fabric. If you serge a seam with the fabrics right sides together, you will end up with a ladder stitch on the right side. The “ladder” you see is the needle thread. If you serge a seam with the fabric wrong sides together you will end up with a “loop” stitch on the right side. The “loop” you see is the looper thread. The example below show the ladder and the loop sides of two maple leaf quilt blocks that I made when I was practicing flatlocking.
What is Serger Flatlock Piecing?
When you sew your pieces together to form a quilt block, it is referred to as “piecing”. When you piece with a sewing machine the stitches made by a sewing machine are hidden within the seam. Flatlock piecing with a serger is piecing your quilt blocks together with a flatlock stitch. The stitch used in flatlock seams is very visible in the finished quilt. You can use the standard serger presser foot for this technique.
Follow the instructions in your manual for setting your serger up for a flatlock stitch. There are different types of flatlock stitches (2 or 3 thread, wide or narrow). I typically use a three thread flatlock for piecing quilts.
For piecing a quilt with a flatlock stitch, I keep the blade engaged and run the raw edge of my fabric along the blade. I don’t really cut anything off, I just trim stray threads.
Always test your serger set-up on a scrap of fabric and adjust as needed, before you begin serging your actual project. The actual tension settings and stitch length needed will vary with different threads and fabrics.
Leave a few inches of thread tail at the end of each seam. By leaving long tails you will prevent your seams from unraveling until you have a chance to secure them.
Press your flatlock seams flat before pulling them open. I feel it helps the fabric within the seam fold properly during the opening process. After pulling the seams open, I press them again.
Your finished blocks may be a little larger than they would be using a sewing machine. The process of opening of the seam allowance changes the size of the seam allowance slightly.
I use the three thread flatlock stitch in smaller projects like table runners and wall hangings. Flatlock stitches are more exposed and tend to snag more easily, so I don’t typically use this stitch for quilts that will get a lot of wear.
Set your iron temperature appropriately for the thread you use in your flatlock stitch, or use a press cloth. Since the thread sits on the surface of your fabric it has more exposure to the heat of the iron. It is possible to melt the thread in your serger stitches – I know from personal experience!
Are you Inspired?
I hope you enjoyed this post and are inspired to try flatlock piecing with a serger.
Since March is National Quilting Month and I love my serger, I thought I would show you how simple it can be to quilt with a serger. To inspire you to try it, I designed my own pattern. My challenge was to design a quilt that was quick and easy to piece using a serger and used only one layer cake of fabric. I named my design, “Forty Two Ten by Jen”. Simple and catchy don’t you think?
Layer Cakes and Other Precuts
I frequently use precuts for my quilts because I don’t have to stress over choosing coordinating fabrics. Precuts come in many different shapes and sizes such as layer cakes, charm packs and jelly rolls. I believe Moda was the first to create the “layer cake” which is basically a package of 42 ten inch squares that all coordinate. Using the word “layer cake” to describe a package of 42 ten inch squares is like calling all brands of facial tissue “Kleenex”. These packages of ten inch squares go by names such as Moda Layer Cakes, Riley Blake Ten Inch Stackers, and Bali Crackers.
A Little Information About my Quilt
For my quilt I used Riley Blake’s, Azure Skies Ten Inch Stacker, designed by Simple Simon and Company.
I am happy to say that my Forty Two Ten by Jen serger quilt is a zero waste quilt, which means it uses every single piece of fabric with no scraps. Those little scraps that are leftover from projects always create a small amount of anxiety for me. Should I throw them away or keep them for another project? If I throw them away I feel guilty. If I keep them I usually can’t find them when I need them. Does anyone else ever feel this way? No need to worry because this quilt has no leftover scraps – yay!
Equipment Required
This project does not require a fancy serger. As long as your serger can do a 4 thread overlock stitch, you can use it to make this quilt. However, not everyone is lucky enough to own a serger, so I also included instructions for how to piece this quilt on a sewing machine. I hope you enjoy quilting with your serger using my free pattern “Forty Two Ten by Jen”.