Tag: flatlock stitch

Simply Leafy 2

simply leafy 2 serge & merge quilts

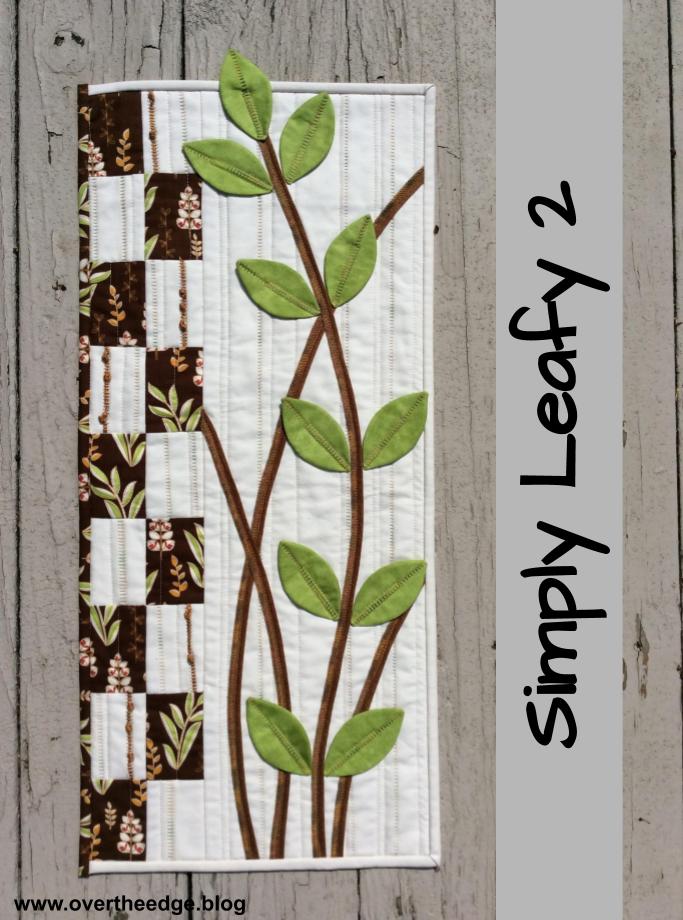
I had so much fun making my Simply Leafy 2 quilt that I thought I would share it with you. Simply Leafy 2 is a project from the book, Serge & Merge Quilts. It’s a small wall hanging and is the perfect size to experiment with creative serging. The serger creates the texture in the background and enhances the dimensional stems and leaves. The project showcases serger flatlock stitching, but uses a sewing machine to complete the quilting and binding. If you enjoy creative quilting and you have a serger, you should give this project a try!

serge & merge quilts

Fabric and Thread Choices

I used quilting weight cotton for all the fabric in my Simply Leafy 2 quilt. I selected a brown leafy floral as my focus fabric and off white for the background. Based off the leafy floral fabric, I chose green fabric for the leaves and brown for the stems. The instructions said to use yarn for embellishing the flatlock stitches so I chose a brown perle cotton. I decided on a variegated Sulky Blendables 30 weight thread for the background flatlocking and a variegated YLI quilting cotton thread 40 weight for flatlocking the leaves and stems. I used Maxilock serger thread in the positions that were not visible in the stitches.

Flatlock Background and Create Rectangle Blocks

I randomly pressed lines in my background fabric to mark my folds for flatlocking. Then I created ladder stitching on the folds of fabric using both a narrow and wide two thread flatlock.

simply leafy 2 flatlocking

I serged each fold, then pulled it open. I pressed all of the flatlock stitching at once after I was finished serging the lines. After flatlocking I used two strands of perle cotton to create extra texture, making knots as suggested. The only change I made here was to add my yarn knots before I cut out the rectangle blocks. Unsecured flatlock stitching unravels easily near the edges, so I thought this change would create less stress on those stitches. When I ran out of yarn, I just cut 2 new pieces and continued where I left off. I fussy cut around the thread tails as I cut out my rectangles, so each rectangle was unique.

simply leafy 2
simply leafy2
simply leafy 2

Create Leaves and Stems

For flatlocking my leaves, I put the variegated thread in my needle. I wanted the variegated thread to show on my leaves. After flatlocking the leaf strip on my serger, I traced the leaf pattern onto the fabric. I then completed making the leaves on my sewing machine.

simply leafy 2

For finishing the stems, I set the serger up for a two thread overlock. The two thread overlock is basically the same stitch as the two thread flatlock, but you don’t open the seam. I put variegated thread in the lower looper because the loops ended up on the right side of my stems.

simply leafy 2

Piece Together Background

After serging the leaves and background, I converted my serger to a four thread overlock stitch. I used the four thread overlock stitch to serge the background rectangles together. I handled the rectangles carefully to keep the cut flatlock stitches from unraveling before piecing them together.

simply leafy 2

Quilt with Sewing Machine

I layered my backing, batting and top of my quilt sandwich and quilted the background using a sewing machine. My quilting was simple. I stitched lines between my lines of flatlocking and outlined some of the leaves in the brown rectangles.

simply leafy 2 quilting

Add Stems and Leaves

After the background was quilted, it was time to add the stems and leaves. I auditioned my stems and leaves on the background until I was happy with the layout. Then I stitched them all down with my sewing machine. Since the top leaf hangs off the edge, it was easier to stitch it on after the binding was applied. One of the things I really like about this project are the three dimensional stems and leaves!

simply leafy 2
simply leafy 2 flatlock stitching

Add Binding and Finish

The instructions have you use two different colors of binding. I bound the top, bottom and right side of my quilt with off-white and the left side with brown. I attached my binding to the front of quilt, and then flipped it to the back. To secure the binding, I stitched in the ditch on the front side with my sewing machine. I also added a hanging sleeve on the back

simply leafy 2 binding

Flatlocking on the Fold

You typically see serger stitching on seam lines and fabric edges. But flatlocking is not limited to seams or fabric edges. You can flatlock on a fold and create decorative stitching within the body of your garment or project.

Flatlocking is a technique you can do with your standard presser foot. However, a foot with a guide, such as a blind hem foot, will make flatlocking easier. 

The flatlock stitch is reversible. Which means you can use either side of this stitch in your projects. I like both the “loop” side and the “ladder” side of the flatlock stitch. To see the loops on the right side of your fabric you fold it with the wrong sides together. To see the ladders on the right side of your fabric you fold it with the right sides together.

When you flatlock on the fold, you serge with the loops hanging off of the fabric. You must guide your fabric so that the fold is about halfway between the needle and the blade. (See photo below.) Without the extra thread in those loops, you won’t be able to pull open the stitch to make it flat. If you have too much fabric in the stitch you won’t be able to fully open it. The stitch will look lumpy on one side and like a tunnel on the other. If you get too little fabric in the stitch you will have loose and floppy stitching.

I recommend you practice flatlocking on the fold before you begin this part of your project. Sharon provides some information about flatlocking on page 16 of her book. Your serger manual will instruct you how to set up and perform a flatlock stitch with your machine.

simply leafy 2 serge & merge quilts

Simply Leafy 2

I hope you enjoyed my post about the creation of my Simply Leafy 2 wall hanging quilt.

Check out another fun project called Down the Pathway that I made from the book, Serge & Merge Quilts.  https://overtheedge.blog/serge-and-merge-quilts-down-the-pathway/

serging with jen

Resources

Serge & Merge Quilts by Sharon Rotz. This book was published in 2009. If you can’t find it in your local shop, try the internet. https://www.amazon.com/Serge-Merge-Quilts-Create-Nancy/dp/0896898105

Flatlock Piecing With a Serger

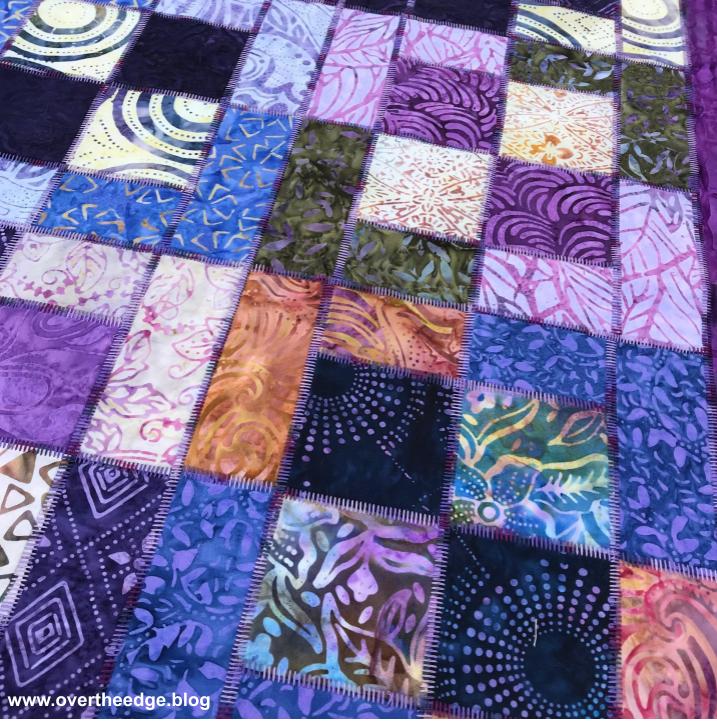
It’s still March and National Quilting Month, so here I am highlighting another way to use a serger to quilt.  Flatlock piecing with a serger is a great way to add an artistic flair to your quilts. With a serger flatlock stitch, you are embellishing your quilt with decorative thread as you piece it together. The photos in this post are of my Four Square Table Runner that I made in 2014. This table runner is one of my favorite serger quilts I have made!

My Four Square Table Runner 

My table runner is a great example of how easy it is to modify a traditional quilt pattern for serger construction.

Fabric, Pattern and Thread

I used a package of forty 5” squares called Tonga Treats by Timeless Treasures. The “Four Square Table Runner” pattern came free in the package. I don’t know if this fabric is still available, but you can do this technique with any fabric or quilt pattern.

I used a variegated purple YLI machine quilting thread in the needle and Maxilock serger thread in the loopers. 

Serging

I followed most of the pattern instructions to make the quilt top, except for using a sewing machine. Instead, I pieced the quilt together with my serger using a three thread flatlock stitch with a length of 2. I serged the pieces right sides together, so the “ladder” side showed after pulling the flatlock stitches open. 

I added a border, which I also attached with the flatlock stitch. Instead of a traditional quilt sandwich, I used a flannel fabric as batting. and attached the backing using the pillowcase or “birthing” method (without binding). I serged the layers together leaving an opening for turning right sides out. After turning and pressing, I hand stitched the opening closed and hand tacked the layers together invisibly at the corners of the blocks. I wanted the decorative thread and the flatlock stitching to be the center of attention.  

What is a Serger Flatlock Stitch?  

A flatlock stitch can be used to seam two fabrics together and to add detail to a seam line. It has unbalanced tensions that allow you to pull open the seam so it lays flat. Typically the needle thread tension is very loose and the lower looper tension is tight. The flatlock stitch is also reversible. It forms a “loop” stitch on one side of the fabric and a “ladder” stitch on the other side of the fabric. If you serge a seam with the fabrics right sides together, you will end up with a ladder stitch on the right side. The “ladder” you see is the needle thread. If you serge a seam with the fabric wrong sides together you will end up with a “loop” stitch on the right side. The “loop” you see is the looper thread.  The example below show the ladder and the loop sides of two maple leaf quilt blocks that I made when I was practicing flatlocking.

What is Serger Flatlock Piecing?

When you sew your pieces together to form a quilt block, it is referred to as “piecing”. When you piece with a sewing machine the stitches made by a sewing machine are hidden within the seam. Flatlock piecing with a serger is piecing your quilt blocks together with a flatlock stitch. The stitch used in flatlock seams is very visible in the finished quilt. You can use the standard serger presser foot for this technique.

Video – Flatlock Piecing With a Serger

For all you visual learners out there I created this short video of the flatlock stitch in action. https://overtheedge.blog/videos/flatlock-piecing-with-a-serger/

How to Easily Remove a Three Thread Flatlock Seam

Tips for Flatlock Piecing With a Serger

  • Follow the instructions in your manual for setting your serger up for a flatlock stitch. There are different types of flatlock stitches (2 or 3 thread, wide or narrow). I typically use a three thread flatlock for piecing quilts.
  • For piecing a quilt with a flatlock stitch, I keep the blade engaged and run the raw edge of my fabric along the blade. I don’t really cut anything off, I just trim stray threads.  
  • Always test your serger set-up on a scrap of fabric and adjust as needed, before you begin serging your actual project. The actual tension settings and stitch length needed will vary with different threads and fabrics.
  • Leave a few inches of thread tail at the end of each seam. By leaving long tails you will prevent your seams from unraveling until you have a chance to secure them.
  • Press your flatlock seams flat before pulling them open. I feel it helps the fabric within the seam fold properly during the opening process.  After pulling the seams open, I press them again.
  • Your finished blocks may be a little larger than they would be using a sewing machine. The process of opening of the seam allowance changes the size of the seam allowance slightly.  
  • I use the three thread flatlock stitch in smaller projects like table runners and wall hangings. Flatlock stitches are more exposed and tend to snag more easily, so I don’t typically use this stitch for quilts that will get a lot of wear.
  • Set your iron temperature appropriately for the thread you use in your flatlock stitch, or use a press cloth. Since the thread sits on the surface of your fabric it has more exposure to the heat of the iron. It is possible to melt the thread in your serger stitches – I know from personal experience!

Are you Inspired?

I hope you enjoyed this post and are inspired to try flatlock piecing with a serger.

What do you get when you combine serging with embroidery? Serge-Broidery!

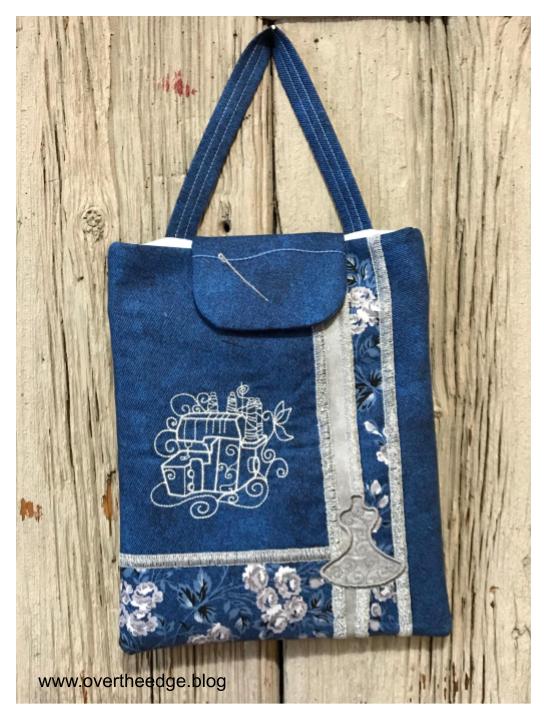
Did you know that February is National Embroidery Month? I thought this would be the perfect time to share with you the sewing tote project I made using both my serger and my embroidery machine. I used the pattern “Serge-Broidery Sewing Tote” by Sue Overy Designs. https://sueoverydesigns.com/product/sewing-tote-serge-broidery/

About the Tote:

When I teach serger classes, I use this tote to carry my supplies.  It has an interior pocket that I use for patterns or fabric, and an outside clear vinyl pocket with a zipper that I use for accessories such as feet and tweezers. I really like being able to see my accessories through the clear vinyl pocket! The only part of the pattern I wasn’t crazy about was the bamboo handle. So I made a fabric handle instead. 

Machine Embroidered Details:

All of the embroidery designs I used on this tote were included with the pattern. I began by stitching the serger design near the center front of the tote. Then after finishing the flatlock piecing of the front panel, I embroidered the dress form applique on the front lower right corner. Finally, the needle was embroidered on the flap after chain stitching the “thread”.

Serger Details:

The tote features decorative thread and four serger stitches – flatlock, cover stitch, chain stitch and four thread overlock.

For my decorative thread, I chose metallic Madeira 12 wt. Glamour to give my serger stitches a little sparkle. Using a flatlock stitch, I pieced together the fabric for the front of the tote.  I installed the zipper on the clear vinyl pocket on the back using the cover stitch, along with a cording foot.  I also used the cover stitch in combination with the belt loop binder attachment to make the handle. The “thread” that goes through the needle on the flap is a clever use of the chain stitch.  The four thread overlock stitch was used to finish constructing the tote.

If you are interested in utilizing different stitches and techniques on your serger, this would be a good project for you.

Isn’t this project tote-ally cute!


Theme: Overlay by Kaira Extra Text
Cape Town, South Africa