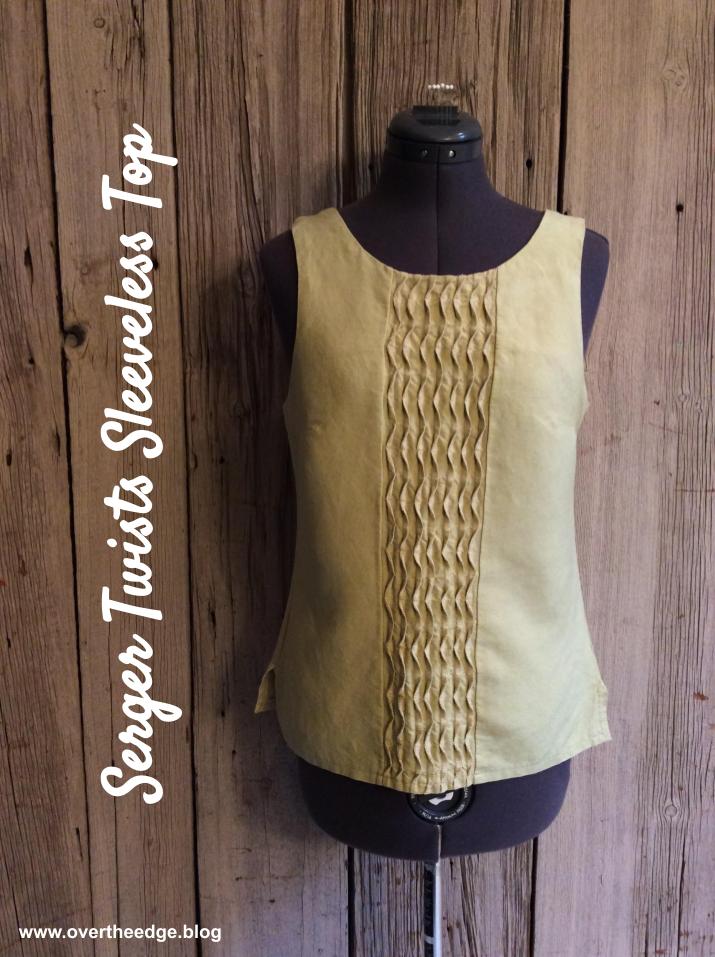
Serger Twists Sleeveless Top
Embellishment can turn a plain garment into a WOW garment. Why not use your serger to make your garments special! I love the texture created from twists and tucks. I’ve heard them called wave tucks or twisted tucks, or as I call them serger twists. I’ve used this serger technique in bags, pillows, serger covers and garments. You can make these folded tucks/twists with a sewing machine, but it is more fun with a serger because you have the added element of decorative thread. Keep reading to learn more about how I started with a pattern for a plain top and transformed it into my serger twists sleeveless top.
The Pattern
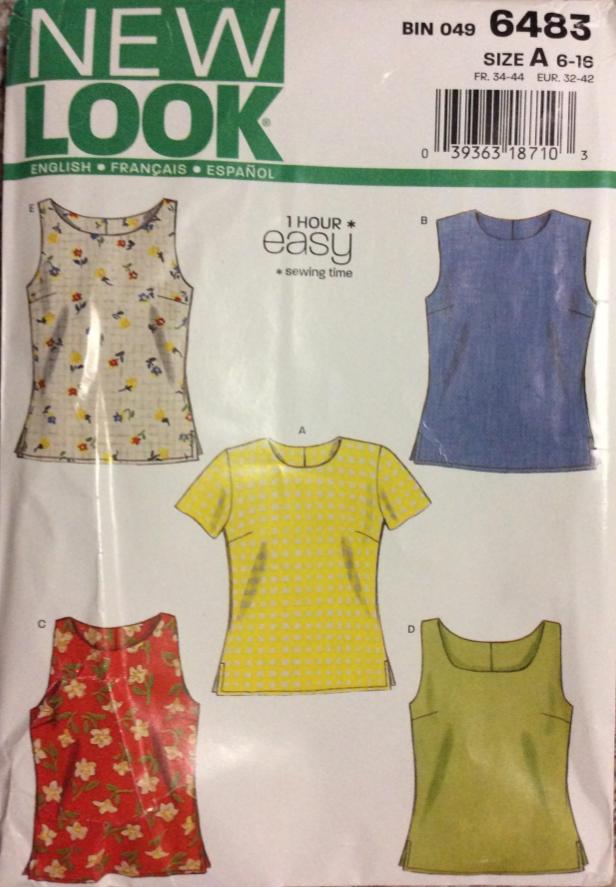
As a foundation for my serger twists sleeveless top, I chose a simple sleeveless top pattern, New Look 6483 view E, and a linen blend fabric. I basically followed the pattern to construct the top, but with a few changes. I modified the pattern to include a serger twists center panel, and I serged some of the steps instead of using my sewing machine.
Equipment
- Serger capable of three thread overlock and 4 thread overlock
- Sewing machine
- Sewing and serging supplies
- Pattern, such as New Look 6483
- Marking pen/pencil
- Fabric and thread
How to Create Serger Twists
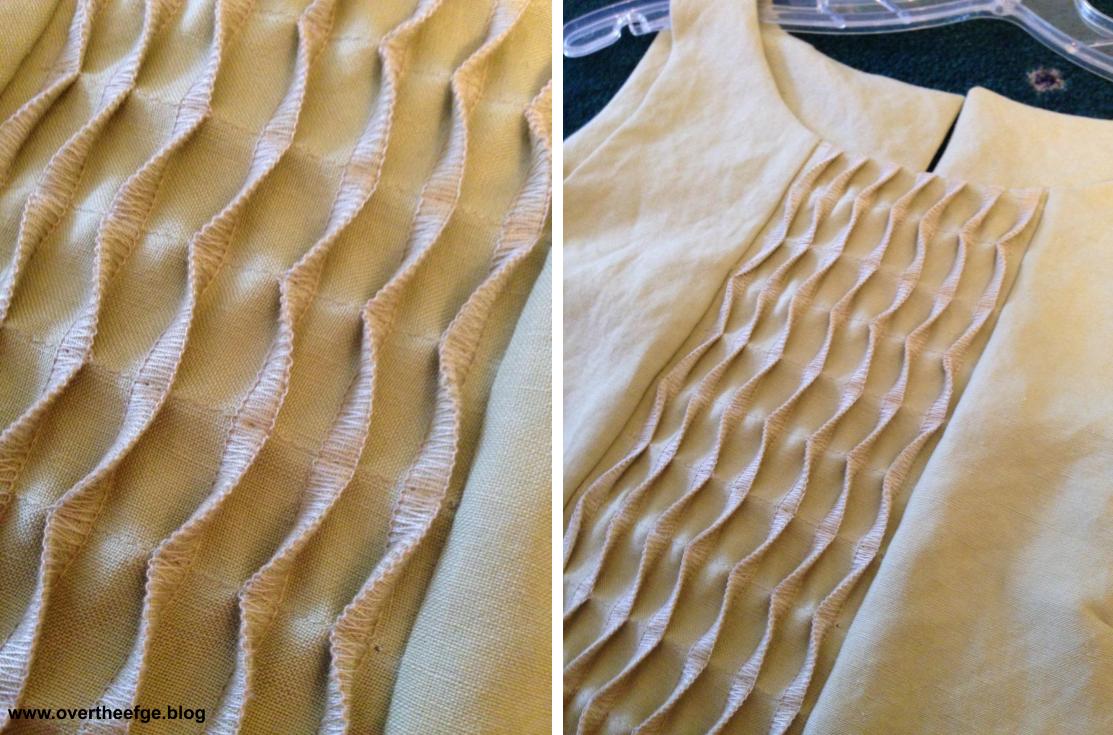
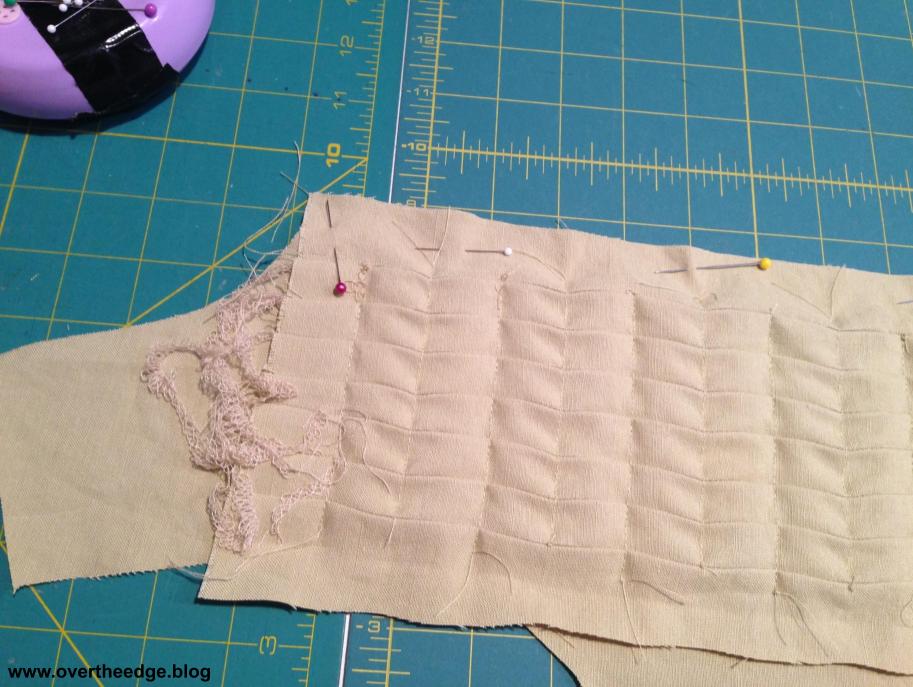
I began by preparing the center panel. I cut a rectangle piece of fabric about 4” longer than the center front pattern piece of the top and about twice as wide as my desired finished center panel plus 4” extra. You need the extra fabric because the width is drawn in as you create the twist. For my top I decided on 7 twists. I marked 7 vertical lines 1¼” apart with a Frixion pen in the center of my rectangle. I folded each line, wrong sides together and pressed to create creases. The creases make it easier to serge on the folds in the next step.

Serge
I set up my serger for 3 thread overlock wide with a stitch width of ¼” and disengaged the blade. Maxi Lock thread was used for all positions because I wanted my thread to blend in with the fabric to emphasize the texture and not the thread color. You could use a more decorative thread if you wanted. I used a stitch length 2-2.5, but it could be longer or shorter depending on the thread and look you are trying to achieve.
Serge on each fold, lining up the fold with where the blade would normally cut. I used a standard foot and guided my fabric along the disengaged blade. But you could also use a blind hem foot for your serger and set up the guide to help you position the fold in the proper place. Serge the same direction each time, so that the upper looper thread is on the same side of all the folds. Press folds well to set the stitches. You may need to use a press cloth so you don’t damage your thread.

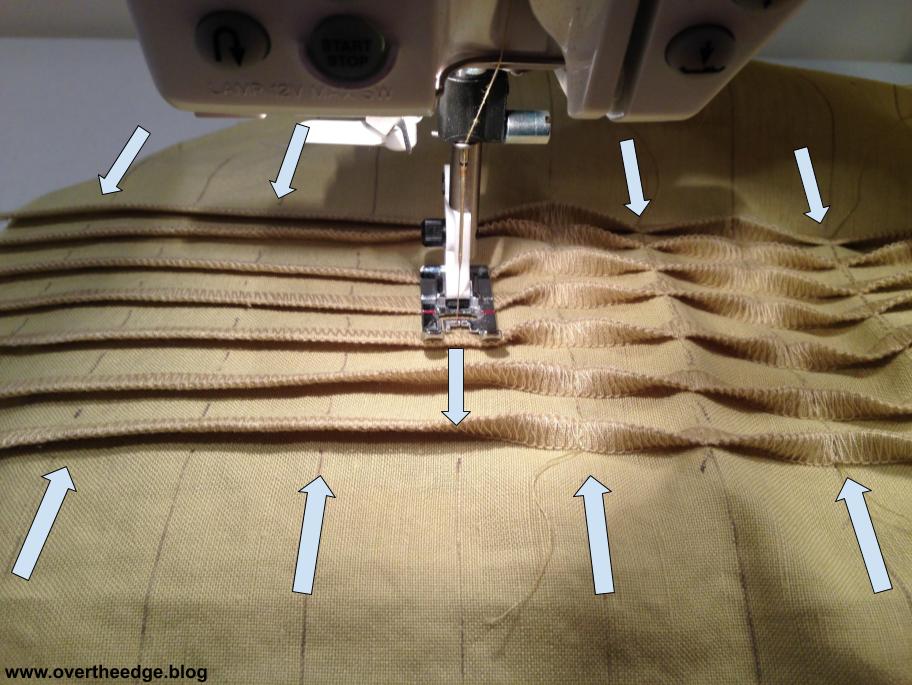
Mark and Stitch
I drew horizontal lines 1” apart on the panel perpendicular to my serged folds using my Frixion pen. Using my sewing machine I stitched across the folds on the lines in alternating directions. You can hold the twists down with your fingers as you stitch to make sure they lay the proper direction. See photo below. Don’t press the twists after making them or you will distort them. You can hover over them and steam them if needed.
How to Modify Pattern Front for Center Panel
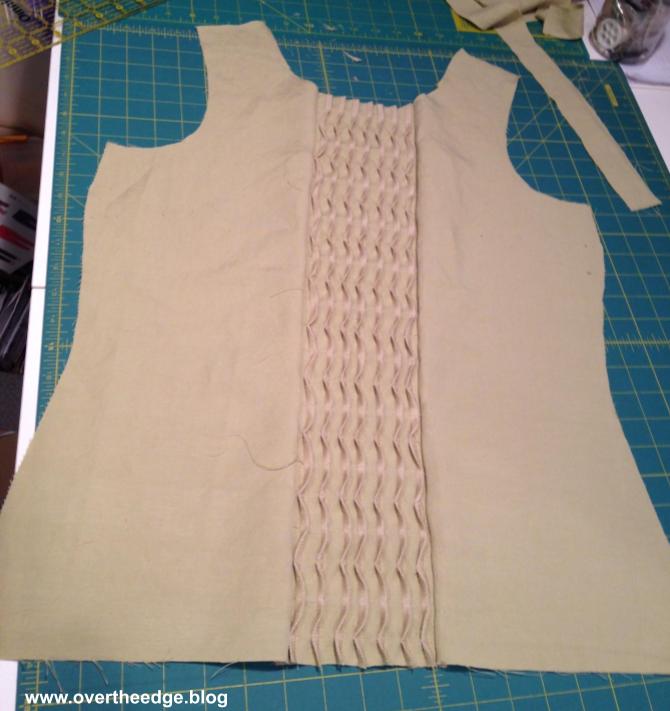
I measured my center panel as it would be finished in my top to be 4.5”. So I added my seam allowances (⅝” + ⅝” = 1¼”) before trimming the center panel to 5¾” wide. The extra fabric on the top and bottom was cut off after combining the center panel with the rest of the front pieces.

Since I added in a center panel, I needed to remove an equivalent amount from the front pattern piece, so the new top front was the same size as the original pattern piece. I determined that the amount to be removed was 3¼” (4½” for the center less seam allowances of ⅝” + ⅝” = 1¼”). The original pattern piece was a single piece cut on the fold. So I cut off 1⅝” from the center of the folded front and ended up with a right and left front piece.

I changed my serger over to a standard 4 thread overlock stitch for serging my garment seams. To create my new top front I serged together the left, center and right front pieces. I pinned the center panel right sides together with the right front and left front. Then I double checked that my new front piece would end up the same size as my original pattern piece front. I serged the seams and trimmed center panel using the original front pattern piece as guide.
Finish Garment Construction
The rest of the garment was constructed using the pattern instructions, but I used my serger for some of the steps. The stay stitching, darts, neckline, armhole edges and hem top stitching was done with my sewing machine. I also used my sewing machine to under-stitch the neckline front facing to keep it from flipping outward. The side seams and raw edges of hems and facings were serged with a standard 4 thread overlock. I used ⅝” seam allowances to be consistent with the pattern and trimmed off the extra as I serged.
Once you cut off that extra seam allowance you cannot put it back on, so I suggest you make certain the garment fits before seaming it with a serger. Making a muslin mock-up takes more effort, but it leads to much less frustration in the long run. It’s a real bummer to spend hours making a beautiful looking garment only to have it not fit when you are all done.
Inside Look
I turned my top inside out so you could get a detailed look at the construction. If you look closely you will see darts, seams, hem and facing edges, and the wrong side of the serger twists. This top has been worn and washed so the stitching you are looking at is not as crisp and clean as when new.

My Serger Twists Sleeveless Top
Serger twists are a fun way to add embellishment to your projects and garments. As with any garments with exposed stitches, handle and launder with care. Any large loops on garments always have the potential to snag or get pulled. Think of those light, airy, lacy sweaters that we buy at the store that are so beautiful. We love to wear them, even though they snag easily. Serger stitches don’t snag as easily as those sweaters, but because of the loops, it’s best to handle them with care. I recommend hand washing garments with exposed stitching. After I spent all that time making the garment I want to be able to wear it more than once!
I hope you enjoyed this post about my serger twists sleeveless top. Try spicing up your garments with serger stitching!

Happy Serging! – Jen

Resources
For another example of exposed serged stitches check out my post, Decorative Serged Seams: https://overtheedge.blog/decorative-serged-seams/
Babylock Wave Tucked Pillow Project: https://www.babylock.com/learn-and-create/projects/serger-pillows-pintuck-wave
Serger twists with Nancy Zieman in her book, Serge with Confidence: https://www.amazon.com/Serge-Confidence-Nancy-Zieman/dp/0873498550