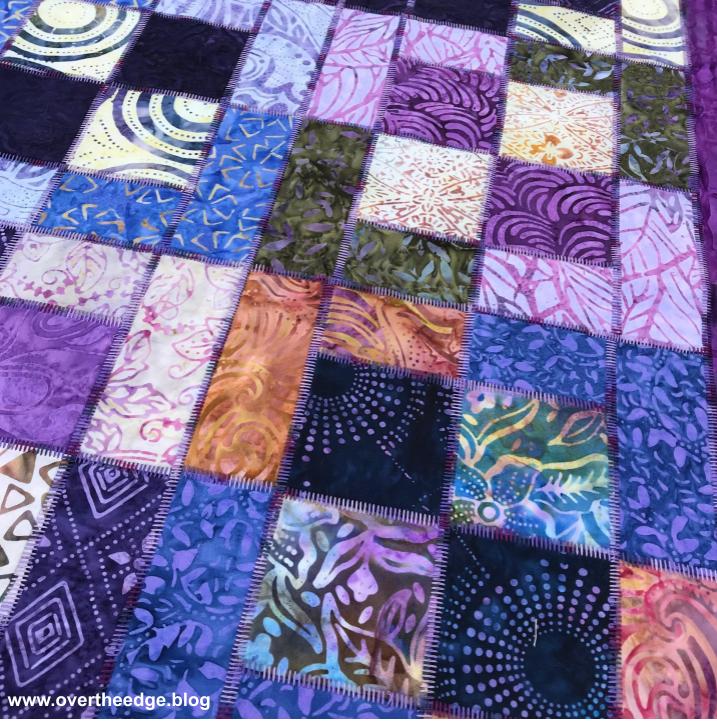

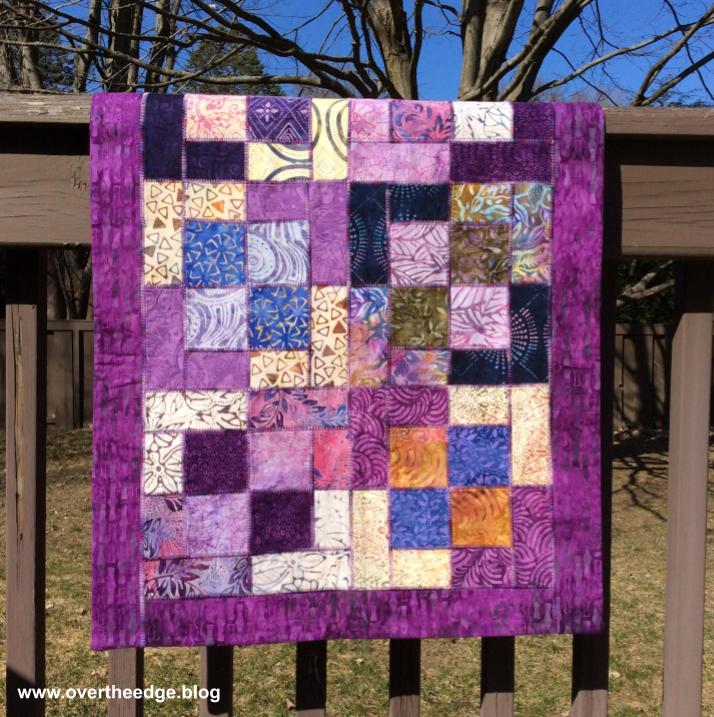
It’s still March and National Quilting Month, so here I am highlighting another way to use a serger to quilt. Flatlock piecing with a serger is a great way to add an artistic flair to your quilts. With a serger flatlock stitch, you are embellishing your quilt with decorative thread as you piece it together. The photos in this post are of my Four Square Table Runner that I made in 2014. This table runner is one of my favorite serger quilts I have made!
My Four Square Table Runner

My table runner is a great example of how easy it is to modify a traditional quilt pattern for serger construction.

Fabric, Pattern and Thread
I used a package of forty 5” squares called Tonga Treats by Timeless Treasures. The “Four Square Table Runner” pattern came free in the package. I don’t know if this fabric is still available, but you can do this technique with any fabric or quilt pattern.

I used a variegated purple YLI machine quilting thread in the needle and Maxilock serger thread in the loopers.

Serging
I followed most of the pattern instructions to make the quilt top, except for using a sewing machine. Instead, I pieced the quilt together with my serger using a three thread flatlock stitch with a length of 2. I serged the pieces right sides together, so the “ladder” side showed after pulling the flatlock stitches open.
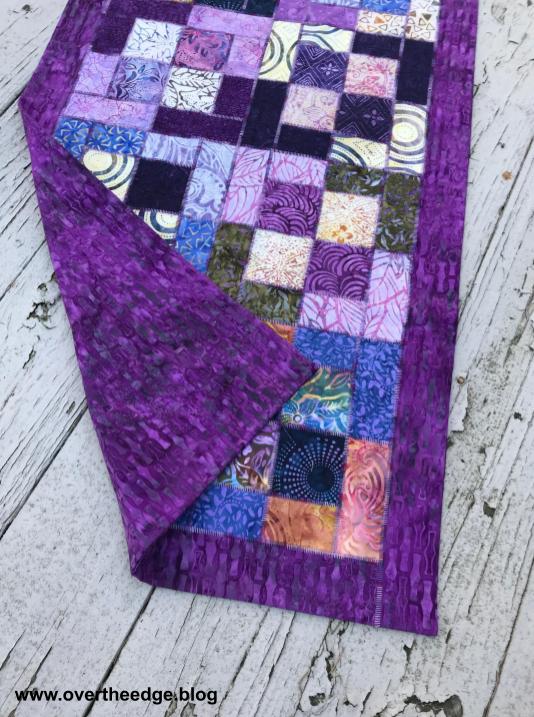
I added a border, which I also attached with the flatlock stitch. Instead of a traditional quilt sandwich, I used a flannel fabric as batting. and attached the backing using the pillowcase or “birthing” method (without binding). I serged the layers together leaving an opening for turning right sides out. After turning and pressing, I hand stitched the opening closed and hand tacked the layers together invisibly at the corners of the blocks. I wanted the decorative thread and the flatlock stitching to be the center of attention.

What is a Serger Flatlock Stitch?
A flatlock stitch can be used to seam two fabrics together and to add detail to a seam line. It has unbalanced tensions that allow you to pull open the seam so it lays flat. Typically the needle thread tension is very loose and the lower looper tension is tight. The flatlock stitch is also reversible. It forms a “loop” stitch on one side of the fabric and a “ladder” stitch on the other side of the fabric. If you serge a seam with the fabrics right sides together, you will end up with a ladder stitch on the right side. The “ladder” you see is the needle thread. If you serge a seam with the fabric wrong sides together you will end up with a “loop” stitch on the right side. The “loop” you see is the looper thread. The example below show the ladder and the loop sides of two maple leaf quilt blocks that I made when I was practicing flatlocking.

What is Serger Flatlock Piecing?
When you sew your pieces together to form a quilt block, it is referred to as “piecing”. When you piece with a sewing machine the stitches made by a sewing machine are hidden within the seam. Flatlock piecing with a serger is piecing your quilt blocks together with a flatlock stitch. The stitch used in flatlock seams is very visible in the finished quilt. You can use the standard serger presser foot for this technique.
Video – Flatlock Piecing With a Serger
For all you visual learners out there I created this short video of the flatlock stitch in action. https://overtheedge.blog/videos/flatlock-piecing-with-a-serger/
How to Easily Remove a Three Thread Flatlock Seam
Tips for Flatlock Piecing With a Serger
- Follow the instructions in your manual for setting your serger up for a flatlock stitch. There are different types of flatlock stitches (2 or 3 thread, wide or narrow). I typically use a three thread flatlock for piecing quilts.
- For piecing a quilt with a flatlock stitch, I keep the blade engaged and run the raw edge of my fabric along the blade. I don’t really cut anything off, I just trim stray threads.
- Always test your serger set-up on a scrap of fabric and adjust as needed, before you begin serging your actual project. The actual tension settings and stitch length needed will vary with different threads and fabrics.
- Leave a few inches of thread tail at the end of each seam. By leaving long tails you will prevent your seams from unraveling until you have a chance to secure them.
- Press your flatlock seams flat before pulling them open. I feel it helps the fabric within the seam fold properly during the opening process. After pulling the seams open, I press them again.
- Your finished blocks may be a little larger than they would be using a sewing machine. The process of opening of the seam allowance changes the size of the seam allowance slightly.
- I use the three thread flatlock stitch in smaller projects like table runners and wall hangings. Flatlock stitches are more exposed and tend to snag more easily, so I don’t typically use this stitch for quilts that will get a lot of wear.
- Set your iron temperature appropriately for the thread you use in your flatlock stitch, or use a press cloth. Since the thread sits on the surface of your fabric it has more exposure to the heat of the iron. It is possible to melt the thread in your serger stitches – I know from personal experience!
Are you Inspired?
I hope you enjoyed this post and are inspired to try flatlock piecing with a serger.
