Tag: serger rolled hem

My Fun and Festive Gather Together Serger Apron

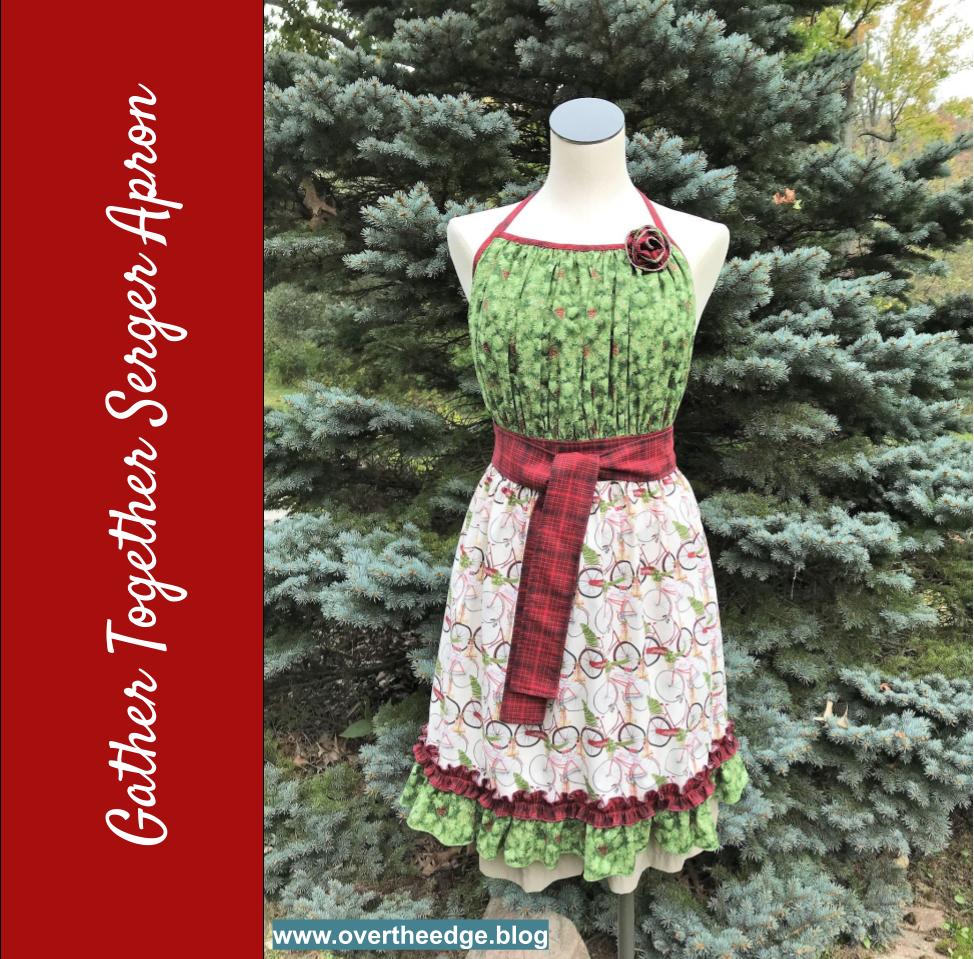
Every year my fellow employees and I sew up holiday aprons to display in the store. For my 2021 holiday apron I made the Gather Together Serger Apron by Baby Lock.

The Gather Together Serger Apron pattern was based on a sewing pattern by Pat Bravo of Art Gallery Fabrics, which was adapted for serger construction. See links to both apron patterns in the Resources section of this post. 

How I Used My Serger

I serged the entire apron using only my Baby Lock Evolution serger. It’s a great apron pattern to try making with your serger. You can use your serger to make as little or as much of the apron as you like.

Edge Finishes

I used a variety of edge finishes to complete this apron, which utilized different stitches and/or attachments.

  • Overlock stitch to keep raw edges from unravelling
  • Rolled hem stitch for ruffles
  • Wave stitch for fabric flower
  • Hem sides of apron with ¼” plain hemmer attachment and chain stitch
  • Encase edges of bodice and make neck straps with a double fold bias binder and chain stitch

Gathering and Ruffles

I gathered the ruffles using two different techniques.

  • Four thread overlock technique which makes adjustable gathers, similar to a double row of basting stitches using a sewing machine. This technique is perfect for gathering fabric where you need to adjust the gathers to fit.
  • Narrow cover stitch technique which makes permanent gathers. The gathers created by the cover stitch are much fuller than those created by an overlock stitch. However, they can not be adjusted.
  • Long stitch lengths and differential feed are used in both gathering techniques. 

Seams and Construction

I serged all seams using a chain stitch.

Feet and Attachments

I used the following feet and attachments to construct the Gather Together Serger Apron:

  • Double fold bias binder 36mm
  • Plain hemmer ¼”
  • Cover/chain stitch foot
  • Clear foot. The pattern did not call for this foot, but I like it’s visibilty. I thought the visibility of the foot made it easier for me to attach the double fold bias binding to the apron bodice.
  • Standard foot

Photo Overview of my Gather Together Serger Apron

Wave Stitch

I used the wave stitch to finish the edges of the fabric flower. Metallic thread in both loopers gave the edges a bit of holiday sparkle. If your serger isn’t capable of the wave stitch you could substitute a rolled hem or three thread overlock stitch.

gather together serger apron

Three Thread Rolled Hem

I used a three thread rolled hem to finish the edges of the ruffles, with metallic thread in the upper looper.

gather together serger apron

Gathering The Bodice

The bodice of the apron was gathered using a four thread overlock stitch. After gathering with my serger, the bodice still needed a bit more gathering. Gathers created with the four thread overlock are adjustable. So I slid the fabrics along the needle threads adjusting the bodice edges to the proper dimensions. See link about gathering in the Resources section of this post.

gather together serger apron

Hem Sides of Skirt with ¼” Plain Hemmer Attachment

I love to try new things with my serger. Using the serger plain hemmer was a new experience for me. I hemmed the side edges of the apron’s skirt using the ¼” plain hemmer, a chain stitch and a standard presser foot. My practice piece turned out perfectly. It must have been beginner’s luck because the first hem on the actual project took me three tries to get it right. I figured out that I needed to generously turn/roll the edge of the fabric in advance and keep it turned as I fed it into the attachment. Then the plain hemmer worked really well. The second side hem of the apron looked beautiful on the first try! See the link in the Resources section for tips for using a serger ¼” plain hemmer.

The plain hemmer rolls the hem to the top side as it is serged. So you feed your fabric into the attachment with the wrong side up. The needle thread will be seen on the back side of your finished project. The chain looper thread will be seen on the right side of your project.

gather together serger apron

Finish Edges of Bodice and Create Straps Using a Double Fold Bias Binder Attachment

I followed the video class/instructions to make the apron. However, instead of making the top edge and neck straps all one piece, I bound the top edge first. Then I bound the side edges of the bodice and continued the binding from the sides to make the neck straps.

gather together serger apron

Gathering Ruffles Using a Narrow Cover Stitch

I used a narrow cover stitch along with the cover stitch foot to gather the narrow ruffle strip, bottom ruffle skirt and flower. The narrow cover stitch gathers fabric much more tightly than gathering with an overlock stitch. But the cover stitch gathers are not adjustable like the gathers made by serger overlock stitching.

gather together serger apron

Construct Seams

I used the chain stitch to serge the seams of the bodice, skirt and waistband/ties. Serging with a chain stitch is very similar to using a sewing machine straight stitch.

gather together serger apron

I attached the narrow ruffle and bottom ruffle to the skirt of the apron using a chain stitch too.

gather together serger apron

Gather Together Serger Apron

I hope you enjoyed learning about how I serged my Gather Together Serger Apron.

serging with jen
gather together serger apron

Resources

Using a Serger Plain Hemmer Attachment https://overtheedge.blog/tutorials/serger-plain-hemmer-attachment/

Tips for Using a Serger Double Fold Bias Binder Attachment https://overtheedge.blog/tutorials/serger-double-fold-bias-binder-tutorial/

Gathering Fabric Using a Serger Overlock Stitch https://overtheedge.blog/tutorials/how-to-gather-fabric-using-a-serger-overlock-stitch/

Links to apron patterns:

Find the serger version – Gather Together Serger Apron by Pam Mahshie of Baby Lock at www.sewedclasses.com

Find the free sewing version of the pattern at: http://www.patbravo.com/freeprojects/sewing/Spiceitup-1.pdf

gather together serger apron

My Bunnies and Flowers Reversible Serger Table Runner

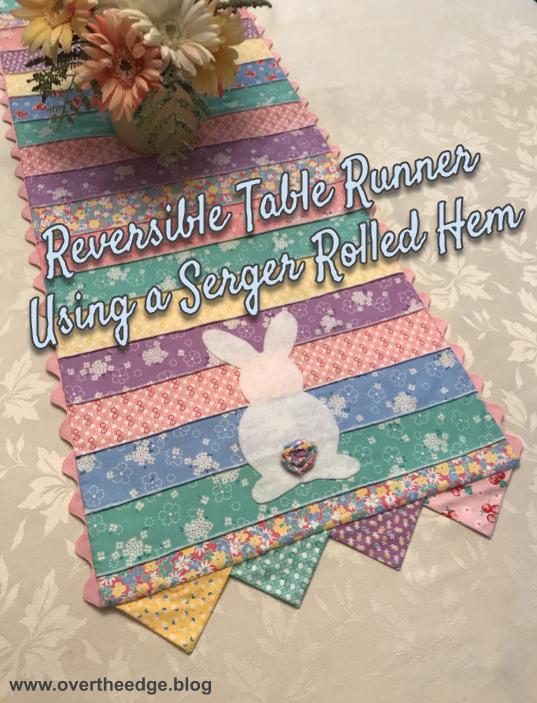
Spring is in the air! The sun is shining and the snow has melted. It’s once again time to dress the table with my colorful and reversible serger table runner. It’s full of texture with exposed seams, prairie points, bunny tails and fabric flowers.

Reversible Serger Table Runner Inspiration

I designed this table runner a few years ago using a bunch of leftover jelly roll strips from another project. And of course I challenged myself to use my serger to make it. My vision began with a “stripey” table runner with texture, and evolved as I serged. 

Creation of Table Runner

I pieced the strips together with the 3 thread rolled hem stitch. I serged the strips wrong sides together so the rolled hem would show on the right side of the table runner. Then I cut the strip sets into two sections and serged the sections together to end up with a rectangle about 16” wide by 48” long.

reversible serger table runner

A Second Runner

I still had a few more jelly roll strips left so I decided to make a second but different runner. I serged these strips together with a three thread rolled hem stitch, adding in a wider strip of white fabric. Then I cut the strips into squares, alternated the layout and added sashing strips in between the squares.

The Reversible Serger Table Runner

Instead of two separate table runners, I decided to make one reversible table runner. I added a wide ric rac trim to the long sides and prairie points to the short sides.

I then layered the two table runner tops right sides together, along with a layer of batting and serged around the outside edges, using a 4 thread overlock stitch.

Here is a closeup of the wrapped corners technique I used at the corners so I didn’t need to trim away any fabric at the corners. For more information about how to wrap a corner with a serger visit my pillowcase tutorial at: https://overtheedge.blog/tutorials/his-hers-serger-pillowcases-tutorial/

I left an opening on one side for turning and closed it up using a fusible web and an iron. 

Serger Rolled Hem Prairie Points

My prairie points started as rectangles that were 5” long and 2.5” wide. I serged one long edge of the rectangle and then folded two corners to the middle to make the prairie point. The rolled hem edge ends up in the center of the prairie point.

serger prairie point
reversible serger table runner
serger rolled hem prairie point

Finishing Touches

The reversible runner turned out nicely, but I thought it needed a little something extra to make it compete. So I added bunnies on one side and flowers on the other. Adorable!

reversible serger table runner

My Felt Bunnies

I cut out two bunny shapes from some white felt and glued the bunnies to the ends of the table runner. The bunny tails were made from fabric trimmings that were cut off to even up the edges of the table runner. I took the strips and twisted them and then rolled them into a circle to form the tails.

My Fabric Flowers

I had a few more leftover jelly roll strips that I transformed into fabric flowers. To make a flower, I serged one edge of a fabric strip using a 3 thread rolled hem. Then I set up my serger to gather and serged the other long edge to gather the fabric. Pulling on the needle threads, I gathered the fabric a bit more before shaping it into a flower. And I added a fabric covered button to create the flower center.

So they could be easily removed when I wanted to display the bunny side, I pinned the flowers to the table runner.  

reversible serger table runner

Reversible Serger Table Runner

I hope you enjoyed learning about how I made my bunnies and flowers reversible serger table runner! And in case you didn’t know, April is National Serger Month. Now would be a good time to serge something fun for spring!

serging with jen

Resources

Setting up for a rolled hem on a Baby Lock Vibrant:  https://youtu.be/KBOZjD57JUU

Scrappy Fabric Pumpkins Make Perfect Fall Decor

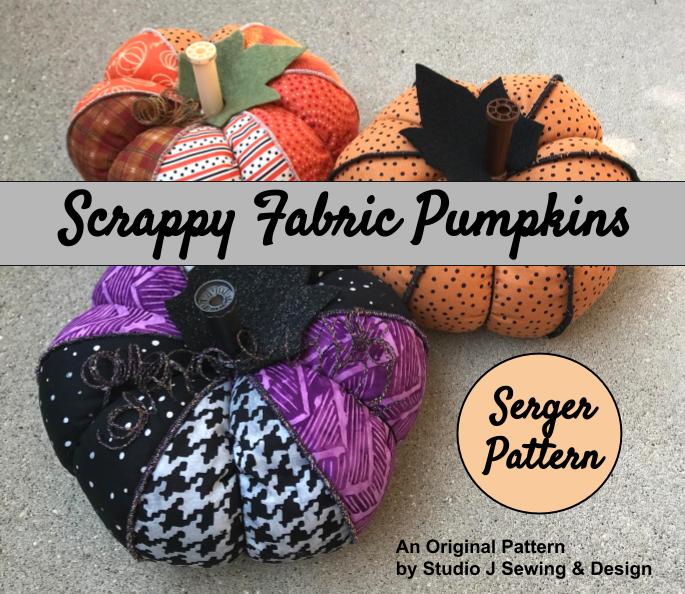
I’m very excited to announce that I have released my first “official” serger sewing pattern, Scrappy Fabric Pumpkins. I originally created this design for a class I taught a few years ago. But now as the leaves begin to change colors, I thought it was the perfect time to update my pattern and make it available to you.

Learn to do More with your Serger

If you’ve taken a serger class with me, you know it is not unusual for me to create my own projects to teach. My goal is to create projects that inspire people to want to use their sergers for more than finishing raw edges or creating samples of techniques for a notebook.

Finishing raw edges cleanly with a serger is a great use of the serger. And technique notebooks are important for understanding the potential uses of your serger. But many people never take the next step when it comes to learning their serger. It would be like making a sample of all the stitches your sewing machine can do, but never using the sewing machine to create a project. Maybe one reason this happens is because patterns written specifically for sergers are not nearly as abundant in the marketplace as patterns written for sewing machines. I’m hoping to change that, one serger pattern at a time!

On my blog I have shared a lot of free content and I will continue to do so. However, there are expenses associated with maintaining a blog, and it is my hope that selling patterns written for sergers will generate enough income to cover those expenses and allow me to continue to inspire others to serge. Thanks for your support!

The Scrappy Fabric Pumpkins Pattern

Serge a scrappy fabric pumpkin for fall and learn to use a serger rolled hem stitch for more than napkins, ruffles and scarves. Not only can you create fun decorations for your home, but you can improve your serging skills. Scrappy serger pumpkins are so cute you won’t be able to make just one! Even the tendrils are made with the serger. An empty skinny thread spool makes a great stem. I’ve included lots of color photographs to help you out every step of the way. Happy Fall! 

Follow the link below to take you to the Pattern Section of my Etsy shop – Studio J Sewing. This pattern is available as a PDF file digital download. You can begin serging pumpkins as soon as you checkout!

Purchase the serger sewing pattern, Scrappy Fabric Pumpkins, before October 31, 2020 and save 30% using Etsy coupon code SAVE30PATTERN during checkout.

https://www.etsy.com/shop/studiojsewing?ref=seller-platform-mcnav&section_id=30533440

I’d love to see the finished scrappy fabric pumpkins you made with your sergers! Please share your photos via email to jennifer@overtheedge.blog.

serging with jen

Serger Funsie Onesie

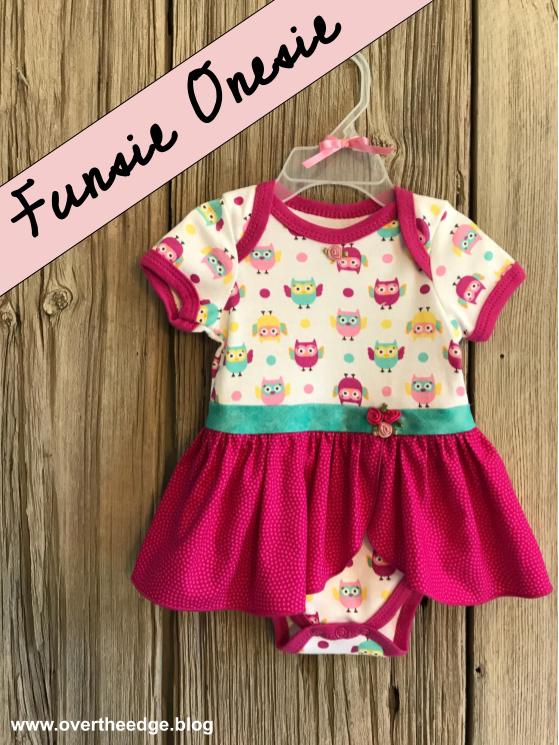
Transform an ordinary onesie into a super sweet outfit for a little baby girl! This Serger Funsie Onesie is fun to create using basic stitches on your serger. My niece is having a little baby girl and her nursery theme is owls. I found this cute little owl onesie and knew I could turn it into something special. I can’t wait until the baby is big enough to wear it!

The Funsie Onesie Pattern

The pattern for the Funsie Onesie came from the book, Simple Serging Sewing, edited by Julie Johnson.

simple serger sewing book

The Transformation from Onesie to Sweet Dress

I was amazed at how a few simple additions took this onesie from cute to amazing! Read along and observe the transformation.

Here’s my onesie, skirt fabric and waistband bias strip.

serger funsie onesie

Prepare Strip for Ruffled Skirt

Because my onesie was larger than the one in the pattern, I added 1” to the length of the ruffled skirt piece.

The instructions said to use a plate as a template for rounding the ends of the ruffle strip. I used the plate as a starting point, and then I drew in the rest of the curve in freehand. 

For this project I used a Babylock Imagine serger. I set my serger up for a 3 thread narrow hem to finish the bottom edge of my ruffled skirt. You could also use a 3 thread rolled hem if you like. I used Maxilock thread in a color that matched my fabric.

serger rolled hem

For helpful information on serging with a rolled hem, check out my tutorial on Quick and Easy Serger Napkins. https://overtheedge.blog/tutorials/quick-easy-serger-napkins/

Gather Skirt

To gather the ruffled skirt, I used my serger ruffling foot (the G foot for the Babylock Imagine) with a 4 thread overlock stitch. Even though you can use the foot to simultaneously create the ruffle and attach it, I chose to do it in two steps so I could adjust the ruffle to fit the onesie exactly. I set my differential feed to 2, my stitch length to 4 and my stitch width to M. The raw edge of the skirt was just skimmed by the blade as I serged. I also held my finger behind the foot to help it gather just a little bit more. 

If you don’t have a ruffling foot for your serger, you can still use your serger to gather. Follow your instruction manual for gathering. Usually gathering on a serger involves increasing the differential feed and stitch length (and increasing your needle tensions if you have a serger with tension dials.)

gathering with a serger ruffling foot

Here’s what my ruffled skirt piece looked like after gathering it with my serger.

gathering with a serger ruffling foot

Prepare Onesie

Determine where to cut your onesie. My onesie was a 6-9 month size. I cut it apart as stated in the pattern instructions. 

serger funsie onesie

Create Bias Waistband

Next I created the bias waistband strip. The bias fabric strip has a some stretch which makes it a little easier to dress the baby. The waistband also adds back in length that was lost in the seams from adding the skirt to the onesie. So your onesie length will still be the same size as when you started. I used a standard 4 thread overlock stitch with a stitch length of 2.5 to serge the ends of the waistband together.

Attach Waistband

I pinned the bias waistband strip to the top half of the onesie, and serged the seam with a standard 4 thread overlock stitch.

serger funsie onesie

Attach Skirt

My onesie waistband measured about 18” around, so I adjusted the gathers of my ruffle to equal 20” (18″ + 2″ for overlap.) My serger didn’t gather the fabric quite as much as I needed. So I adjusted the gathers by first separating the needle threads from the looper threads. And then I pulled on the needle threads and slid the fabric, just like I would using 2 rows of basting stitches on my sewing machine. I overlapped the ends of my ruffled skirt by 1” on each end. 

After adjusting the gathers, I pinned the ruffled skirt to the bottom of waistband, aligning the overlapped section of skirt slightly off center. I serged this skirt to the waistband using a standard 4 thread overlock with a stitch length of 2.5.

serger funsie onesie

Attach Bottom Half to Top Half

After attaching the skirt, the last step was to reattach the bottom half of the onesie. I pinned the onesie panties to the waistband/skirt section, making sure that the side seams of both onesie halves were aligned. To serge this seam, I increased my stitch width as wide as it would go (7.5) and used a stitch length of 2.5. I made this stitch wider than the stitching I used to gather the ruffle, so the gathering stitches on the skirt would not show on the right side of the garment.

serger funsie onesie

Add Finishing Touches

Even though the skirted onesie was adorable, I thought it needed just a little something more. So I hand stitched a few ribbon roses on the waistband and one at the center of the neckline.

serger funsie onesie

My Serger Funsie Onesie

My serger funsie onesie is finished and ready for a sweet baby girl to wear! I hope you enjoyed this post and are inspired to serge.

serger funsie onesie
serging with jen

Resources

Book – Simple Serger Sewing, published in 2009, but found online:

How to make bias strips: https://sew4home.com/how-to-make-your-own-continuous-bias-binding/

Quick video on using the ruffling foot to gather fabric:

Theme: Overlay by Kaira Extra Text
Cape Town, South Africa